Connecting Office 365
Introduction
You can use an Identity Provider defined into Soffid to connect to Office 365. You only need to register the Office 365 metadata into a Soffid Service Provider and register the Identity Provider Metadata into your Office 365.
At this tutorial Soffid explain how to connect to Office 365 using PowerShell.
Step By Step
Attribute definition
Review the attribute definition to check if it will be necessary to add the Required attributes.
https://docs.microsoft.com/en-us/azure/active-directory/hybrid/how-to-connect-fed-saml-idp
Attribute sharing policies
Review the attribute sharing policies to add the required attributes.
Option 1
Soffid will be in charge of creating users in Office 365.
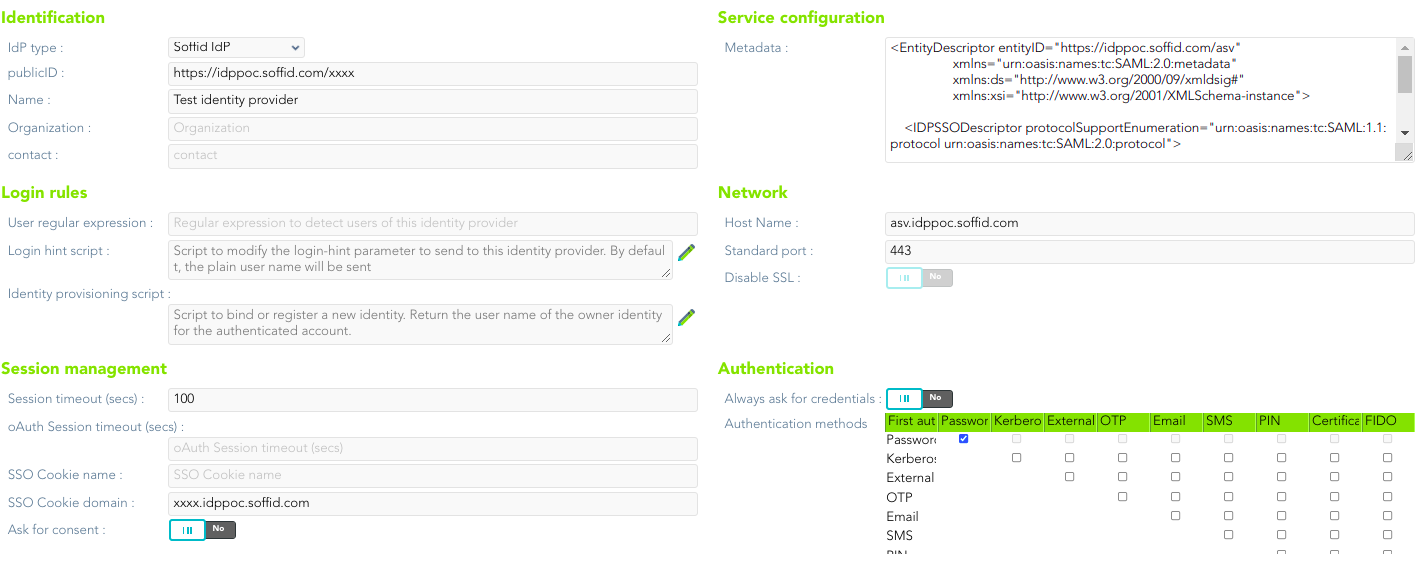
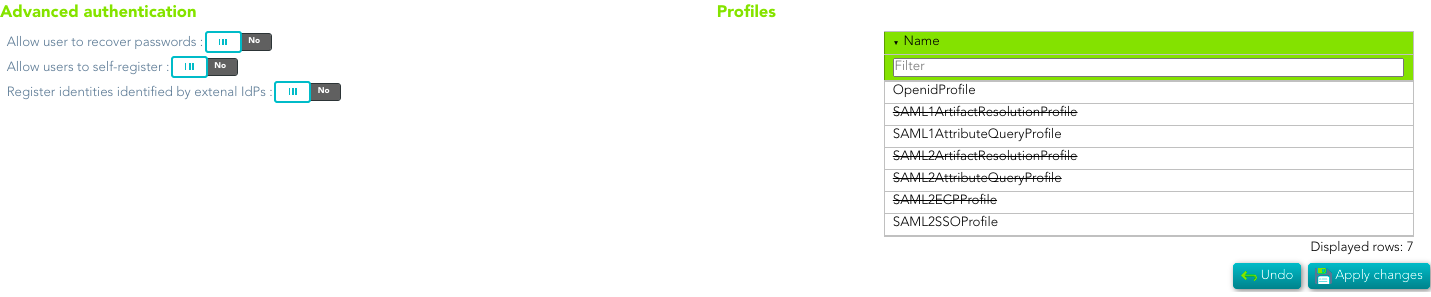
1. First of all, you need to configure your Identity Provider, in that case, we configure Soffid as Identity Provider.
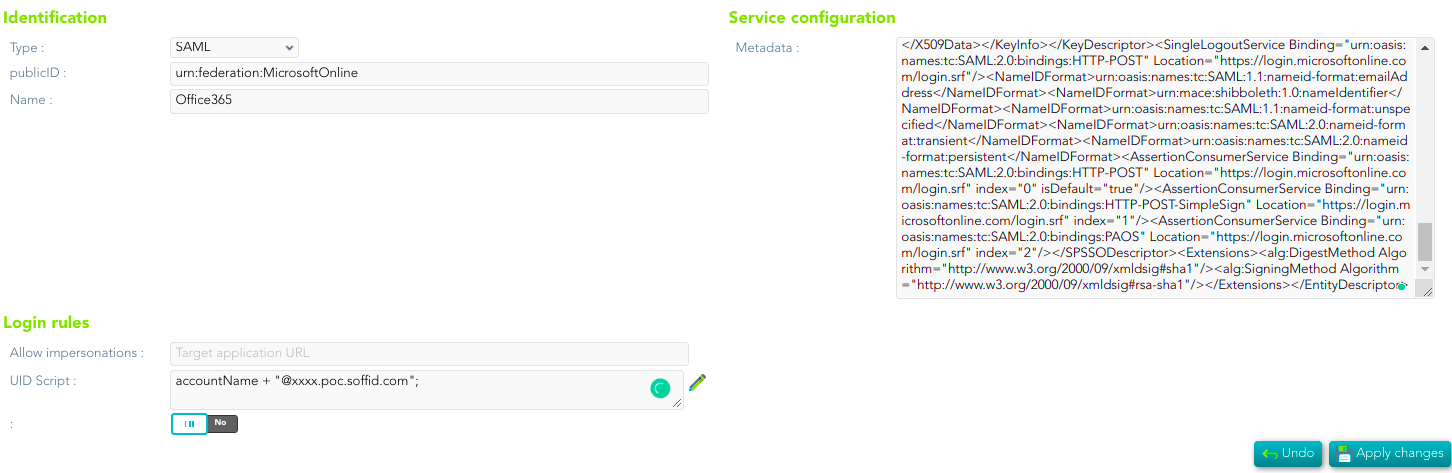
2. Then, you need to configure the Service provider. It will be mandatory to copy the Metadata of Office 365 into the Service Configuration.
3. You need to configure an Office 365 agent: https://bookstack.soffid.com/books/connectors/page/how-to-configure-the-office-365-agent
Option 2
The Active Directory will be in charge of creating users in Office 365.
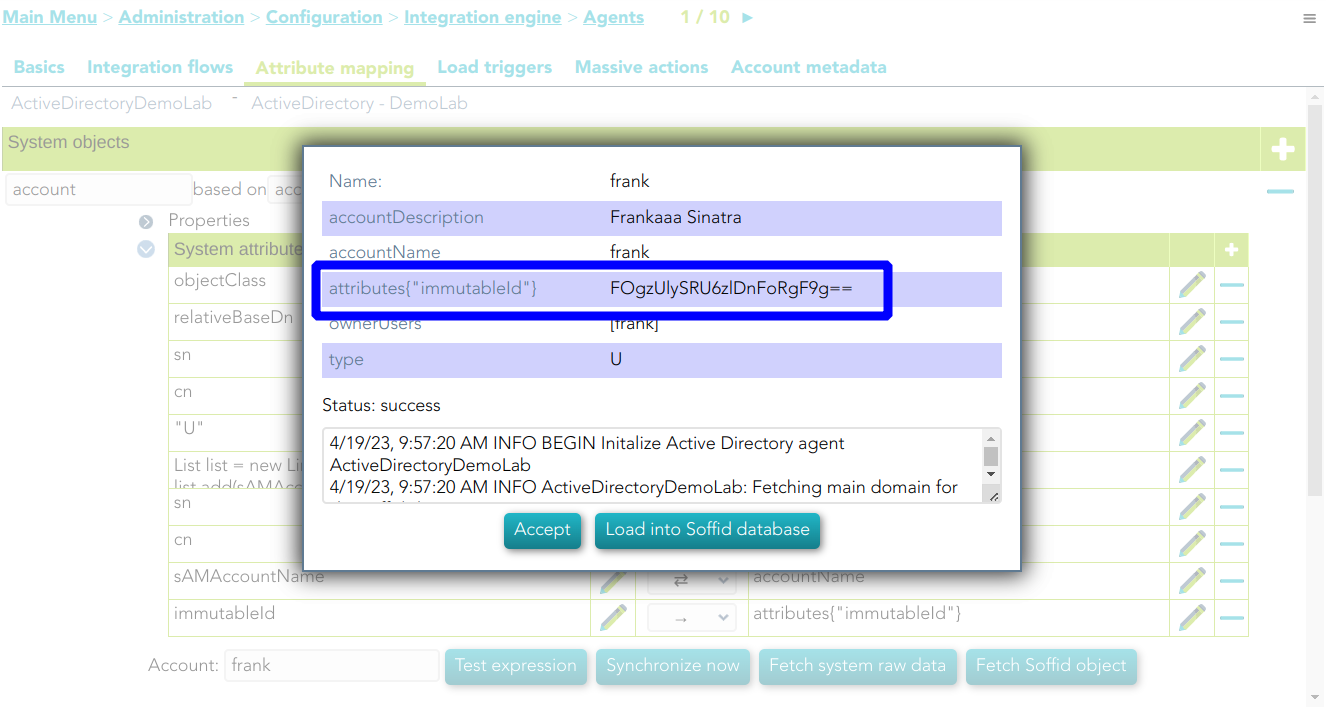
1. You need to create the attribute inmutableId in the agent configuration
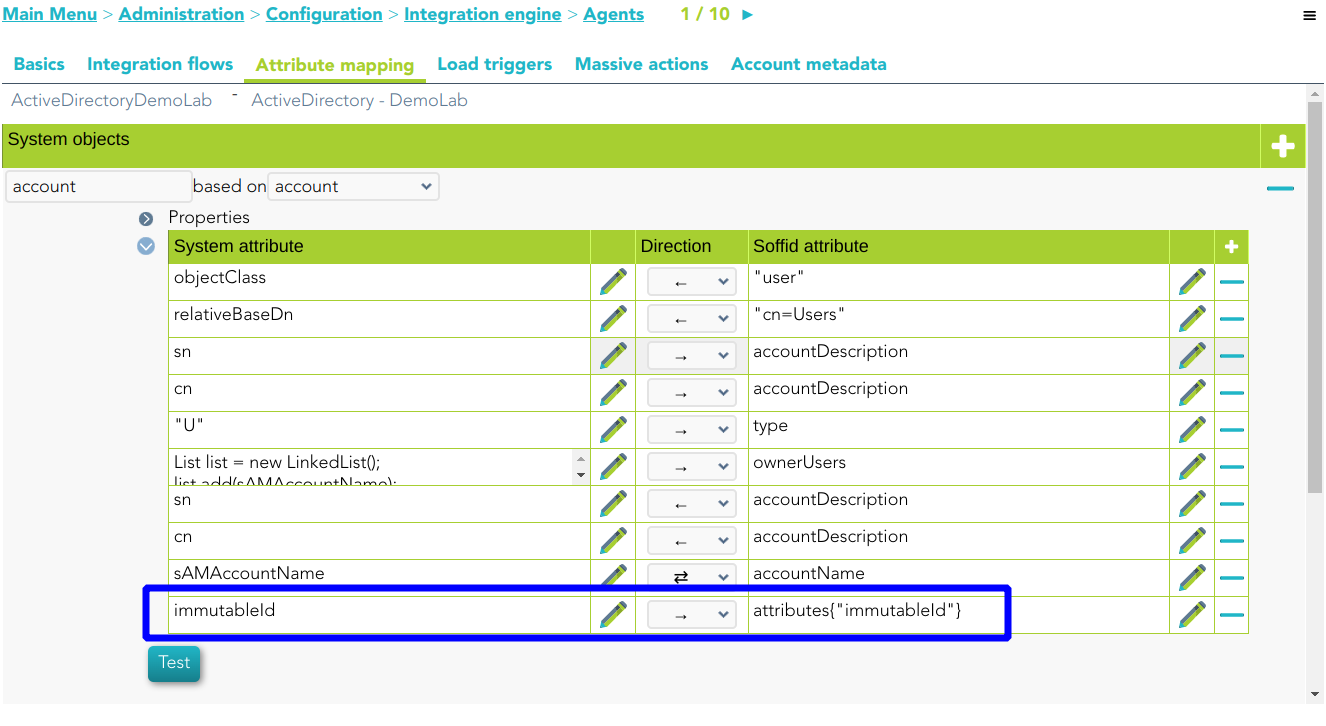
If you fetch the Soffid object, Soffid will display this new attribute
2. You must add a UID Script in the Office 365 Service Provider
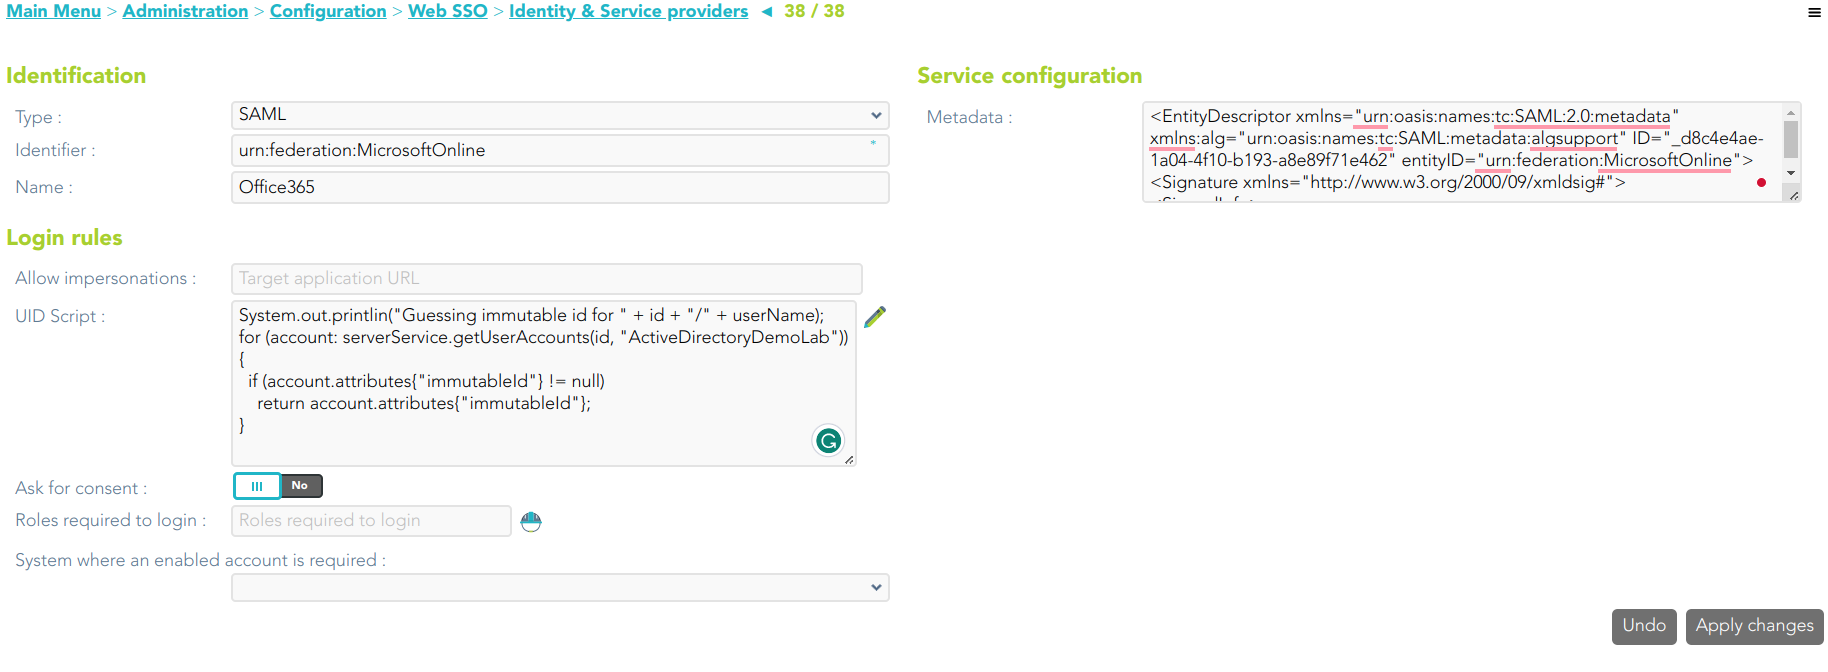
System.out.printlin("Guessing immutable id for " + id + "/" + userName);
for (account: serverService.getUserAccounts(id, "ActiveDirectoryDemoLab")) {
  if (account.attributes{"immutableId"} != null)
    return account.attributes{"immutableId"};
}
PowerShell
If necessary you can install the Azure AD module for Windows PowerShell
Install-Module MSOnlineThen you can connect to the service
Connect-MsolServiceWhen you executed the connect method, a new window will open to login Microsoft in as an administrator domain user.

Once you have logged in, you could execute some commands to configure the connection to Office 365:
- Register-PSRepository -Default: registers a PowerShell repository
- Get-MsolDomain: displays the registered domains in Azure Active Directory.
- GetMsolDomainFederationSettings: get the settings for a federated domain
- Set-Msoldomain -Name <YOUR_DOMAIN> -isdefault: set as default one domain
- Set-MsolDomainAuthentication -DomainName <YOUR_DOMAIN> -Authentication federated: set as federated a specific domain.
In order to connect to Office 365, one can use the following script:
$dom = "<Your demain>"
$BrandName = "<Your company>"
$LogOnUrl = "https://<Your Soffid IdP>/profile/SAML2/POST/SSO"
$LogOffUrl = "https://<Your Soffid IdP>/profile/SAML2/POST/SLO"
$ecpUrl = "https://<Your Soffid IdP>/SAML2/POST/PAOS"
$MyURI = "<Your Soffid IdP>"
$MySigningCert = "<Your certificate in Base64>";
# "MIIGaDCCBVCgAwIBAgIQAWdkq9pxzP/bK+Mlym5y5zANBgkqhkiG9w0BAQsFADBeMQswCQY....
$Protocol = "SAMLP"

# To enable
Set-MsolDomainAuthentication -DomainName $dom -FederationBrandName $BrandName -Authentication Federated -PassiveLogOnUri $LogOnUrl -SigningCertificate $MySigningCert -IssuerUri $MyURI -LogOffUri $LogOffUrl -PreferredAuthenticationProtocol $Protocol

# To disable
# Set-MsolDomainAuthentication -DomainName $dom -Authentication Managed
https://docs.microsoft.com/en-us/powershell/module/cimcmdlets/?view=powershell-7.2
https://docs.microsoft.com/en-us/azure/active-directory/hybrid/how-to-connect-fed-saml-idp