How to enable Kerberos authentication
Step-by-step
To enable the kerberos authentication method, the identity provider must have a keytab file that enables it to authenticate users. The steps to get it are described below:
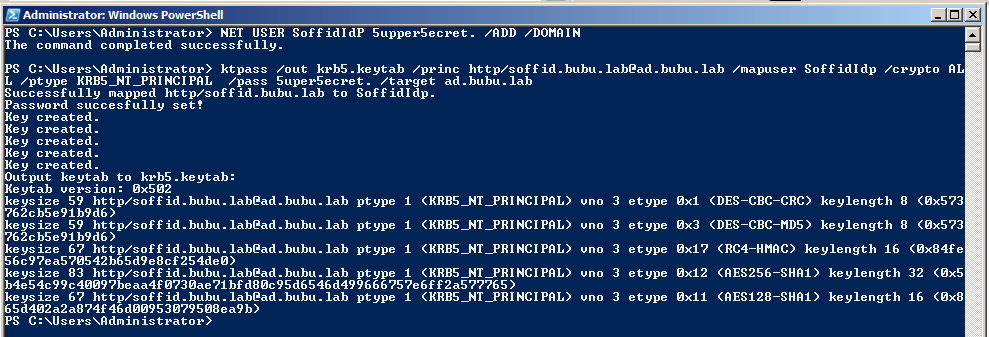
1. First of all, you need to create a net user. You can use the old-fashioned but still useful net user command:
NET USER SoffidIdP <NewPassword> /ADD /DOMAIN
2. The second step will be to create a service name and generate a keytab file.
KTPASS /out krb5.keytab /princ http/<YourIdp.Host.Name>@<Your.Ad.Domain> /mapuser SoffidIdp /crypto ALL /ptype KRB5_NT_PRINCIPAL /pass <NewPassword> /target <Your.AD.Domain>
Mind that the browser expects the server name in the URL bar matches the principal name you have just created.

3. Finally, you need to add the keytab file to the identity provider configuration.
3.1. Open the Identity & Service providers page
3.2. Click on the Identity Provider you are configuring. Then Soffid will display the Identity Provider detail.
3.3. On the Authentication section, on the Kerberos domain list, you can click on the add button (+) to pick up the keytab file.
3.4. Pick up the keytab file and Soffid will load automatically into the console.
Mind that the active directory agent for this domain must be successfully connected, as it is needed to translate the kerberos identity to a user name.
