BPM editor page
Description
BPM is a technology that allows modeling, implementing, and executing processes automatically to enhance efficiency and productivity in support of enterprise goals.
Soffid includes a BMP (Business Process Management) in its Smart Engine to provide useful workflows integrated with the processes and the policies.
The BPM Editor Addon allows you to create, configure and publish business processes very easily for the Soffid administrators.
The BPM Editor addon provides some templates to create new workflows, these templates depend on the process type selected when you are adding a new business process. Nowadays there are the following templates available:
- User management
- Permissions management
- Account reservation
- Permissions request
- Delegate roles
You can find additional information by visiting Process types chapter.
Once a workflow is published with the proper configuration, the users with the correct permissions could start, approve or observe the workflow from the "My Request" option. You can find more información on My Requests page.
When a workflow is deleted in the BPM editor, that workflow continues to be available to be executed. If you do not want that a workflow will be executed, you must disable that process on the "Business process definition" page. If you disable a workflow, processes initiated and pending can be finalized, but no longer than workflow could be started.
A workflow could be updated with a new version. Processes started with the previous version, will be performed with the previous definition (previous version). And the processes those start with the new version will be performed with the new version.
We will use two concepts to explain the process: identity, and end-user. Identity will be the identity or user that will be created, updated, or deleted in Soffid Console. The end-user is referred to an user of Soffid that will request processes using the self-service portal.
Screen overview
Related objects
- Configure Workflow engine : where the workflow engine is configured
- Business process definition : where workflows are published
- BPM editor : where to create or modify workflows
-
My tasks : pending workflows where the user has to perform an action in order to continue their workflow.
-
My requests : The workflows that the user can initiate are listed here.
-
My requests > Query request status : to search for all processes started by oneself
-
Process Search : to search for all processes
- Metadata : to add attributes to display in the search tables
- Scheduled jobs : shows active workflows pending asynchronous tasks
Standard attributes
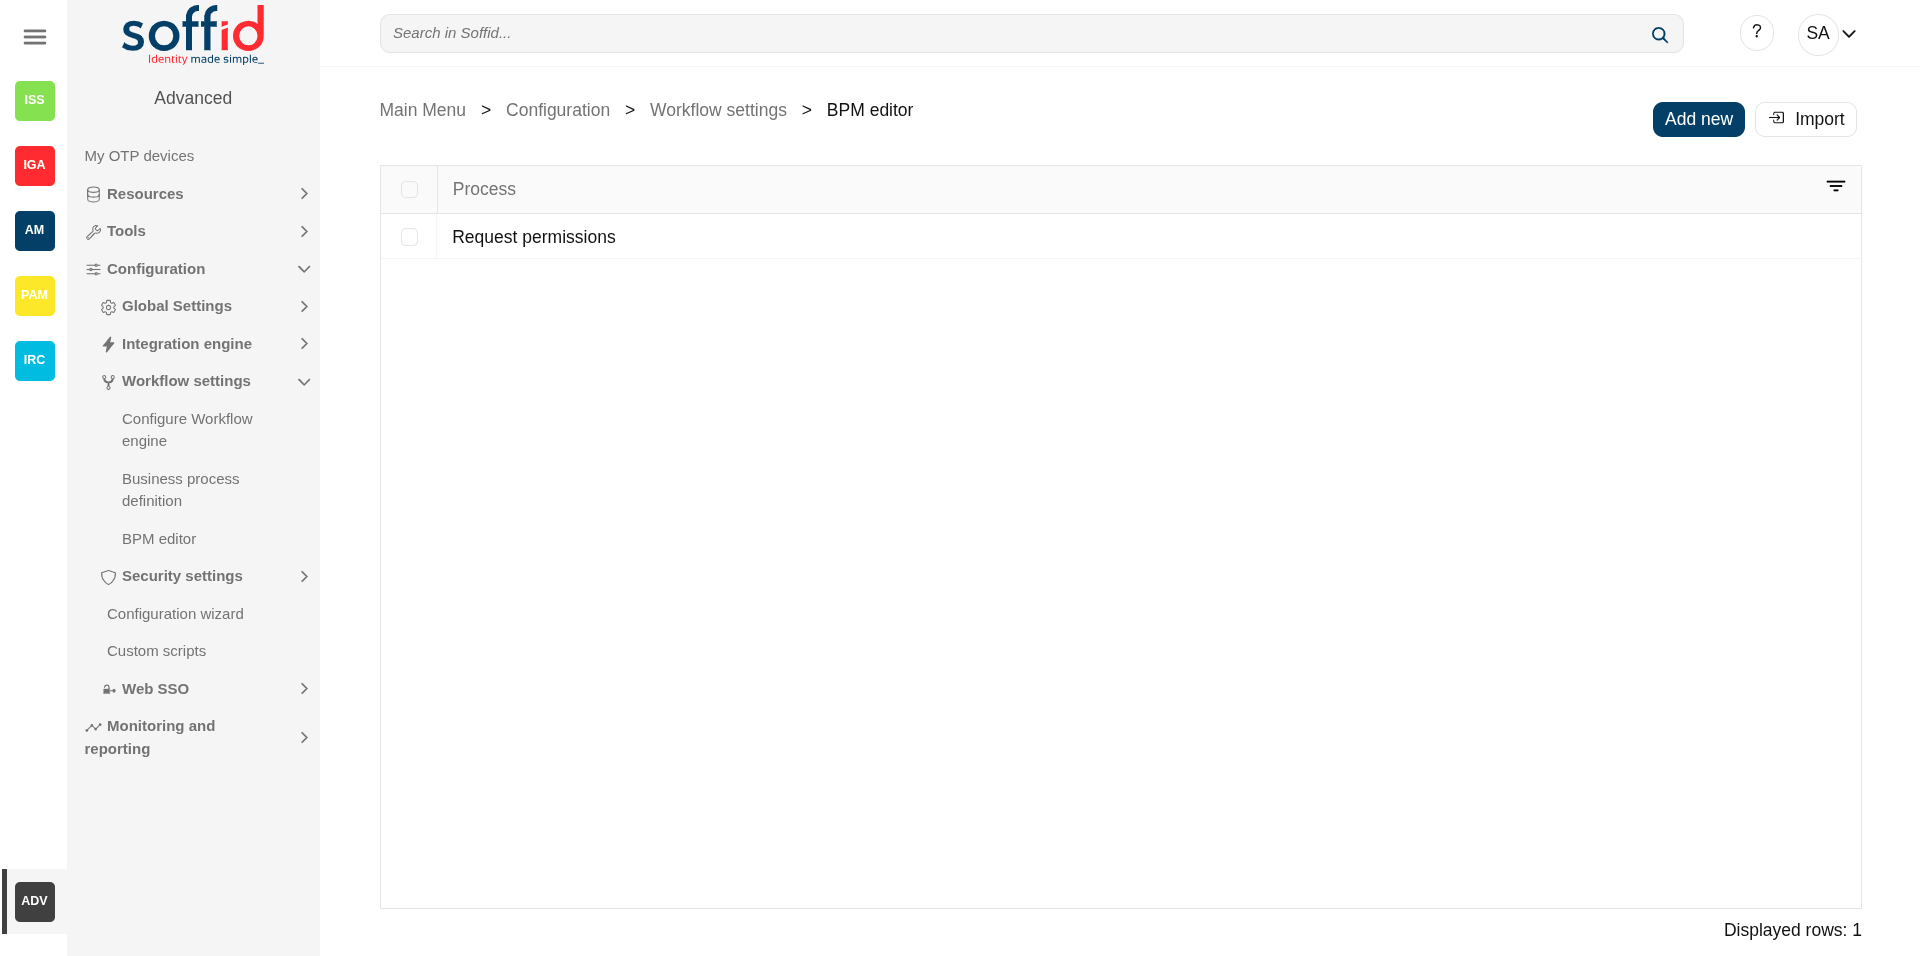
Processes list
The list of the processes already created or imported.
- Process: identifier name of the workflow
Summary tab
That area of the form displays the general information about the business workflow and the main operations to perform. The actions to perform are defined by flowing that link Process editor actions
- Process name: identifier name of the workflow. This name will be used to label the workflow for the end-user. BPM editor allows you to manage the process into folders, you can type the folder name following by "/" .
Image
Configuration: folder/name

My request with the Users folder
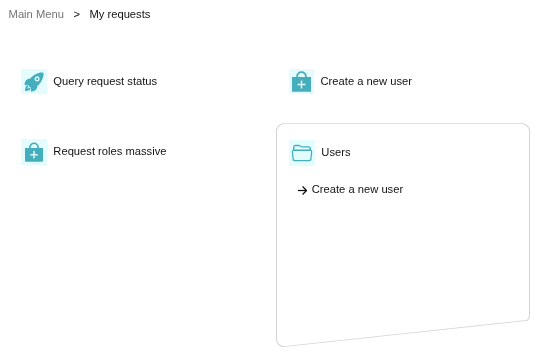
Users folder with the workflow

- Process type: allows categorizing the process. There are three different types of processes, each one with its own template.
- Use management: used to create and update identities and their attributes.
- Permissions management: used to create, update and remove permissions and account to identities.
- Permissions request: used to request permissions.
- Account reservation: to use privileges account. In this case, initiators must be -nobody-, that is nobody can start the process directly.
- Delegate roles: used to delegate permissions to other user.
- Description: a brief description of the workflow. When an end-user starts a workflow, this text will be displayed in the Actions log tab.
- Initiators: here you could configure the roles or the identities that could start a new workflow from the Console and Selfservice. E.g. "admin" identity, "SOFFID_ADMIN" role, both separated by comma ',' as "admin,SOFFID_ADMIN" or if you want to publish the workflow to everyone, you can use the text "tothom" or the character '*' . When you are configuring an Account reservation process, that value must be -nobody-, that is nobody can start the process directly.
- Managers: here you could configure the roles or the identities that could perform tasks in the workflow as approve permissions or cancel the workflow.
- Observers: here you could configure the roles or the identities that could open the workflows in read-only mode.
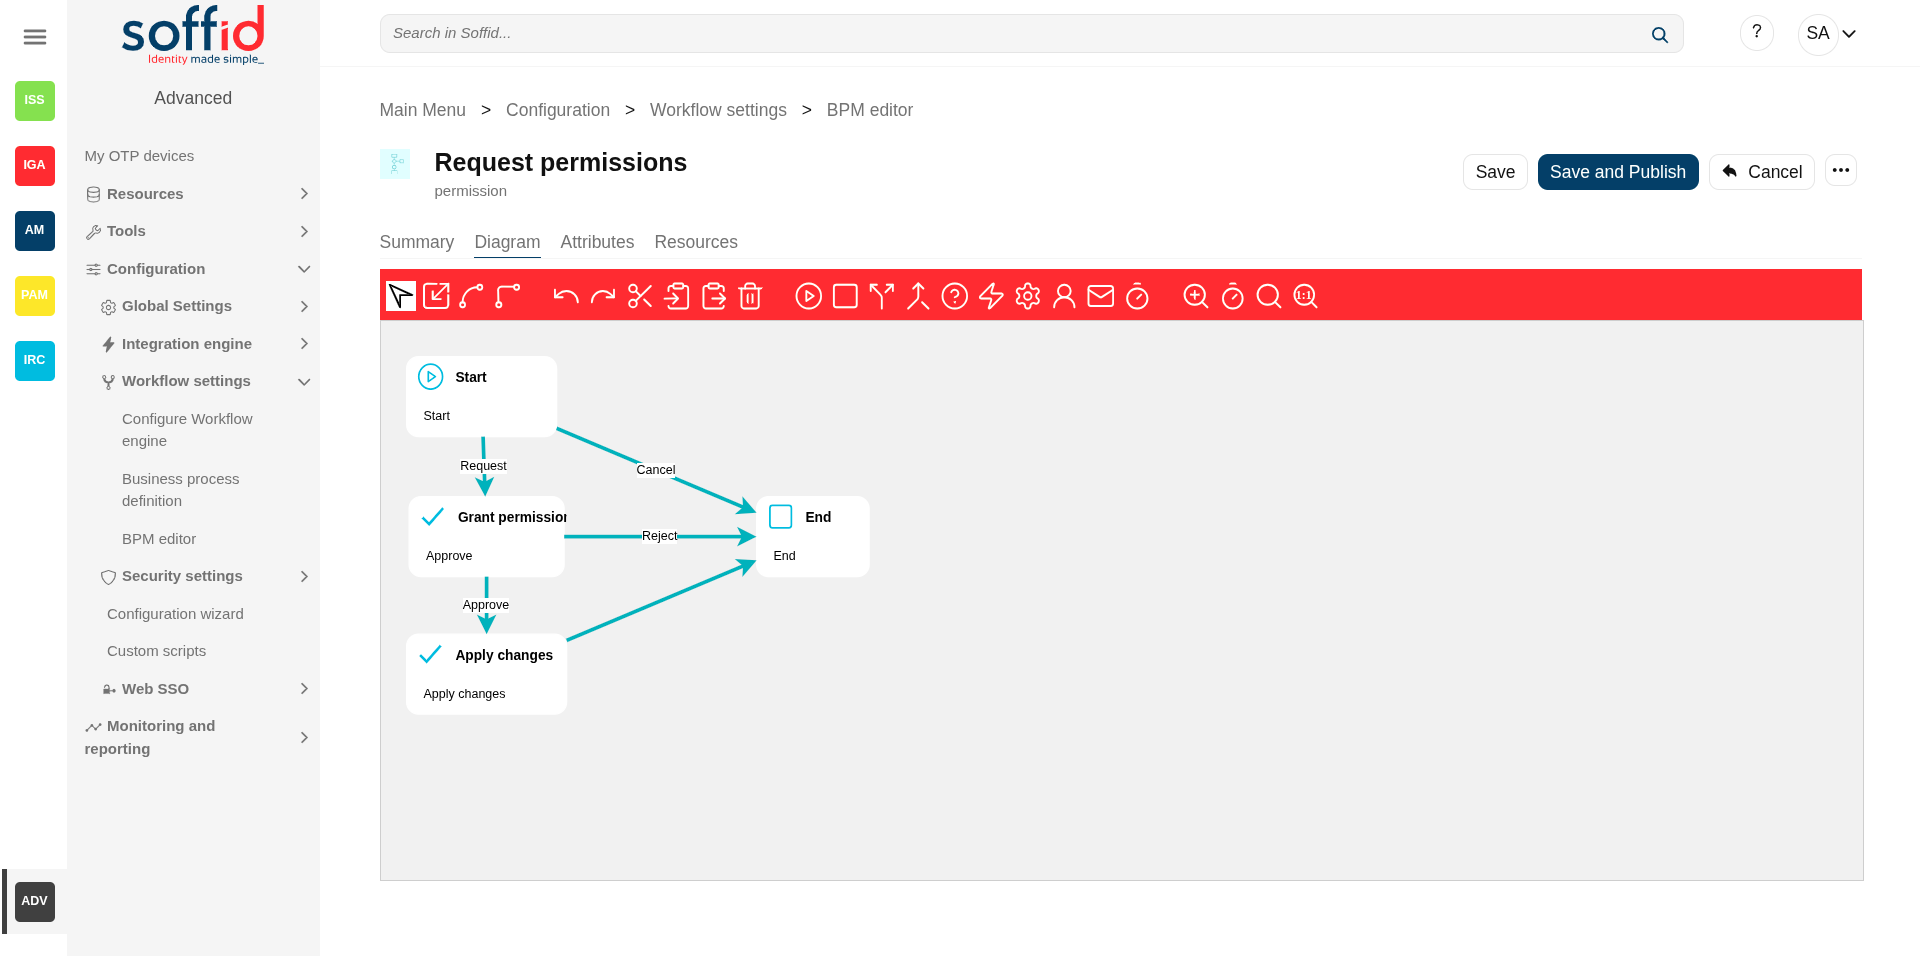
Diagram tab
This tab displays the workflow diagram. The editor allows you to perform many actions as edit a node, edit a transition, add nodes and transitions, or redistribute the diagram.
Steps
There are some available step types to define the properties and behavior of the process. Depending on the selected type, there are common properties to all types and specific properties for each one of them.
The workflows have default steps defined, those steps can be deleted or updated, and other steps can be added. Each step has detail to set up its properties and its behavior. The default steps are below:
| Start |
This step is used to define the beginning of the workflow. 💻 Image
|
| Screen |
This step is used to define a form that must be filled in by the end-user. 💻 Image
|
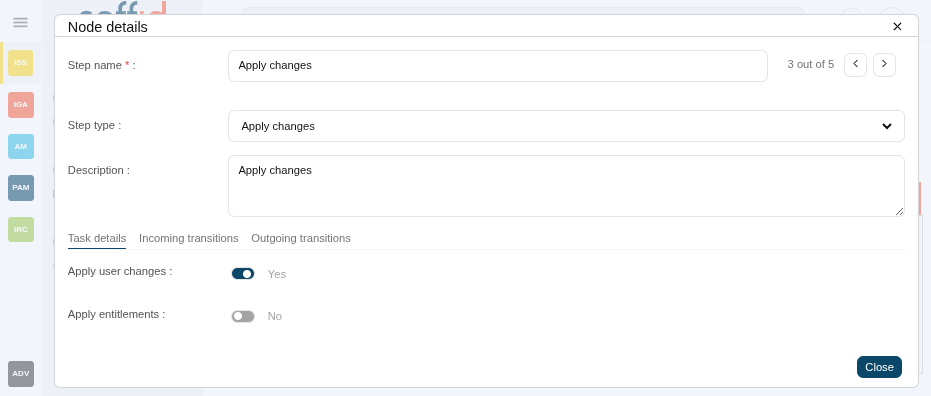
| Apply changes |
This step is used to show the manager a form with the changes that must be approved. 💻 Image
|
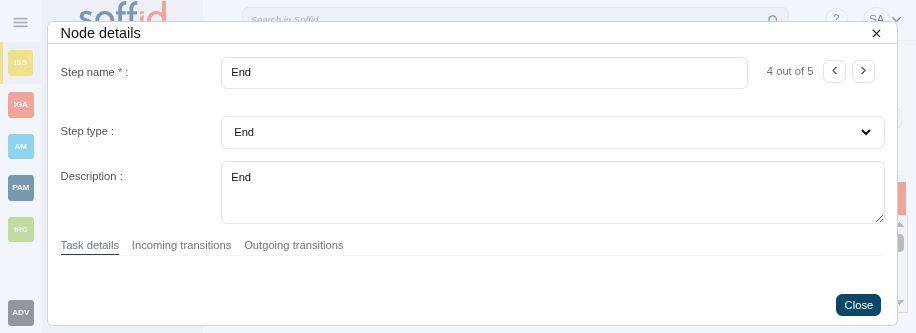
| End |
This step is used to define the finish of the workflow. 💻 Image
|

Other available steps to custom your business process:
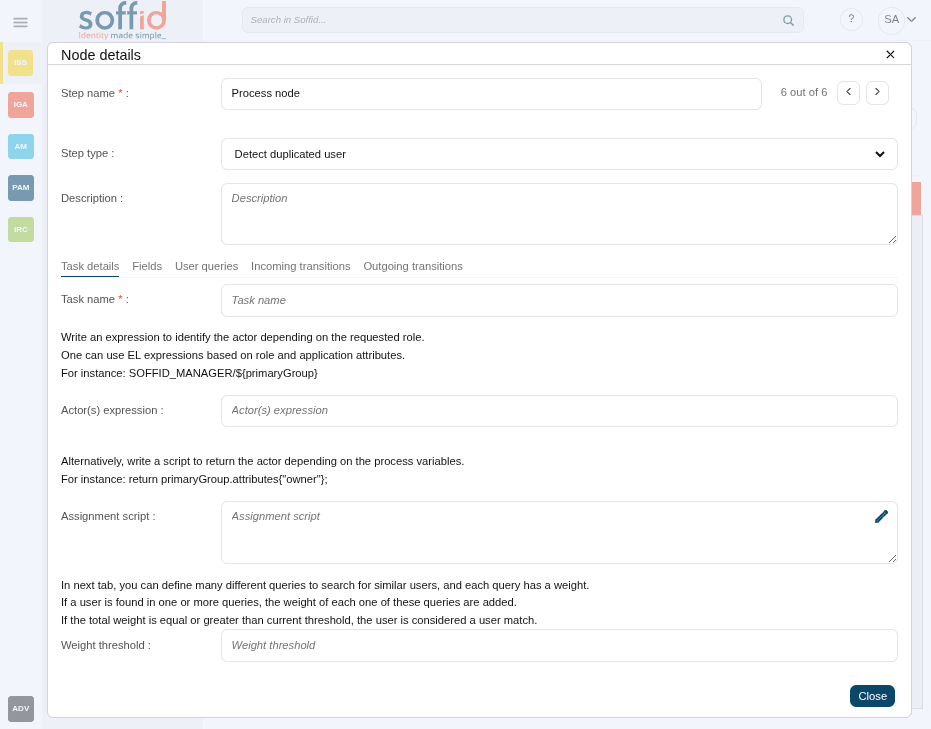
| Detect duplicated user |
This step is used to detect duplicated users. 💻 Image
|
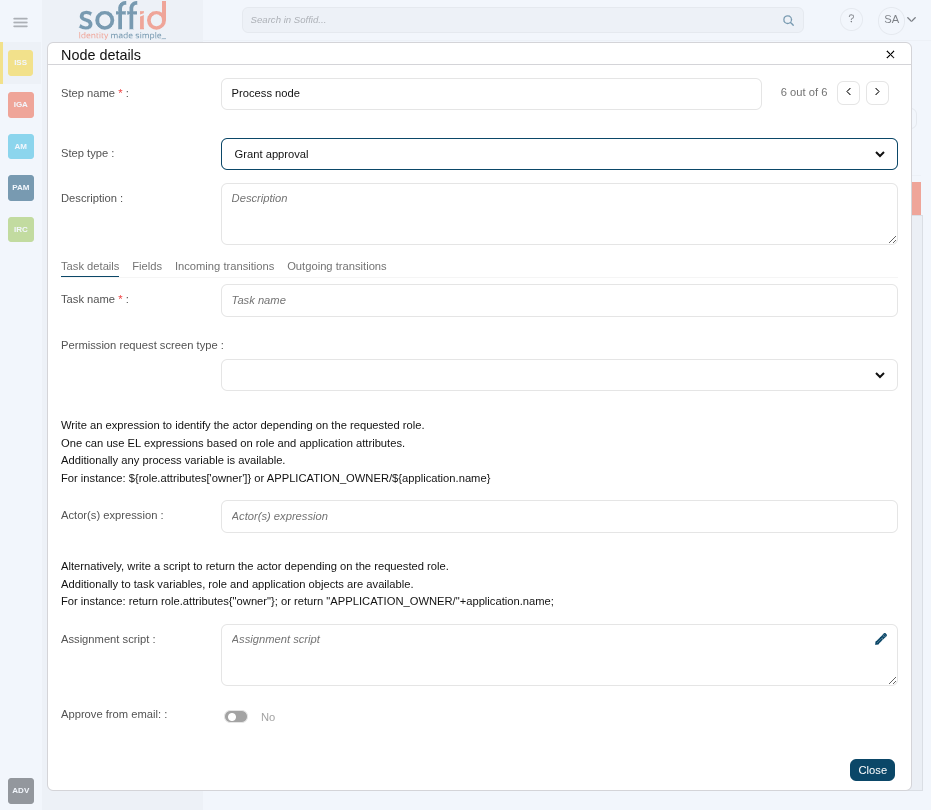
| Grant approval |
This step is used to show the manager a form with the changes that must be approved. 💻 Image
|
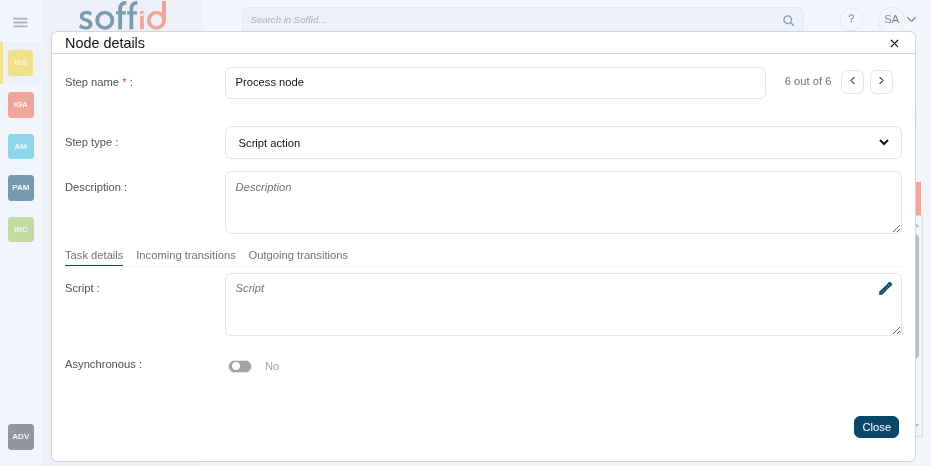
| Script action |
This step allows you to define a script to be executed at this point. This process can be configured as asynchronous. 💻 Image
|
|
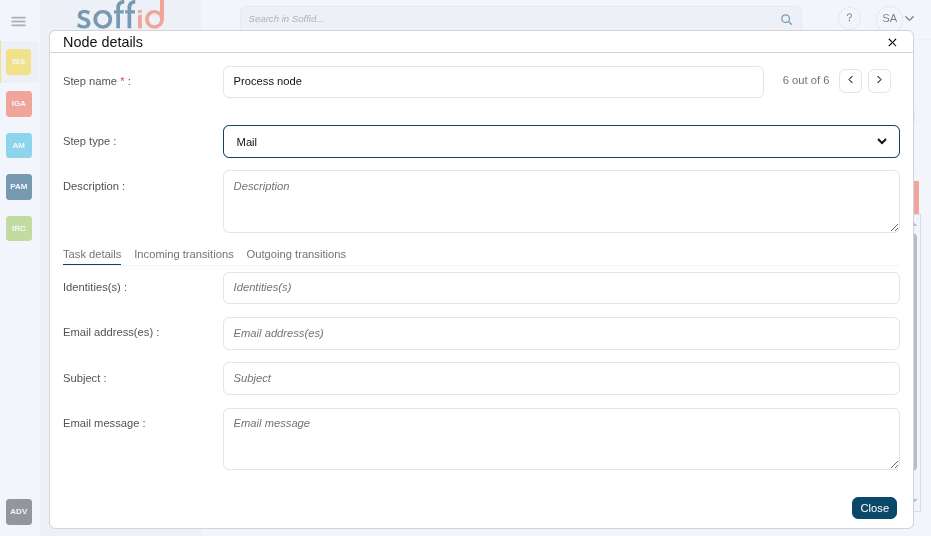
This step is used to configure sending mail. 💻 Image
|
|
| Fork |
The process is splited into two or more paths that are run in parallel, allowing multiple activities to run simultaneously. 💻 Image
|
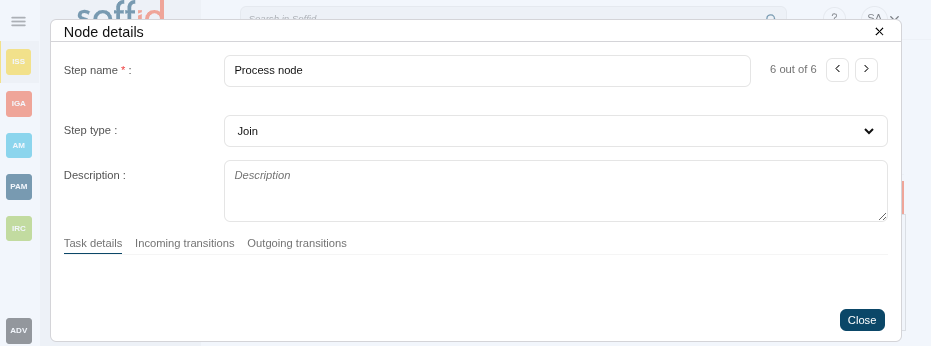
| Join |
Two or more parallel sequence flow paths are combined into one sequence Flow path. 💻 Image
|
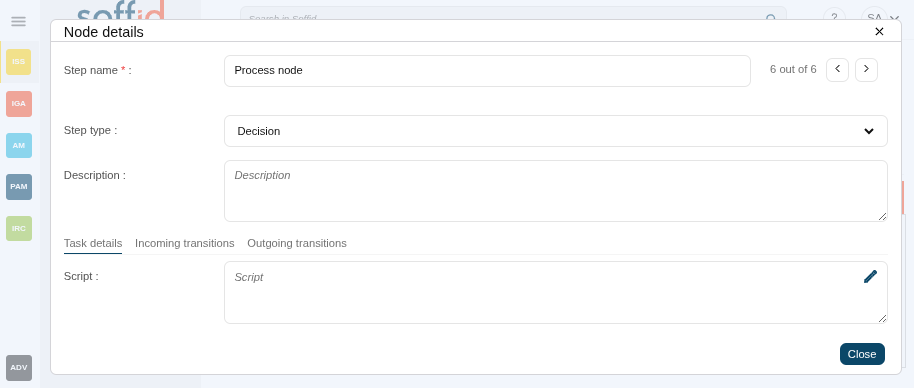
| Decision |
This step allows you to define a script to decide which will be the next step. You must configure the next step by typing the transition name as part of the return command (e.g. return "transitionName"). 💻 Image
|
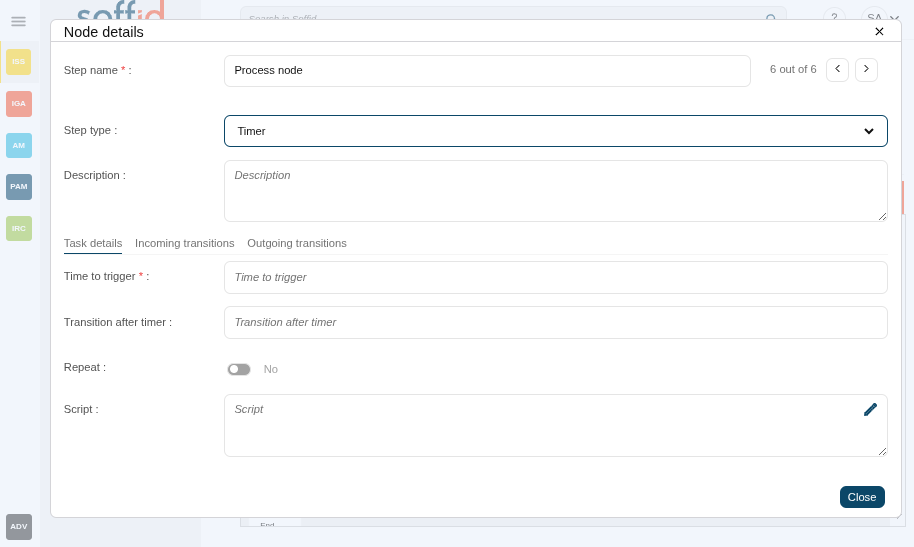
| Timer |
This option can be an independent node or as a part of an existing node. This allows you to determine the time to run the action. For Time to trigger field, the availabe options are hours, minutes, seconds, days, or a date #{fecha} 💻 Image
|
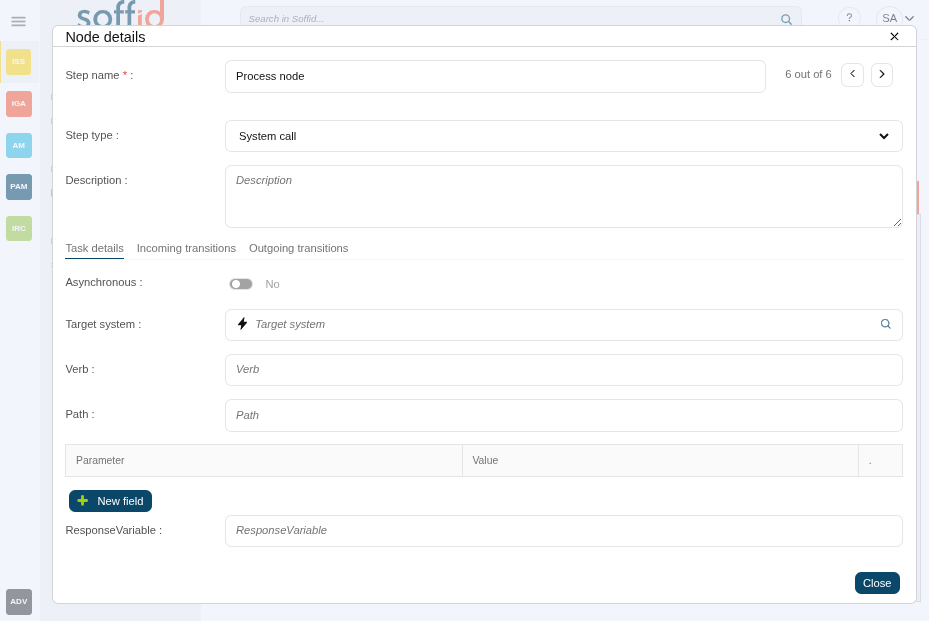
| System call |
This step allows you to set up a call to a specific system. You can find more information about the Invoker for Shell connector and the Invoker for Active directory connector. 💻 Image
|

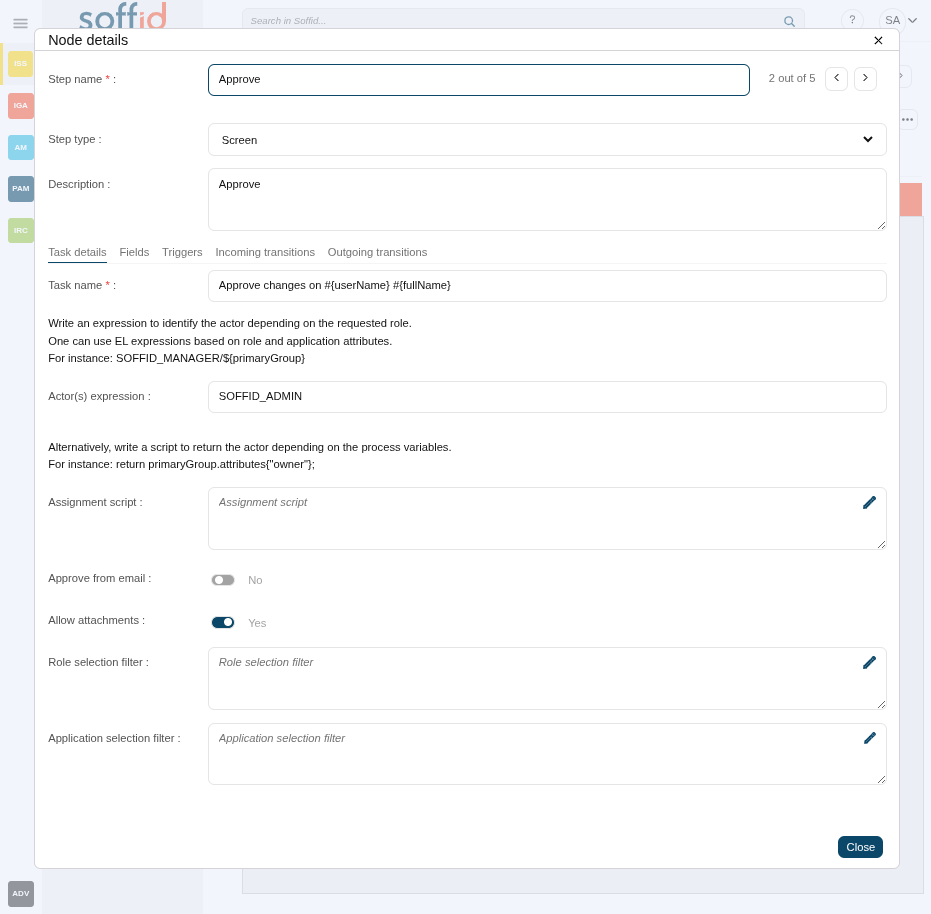
Step details
All steps have some detailed data:
- Step name: identifier name of the step.
- Step type: step to be configured.
- Description: a brief description of the step.
Step tabs
All steps have some tabs for more detailed configuration, the tabs depend on the step type:
- Task details: tab with more custom attributes that depend on the step type
- Fields: objects attributes to be managed in the workflow form
- Triggers: scripts to be executed depending the trigger selected
- User querys: user querys
- Incoming transitions: tab to manage the incomming transitions and algo manage actions
- Outgoing transitions: tab to manage the outcoming transitions and algo manage actions
Attributes tab
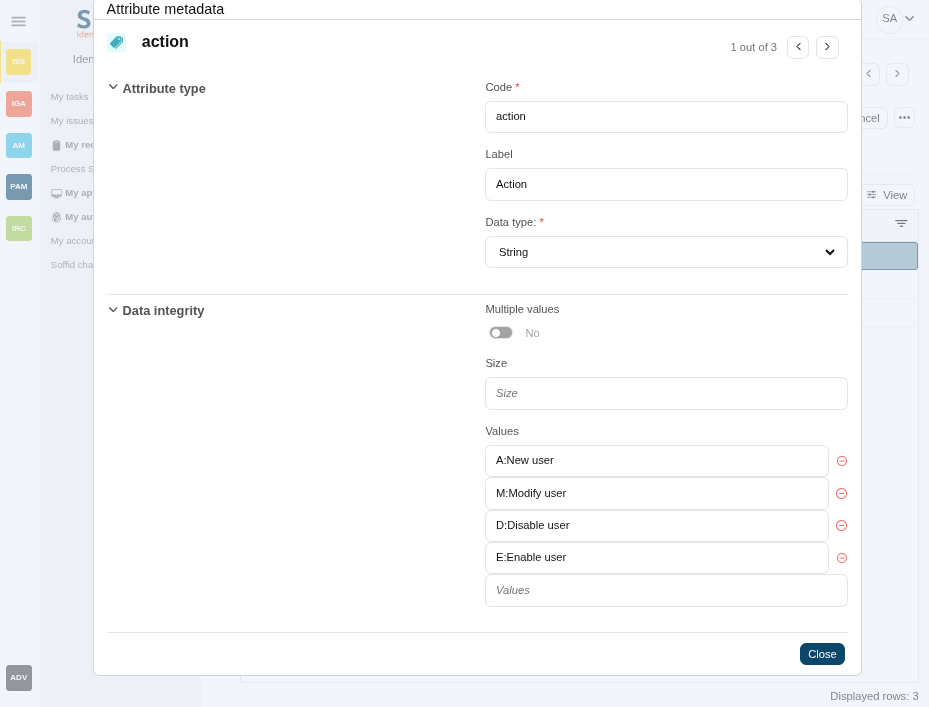
The Attributes tab is allowed for creating custom attributes to be used to configure the workflow. The defined attributes will be used in the Steps tab to be mapped with the Soffid data.
There are customized templates depending on the Process Type selected, those give you default attributes that you can customize.
- Code: code is used internally as an identifier by the system. Try to create a short one without spaces and with uppercase to separate words.
- Label: label displayed on the web page. This may be a name or a short description.
- Data type: data type of the value of the metadata attribute. The data type includes:
- Basic data types as String or Boolean.
- Extended data types as Photo or E-mail.
- Default Soffid objects as User or Group.
- Your own custom objects are created in Soffid.
- Multiple values: (Optional) If this flag is enabled, the metadata may contain more than one value.
- Size: (Optional) Set the maximum length of the value.
- Values: (Optional) Allows creating a set of values to provide to the user as a list.
💻 Image
Actions
Process list actions
|
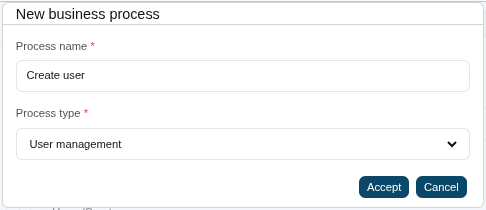
Add new |
Allows you to add a new workflow to Soffid. You need to set a name and select the process type and accept. Then Soffid opens the Process editor, which allows you to configure the process. And finally, save the process configuration, or save and publish. If you cancel that operation, Soffid will not save the process definition. 💻 Image
|
|
Import |
Allows you to import a workflow from a .pardef file. That functionality is very useful for next scenarios:
Click the button, pick up a .pardef file, and save the process or save and publish. Soffid will ask you for confirmation, If you confirm, finally, Soffid will import the process definition. If you cancel that operation, Soffid will not upload and save the process definition. Note that with this option you only can load workflows defined by the BPM editor. |
|
"Edit process" |
Allows you to edit a workflow to update it by clicking the process row. Then you can update the process definition and save, or save and publish the updates. |
|
Delete process definition |
Allows you to delete a workflow. Select a process row to enable the delete button. When a process is deleted, that process continues to be available to be executed. If you want that process is not available, you must disable that process on the Business process definition page. |
Summary tab actions
The action that can be performed in the process are detailed below
|
Save |
Allows you to save all changes included in the workflow. That workflow can be a new or an updated workflow. |
|
Save and Publish |
Allows you to save the changes performed in the workflow setup and also publish the workflow to be used in Soffid.
After this action, the last version of the workflow will be available for the end-user (with the proper permissions) in the Soffid Console and Self-service portal on the My requests page.
This latest version has been saved internally on the Business process definition screen. |
|
Cancel |
Allows you to quit the process editor without saving changes. Soffid will ask you for confirmation to exit without saving updates |
|
Export process |
Allows you to export a workflow to a .pardef file. You can choose that option clicking the "three points" icon. Automatically Soffid will download a .pardef file with the process definition. |
Diagram tab actions
|
"Transition icons" |
Allws you to add or update transitions.
Image
|
|
"Edit icons" |
Allows you to delete an existing step. To delete a step you must click "trash" icon, the last of the edit icons.
💻 Image
|
|
"Step icons" |
Allows you to add a new step to the workflow by selecting the action from the tool bar. When a new step is added, it will be mandatory to configure it.
💻 Image
|
|
"Size icons" |
Allows you to change the size view of the diagram.
Image
|


Diagram tab > step node > fields tab actions
|
Add new |
Allows you to add a new attribute on the Attribute tab. You need to click the "New field" button and Soffid will show a new row to fill in. For each new field you may define:
💻 Image
|
|
Delete |
Allows you to delete a field. To delete a field you must click on the subtract icon (-) that is at the end of the same line. |
|
Order (icon) |
Allows you to sort the fields using drag and drop. |
|
Validation (icon) |
Allows you to add a new customized script with validation rules |
|
Visibility (icon) |
Allows you to add a new customized script to determine the visibility of that field. |
| SCIM query (icon) | Allows you to define a SCIM filter to get the data |

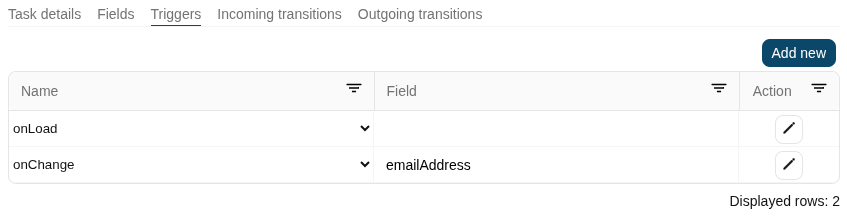
Triggers
|
Add new |
Allows you to add a new trigger to perform actions. 💻 Image
|
|
Delete |
Allows you to delete a trigger. |
|
Action (icon) |
Allows you to add a new customized script. |
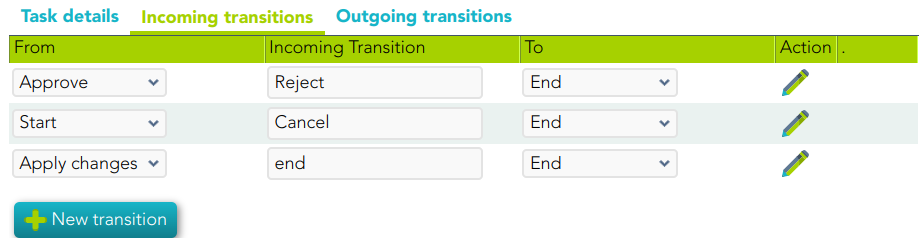
Incoming transition
|
New transition |
Allows you to add a new incoming transition. You need to click the "New transitions" button, then Soffid will show a new row to fill in. For each new incoming transition you may define:
💻 Image
|
|
Delete transition |
Allows you to delete an incoming transition. To delete an incoming transition you must click on the subtract icon (-) that is at the end of the same line. |
|
Action |
Allows you to add a new customized script by clicking the pencil icon. |
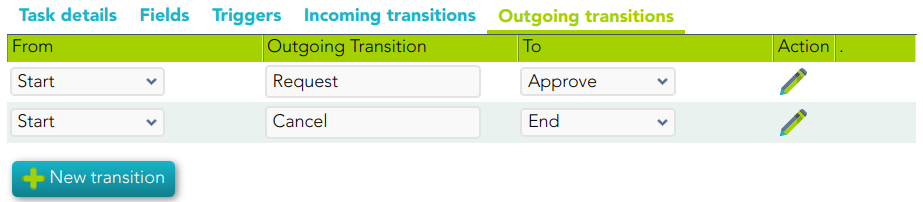
Outgoing transition
|
New transition |
Allows you to add a new outgoing transition. 💻 Image
|
|
Delete transition |
Allows you to delete an outgoing transition. To delete an outgoing transition you must click on the subtract icon (-) that is at the end of the same line. |
|
Action |
Allows you to add a new customized script by clicking the pencil icon. |
Attributes tab actions
| Add new | Allows you to add a new attribute to use to configure the step. |
|
View |
Allows you to show and hide columns in the table. You can also set the order in which the columns will be displayed. |
| Delete | Allows you to delete an attribute. To enable the delete button you must select one attribute. |
| Add value | Allows you to add a new value to the attribute. |
| Delete value | Allows you to delete a value. To delete a value you must click on the subtract icon (-) that is at the end of the same line. |
Resources tab actions
| Upload resources | Allows you to add files in a zip file as externals resources to be used in the scripts |
Others
Workflow to import as examples
- User management --> User.pardef
- Permissions management --> Permissions+request.pardef
- Account reservation --> Account+reservation.pardef
- Permissions request
- Delegate roles