Step 6.2. Create Password policy


How to define a new password policy for the previous user type created.

Step-by-step

1. First of all, you must access the Password policies page, the path to access is the following:

Main Menu > Administration > Configure Soffid > Security settings > Password policies

2. Once you are located on the Password policies page, you must click the "Add password policy", at the proper domain, to add a new Password policy type. Then Soffid will display a new empty page to fill in the data.

You must fill, at least the required fields (fields with an asterisk) to create a password policy.

  • You must select the User type created in the previous step.
  • The Description should be a brief description about the password policy.
  • The Password type you must select the option Automatically generated.

Other fields you could configure

  • Renewal Time: added number of days to change the password. That option is available when you select the "Automatically generated" option.
  • Length (min & max): added the number of days to change the password.
  • Regular expression: the password must comply with that regular expression.
  • Uppercase letters (min & max): min and max number of uppercase letters that be included on the password.
  • Lowercase letters (min & max): min and max number of lowercase letters that be included on the password.
  • Numbers (min & max): min and max number of numbers that be included on the password.
  • Symbols (min & max): min and max number of symbols that are included on the password.
  • Complexity: Similar operation to the same option in Active Directory. It is mandatory to use three different types of characters (uppercase, lowercase, numbers, and symbols), it is not allowed to use the user code, name, or surname.
  • Passwords remembered: the number of passwords the system will remember.
  • Forbidden words: list of forbidden words that may not be used to create a password if they are selected. It will be case insensitive.  For instance, there will be no distinction between "Soffid", "SOFFID", or "soffid".
  • Lock after failures: the number of login attempts before blocking an account.
  • Unlock after seconds: the number of seconds an account is blocked.

    3. Once you have filled in all those fields, you must apply changes, by clicking on the "Apply changes" button to create the new user type.

    4. When you apply changes:

    4.1. If all the required information is correct, Soffid will save the new user type, close the page and show the user types list with all the user types created on the system, including the last one created.

    4.2. If the information filled in is not correct, Soffid will show an alert on the fields which have errors. You must correct the mistakes and save the user type again.

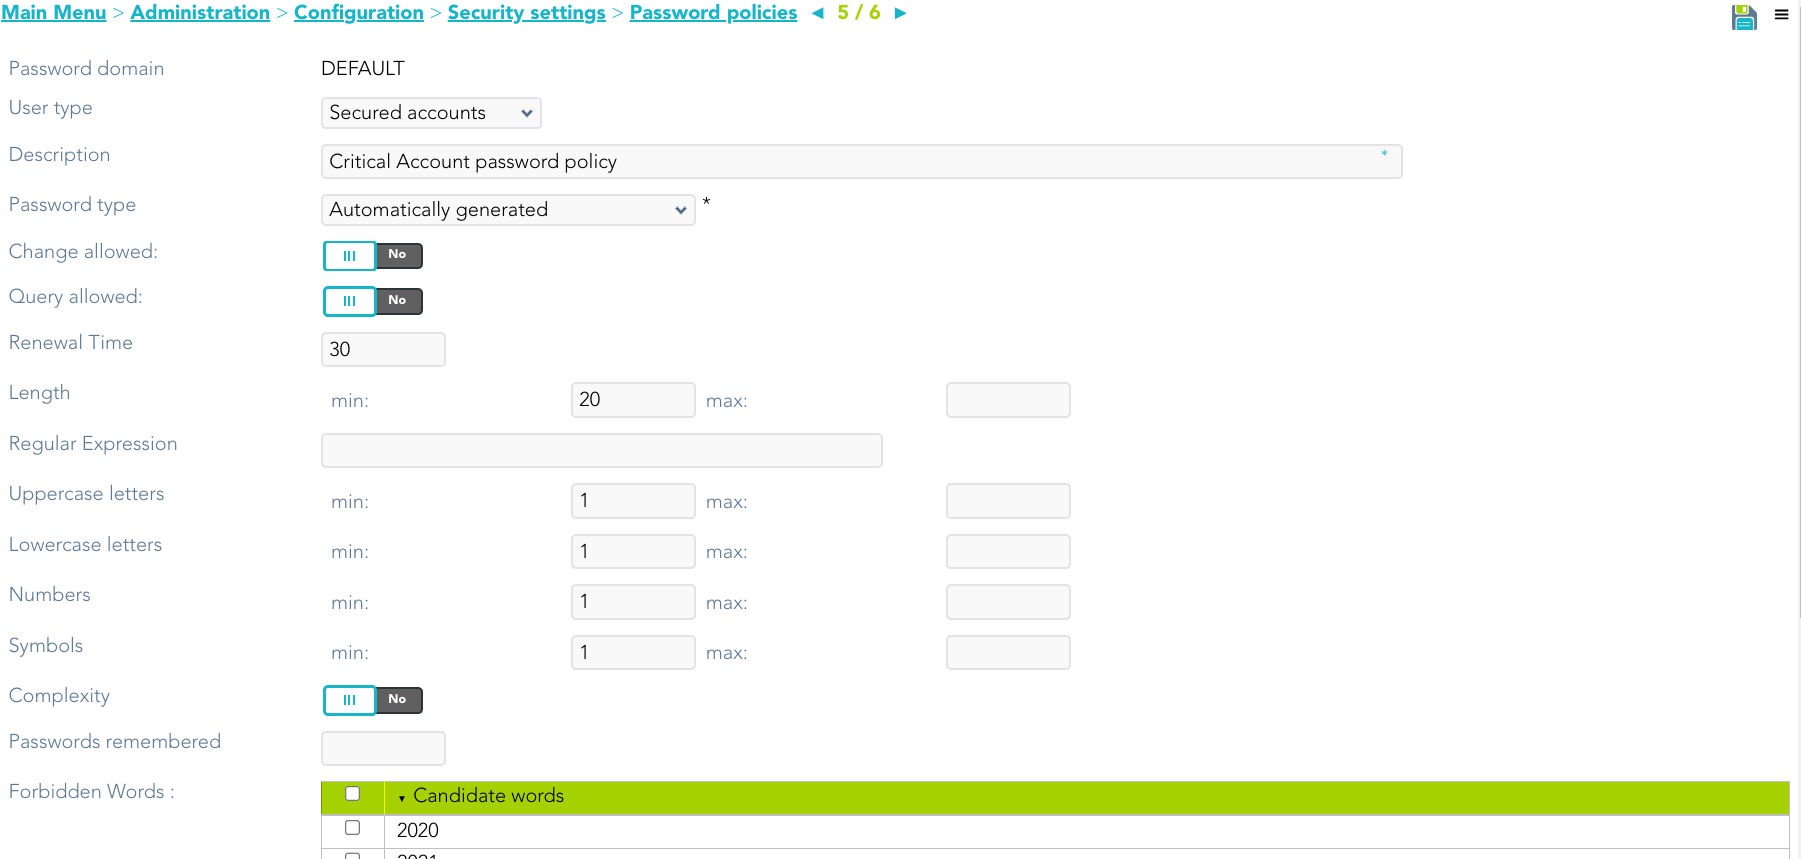
    Screen overview

    image-1688998161328.png