Installing Sync server
Guide to install Synchronization server on your own server
Prerequisites
Soffid IAM sync server requires the following requirements:
- Windows or Linux (Ubuntu is the most commonly used)
- Java JDK 11 for Soffid 3, Java JDK 17 for Soffid 4
- 8GB RAM
- > 10GB disk space
- Soffid console installed
Video tutorial
Windows
Linux
Installation
Download
You can download Soffid 3 and Soffid 4 components from our website Soffid Download Opensource or Soffid Download Enterprise.
Click on Soffid Sync Server and download the latest version for your OS.
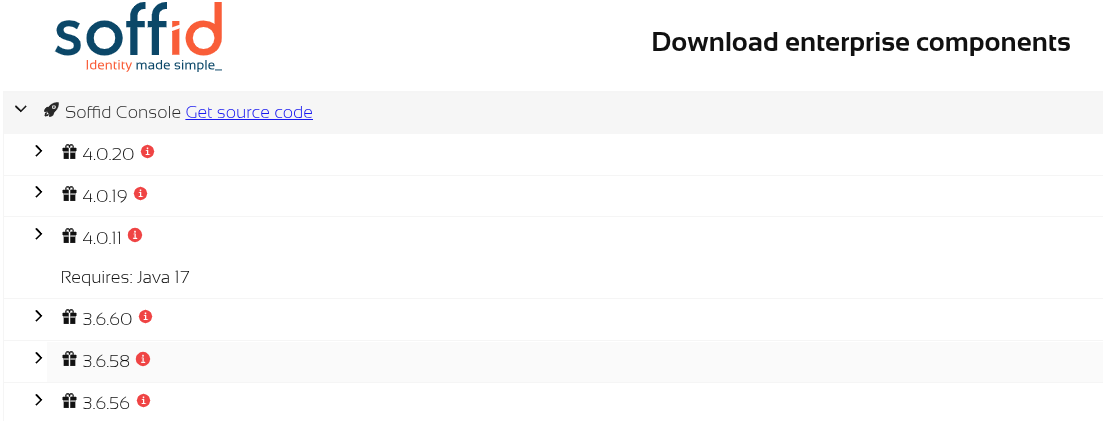
As soon as the install-x.y.z.sh file is in your computer, copy the file into a path of your server.
Installing Sync Server
Windows
Open the installation file. It will install the software and will execute the installation wizard.
The installation wizard will ask if it is the first sync server or not.
Linux
sudo dpkg -i '/your-path/Soffid Sync Server-Debian_Ubuntu Installer-4.0.0-beta-2.deb'The installation wizard will ask if it is the first sync server or not.
Installing the first sync server
Automatic wizard
If you answer Y to the first question, the wizard will ask for the following information:
- Database URL: Use the same URL used to install the console.
- Database user: The user name to connect to the database. It was used during the console installation
- Database password: The database user password
- Host name: Enter the fully qualified domain name of the host. IP addresses are not accepted.
- Port to listen: Enter a TCP port number. The sync server will receive connections from the console or other sync servers through this port. The suggested value is 1760.
After checking the database status, the wizard will register the sync server and will create a new certification authority, as well as a digital certificate for the brand new sync server.
Manual wizard
If the wizar is not launched automatically, you should launch it manually. To do that, you must follow the next steps:
1. Stop syncserver service: systemctl stop soffid-iamsync.service
2. Delete previous configuration: rm /opt/soffid/iam-sync/conf/*
3. Launch wizard: /opt/soffid/iam-sync/bin/configure
4. Start synserver service: systemctl start soffid-iamsync.service
The wizard will request about the database configuration:
......
Is this the first sync server in the network (y/n)? y
Database URL (jdbc:....): jdbc:mariadb://localhost/soffid
Database user: ADMIN_USER
Password: xxxxx
This server host name [soffid.my.lab]: localhost
Port to listen to [1760]: 1760
....
Installing the next sync servers
If you answer N to the first question, the wizard will ask for the following information:
- Cloud service: You can install an on-premise sync server connected to a cloud instance. In this case, the communication stack works in a slightly different way. If this is the case, enter Y. If you are connecting to an on-premise Soffid deployment, enter N.
- Server URL: Enter the URL for the first sync server.
- Tenant name: Enter the tenant name. If the sync server is not intended to work with a single tenant, enter master.
- User name: Enter an administrator user name.
- Password: Enter the administrator password.
- Host name: Enter the fully qualified domain name of the host. IP addresses are not accepted.
- Port to listen: Enter a TCP port number. The sync server will receive connections from the console or other sync servers through this port. The suggested value is 1760.
The wizard will connect to the sync server and create a sync server connection request. The administrator must open the "My tasks" page and approve the request. Once the request is approved, the wizard will finish.
Running synchronization server in root mode
Sometimes it is necessary to run the sync server in root mode to solve a problem. To do this it is necessary to edit the service, modify some data and finally restart the service.
sudo systemctl edit --full soffid-iamsyncUser=root
group=root
protectSystem=falsesudo systemctl restart soffid-iamsyncManual Configuration
Manual service configuration
If you are using the RPM, DEB or MSI installers, the service is automatically configured to start up with the computer. If you are using the .tar.gz file, you must enable it manually. Execute these commands as root to start Soffid IAM sync server service on boot:
ln -fs /opt/soffid/iam-sync/bin/soffid-sync /etc/init.d/soffid-sync
ln -fs /etc/init.d/soffid-sync /etc/rc1.d/K01soffid-sync
ln -fs /etc/init.d/soffid-sync /etc/rc2.d/S06soffid-sync
ln -fs /etc/init.d/soffid-sync /etc/rc3.d/S06soffid-sync
ln -fs /etc/init.d/soffid-sync /etc/rc4.d/S06soffid-sync
ln -fs /etc/init.d/soffid-sync /etc/rc5.d/S06soffid-sync
ln -fs /etc/init.d/soffid-sync /etc/rc6.d/K01soffid-sync
Note that if you are running Centos, Redhat7 o version higher than Ubuntu 16.04, you should enable the service in systemctl
sudo systemctl enable soffid-sync
Once you have installed and configured Soffid Sync Server as a service, you could manage it with the following operations
service soffid-sync status
service soffid-sync restart
service soffid-sync start
service soffid-sync stop
First synchronisation server configuration
It is not recommended to install the first sync server on the same host where the database is installed.
To configure the server, please execute the following commands:
On Linux:
/opt/soffid/iam-sync/bin/configure -main -hostname [hostname] -port 760 -dbuser [soffid] -dbpass [pass] -dburl [jdbc:mysql://localhost:3306/soffid]On Windows:
%ProgramFiles%\soffid\iam-sync\bin\configure -main -hostname [hostname] -port 760 -dbuser [soffid] -dbpass [pass] -dburl [jdbc:mysql://localhost:3306/soffid]User and password must be the ones created during the installation process.
The hostname value must be a FQDN (fully qualified domain name), for instance, "myhost.mydomain.com" or in a test environment "syncserver.soffid.lab"
Mind the configuration wizard will refuse to register the sync server if this is not really the first sync server. If you really want to register this sync server as the first one, you must open the Synchronization servers page and remove any already registered sync server.
Next servers configuration
In order to configure the next server syncservers, a two step process is required: first, a normal user installs and configure the sync server software; next, a Soffid administrator allows the sync server to join the sync servers network.
To perform the next step, you do not need to enter the database credentials. Instead, the primary sync server URL and a Soffid console user name and password are required.
For instance, you can execute:
On Linux:
/opt/soffid/iam-sync/bin/configure -hostname [hostname] -user [user] -pass [pass] -server [https://yourserver:760] -tenant [master]On Windows:
%ProgramFiles%\soffid\iam-sync\bin\configure -hostname [hostname] -user [user] -pass [pass] -server [https://yourserver:760] -tenant [master]
After executing the command, an approval task will appear in Soffid console. The administrator can take ownership of the task and approve or reject it. After approving the server creation, the server will be configured as a proxy sync server (without database access).
The administrator can open the sync servers configuration page to change the sync server role at any time.
Configure a synchronization server proxy without approval in UI
If you want to bypass the appoval process, there is a configuration setting that allows it:
- Open console and click on Start → Soffid Configuration → Soffid Parameters:
- Click on Add New and, then, write the parameter soffid.server.register, set the value to direct and Confirm changes.
-
Execute the configuration of a synchronization server proxy as follows:
On Linux:
/opt/soffid/iam-sync/bin/configure -hostname hostname -user usuario -pass pass -server https://<yourserver>:760 -tenant master
On Windows:
%ProgramFiles%\soffid\iam-sync\bin\configure -hostname hostname -user usuario -pass pass -server https://<yourserver>:760 -tenant master
Where hostname is the name of the synchronization server proxy, user and pass are the Soffid console user name and password and, finally, URL is the first synchronization server URL.
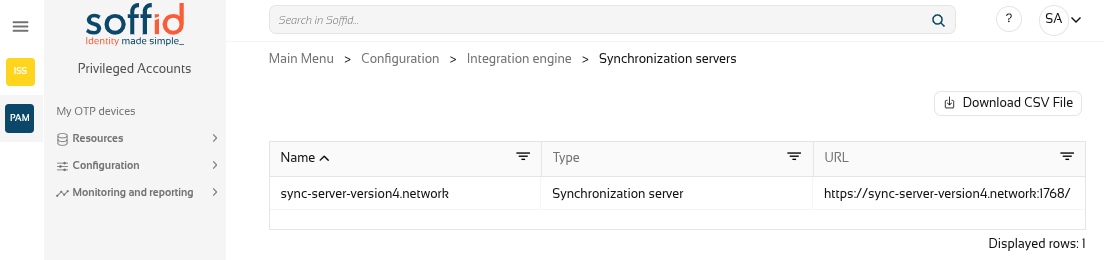
- In the Soffid console, go to Start→ Soffid Configuration → Agents and click on Synchronization Servers to check if the synchronization server proxy has been registered.
Thus, you can bypass the standard workflow needed for a sinchronization server to join the synchronization servers security network. Otherwise, the standard approval workflow will be required.
Renaming a sync server
You can rename any sync server at any time by removing the conf directory and executing the configure process again, but the main sync server is a special case. If you remove the conf directory, the certification authority managed by the main sync server will be lost, and every single sync server will be thrown out of the security domain.
Instead, to reconfigure the main sync server you can execute
On Linux:
/opt/soffid/iam-sync/bin/configure -main -force -hostname hostname -port port -dbuser soffid -dbpass pass -dburl jdbc:mysql://localhost:3306/soffidOn Windows:
%ProgramFiles%\soffid\iam-sync\bin\configure -main -force -hostname hostname -port port -dbuser soffid -dbpass pass -dburl jdbc:mysql://localhost:3306/soffidUser and password must be the ones created during the installation process.
The Soffid installation process changes console setup to reflect the new sync server name
The url connection parameter depends on the database system:
- For Oracle by SID: jdbc:oracle:thin:@localhost:1571:XXXX
- For Oracle by Service Name: jdbc:oracle:thin:@localhost:1571/XXXX
- For Mysql: jdbc:mysql://localhost:3306/XXXX
- For SQLServer: "jdbc:sqlserver://localhost:1433;databaseName=XXXX"
- For Postglesql: "jdbc:postgresql://localhost:5432/XXXXX
Now you can connect to the IAM console http://localhost:8080/soffid and chek if Console and Syncserver are connected.