Roles
Description
Soffid allows you to create roles to specify permissions that can be assigned to a user, a group, or an account. These permissions determine what operations are allowed on a resource. You can use roles to delegate access to users, applications, or services. The main goal is to achieve optimal security administration.
Roles can be defined at different levels:
- Organizational permissions.
- Application permissions.
- Low-level permissions.
When needed, generic roles can be created. When such a role is granted to any user, it is converted into a specific role by specifying an organization unit, information system, or a specific value. So, for instance, a generic emergency coordinator role can be created. The master emergency coordinator will have this role granted for the whole organization, while a remote office emergency coordinator will have this role granted for his single unit.
Note that a role can belong to an information system with a defined role definition process.
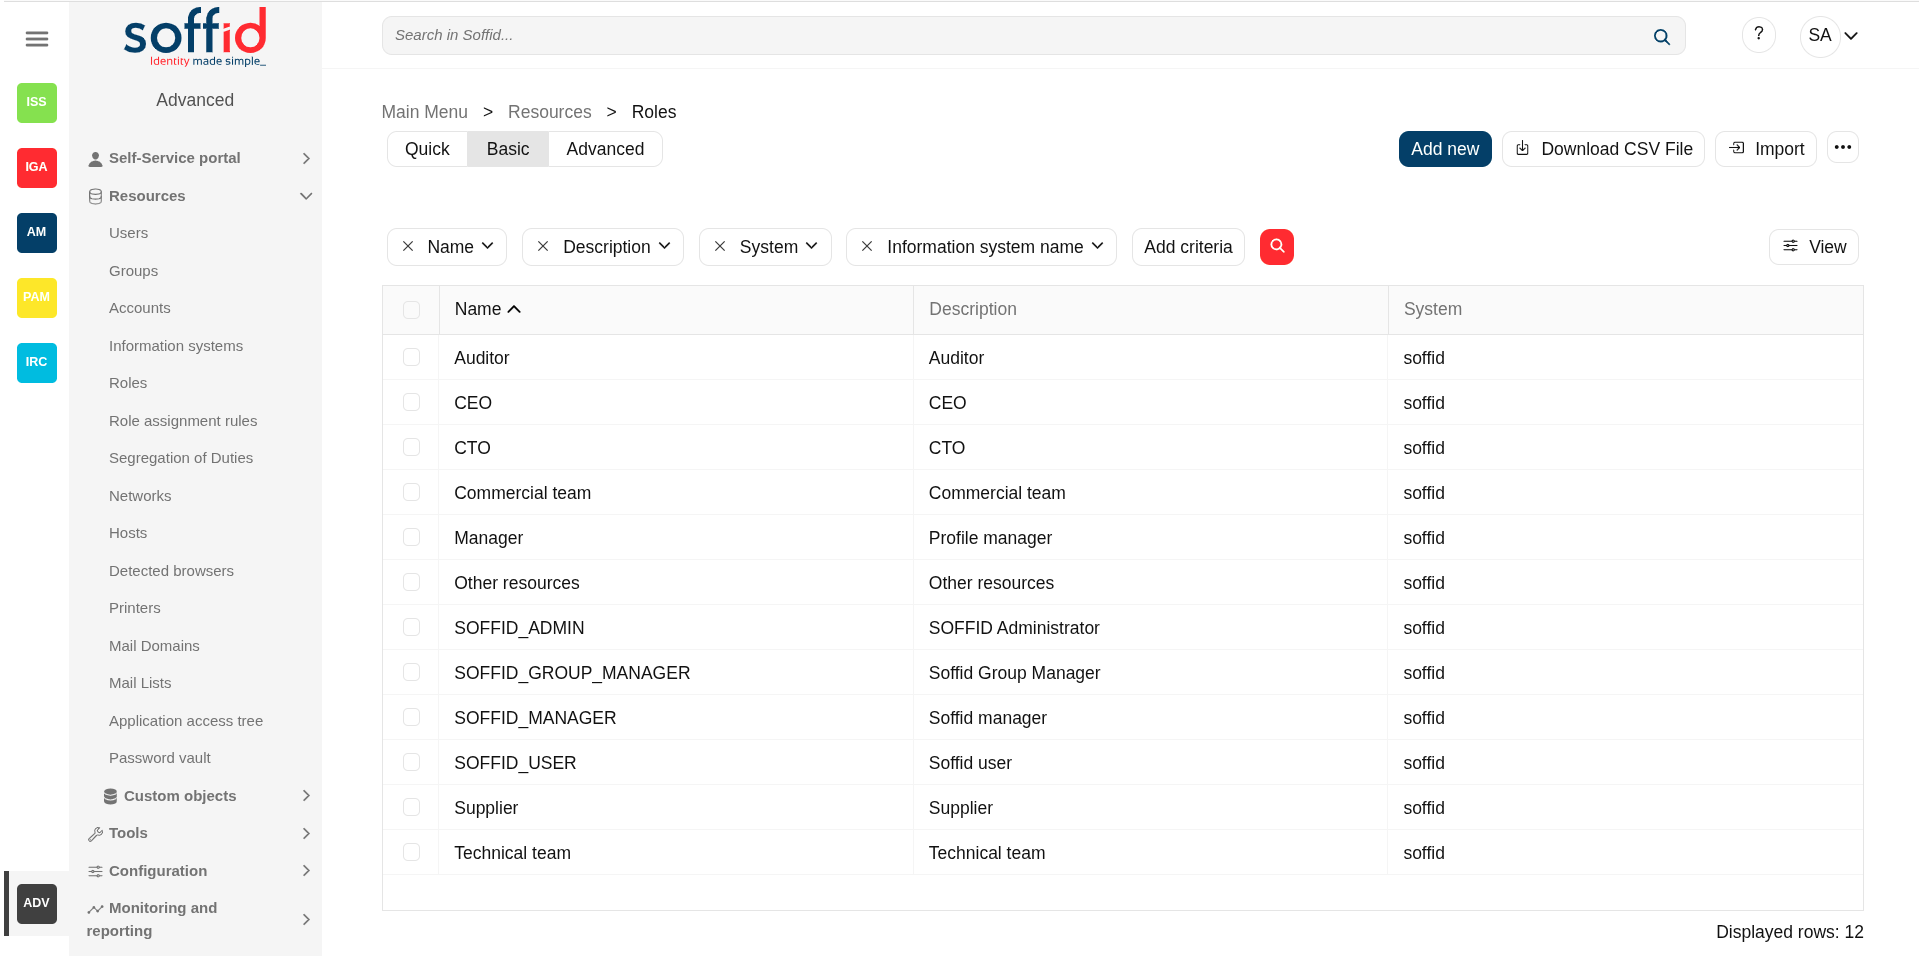
Screen overview
Related objects
UserUsers : owner users of the accounts- Accounts : a role is granted to a user throght an account
- Agents : the target system owner of the role
- Roles : a role can be inherited from another role
- Groups : a role can be inherited from a group
- Role assignment rules : a role can be inherited from a rule
GroupsInformation systems : where the roles are gatheredInformationBPMSystemeditor : roles and information system need to be BPM enabled to be menaged on worlkflows
Standard attributes
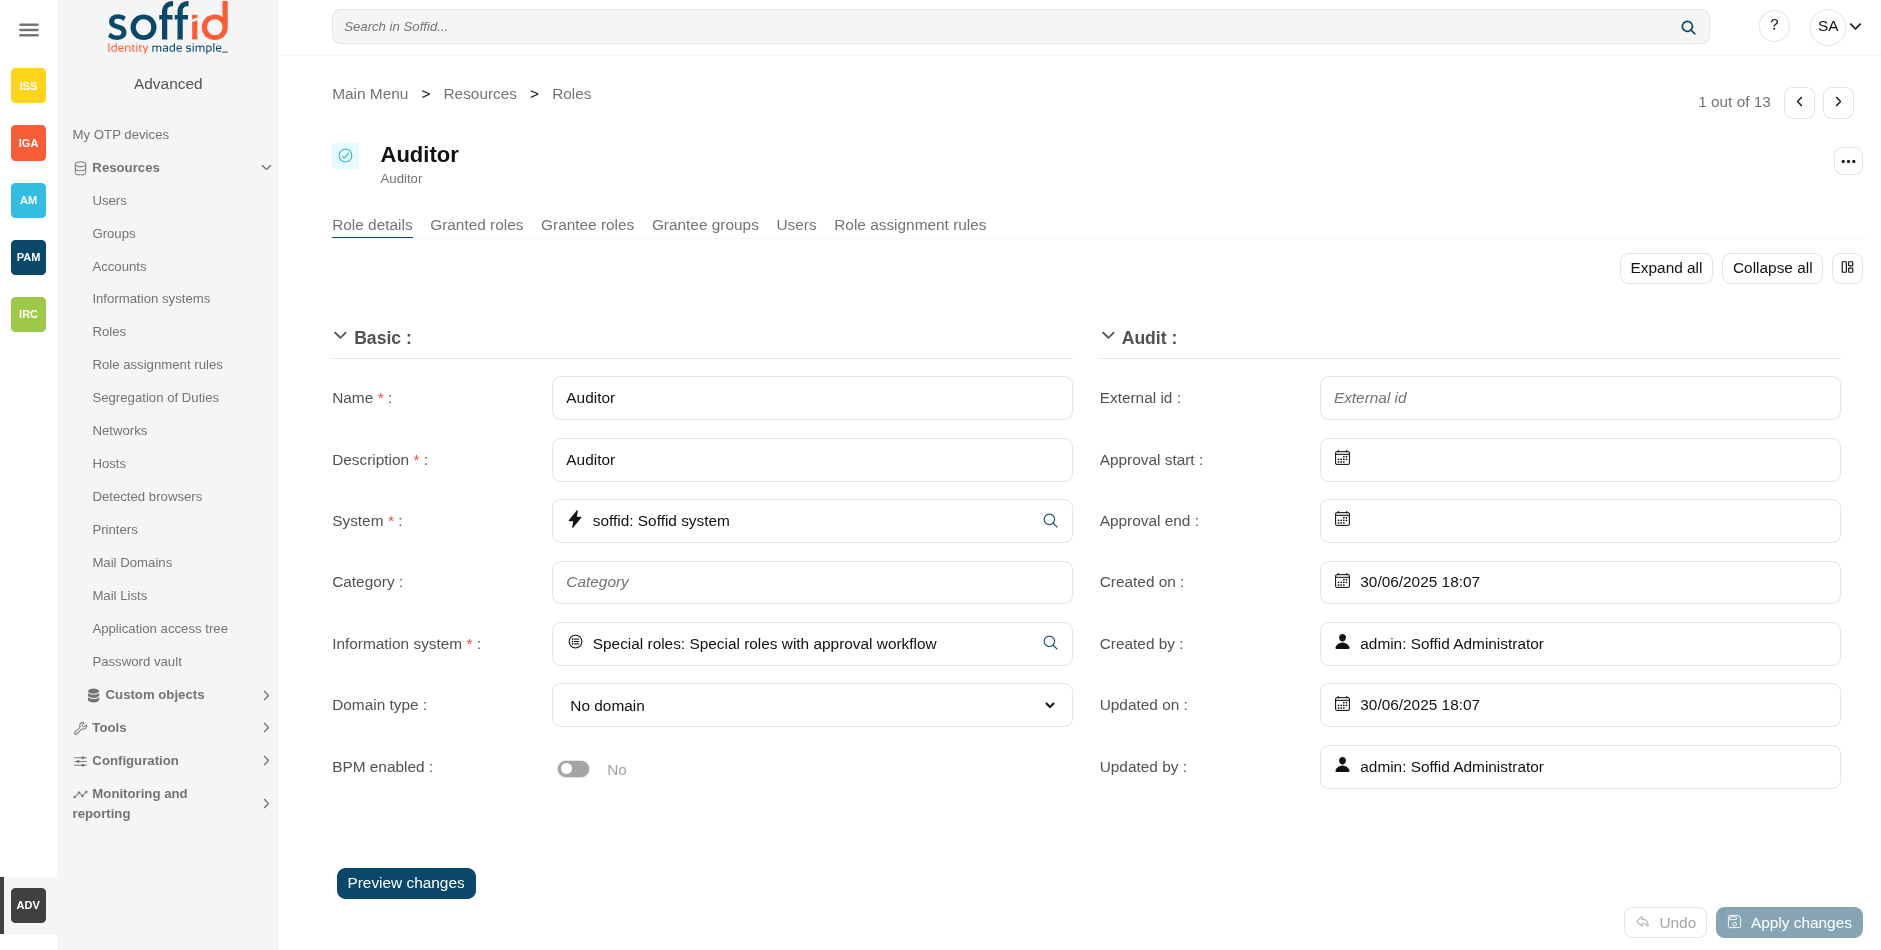
Role detail
- Name: name used to identify the role
- Description: detailed role description.
- System: information storage system from a technical point of view (active directory, database, CSV, ...).
- Category: this attribute can be used as a label to define the type of group, its use, or any other distinction you consider useful.
- Information system
name: asset or application, from a functional point of view, on which the permissions are granted or revoked. - Domain type: you can set a limitation of the role scope by selecting the domain. Initially, there are two domains defined, Groups and Information
Systems.Systems. Soffid allows you to add more domains. (*1) (*2) - BPM enabled: if you check this option (value selected is Yes) this role will be available in the Permissions management workflows.
- External id: new attribute in Soffid 4 to keep a record of the unique identifier of the object in the final system (useful for synchronisation and renaming).
- Approval start: at this date, Soffid will connect to the system and will assign the role. If there is no approval start, it will be assigned at the moment.
- Apploval end: at this date, Soffid will connect to the system and will revoke the role.
- Created: account creation date.
- Last change: last modified.
- Created by: user who created the account
- Updated by: last user who updated the account
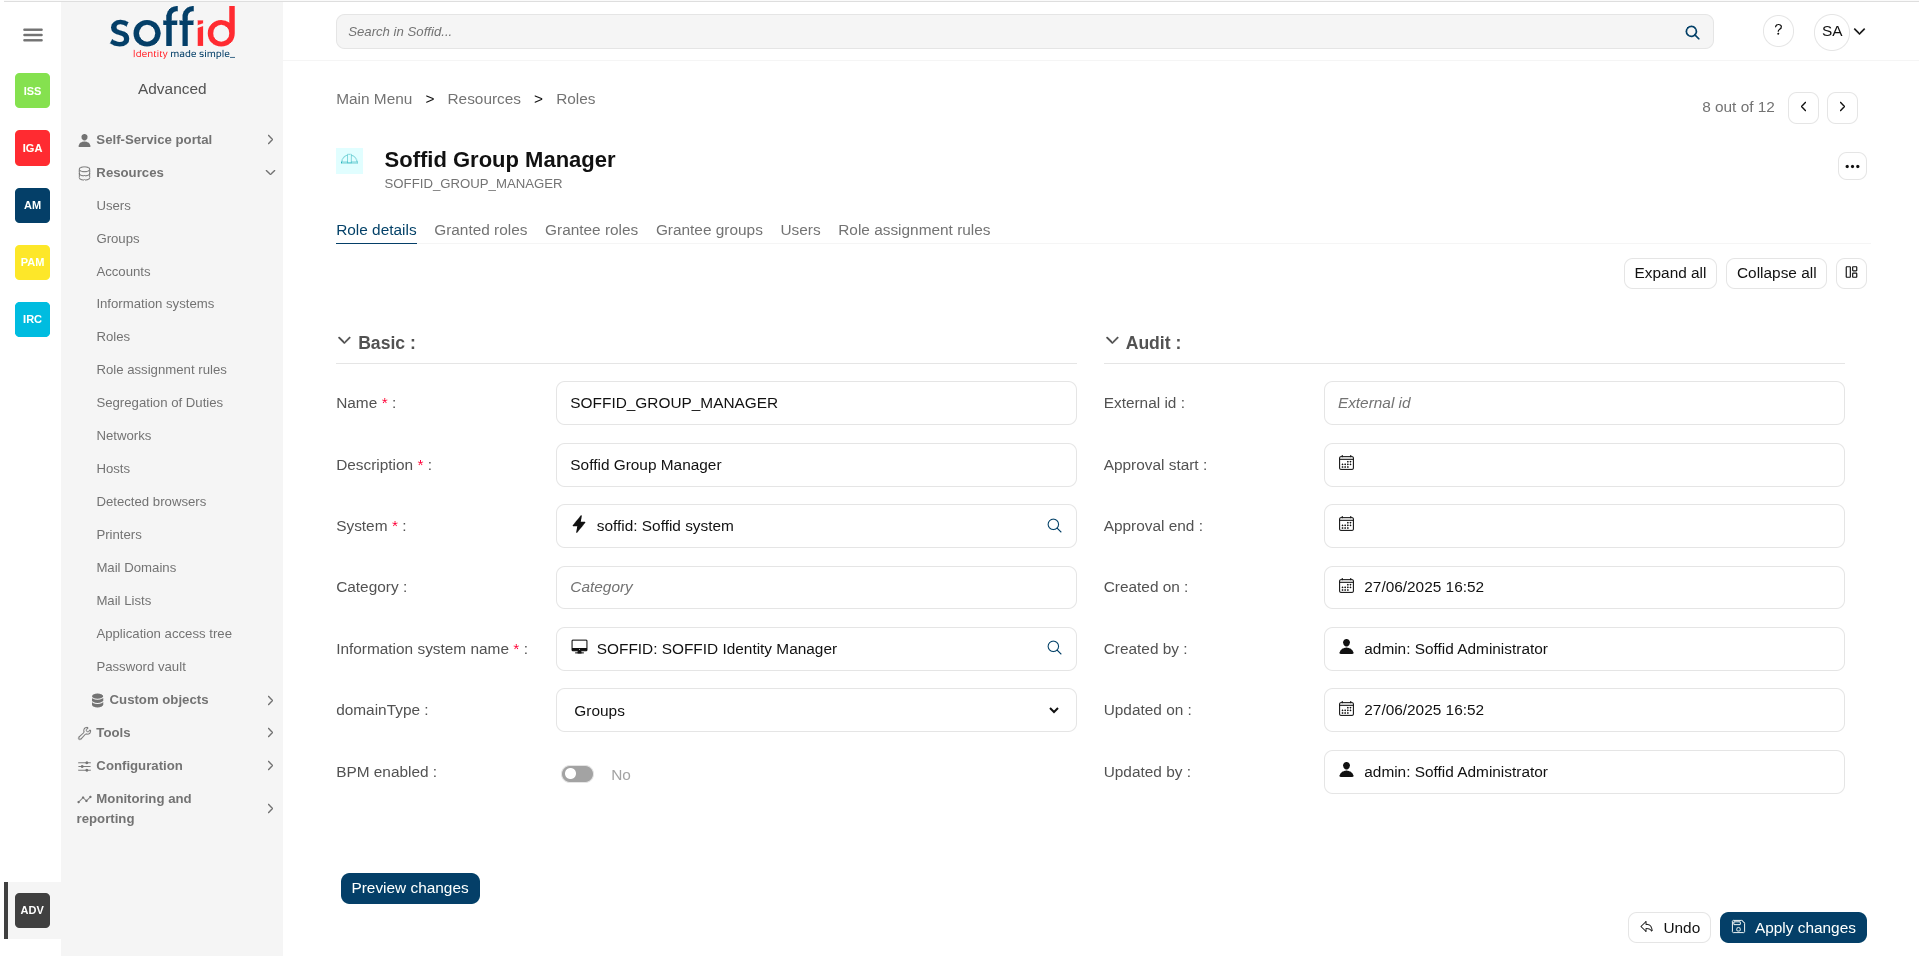
Domain example (*1)
First, you can define the scope for one specific Role, for instance, you define role manager in Soffid System, with the scope Groups:
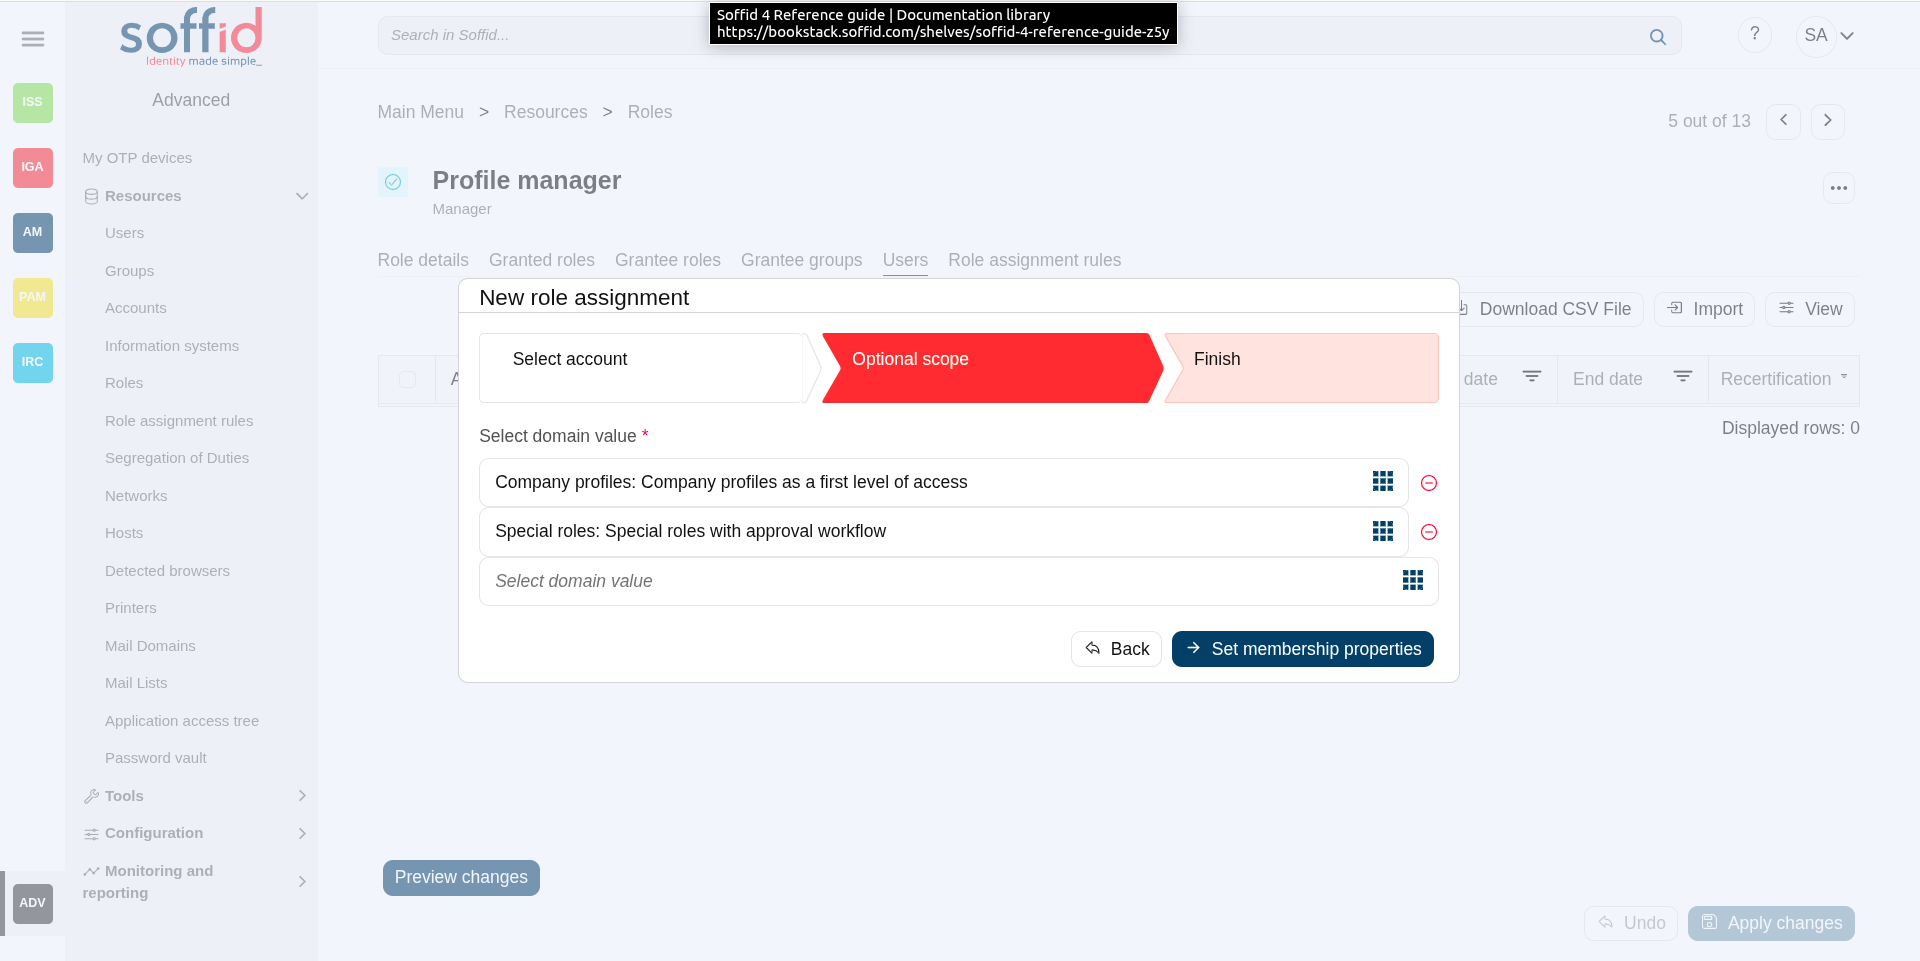
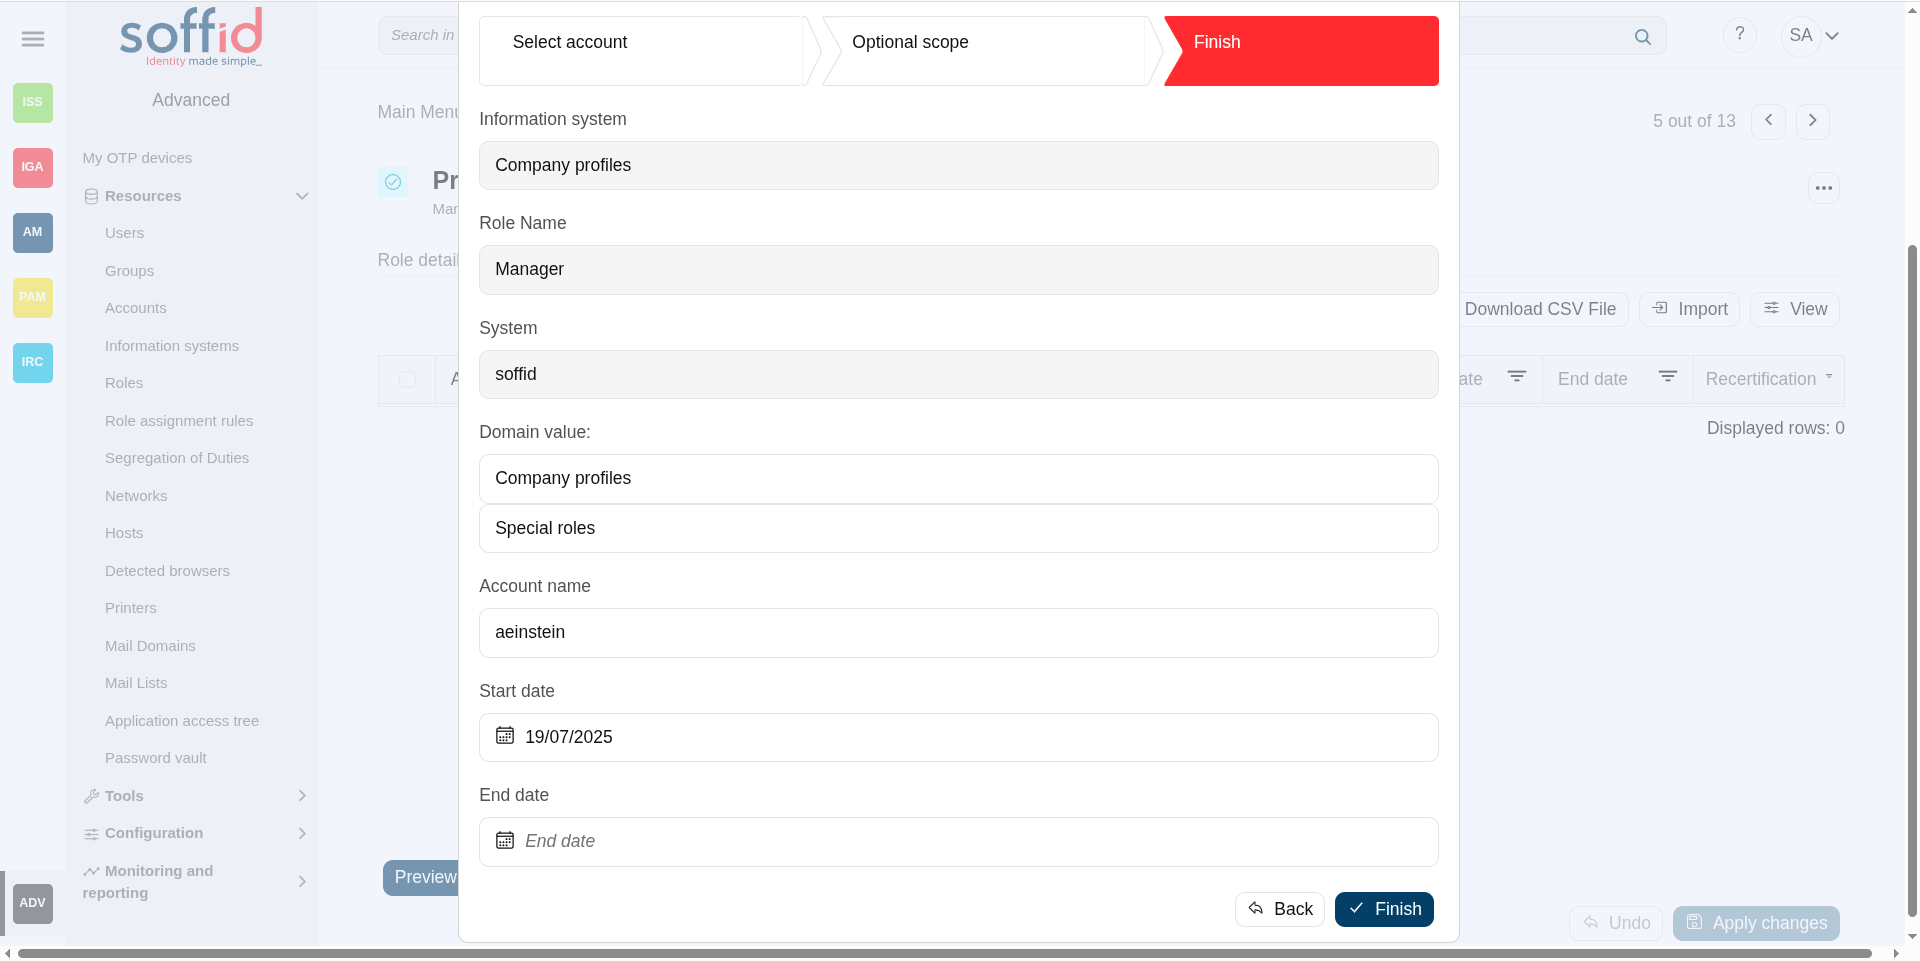
Then, you can assign this role to one or more users. To do this you must indicate the scope (can be one or more scoped):
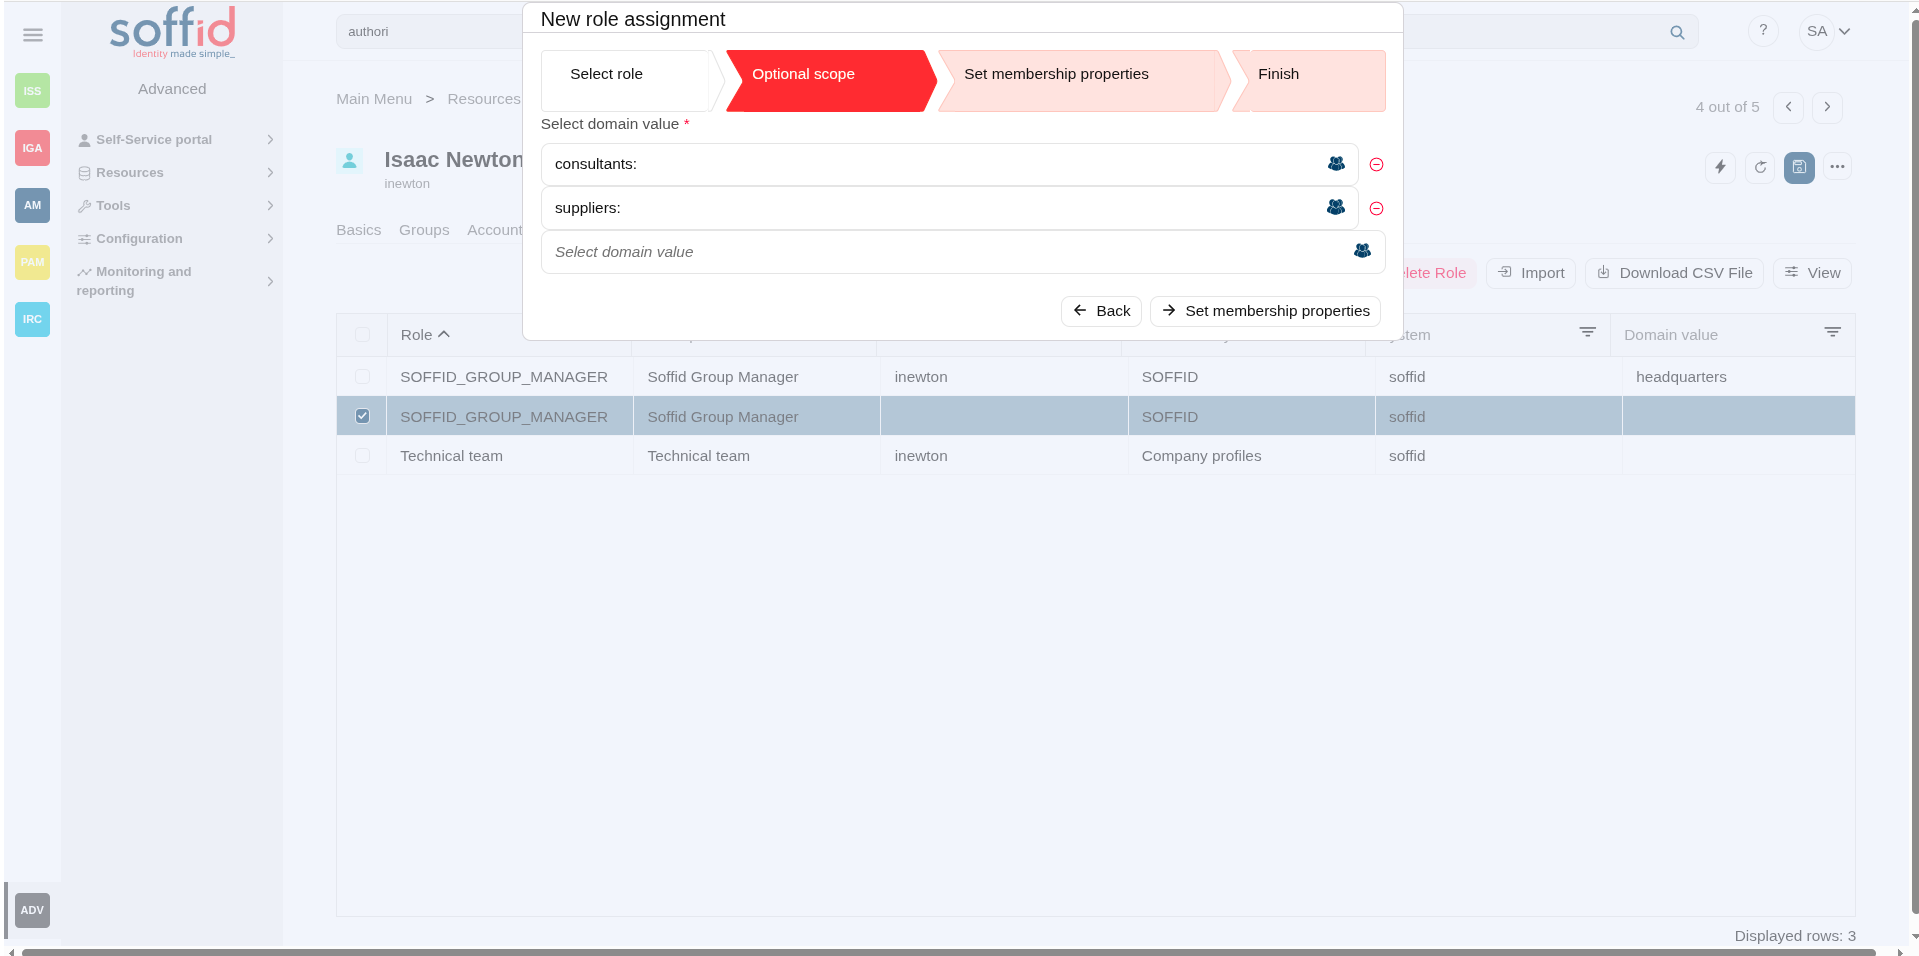
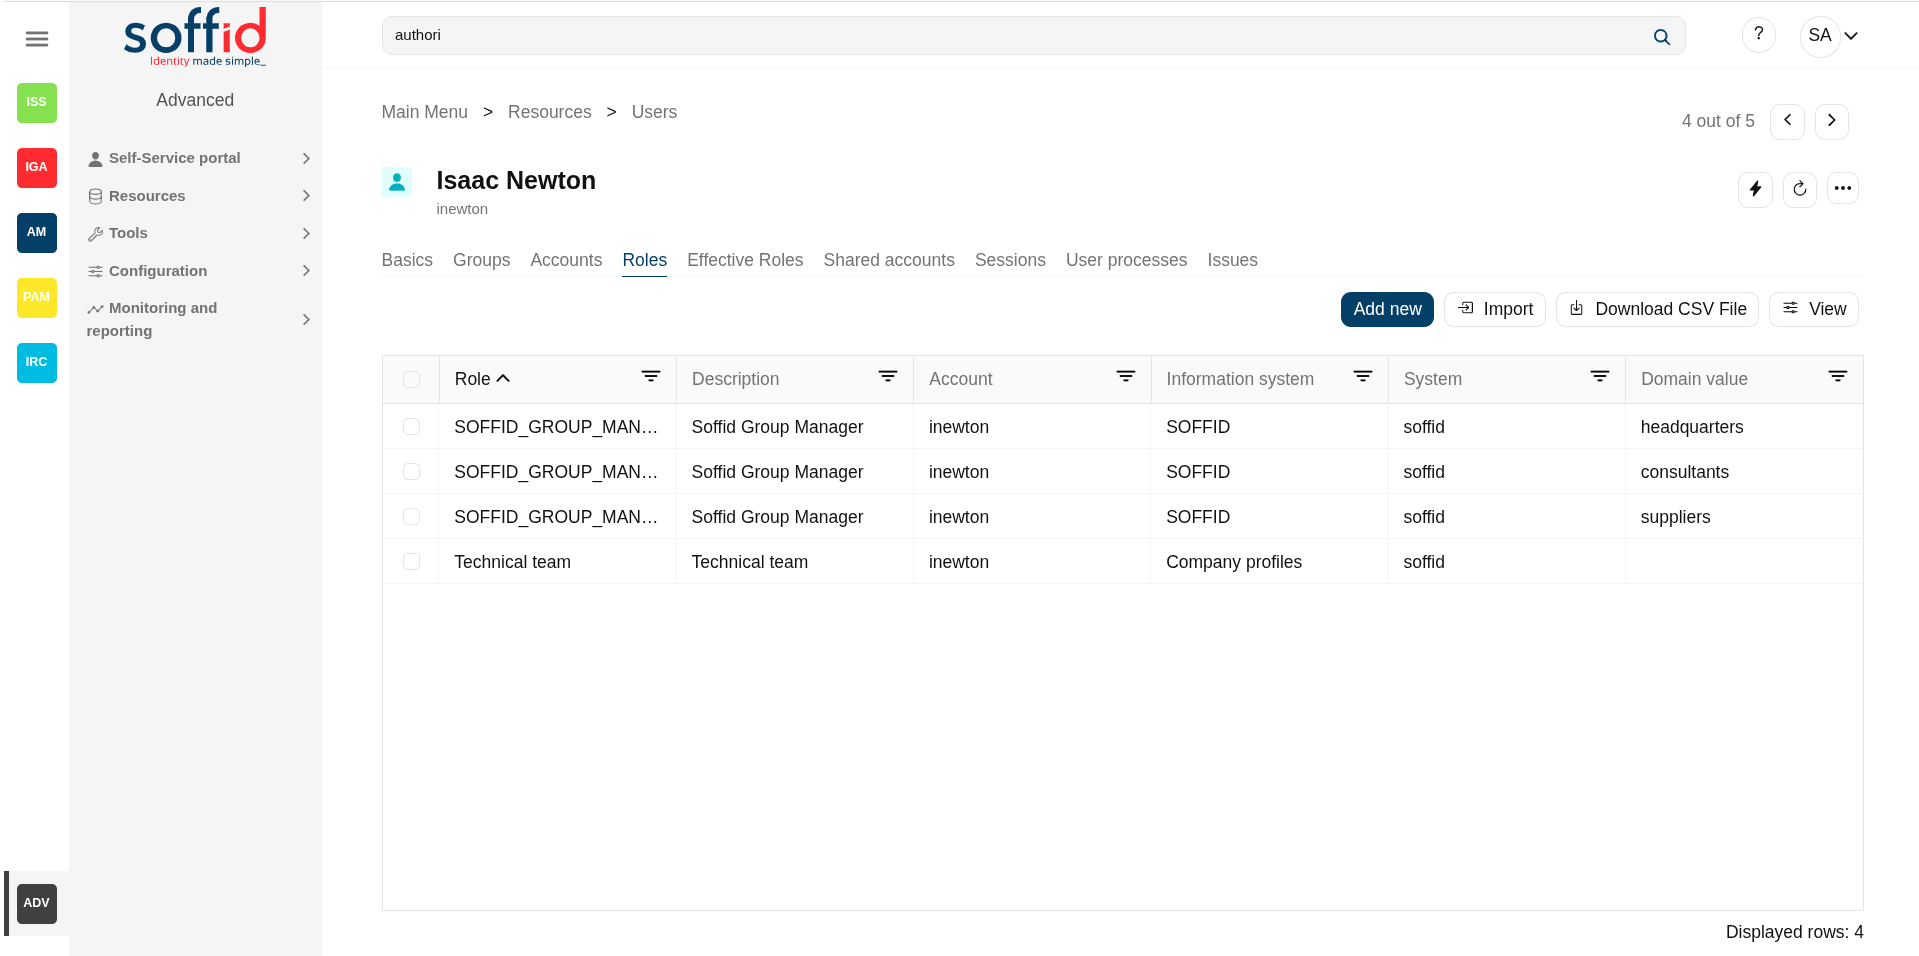
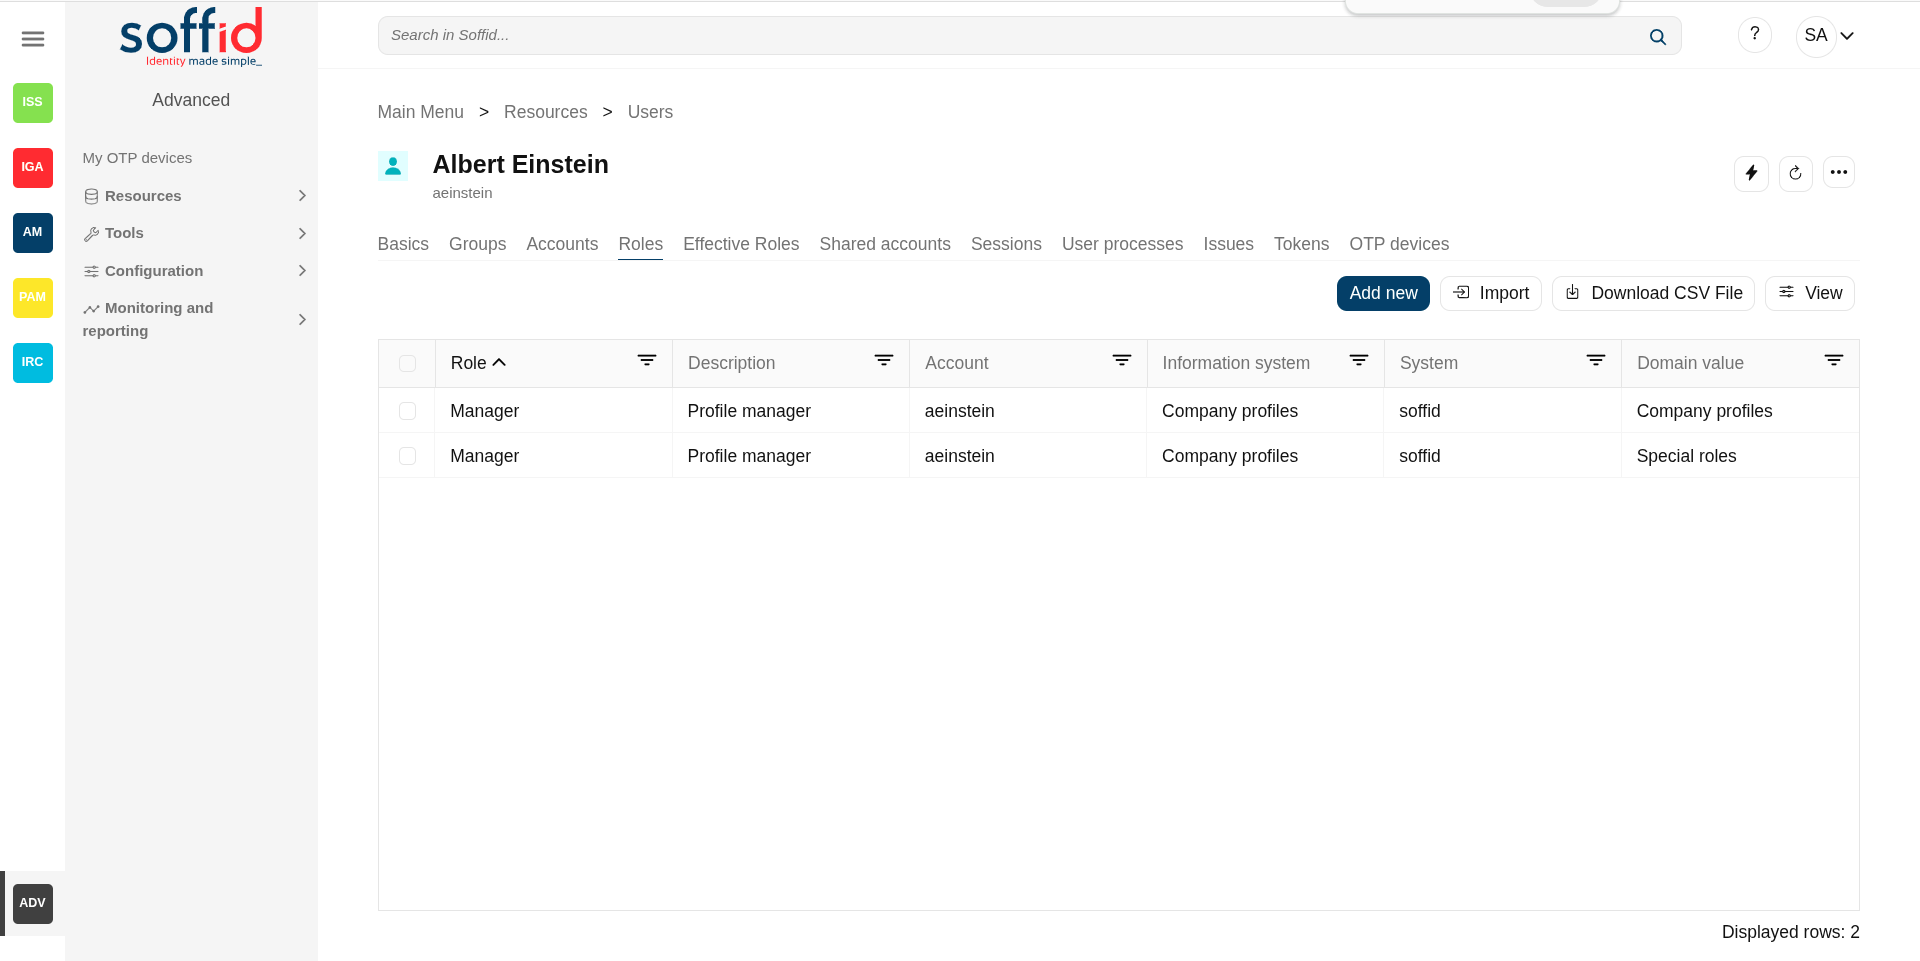
So the user will have the role in the scopes indicated:
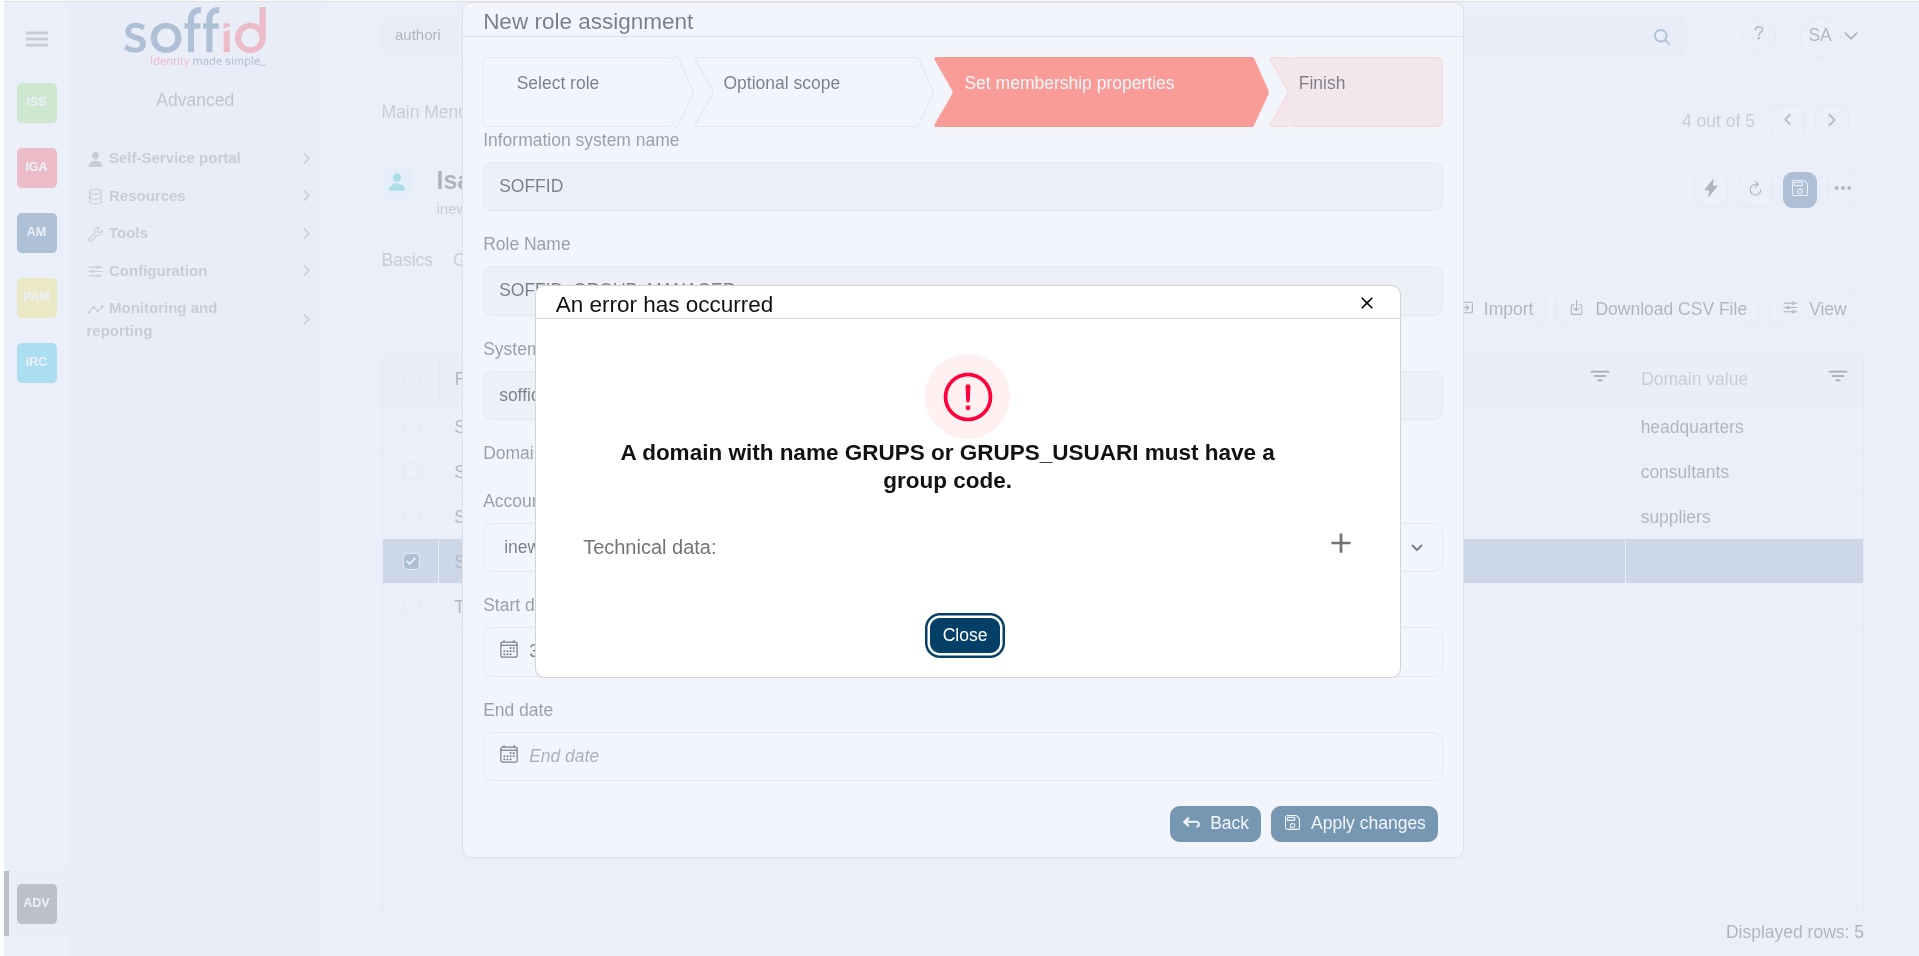
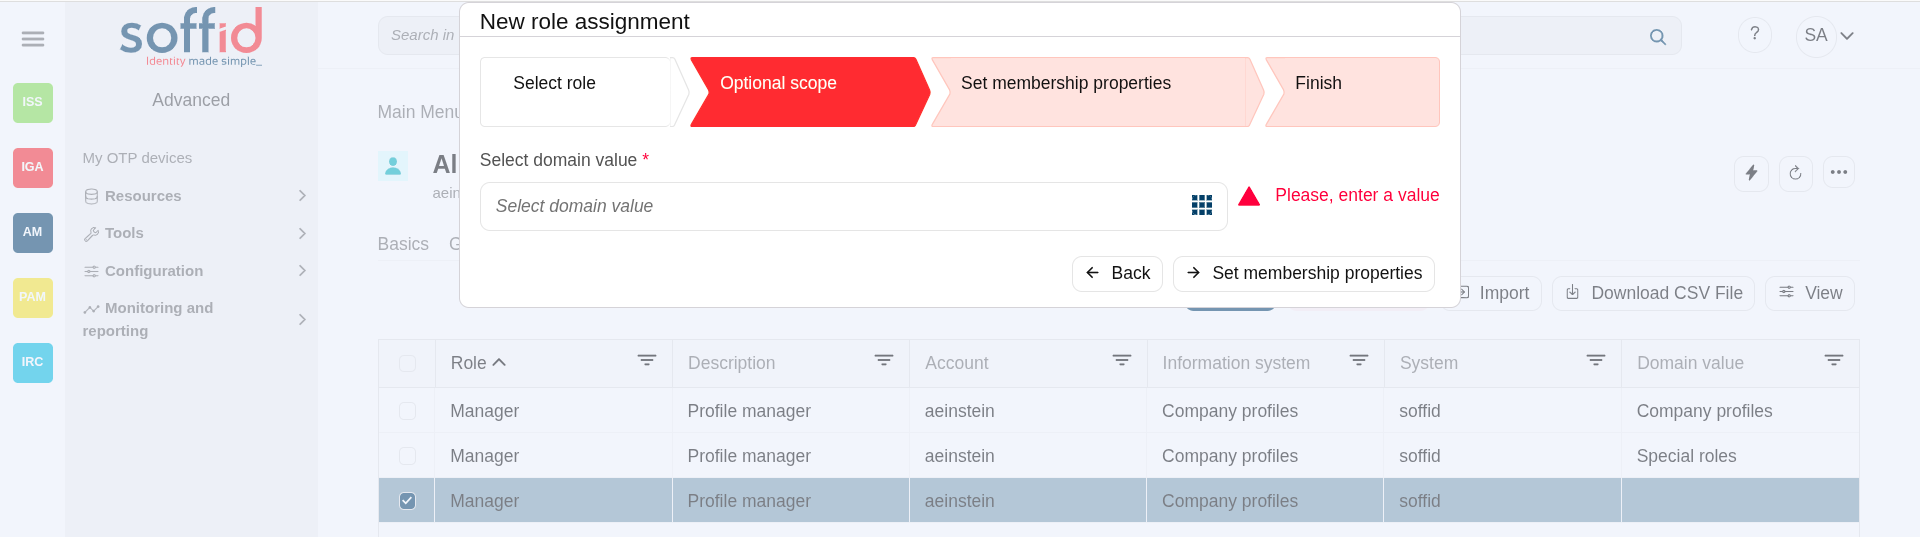
If you try to assign the role without domain, this error will be displayed:
Domain example (*2)
You can define the scope for one specific Role, for instance, you define role manager in Soffid System, with the scope Information Systems:

Then, you can assign this role to one or more users.
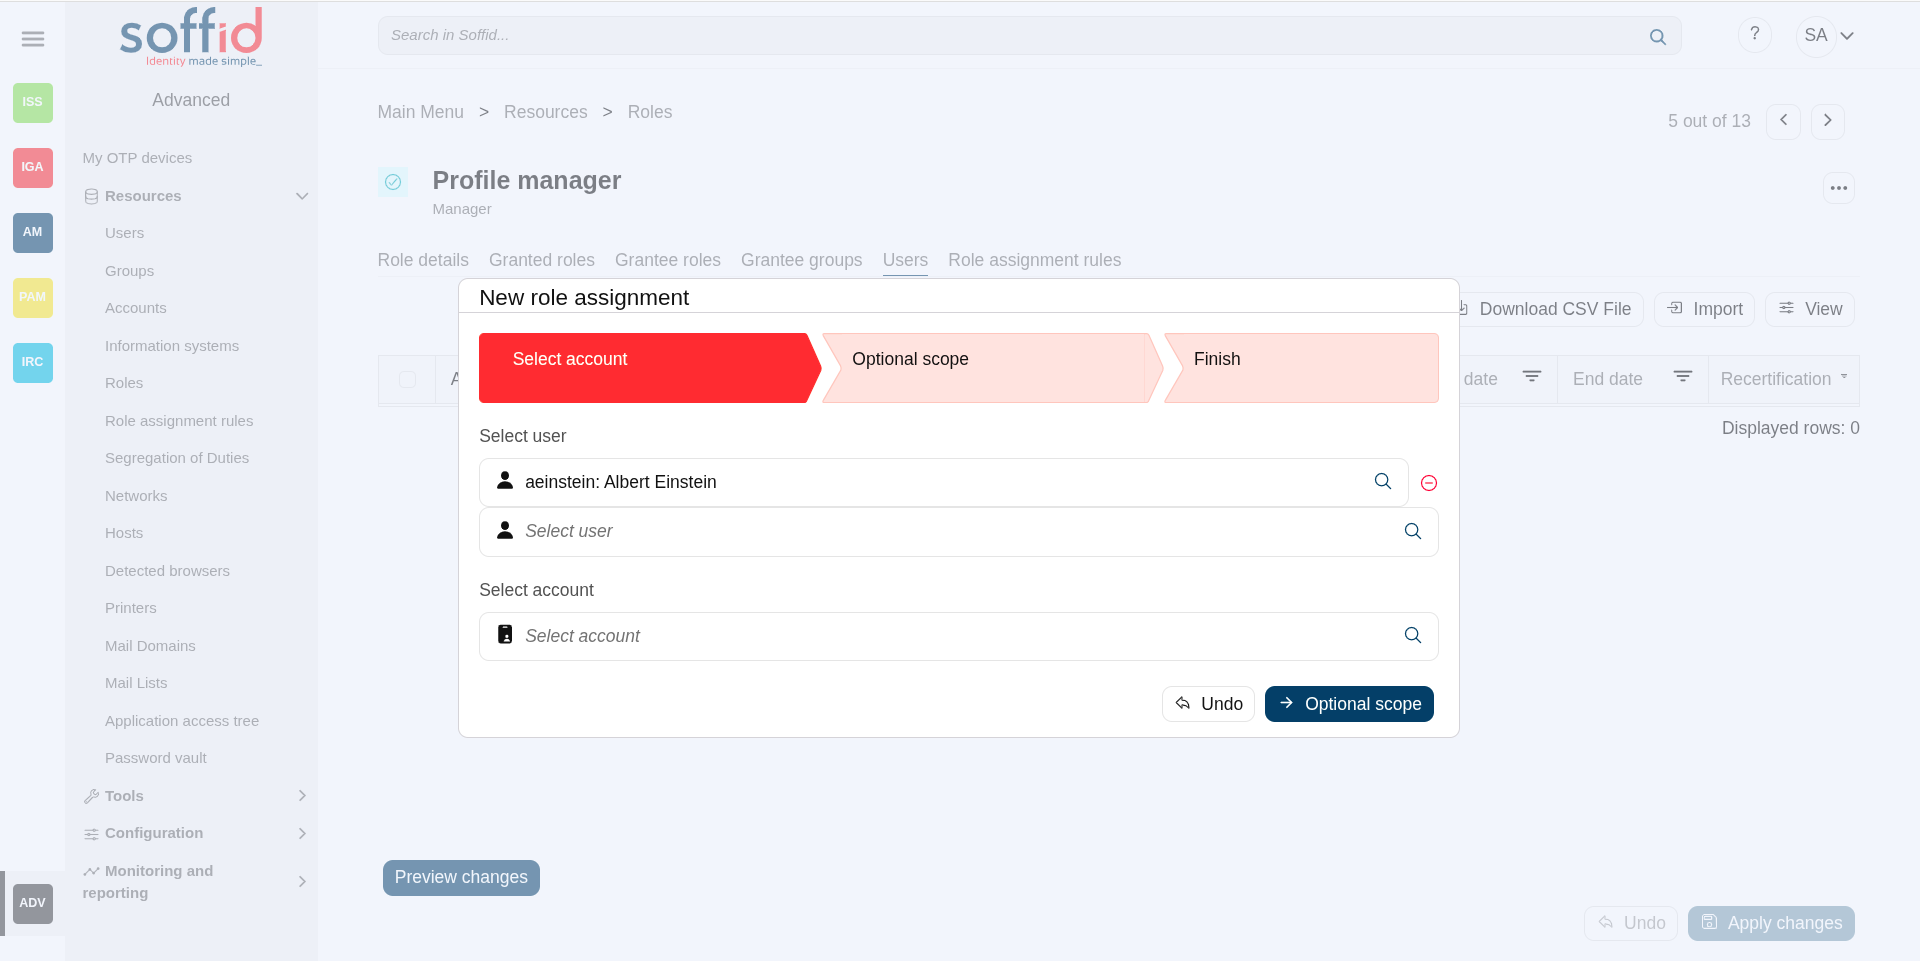
To do this you must indicate the scope (can be one or more scoped):
So the user will have the role in the scopes indicated:
If you try to assign the role without domain, this error will be displayed:
Granted roles
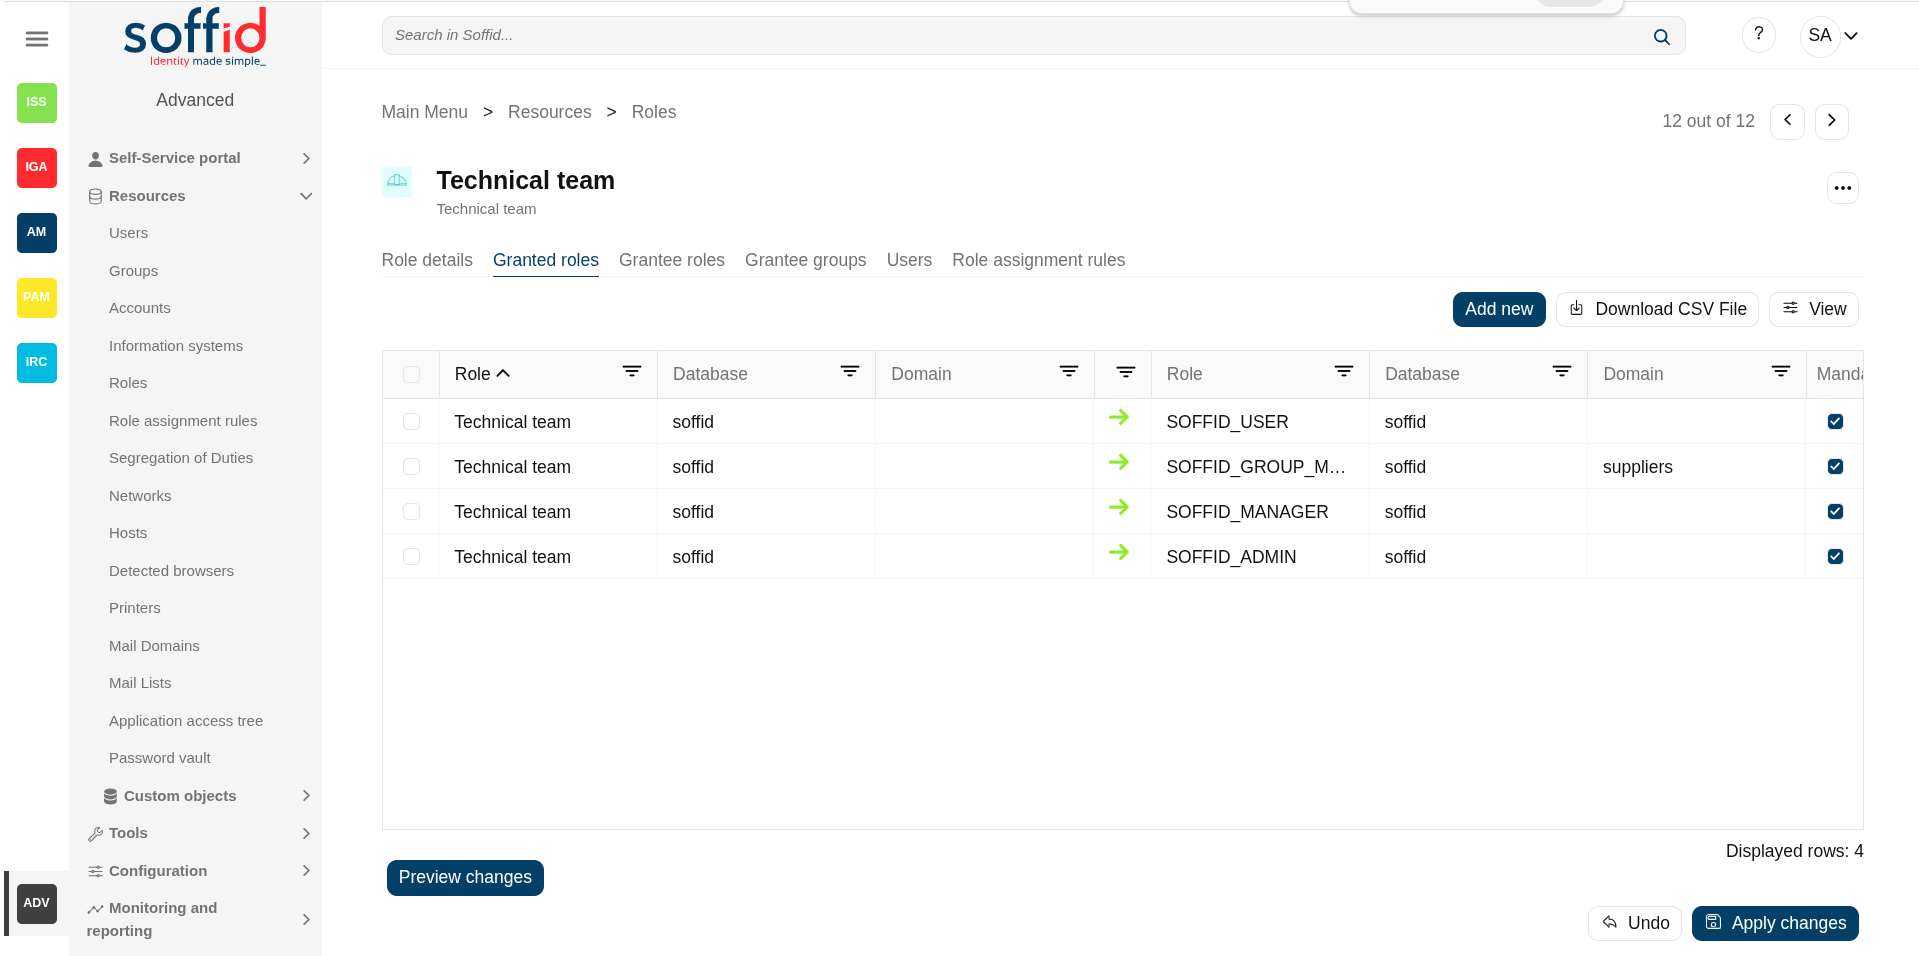
On the granted roles tab, you can assign the privileges of this role to another role in another system.
- Role: (parent) name used to identify the role.
- Database: (parent) agent of the target system owner of the role
- Domain: (parent) domian type of the role
- Role: (child) name used to identify the role.
- Database:(child) agent of the target system owner of the role
- Domain:(child) domian type of the role
- Mandatory: the roles with this flag checked will be displayed in the user's effective roles tab
Assign privileges
To assign privileges you should click the button with the add"Add (+)new" symbol,button, then select the target role, the domain values when necessary, and click the finish button. At this point the record will be added to the list.
Now you can check or uncheck the mandatory field.
- Mandatory: the roles with this flag checked will be displayed in the user's effective roles tab.
- No Mandatory: roles with this flag unchecked will be displayed in the user's roles tab and can be managed. It is not automatically assigned to users who already had the parent role.
And finally, you should click the Apply changes button to save the changes. With this operation, all the permissions of this will be assigned to the target role.
💻 Image
💻 Image
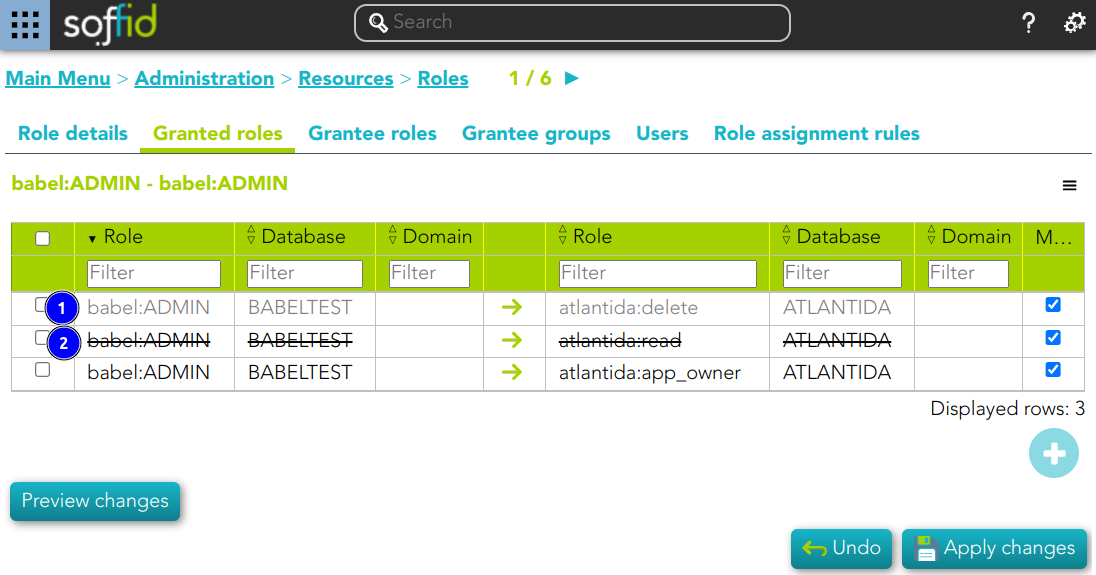
This role belong to an Information System with a defined Role definition process.
- This assignation is pending to approve
- This deletion is pending to approve
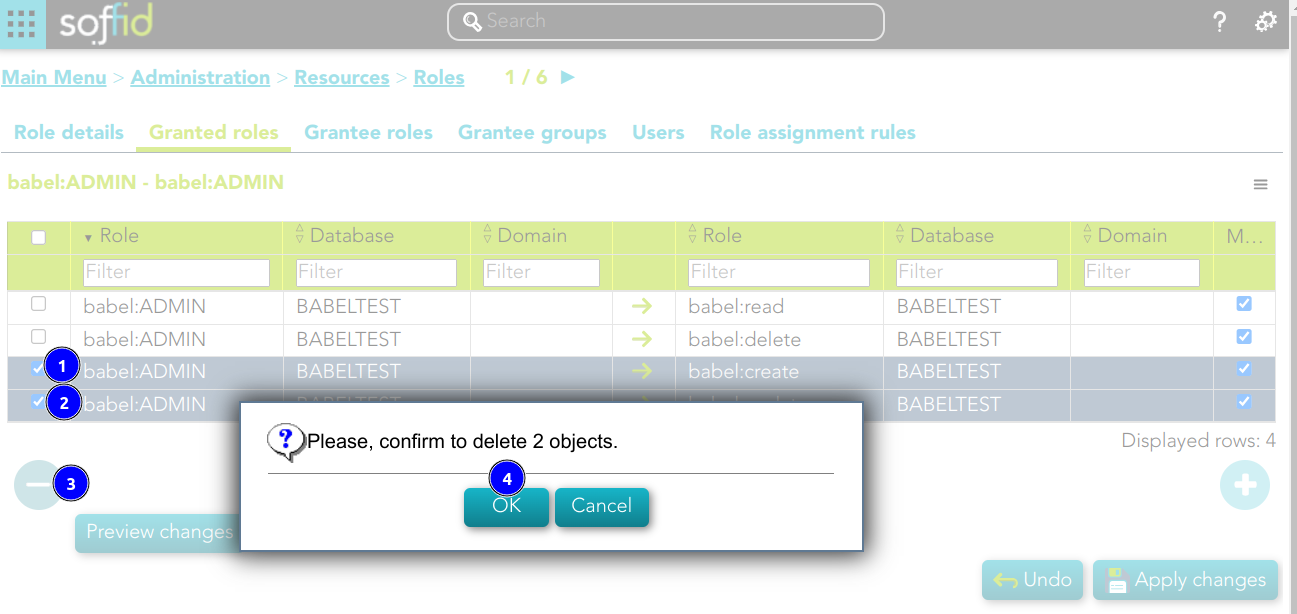
Revoke permissions
If you want to revoke permissions, you must select one or more records from the list and click the "Delete granted role" button with the subtraction symbol (-) and then click the "Apply changeschanges" button to save the changes.
💻 Image
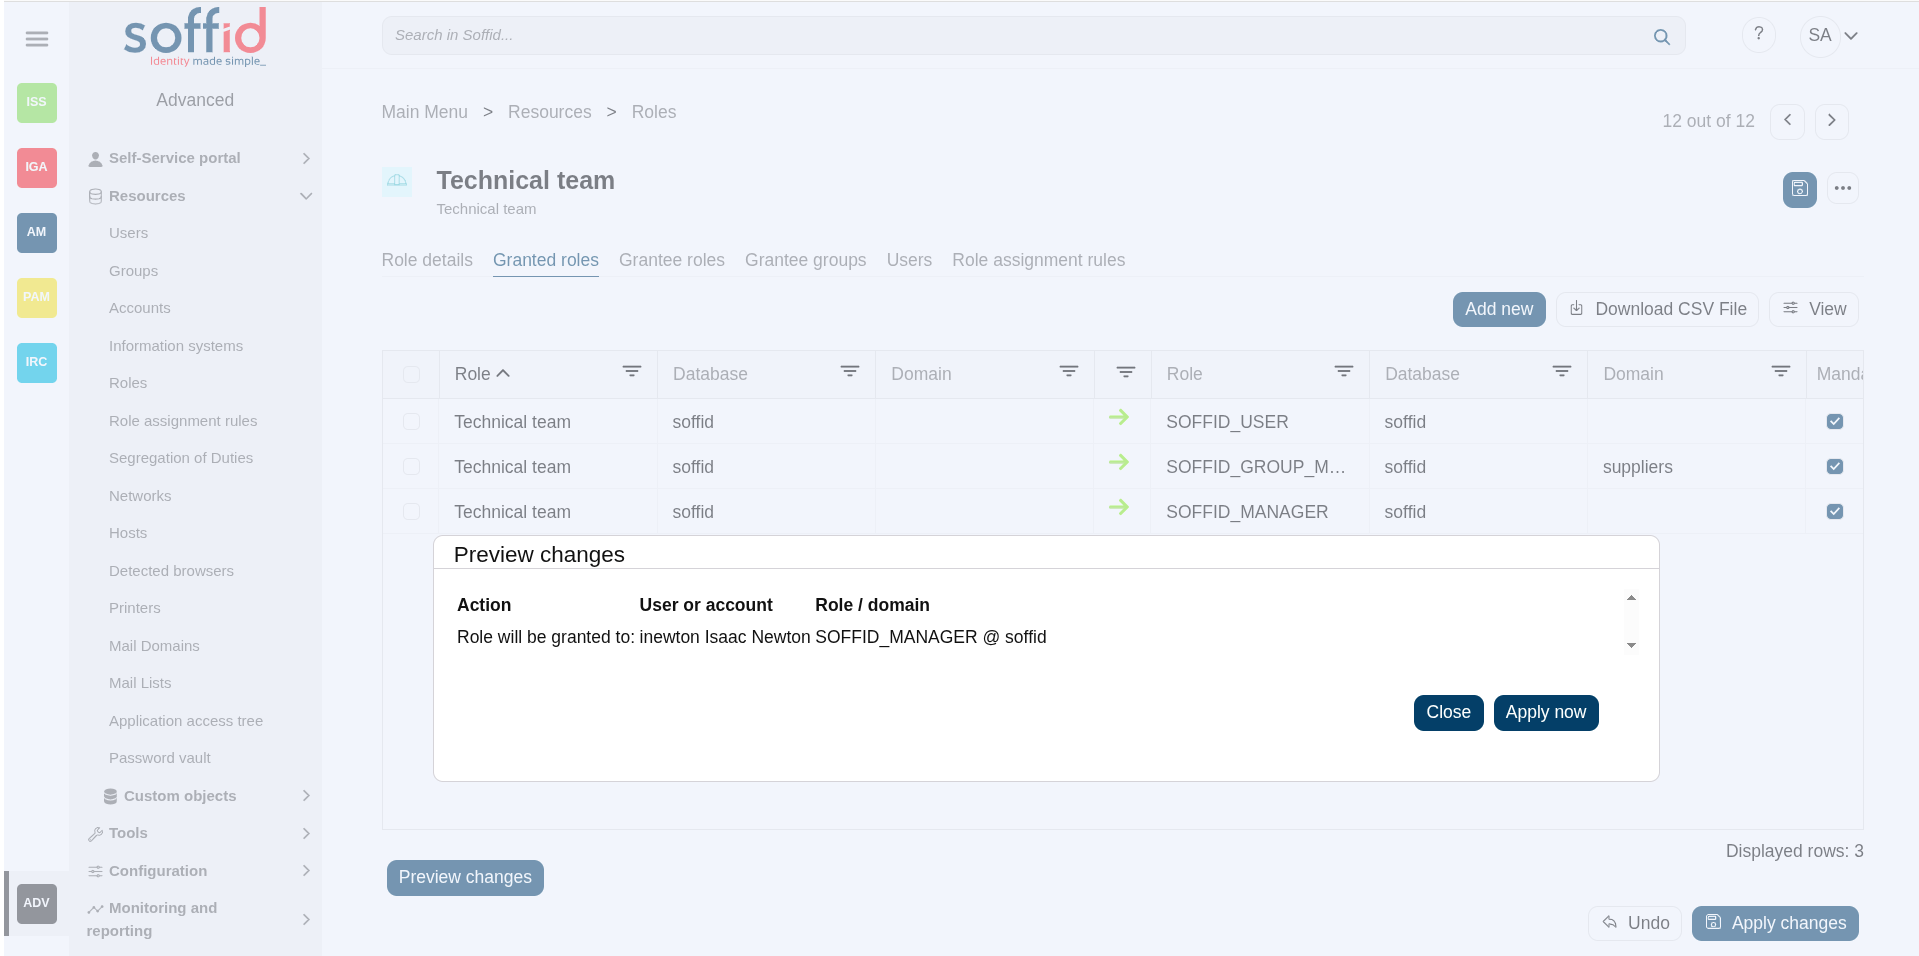
Preview changes
In addition, you can check the preview changes, it display information about the action, the user or account, and the role or domain, and you can apply them.
💻 Image
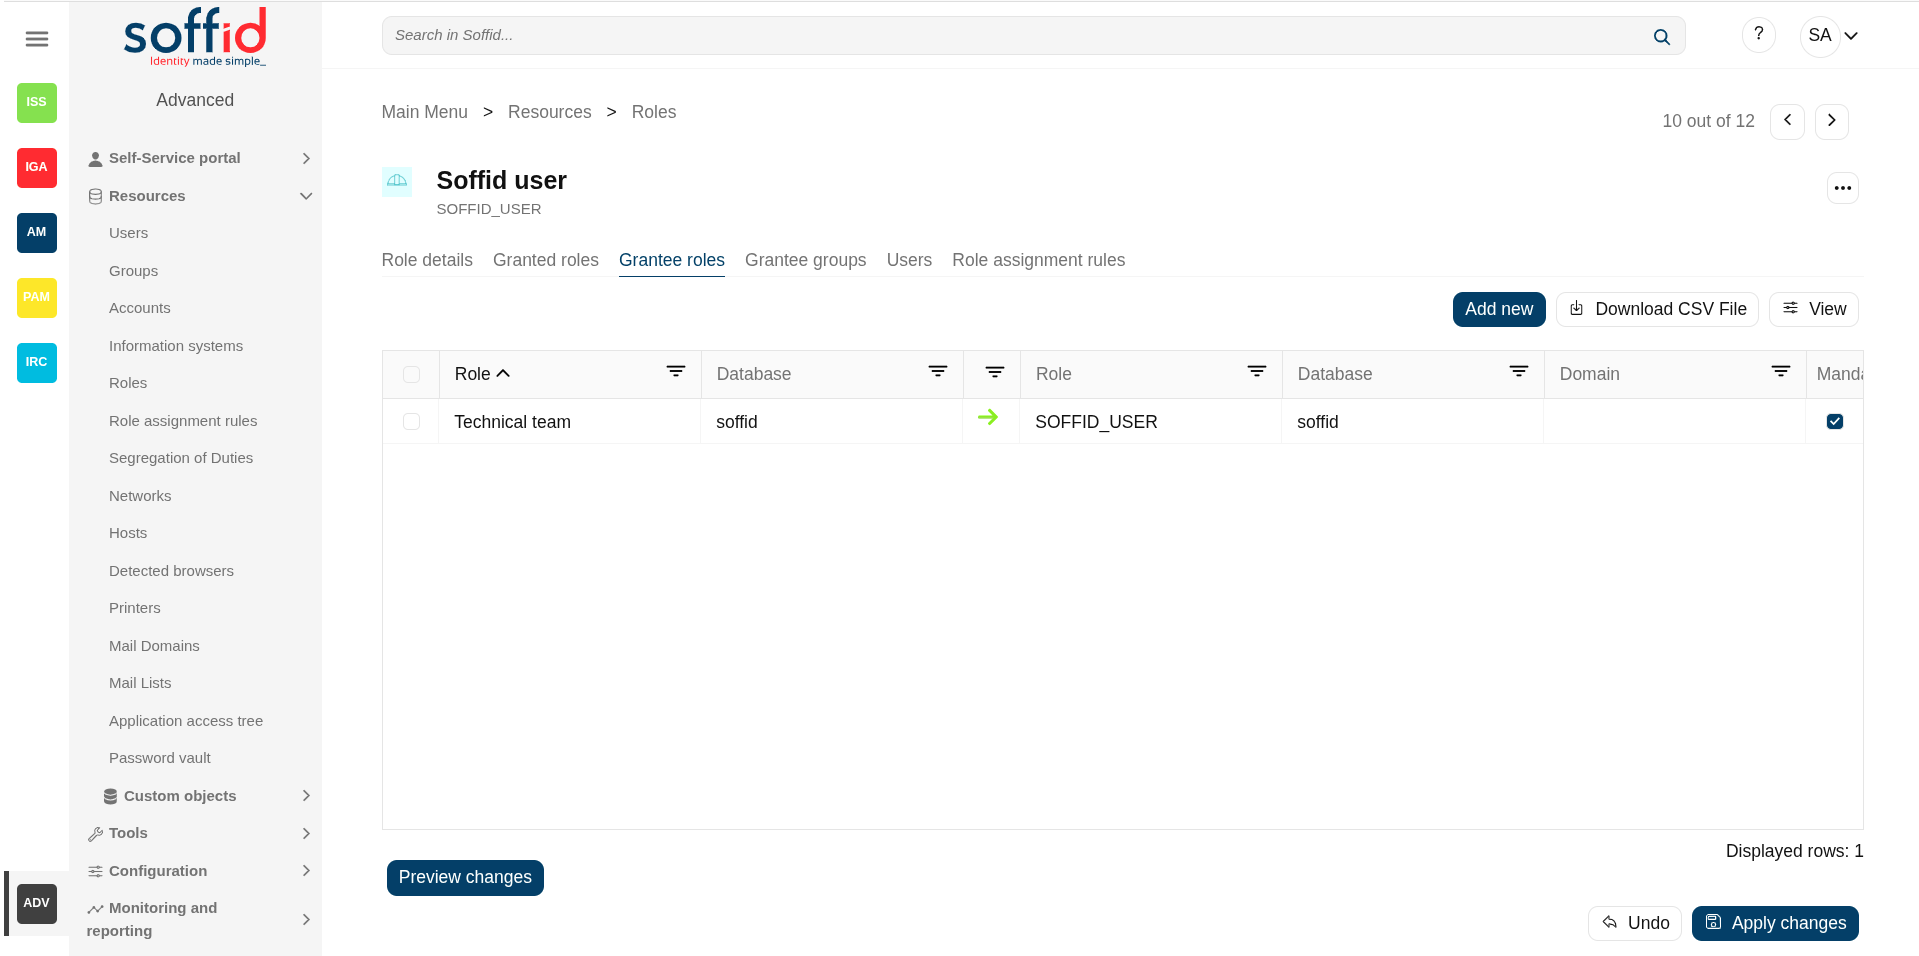
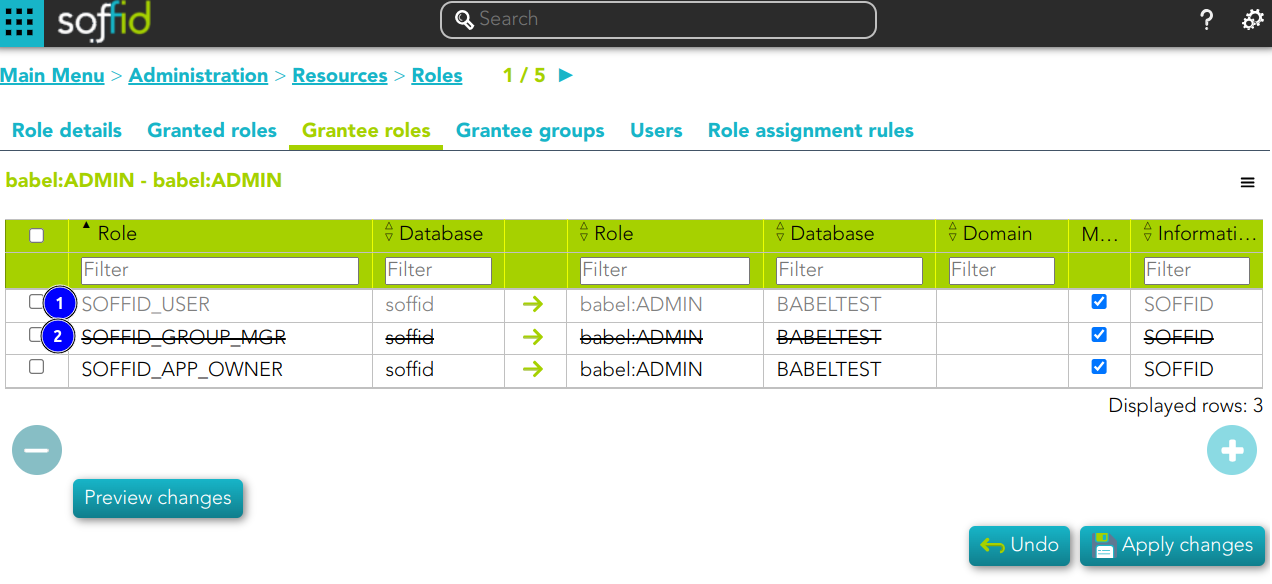
Grantee roles
On the grantee roles tab, you can assign the privileges of a role of any other system to this role.
- Role: (parent) name used to identify the role.
- Database: (parent) agent of the target system owner of the role
- Domain: (parent) domian type of the role
- Role: (child) name used to identify the role.
- Database:(child) agent of the target system owner of the role
- Domain:(child) domian type of the role
- Mandatory: the roles with this flag checked will be displayed in the user's effective roles tab
Assign privileges
To assign privileges you should click the button with the add (+) symbol, then select the source role, the domain values when necessary, and click the finish button. At this point the record will be added to the list.
Now you can check or uncheck the mandatory field.
- Mandatory: the roles with this flag checked will be displayed in the user's effective roles tab.
- No Mandatory: roles with this flag unchecked will be displayed in the user's roles tab and can be managed. It is not automatically assigned to users who already had the parent role.
And finally, you should click the Apply changes button to save the changes. With this operation, all the permissions of this will be assigned to the target role.
Image
💻 Image
This role belong to an Information System with a defined Role definition process.
- This assignation is pending to approve
- This deletion is pending to approve
Revoke permissions
If you want to revoke permissions, you must select one or more records from the list and click the button with the subtraction symbol (-) click the Apply changes button to save the changes.
Preview changes
In addition, you can check the preview changes, it display information about the action, the user or account, and the role or domain, and you can apply them.
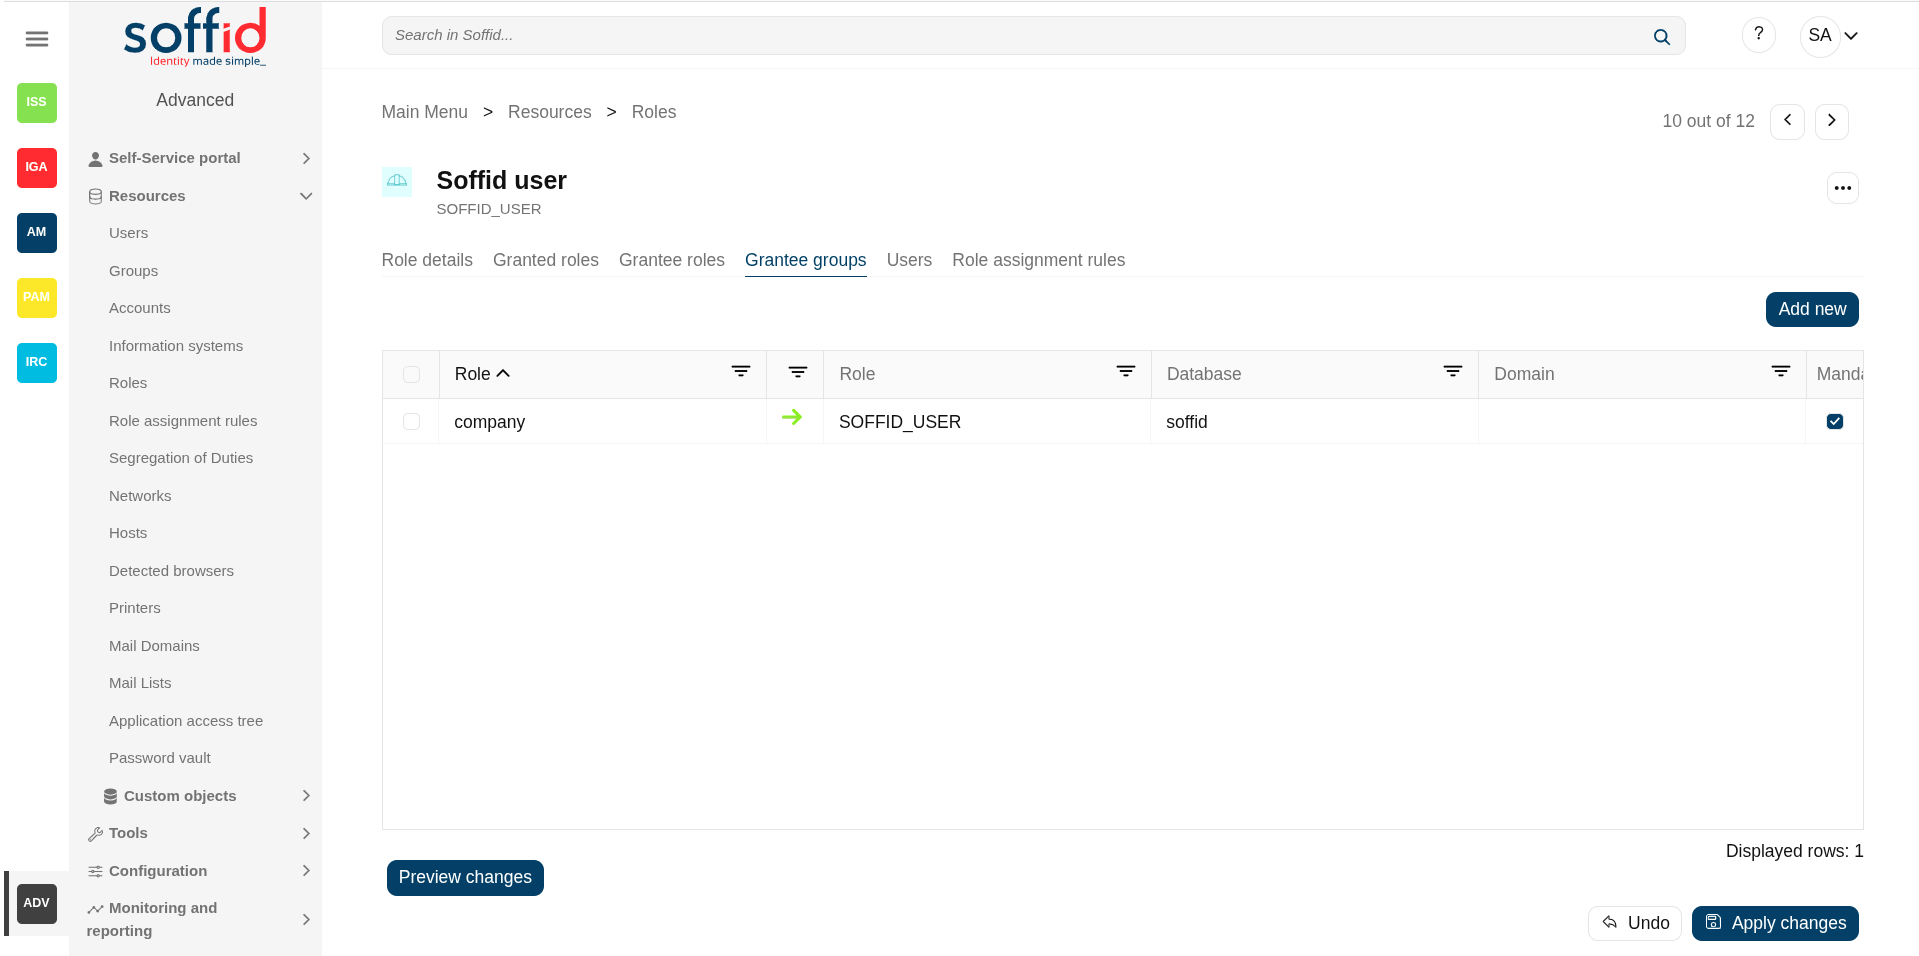
Grantee groups
On the grantee groups tab, you can assign the privileges from a specific group to this role, or revoke the privileges.
- Group: (parent) name of the group.
- Role: (child) name used to identify the role.
- Database:(child) agent of the target system owner of the role
- Domain:(child) domian type of the role
- Mandatory: the roles with this flag checked will be displayed in the user's effective roles tab
Assign privileges
To assign privileges you must click the button with the add"Add symbolnew" (+),button, then select the group, finish, and apply changes. Thus, the roles indicated, in the corresponding system, will be assigned to all users belonging to this group.
Now you can check or uncheck the mandatory field.
- Mandatory: the roles with this flag checked will be displayed in the user's effective roles tab.
- No Mandatory: roles with this flag unchecked will be displayed in the user's roles tab and can be managed. It is not automatically assigned to users who already had the parent role.
And finally, you should click the "Apply changeschanges" button to save the changes. With this operation, all the permissions of this will be assigned to the target role.
💻 Image
Revoke permissions
If you want to revoke permissions, you must select one or more records from the list and click the "Delete granted role" button with the subtraction symbol (-)and click the "Apply changeschanges" button to save the changeschanges.
Preview changes
In addition, you can check the preview changes, it display information about the action, the user or account, and the role or domain, and you can apply them.
Users
On the users tab, you can assign or revoke roles. To assign a role you must click the button with the add"Add symbol (+)new" and choose one or more users, fill the scope when it is mandatory, and set membership properties. Each role needs an account to be applied to, so, if a user has no account on a system and a role on that system is granted, a new account will be created on this system. In case a user has more than one account on a system, you should indicate which of the suitable accounts will be granted the role.
It is also possible to revoke roles to the user from the entitlement details or by selecting one or more records from the list and clicking the button"Delete withuser" the subtraction symbol.button.
The users with the role assigned by rules will be displayed with different colors. Soffid does not allow to revoke roles, on that page, that were assigned by rules.
Additionally, you can download a CSV file with the basic users data.
Attributes:
- Account: account owner of the role
- Description: description of the account (usually the user full name).
- Start date: at this date, Soffid will connect to the system and will assign the role. If there is no approval start, it will be assigned at the moment.
- End date: at this date, Soffid will connect to the system and will revoke the role.
- Domain value: domain value of the granted role
- Domain description: domain type of the granted role
- Risk: risk related with SoD rules
- Category: this attribute can be used as a label to define the type of group, its use, or any other distinction you consider useful.
- Recertification: date of the last recertification
- Holder group: holder group of the granted role
💻 Image
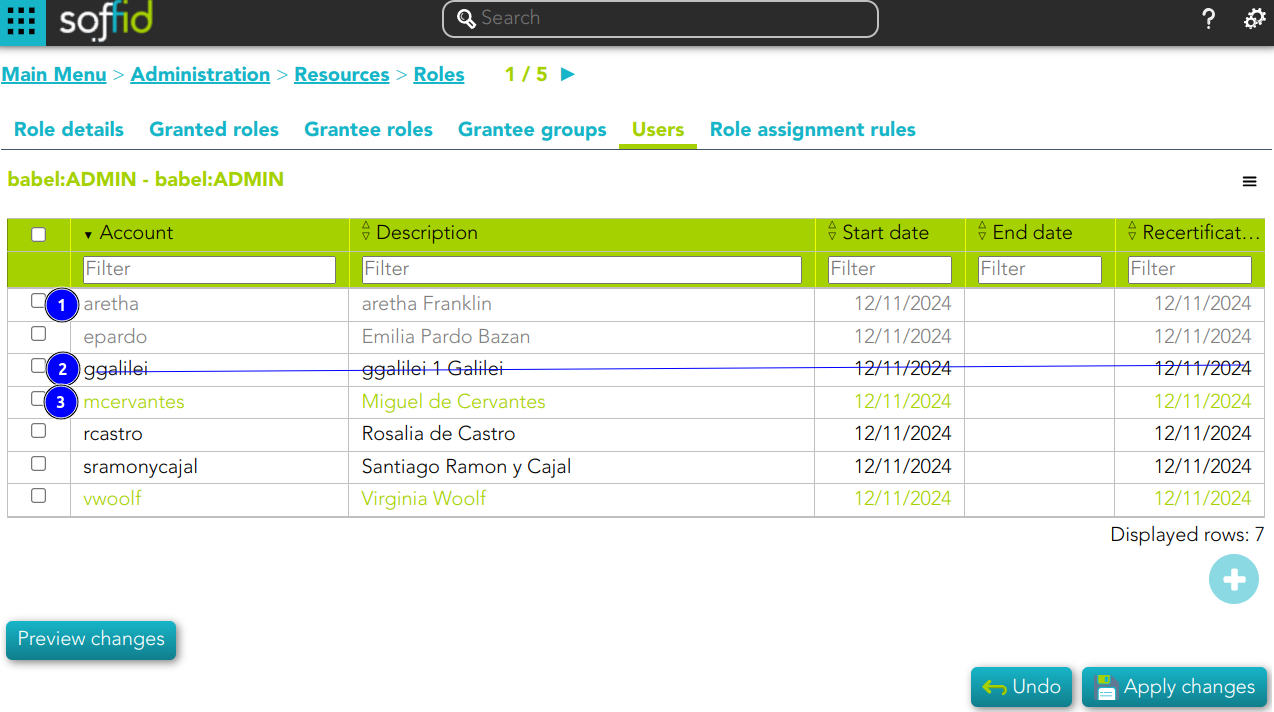
1) This assignation is pending to approve
2) This deletion is pending to approve
3) This assignation is by an assignment rule
Role assignment rules
You can consult the Role assignment rules related to this role.
- Name: name of the role assignment rule
- Description: decription of the role assignment rule
💻 Image
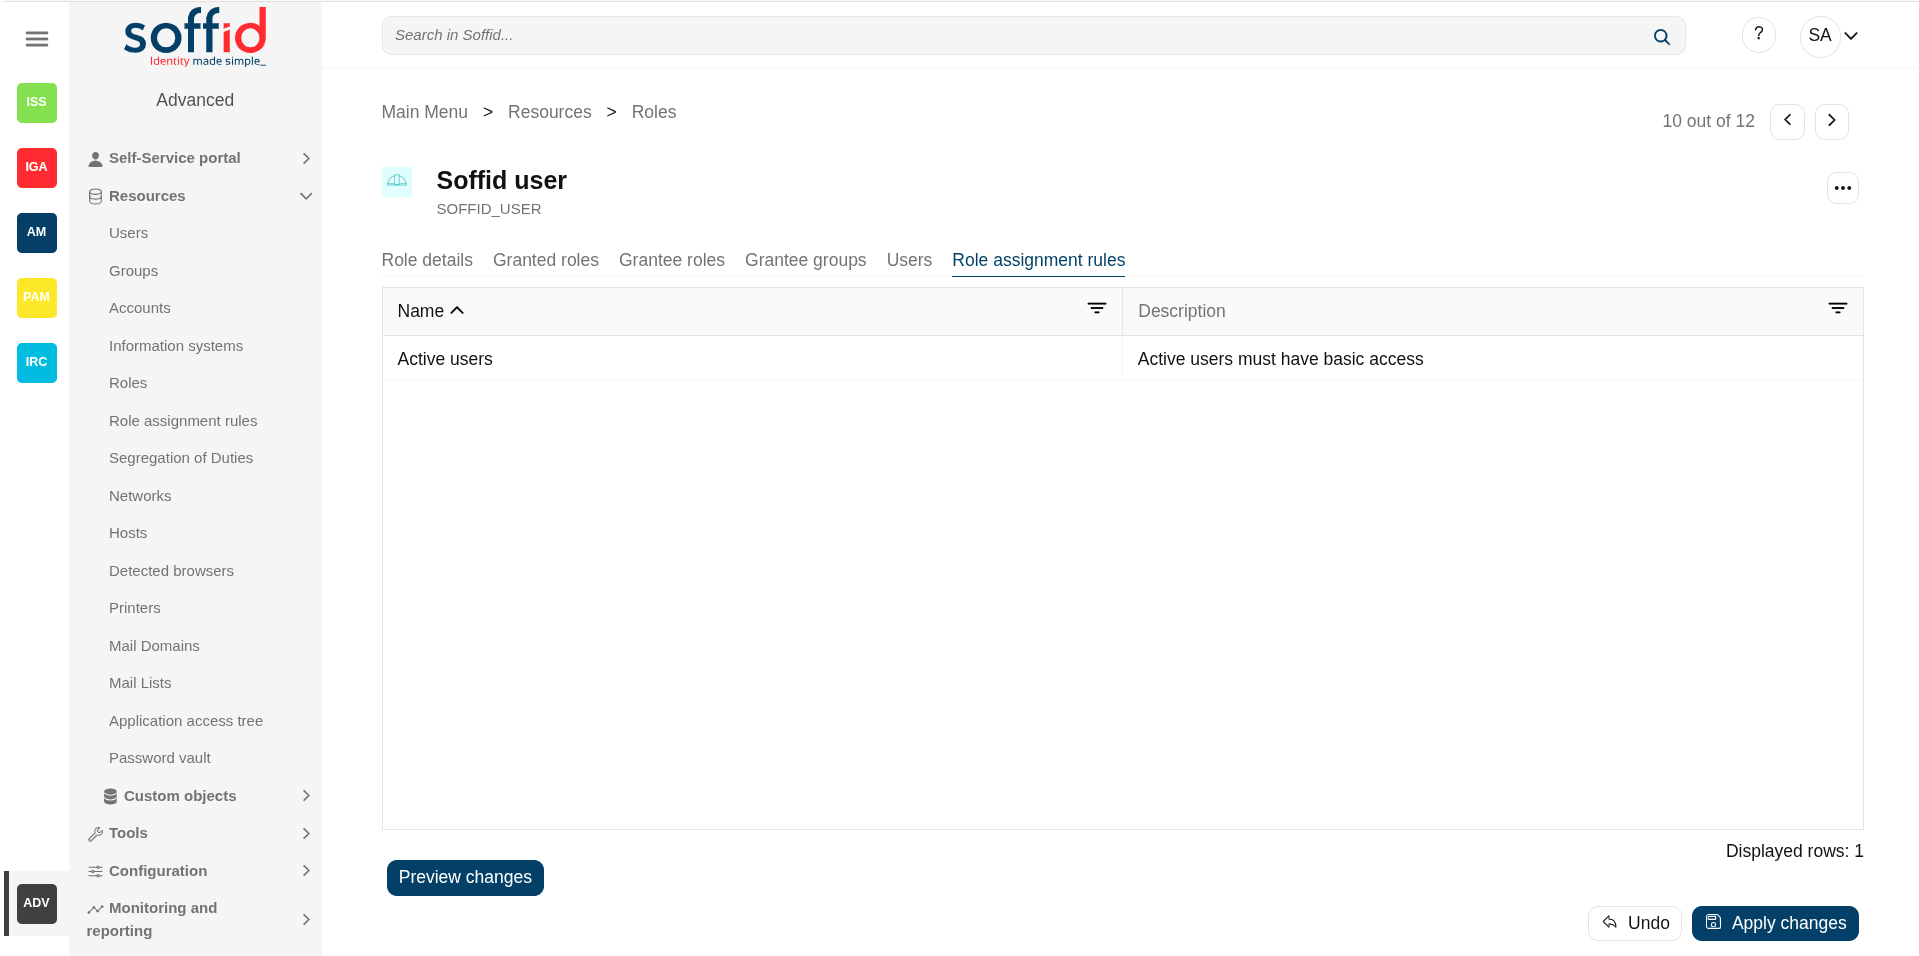
For more information, you can visit the Role assignment rules page.page.
Actions
Roles querytable
|
"Query buttons" |
Allows you to query roles through different search systems, Quick, Basic and Advanced. |
|
|
|
|
Add new |
Allows you to add a new role in the system. To add a new role it will be mandatory to fill in the required fields |
|
Delete role |
Allows you to remove one or more roles by selecting one or more records and next clicking To perform that action, Soffid will ask you for confirmation, you could confirm or cancel the operation. |
|
Download CSV file |
Allows you to download a csv file with the basic roles data. |
|
Import |
Allows you to upload a CSV file with the role list to add or update roles to Soffid. First, you need to pick up a CSV file, that CSV has to contain a specific configuration. Then you need to check the content to be loaded, it is allowed to choose if you want or not to load a specific attribute. And finally, you need to select the mappings for each column of the CSV file to import the data correctly and to click the Import button. |
|
|
|
Bulk actions |
Allows massive operations to be performed on all system roles. With that operation, updates can be made to any of the role's parameters. First of all, you must select the records that you want to update, once you have selected them, you must choose the bulk action on the hamburger icon. For more information visit the Bulk action page. |
RolesRole detaildetails
|
Apply changes (disk button) |
Allows you to apply the pending changes. |
|
Delete role |
Allows you to delete a role. You can choose that option on the hamburger icon. To perform that action, Soffid will ask you for confirmation, you could confirm or cancel the operation. |
| Expand all | Displays all the attributes of the different blocks. |
| Collapse all | Hide all attributes of the different blocks. |
| "Types of views" | Change the view type: Classic view, Modern view, Compact design. |
|
Preview changes |
Shows the pending changes on users or accounts. Soffid displays the information about the user or accounts, the action and de Role. You can choose if you want to apply the changes, or close the previer changes window. |
|
Undo |
Allows you to quit without applying any changes. |
|
Apply changes |
Allows you to apply the pending changes. |
|
|
Granted roles
|
|
|
|
Allows you to add a new granted role. To add a granted role, first you need to click the |
|
Delete granted role |
Allows you to delete one or more granted roles. To delete you need to select the records and then click this button. To perform that action, Soffid will ask you for confirmation, you could confirm or cancel the And finally, you need to apply changes. |
|
Download CSV file |
Allows you to download a CSV file with the |
| View |
Allows you to add or remove columns to the table. It is also possible to change the order of the columns. |
|
Preview changes |
Shows the pending changes on users or accounts. Soffid displays the information about the user or accounts, the action and de Role. You can choose if you want to apply the changes, or close the previer changes window. |
|
Undo |
Allows you to quit without applying any changes. |
|
Apply changes |
Allows you to apply the pending changes. |
Grantee roles
|
Add new |
Allows you to add a new grantee role. To add a grantee role, first you need to click the "Add new" button. Second, you need to write or search for a role. Once you have selected the role, if it is necessary, the next step will be to set the source scope and the scope. Then, you need to finish the process. And finally, you need to apply changes. |
|
Delete granted role |
Allows you to delete one or more grantee roles. To delete you need to select the records and then click this button. To perform that action, Soffid will ask you for confirmation, you could confirm or cancel the operation. And finally, you need to apply changes. |
|
Download CSV file |
Allows you to download a CSV file with the grantee roles. |
| View |
Allows you to add or remove columns to the table. It is also possible to change the order of the columns. |
|
Preview changes |
Shows the pending changes on users or accounts. Soffid displays the information about the user or accounts, the action and de Role. You can choose if you want to apply the changes, or close the previer changes window. |
|
Undo |
Allows you to quit without applying any changes. |
|
Apply changes |
Allows you to apply the pending changes. |
Grantee groups
|
Add new |
Allows you to add a new grantee group. To add a grantee group, first you need to click the "Add new" button. Second, you need to write or search for a group. Once you have selected the group, if it is necessary, the next step will be to set the scope. Then, you need to finish the process. And finally, you need to apply changes. |
|
Delete grantee group |
Allows you to delete one or more grantee groups. To delete you need to select the records and then click this button. To perform that action, Soffid will ask you for confirmation, you could confirm or cancel the operation. And finally, you need to apply changes. |
|
Preview changes |
Shows the pending changes on users or accounts. Soffid displays the information about the user or accounts, the action and de Role. You can choose if you want to apply the changes, or close the previer changes window. |
|
|
|
Undo |
Allows you to quit without applying any changes. |
Grantee roles
|
|
|
|
|
|
|
Apply changes |
Allows you to apply the pending changes. |
|
|
Grantee groups
|
|
|
|
|
|
|
|
|
|
Users
|
Add |
|
|
Allows you to add users or accounts to assign the role. To add users or accounts, fist of all, you need to click the |
|
Delete user |
Allows you to delete one or more users and/or accounts, that is, Soffid will revoke the role. To delete one, you can select the record and click To delete more at the same time, you need to select the records and then click To perform that action, Soffid will ask you for confirmation, you could confirm or cancel the operation. And finally, you need to apply changes. |
|
Download CSV file |
Allows you to download a CSV file with all the information about users. |
|
Import |
First, you need to pick up a CSV file, that CSV has to contain a specific configuration. Then you need to check the content to be loaded, it is allowed to choose if you want or not load a specific attribute. And finally, you need to select the mappings for each column of the CSV file to import the data correctly and to click the Import button. |
| View |
Allows you to add or remove columns to the table. It is also possible to change the order of the columns. |
|
Preview changes |
Shows the pending changes on users or accounts. Soffid displays the information about the user or accounts, the action and de Role. You can choose if you want to apply the changes, or close the previer changes window. |
|
Undo |
Allows you to quit without applying any changes. |
|
Apply changes |
Allows you to apply the pending changes. |
|
|