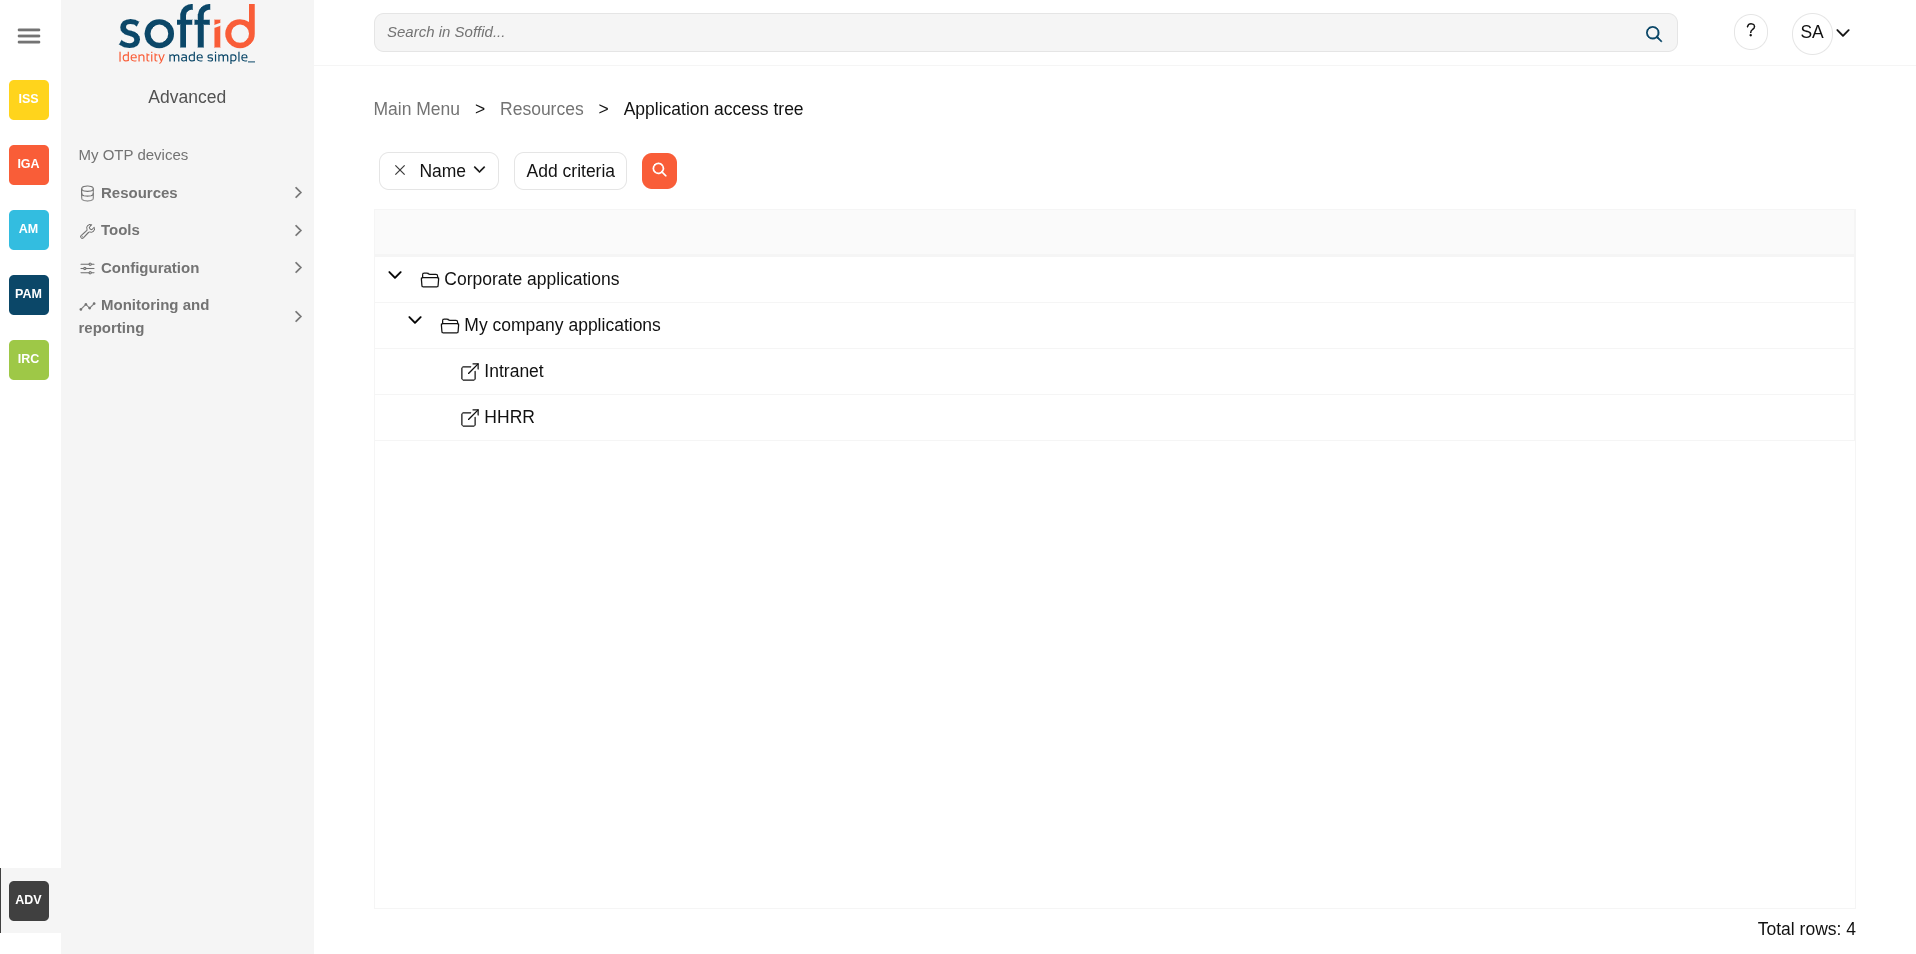
Application access tree
Description
The entry points could be to connect to information systems defined on Soffid, or to connect to other applications. These applications can be Web applications or Native applications. Each information systems can have one or more application entry points.
The entry points are managed in a tree structure, that allows creating new menus and new application access.
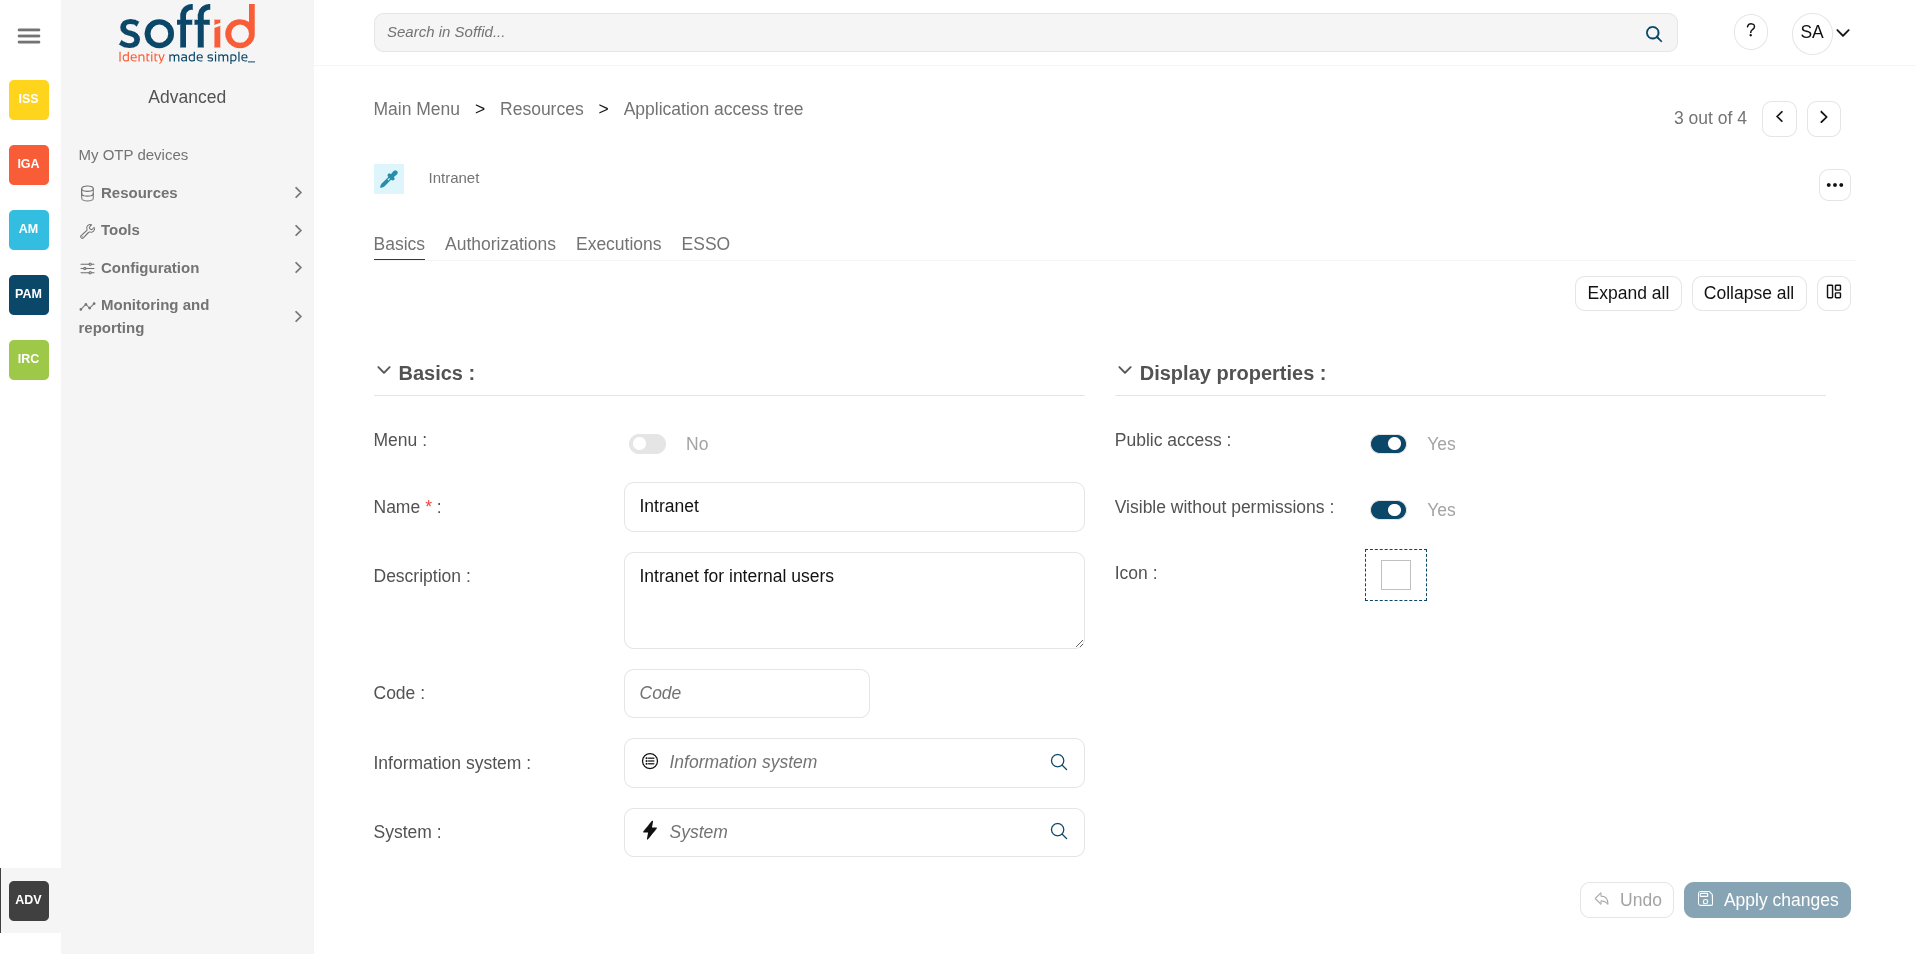
Each member of the tree can be tied to a list of users, account groups, or roles. Also, you can choose if the application menu entry will be visible or not by unauthorized users.
After logging on to a managed workstation, the system will apply such restrictions and will update the Windows or Linux start menu.
Each application entry point will have different execution methods for fully managed workstations, loosely managed workstations, or external devices. Each of them can be a web browser URL or a javascript piece.
Each application entry point can have a single sign on rule. Those roles are fully explained in the ESSO reference guide. For more information, you can visit the ESSO chapter.
The defined entry points allow to final users open applications from the self service portal. For more information can visit My applications page.
Screen overview
Related objects
- Information systems : information system configured
- Agents : systems configured
- Users : authorizations
- Groups : authorizations
- Roles : authorizations
- Accounts : authorizations
- My applications : where the applications are published for the end users
- Networks : executions
Standard attributes
Table
- Name of the item. It can be a folder or an application. It's a tree view.
Basics tab
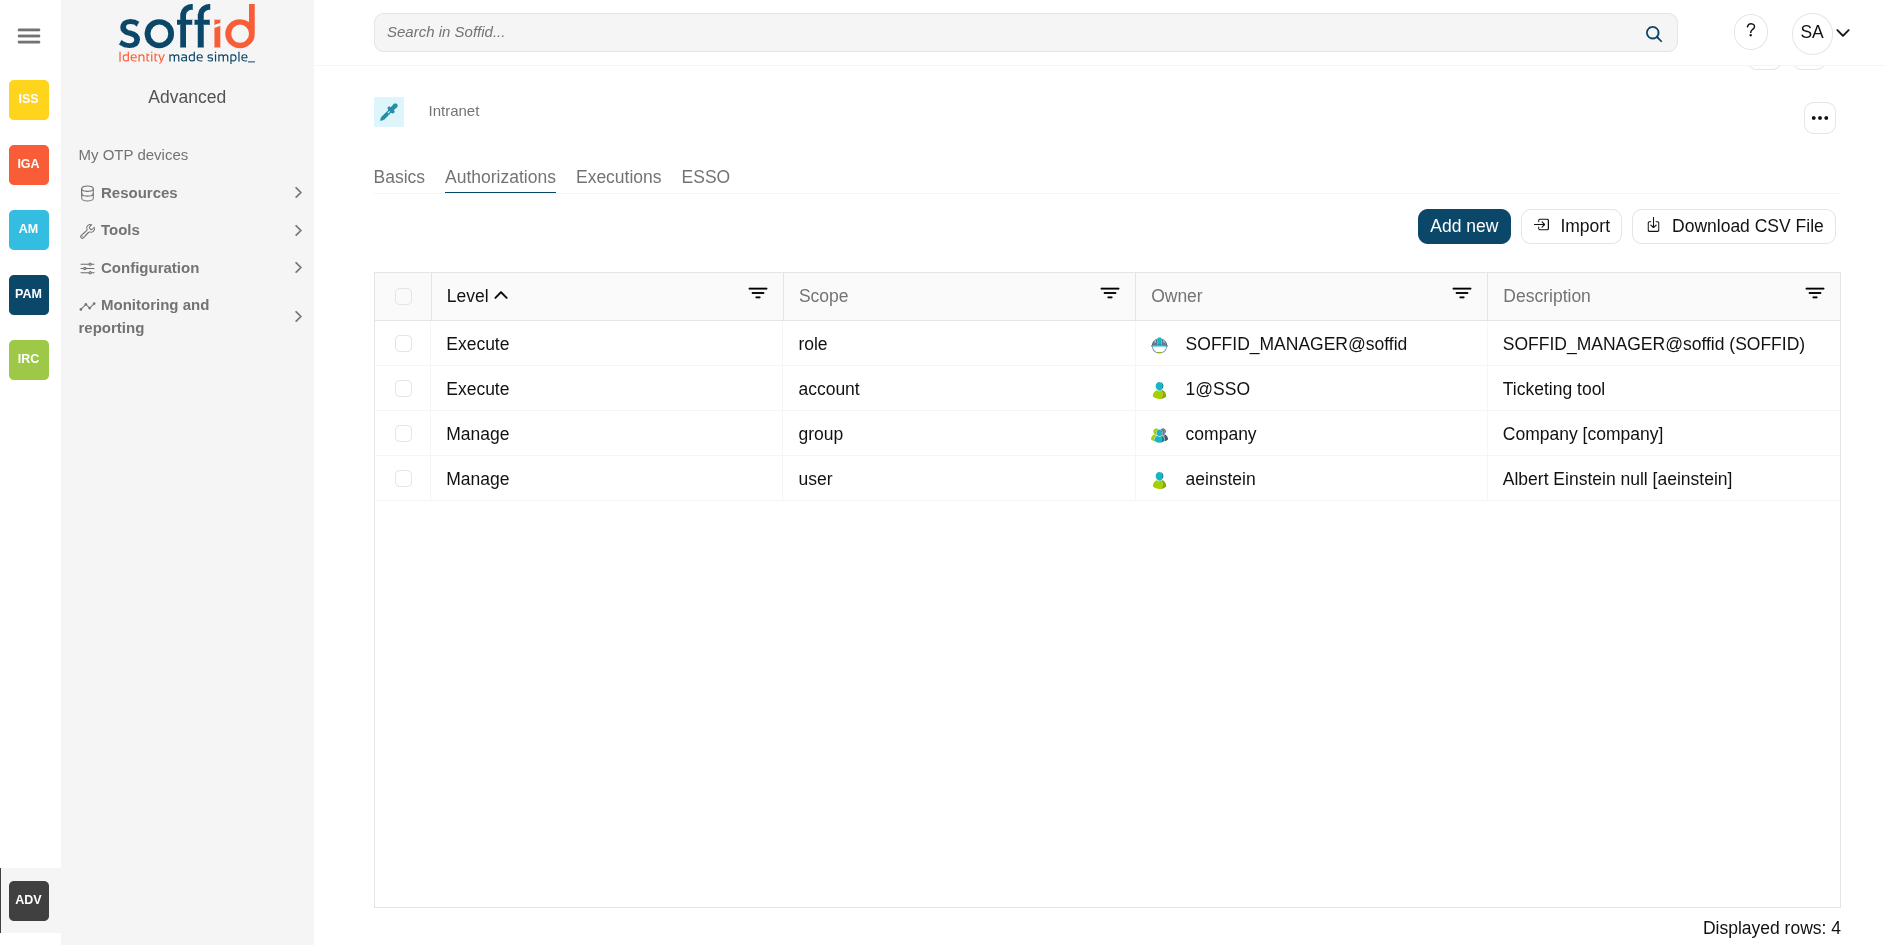
Authorizations tab
Allows you to grant access permissions to users, groups, roles, or accounts.
- Manage: allows to update the entry point.
- Execute:
- When the entry point has selected the option public access to NO, only users with the assigned access level as execute could execute that entry point.
- When the entry point has selected the option public access to YES, all users can execute that entry point.
Image
Executions tab
Allows Administrator users to configure the entry point access. It is only available to entry points with the option Menu not selected.
There are three options to configure the executions. Administrator users can configure one or more:
- Running from Intranet: if you select the Yes option, Soffid will check if the host that is trying to run this entry is located in a network flagged as internal, if so, Soffid will allow to run the entry.
- Running from Extranet: if you select the Yes option, Soffid will check if the host that is trying to run this entry is located in a network NOT flagged as internal, if so, Soffid will allow to run the entry.
- Running on the Internet: if you select the Yes option, Soffid will check if the host that is trying to run this entry is located in an unknown network, if so, Soffid will allow to run the entry.
For each execution option it is possible to configure the following parameters:
- Enabled: if the option is available to configure.
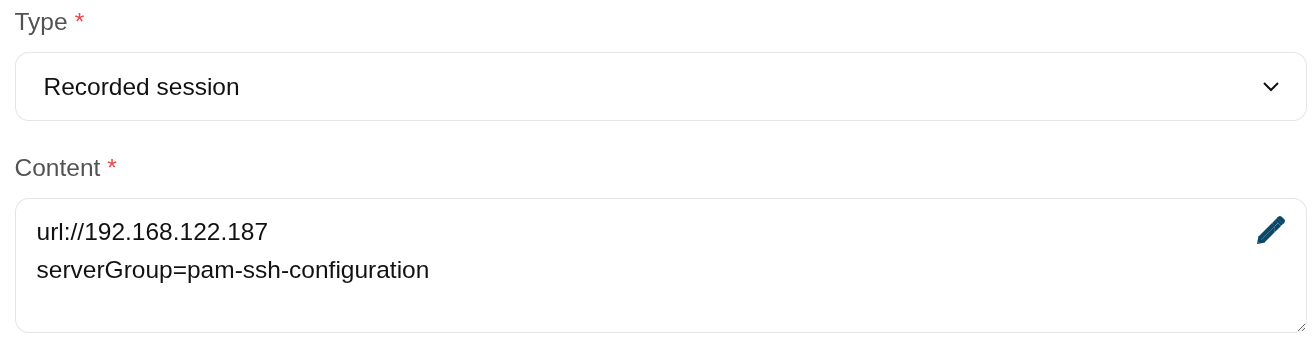
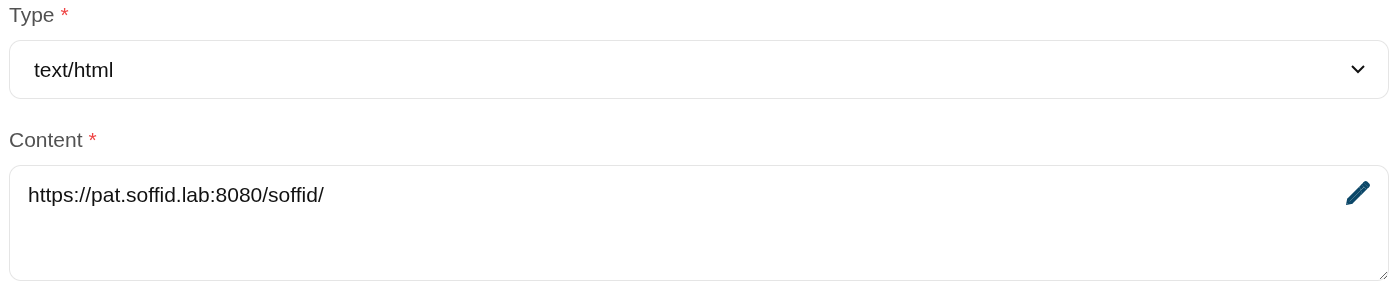
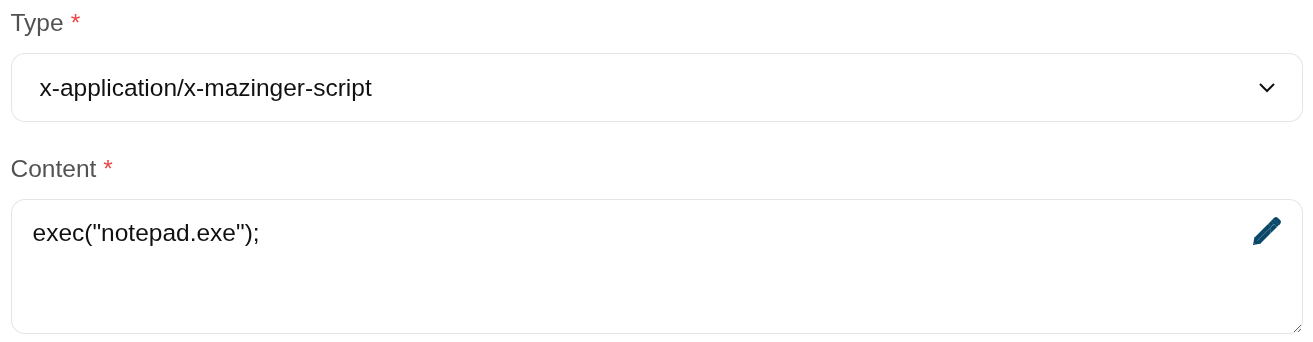
- Type: access connection type.
- Content:
- text/html: a URL to access to the application.

- x-application/x-mazinger-script: scripts that will be executed on ESSO clients

- Recorded session: configuration to use PAM service.
- Web Single Sign On: a URL to access the application with SSO.
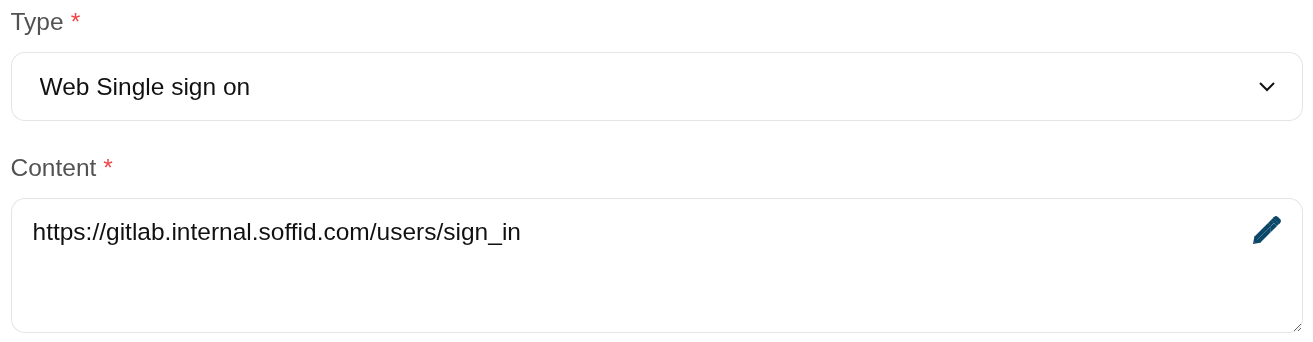
- text/html: a URL to access to the application.


ESSO
Allows you to customize a script to define a pattern to detect when an application is used and how to inject the credentials.
For more information, you can visit the ESSO chapter.
Actions
Table
| "Query" | Allows to query the entry points through different search systems, Quick, Basic and Advanced. |
| Create new entry |
Allows you to add a new entry point. To create a new entry point you can click the Create new entry button, then Soffid will display a new window to fill in the entry point data. To add a new entry point it will be mandatory to fill in the required fields. |
Basics tab
| Apply changes | Allows you to save the data of a new entry point or to update the data of a specific entry point. To save the data it will be mandatory to fill in the required fields. |
| Delete |
Allows you to delete the entry point. To delete an entry point, you can click the hamburger icon and then click the delete button (trash icon). Soffid will ask you for confirmation to perform that action, you could confirm or cancel the operation. |
| Expand all | Displays all the attributes of the different blocks. |
| Collapse all | Hide all attributes of the different blocks. |
| "Types of views" | Change the view type: Classic view, Modern view, Compact design. |
| Undo | Allows you to quit without applying any changes made. |
Authorizations tab
|
Add new |
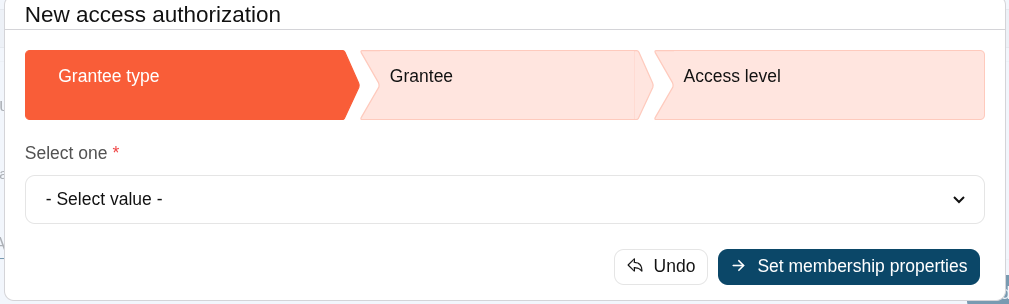
Allows you to add a new authorization. 💻 Image
First, you will select the Grantee type, which could be a role, a user, an account, or a group. Second, you will select the Grantee, it will depend on the Grantee type selected. Then, you will fill in the access level. And finally, you will apply changes. |
|
Delete |
Allows you to remove one or more authorizations by selecting one or more records and next clicking this button. To perform that action, Soffid will ask you for confirmation, you could confirm or cancel the operation. |
|
Import |
Allows you to upload a CSV file with the authorization list to add or update them to Soffid. First, you need to pick up a CSV file, that CSV has to contain a specific configuration. Then you need to check the content to be loaded, it is allowed to choose if you want or not to load a specific attribute. And finally, you need to select the mappings for each column of the CSV file to import the data correctly and to click the Import button. |
|
Download CSV file |
Allows you to download a CSV file with the authorizations. |
Executions tab
| Apply Changes | Allows you to save the execution configuration. |
| Test | Check if the settings for a specific type are correct. |
ESSO tab
| Validate | Allows you to validate and save the script. |