Installing IAM Console
Guide to install IAM Console on your own server
Prerequisites
Installing Soffid IAM solution requires the following requirements:
- Linux or Windows
- Java JDK 8 or higher. Java JDK11 recomended
- 4GB RAM
- 10GB disk space
- Supported database installed
Video Tutorial
Windows
Linux
Installation
Download
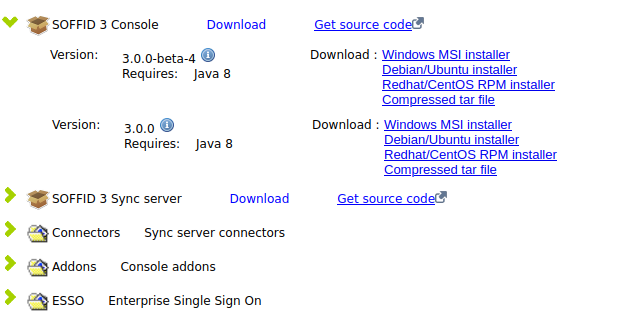
You can download Soffid 3 components from our website Soffid Download Manager
Depending on your platform, you can download the MSI, RPM or DEB version.
As soon as the install-x.y.z.sh file is in your computer, copy the file into a path of your server.
Installing IAM Console
Windows
Open the installation file. It will create the operating system level service and will start it. After some seconds, the installation wizard will be up and running in port 8080.
Linux
We recommend to install the package like:
sudo dpkg -i '/your-path/SOFFID 3 Console-Debian_Ubuntu installer-3.0.0.deb'You can ckeck the IAM Console service status:
systemctl status soffid-iamconsole.serviceConfiguration
Then, open the web browser pointing to http://localhost:8080
The wizard will ask for the following information:
- Host name: enter the name that will be used by end-users to access to the console. To use the fully qualified domain name is suggested. A virtual service name can be used as well. Mind that the web server will work even when you put a wrong host names. This host name will be used in email notifications that contain a link to the console.
- User name: Enter the name of a user with permissions to create tables and indexes in the selected database.
- Password: Enter the database user password.
- Database type: select the right database engine: Maria DB, MySQL, PostgreSQL, MS SQL Server or Oracle.
- Database URL: complete the database URL. The default template use to be good enough, but you can use advanced features depending on the selected database driver:
- Maria DB and MySQL: https://mariadb.com/kb/en/about-mariadb-connector-j/
- PostgreSQL: https://jdbc.postgresql.org/documentation/80/connect.html
- MS SqlServer: https://docs.microsoft.com/es-es/sql/connect/jdbc/building-the-connection-url?view=sql-server-ver15
- Oracle: https://docs.oracle.com/cd/B28359_01/java.111/b31224/urls.htm#BEIJFHHB
The next step, allows you to enter the name and password for the initial Soffid user. You must enter:
- Login name: by default it's admin, but you can use any other naming convention. To change it is good security practice.
- First name: Your first name.
- Last name: Your last name.
- Password: Enter the initial password to use. Write it twice and don't forget it.
Manual Configuration
Configuring service startup
If you are using the RPM, DEB or MSI installers, the service is automatically configured to start up with the computer. If you are using the .tar.gz file, you must enable it manually. Execute these commands as root to start Soffid IAM console service on boot:
ln -fs /opt/soffid/iam-console-3/bin/catalina.sh /etc/init.d/soffid-iamconsole
ln -fs /etc/init.d/soffid-iamconsole /etc/rc2.d/S98soffid-iamconsole
ln -fs /etc/init.d/soffid-iamconsole /etc/rc3.d/S98soffid-iamconsole
ln -fs /etc/init.d/soffid-iamconsole /etc/rc2.d/K10soffid-iamconsole
ln -fs /etc/init.d/soffid-iamconsole /etc/rc3.d/K10soffid-iamconsole
If something is not running as expected, please check the log at:
root@localhost:~# cd /opt/soffid/iam-console-3/logs
root@localhost:/opt/soffid/iam-console-3/logs# less soffid.YEAR-MONTH-DAY.log
Now you can connect IAM Console http://localhost:8080/soffid The first thing you must do is to configure database parameters and admin user. When the console is created, the password for user admin will be valid for 24 hours.

