OpenID-Connect architecture
Introduction
OpenID is based on the well known protocol. It is easier to implement and deploy, as it does not require digital signature or encryption. The drawback is that it is significantly less secure. For example, the single logout protocol is not finished yet.
Single Log-in
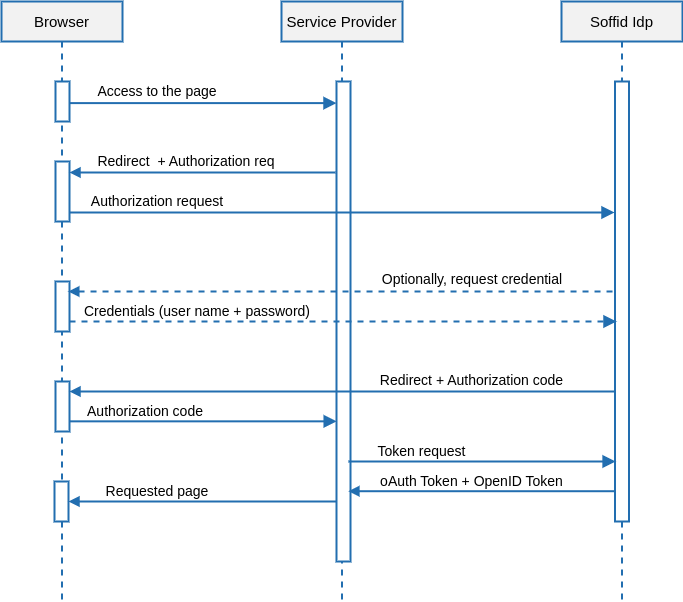
The usual log-in process follows the next UML diagram:

Description
1. User’s browser tries to get a web page from the service providers
2. . The service provider wants to authenticate the user identity. To get this, redirects the user to the identity provider, including the returning URL.
Next, the identity providers checks if the user browser does have an active SSO session. In such a case, skip to step 6.
4. The identity providers ask for credentials to the user.
5. The user enters its credentials. At this time, the identity provider verifies the user name and password are correct, and creates a new SSO session.
6. The identity provider redirects the user to the service provider, sending an authorization code.
7. The service provider connects to the identity provider, using its client id and client secret, as well as the authorization code.
8. The identity provider verifies the authorization code and generates two tokens: the oAuth token and the OpenID token. The Auth token is a bare token that can be used by the service provider to perform additional requests.
The Openid token contains some user attributes. The included attributes and its value can vary depending on the service provider that will receive it. This token can be signed using JWT standard.
9. The service provider receives the both tokens, parsing the JSON document contained in the JWT OpenID token.
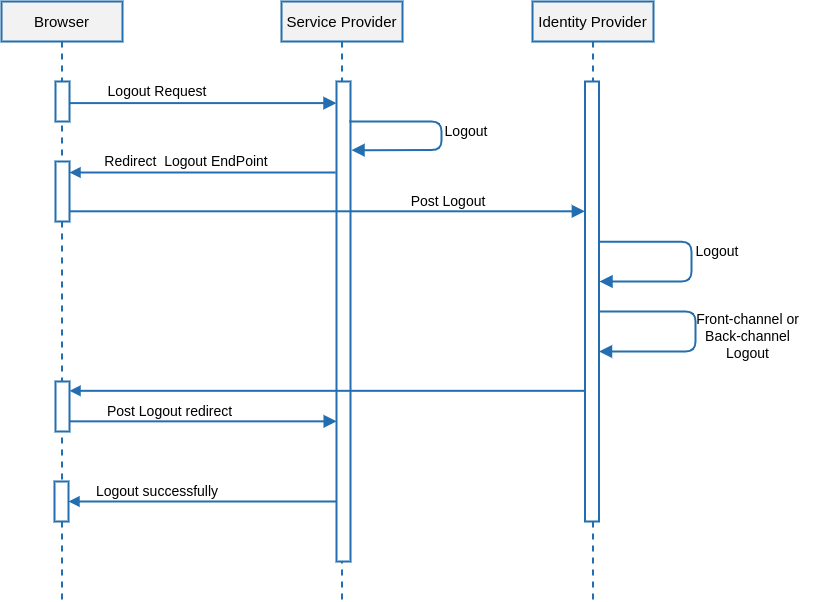
Single Log-out

Description
1. The user requests to log out the application.
