Reporting is an add-on provided by Soffid that offers an easy way to generate reports based on Soffid data model.
In order to manage reports, three authorization levels are allowed: 1. **Permission to access report screen**: allows the user to execute the explicitly granted reports. 2. **Permission to schedule reports**: allows the user to schedule the execution and delivery of periodic reports. 3. **Permission to admin reports**: allows the user to upload or remove reports.Soffid provides a Report add-on that allows you to define new reports based on Soffid data model. For more infomation about the data model you can visit the [data model documentation](http://www.soffid.org/doc/console/latest/uml/entities.html).
# How to install Reporting in Soffid ## Installation ### Download Please download the Soffid Reporting add-on. You can download it at the following link [http://www.soffid.com/download/enterprise/](http://www.soffid.com/download/enterprise/) if you have Soffid user with authorization, or in the following [http://download.soffid.com/download/](http://download.soffid.com/download/) by registering. ### Upload Once the Reporting add-on is downloaded, please log in to IAM Console.You need to be an administrator user of the Soffid console or a user with permissions to upload addons.
It is recommended to upload the addons to master, this is the way to maintain updated all, master and tenants if there are.
In the Soffid console, please go to: "Main Menu > Administration > Configure Soffid > Global Settings > Plugins" and upload the addon file, for more information visit the [Addons Getting started](https://bookstack.soffid.com/books/addons-getting-started/page/getting-started "Addons installation") page Finally, when the addon is installed, it will be required to restart the Soffid Console. # How to customize Reporting in Soffid # Using iReport ## Steps Once you have installed the Reporting add-on you must follow the following steps: 1. Download the iReport classes from Soffid. 1.1. Open the Reports screen. `Main Menu > Administration > Monitoring and reporting > Reports` 1.2. Click on the "Reports definitions" tab. 1.3. Click on the hamburger icon. 1.4. Click on the "Download iReport componet" option and save in your computer the file. 1.5. Once you have saved the file, you need to customize the **hibernate.cfg.xml** file to point your development database.| ```XML
|
The data model documentation, including [E-R diagrams is here](http://www.soffid.org/doc/console/latest/uml/entities.html).
6. Upload your report to Soffid Console. 7. Execute or schedule it!!! # Using JasperReports ## Introduction Soffid provides an addon to execute a custom Jaspersoft report designer. Configure a new Soffid data adapter will be mandatory with the proper data to connect to Soffid console, it will not be necessary to configure the database connection. Then you can use your custom Jasper report designer, it will be in charge to make REST requests to the Soffid console, and Soffid console will make the requests to the database. Steps Once you have installed the Reporting add-on you must follow the following steps: 1. Download the Report designer from the Soffid download page. You could donwload in the following link [http://www.soffid.com/download/enterprise/](http://www.soffid.com/download/enterprise/) if you have Soffid user with authorization, or in the following [http://download.soffid.com/download/](http://download.soffid.com/download/) by registering. 2. Open the custom Jaspersoft report designer. ```shell root@soffid:/home/user/Descargas/jaspersoftstudio# ./Jaspersoft\ Studio ``` 3. Add a new Soffid Data Adapter - **Name**: data adapter name. - **Soffid console URL**: your Soffid console URL. - **User Name**: user to connect to Soffid Console. - **Password**: password to connect with the user to Soffid Console. [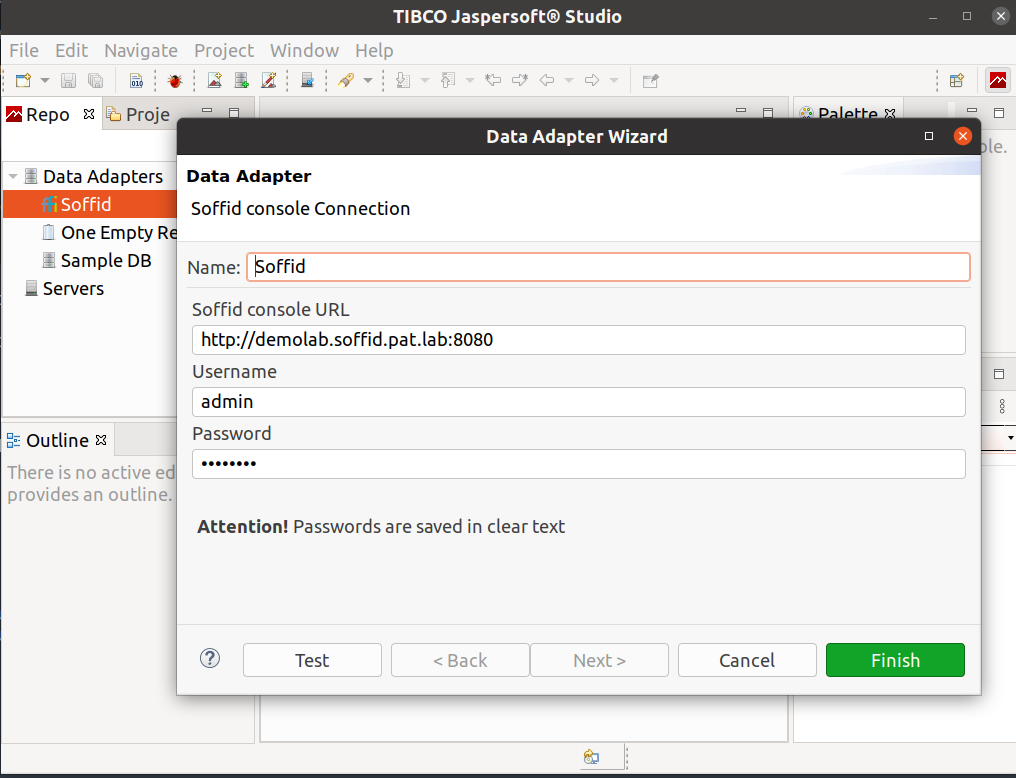](https://bookstack.soffid.com/uploads/images/gallery/2022-05/image-1651765772922.png) 4. Design your report or open an existing one.The data model documentation, including [E-R diagrams is here](http://www.soffid.org/doc/console/latest/uml/entities.html).
5. Upload your report to Soffid Console. 6. Execute or schedule it!!! # Reports # Reports definitions ## Description At the report definitions tab you can add new reports to Soffid Console, and manage the the existing ones. You can create your own reports, you can visit the [How to customize Reporting page](https://bookstack.soffid.com/books/reporting/page/how-to-customize-reporting), or download then from the [Standard reports library page](https://bookstack.soffid.com/books/reporting/page/standard-reports-library). Screen overview [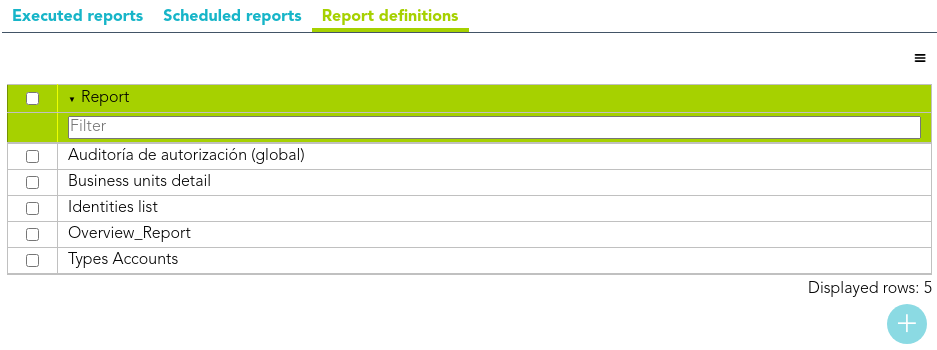](https://bookstack.soffid.com/uploads/images/gallery/2021-11/image-1638197196660.png) ## Actions| **Download iReport component** | Allows you to download the ireport-addon.jar. That add-on will be customized and added to the iReport designer to design your owns reports. You can visit the [How to start Reporting in Soffid page](https://bookstack.soffid.com/link/466#bkmrk-1.5.-once-you-have-s). |
| **Upload** | Allows you to upload a designed report with iReport tool. You can upload defautl jasper files or customized jasper files as well. First of all, you need to click the Upload option by clicking in the hamburguer icon. Then Soffid will display a window to pick up the new report (a .jasper file). |
| **Add** | Allows you to upload a designed report with iReport tool. You can upload defautl jasper files or customized jasper files as well. First of all, you need to click the add button (+). Then Soffid will display a window to pick up the new report (a .jasper file). |
| **Delete** | Allows you to delete one or more defined reports. To delete reports, first select the reports, then click on the subtract button (-) and finally Soffid will ask you to confirm or cancel the operation. |
| **Update report** | By clicling on a report, Soffid will display the report configuration. You could update and customize the report configuration. |
You can download the **iReport** designer from [sourceforge](http://sourceforge.net/projects/ireport/files/iReport/).
# Scheduled reports ## Description At the schedule reports tab you can schedule or run the report. The report must be defined in the report definition tab. First of all, you need to select the report you want to execute. Once the report was selected, then you will need to fill in the parameters if they are required. And finally, you can execute the report right now, or shedule the report execution. If you schedule the execution, you would config a Access control list. At this list you would define the users, groups or roles ## Screen overview [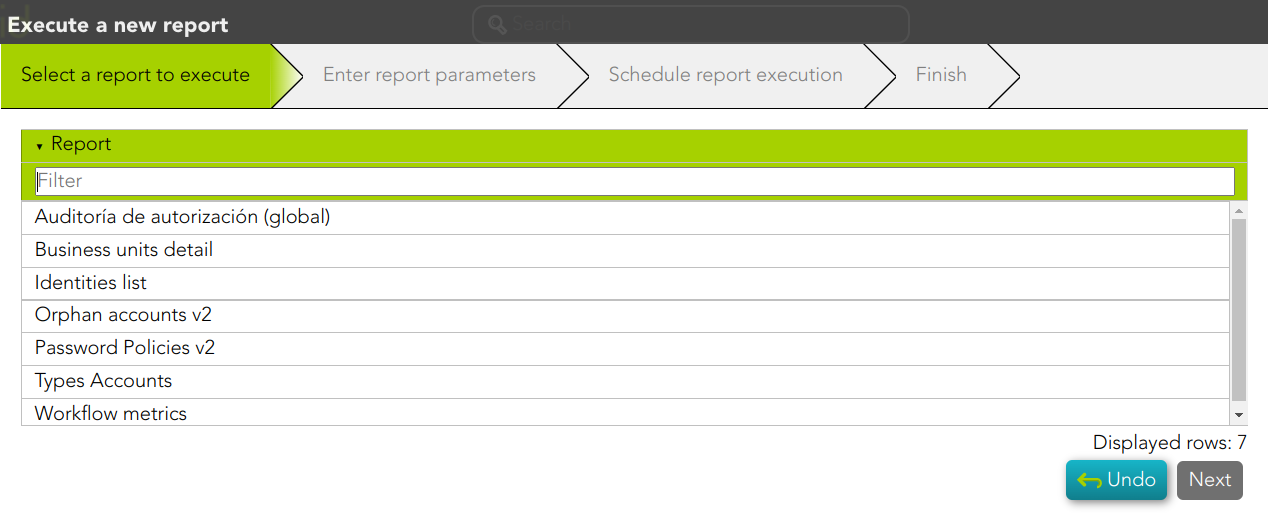](https://bookstack.soffid.com/uploads/images/gallery/2022-03/image-1647260909831.png) [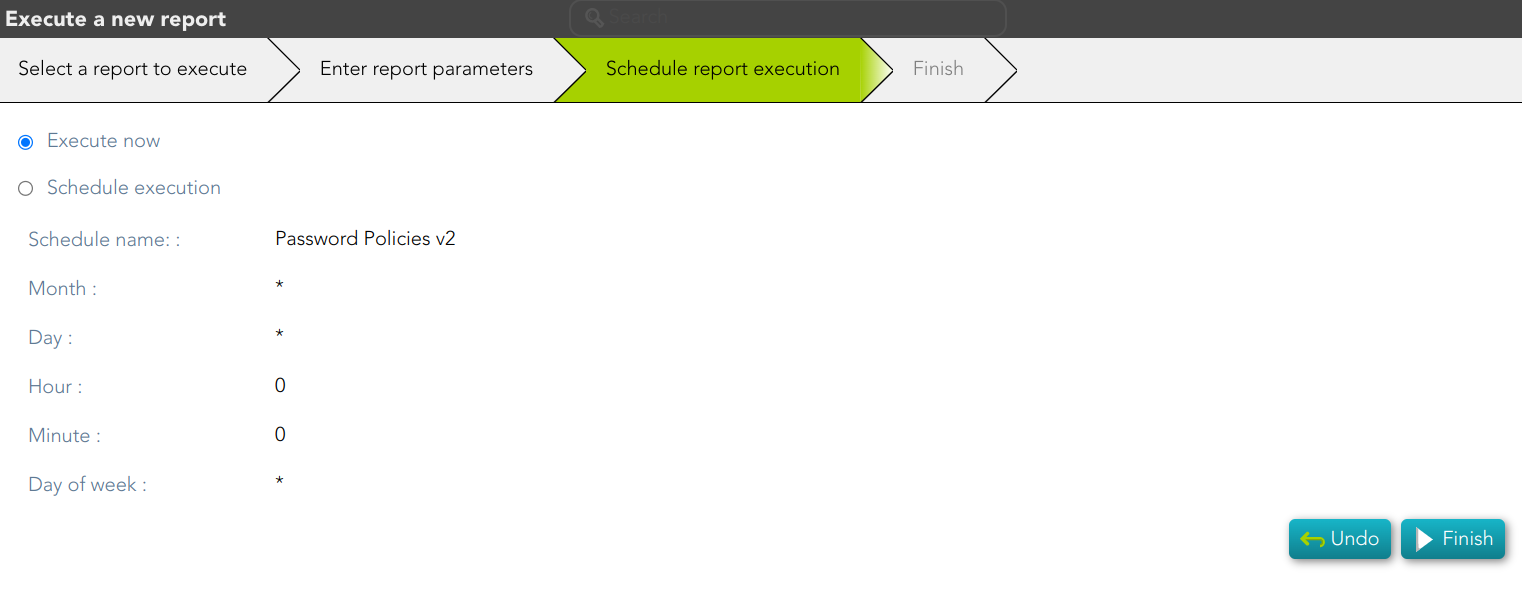](https://bookstack.soffid.com/uploads/images/gallery/2023-02/image-1676995644176.png) [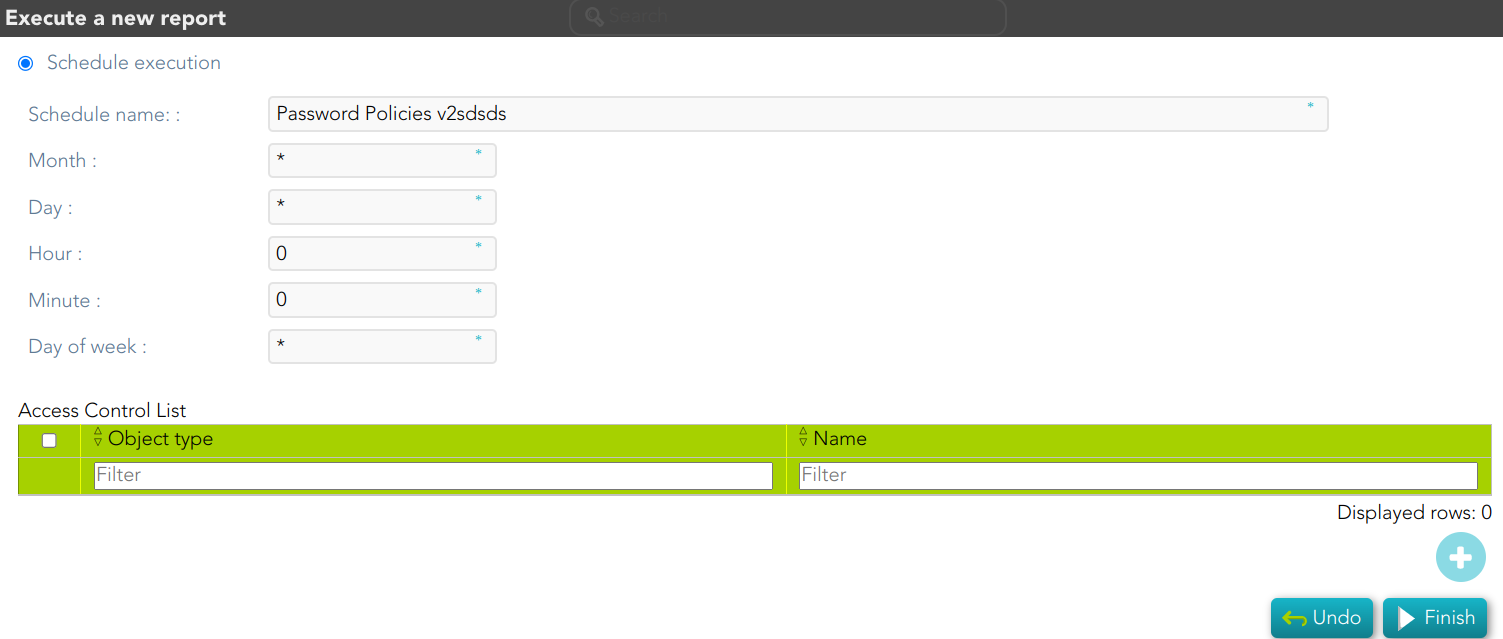](https://bookstack.soffid.com/uploads/images/gallery/2023-02/image-1676995941382.png) ## Standard attributes - **Schedule name**: identified name. - **Month**: number of the month (1-12) when the task will be performed. - **Day**: number of the day (1-31) when the task will be performed. - **Hour**: hour (0-23) when the task will be performed. - **Minute**: minute (0-59) when the task will be performed. - **Day of week**: number of the day (0-7 where 0 means Sunday) of the week when the task will be performed. - **Access Control List**: to prevent unauthorized usage. Will be granted to users, groups or roles. For each value of month, day, hour, minute, or day of the week:| **Add** | Allows you to shedule or execute a report. First of all, you need to click the add button (+). Then Soffid will display a window to pick up the report. Then you need to select the report you want to execute or schedule and click Next button. At the Enter report parameter, you could fill in the required parameter, and click the Next button. Alt the Schedule report execution, you could choose to execute the report right now, or to schedule the execution, to do that, you need to fill in the parameters, and the click the Finish button. |
| **Delete** | Allows you to delete one or more scheduled reports. To delete reports, first select the reports, then click on the subtract button (-), and finally Soffid will ask you to confirm or cancel the operation. |
| **Edit** | By clicling on a report, Soffid will display the report sheduled configuration. You could update and customize the sheduled configuration. |
Soffid allows you to define a parameter to establish the maximun number of days to keep generated reports in Soffid. Todo that, you can add the parameter **soffid.addon.report.expire** at the[ Soffid parameters page](https://bookstack.soffid.com/books/soffid-3-reference-guide/page/soffid-parameters) and indicate the maximum number of days.
## Screen overview [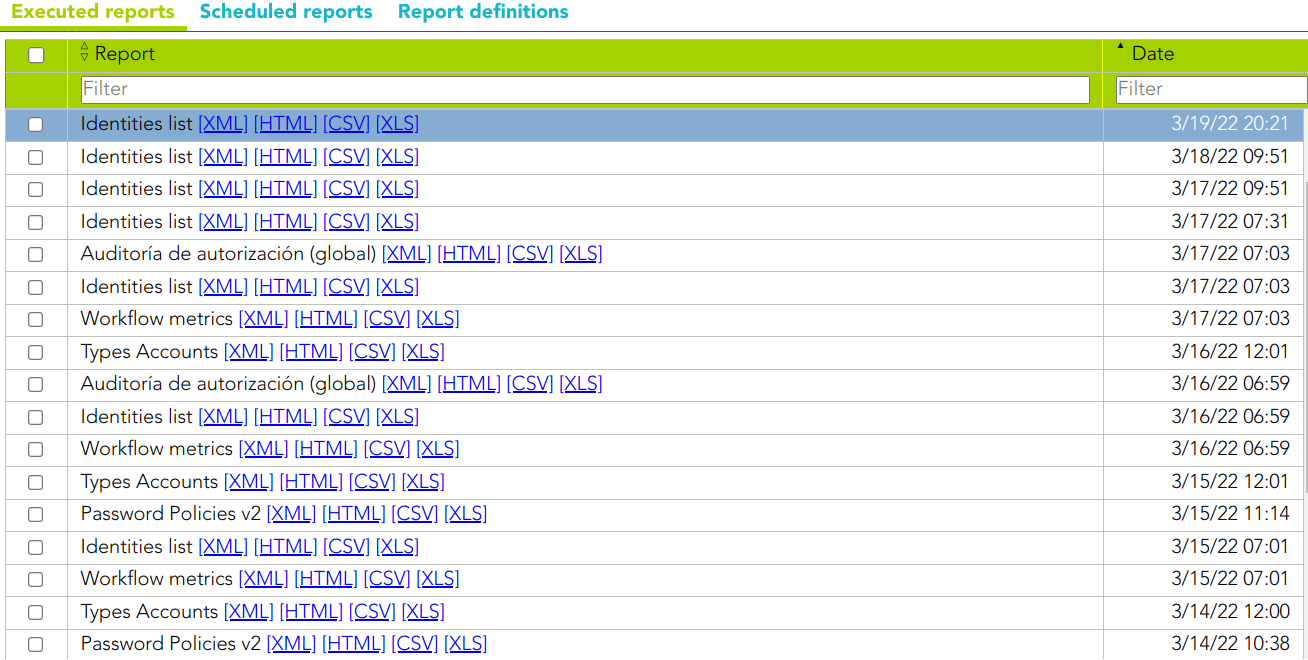](https://bookstack.soffid.com/uploads/images/gallery/2023-02/image-1676995449032.png) ## Actions| **Schedule report execution** | Allows you to run or schedule the execution of a report. First, you need to click on the add button (+), then Soffid displays a wizard in which you must select the report you want to execute or to schedule. Once the report is selected, you must click the Next button. Then you can fill in the filter parameters and click the Next button. Then, you need to select if you wan to execute now, or if you want to schedule execution, if you select the second one, you could customize the execution and you could define de access control list. Finally you need to click on the Finish button, and the report will be executed or scheduled depending on you previous selection. |
| **Delete** | Allows you to delete one or more executed reports. To delete executed reports, first select the reports, then click on the subtract button (-) and finally Soffid will ask you to confirm or cancel the operation. |