Recertification
Recertification
- What is the Recertification process?
- Introduction to the Recertification addon
- How to install Recertification addon in Soffid
- Recertification policies
- Recertification campaigns
- Recertifications to do
- Recertification Examples
What is the Recertification process?
What is the Recertification process?
Recertification is a business process consisting of a periodic assessment carried out internally by a company to verify that it continues to comply with the standards of a regulation, management system or its own internal processes, ensuring that its processes, knowledge, assets and data are kept up to date, with the highest possible quality and avoiding problems and information leaks.
Each company decides which assets require greater focus and therefore greater control. This control can come from implementing workflows to control which people can perform which actions, who has authorisation over which data, or simply who is responsible for each asset.
Recertification is a manual, guided, or automated process to ensure that all individuals have the appropriate responsibility for their assets, and that users of those assets also have the correct access to them.
In summary, recertification is a control and updating mechanism for maintaining valid permits and certifications, adapting to changing standards and ensuring the competence or necessity of the right granted.
Introduction to the Recertification addon
What is the Recertification addon?
The Recertification addon provides the functionality to review access rights to make sure the users have access only to what they need.
This Soffid's functionality increases security, mitigates access risk, reduces review times, reduce the cost and also becomes the process auditable and compliant.
Recertification allows you to take immediate action to correct inconsistent or unauthorized permissions to prevent unwarranted access. These changes will be applied in real time with our provisioning solution in the source systems.
Concepts
Soffid uses three different concepts:
1. Recertification policies: the first step is to define and configure the different recertification processes based on the type and scope of the recertification process and the users involved in it.
2. Recertification campaign: once we have the policies, we can create recertification campaigns for each of them, identifying the groups and information systems in which to search for roles or accounts to recertify.
3. Recertification to do: this is the list of pending recertification campaigns along with the internal tasks that still need to be completed.
How to install Recertification addon in Soffid
Installation
Introduction
To use an addon in Soffid, you must download and install it in the Console. There are two ways to do this.
1. The first option is to use the Soffid 4 marketplace. You can download and upload it directly from the Licence and plugin page.
2. The second option is to download the file from the Soffid download page and then upload it to the Console.
Soffid 4 marketplace
Soffid 4 allows you to install and update plugins through the new Addons marketplace feature.
To access the marketplace, you must have a valid token to use Soffid and have configured the Console via https. Please check the License and plugin page.
1. Please log in to IAM Console.
You need to be an administrator user of the Soffid console or a user with permission to upload addons.
It is recommended to upload the addons to the master, this is the way to maintain updated all, master and tenants if there are.
2. In the Soffid console, please go to the License and plugin page.
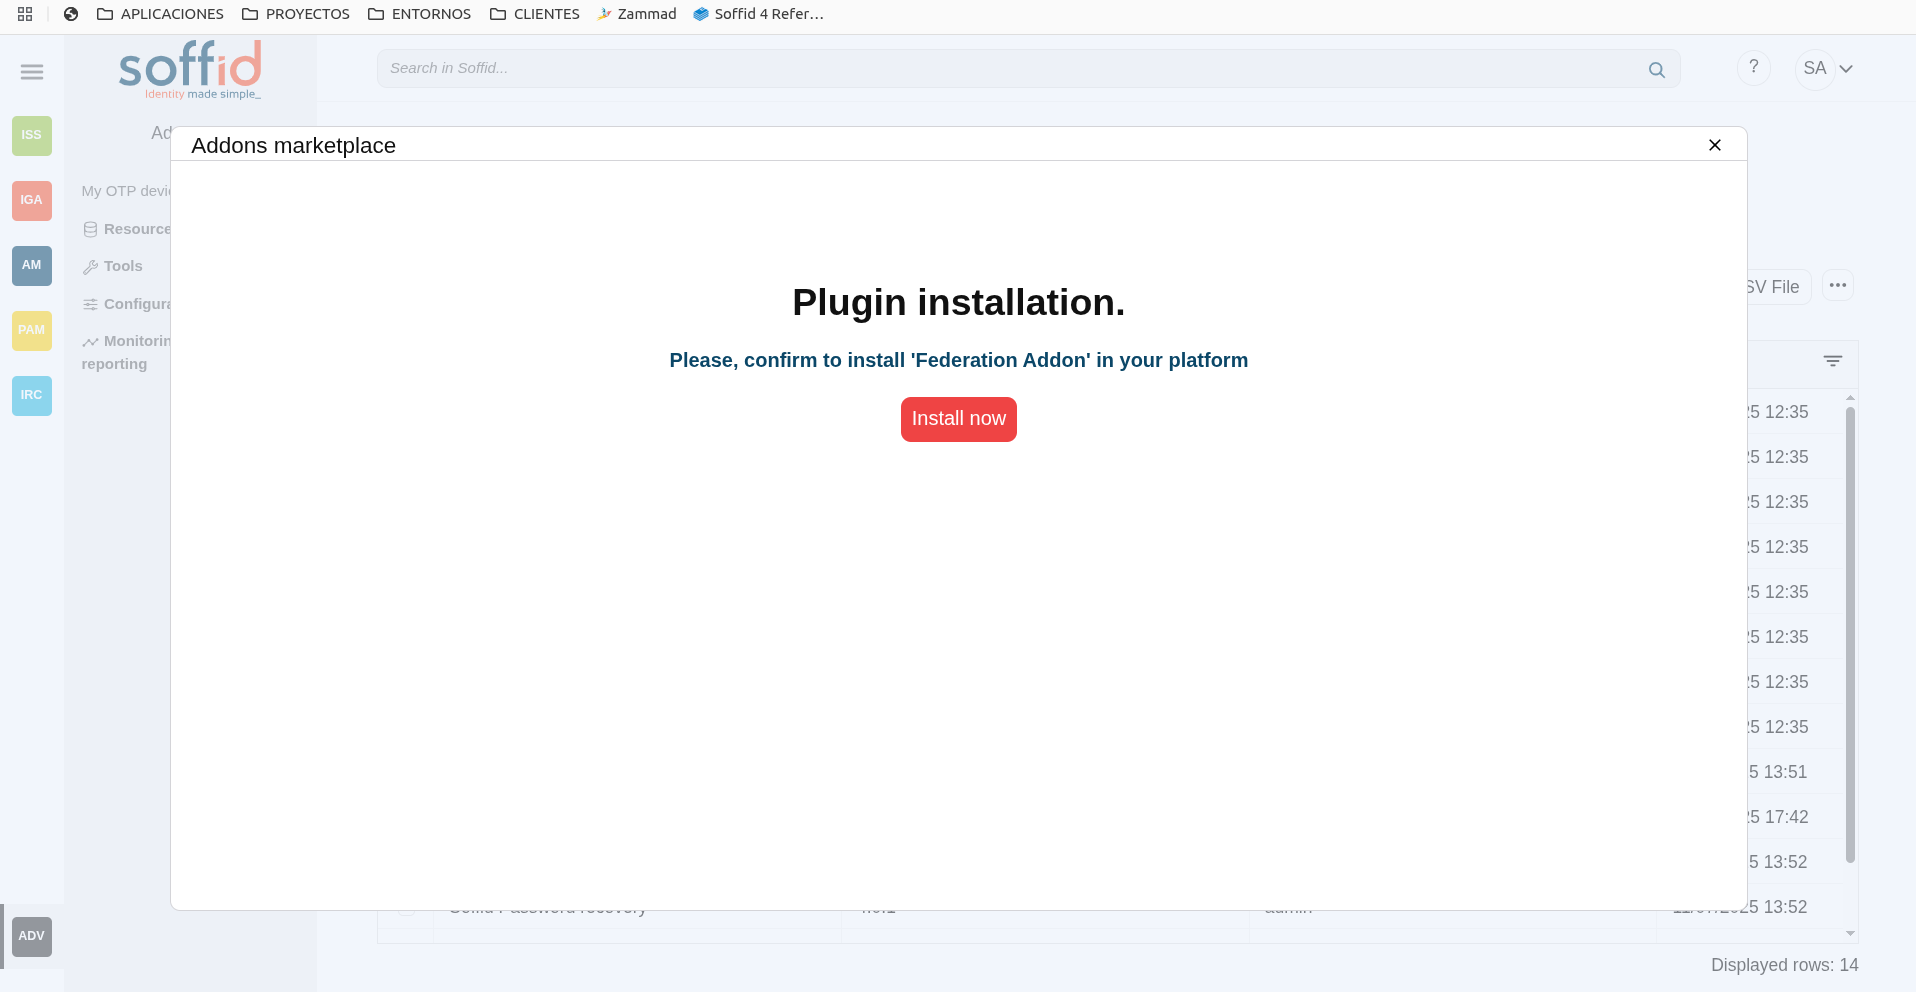
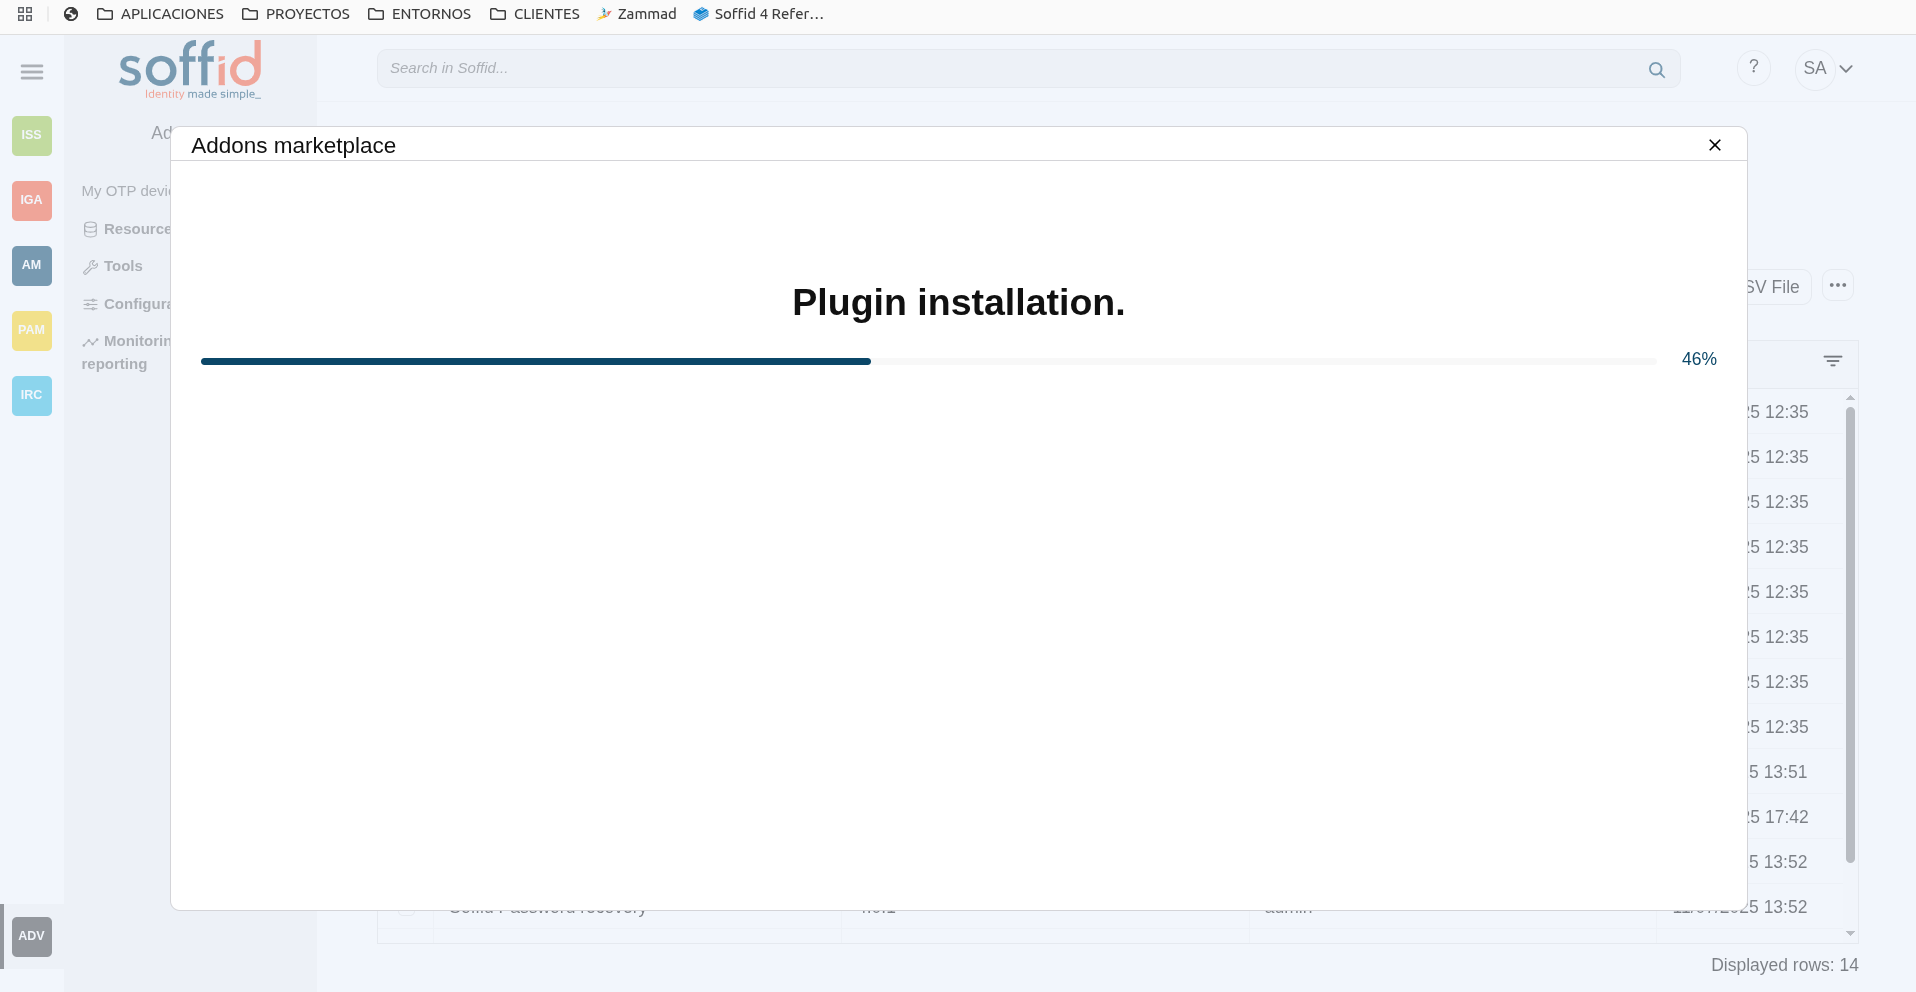
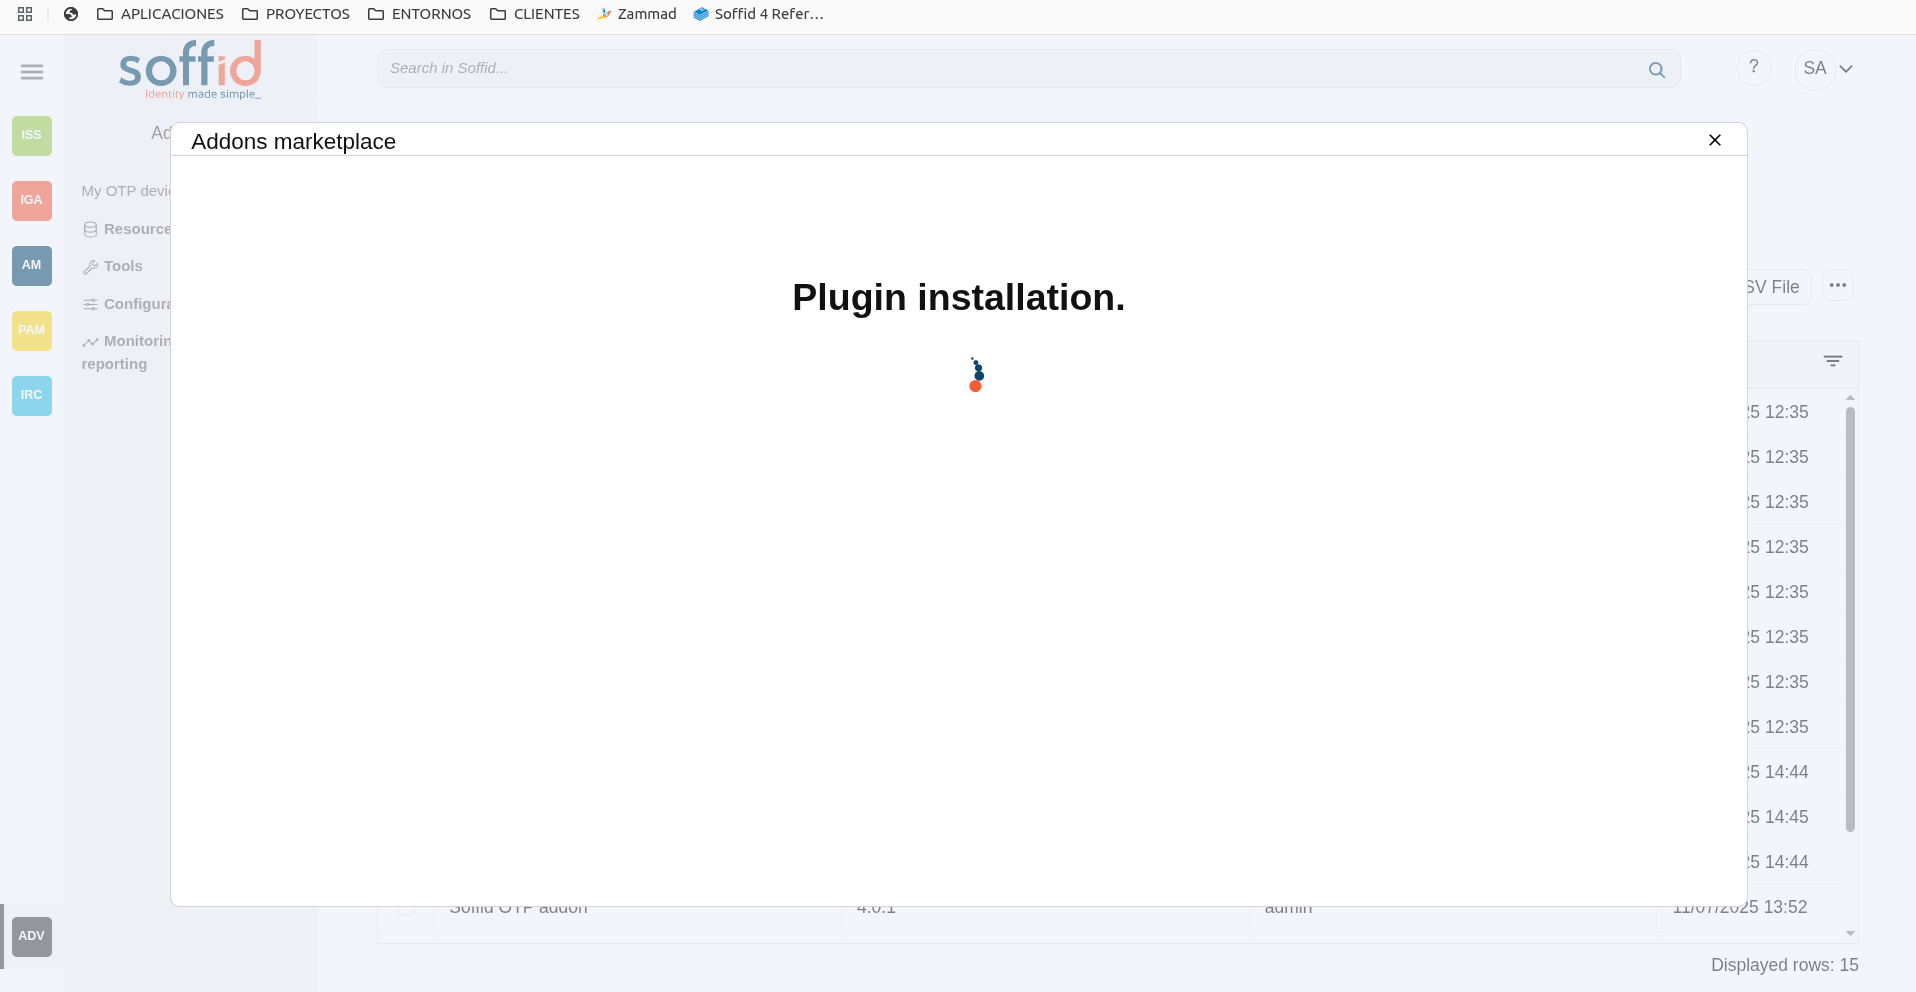
3. Then, click the add button "Add new" button, open the "Soffid Addons" secction and select the "Instlla addon" option, Soffild will upload the addon file.
Image

4. Finally, when the addon is installed, the Consola has to be restarted, a popup will be displayed to perform this action, you can choose to do it now or later.
Image
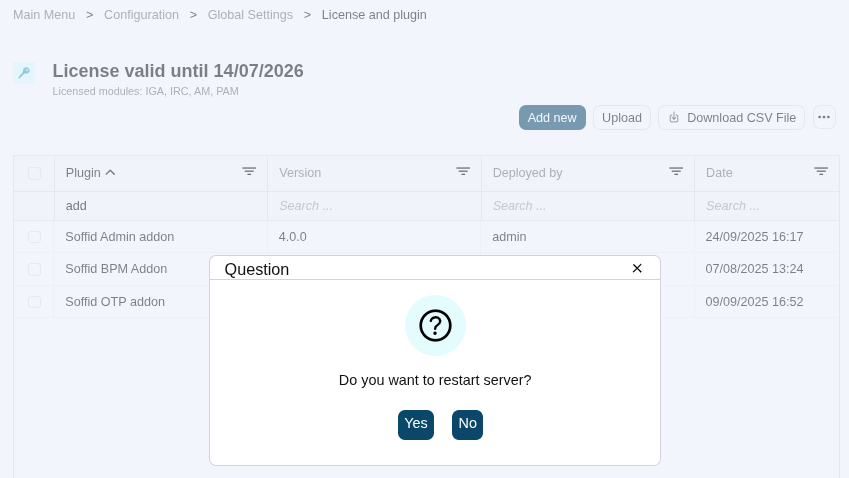
5. Once the Soffid console has restarted, you can check if the plugin was correctly uploaded on the "License and plugins" page.
6. Now, you can configure the addon.
Download an upload
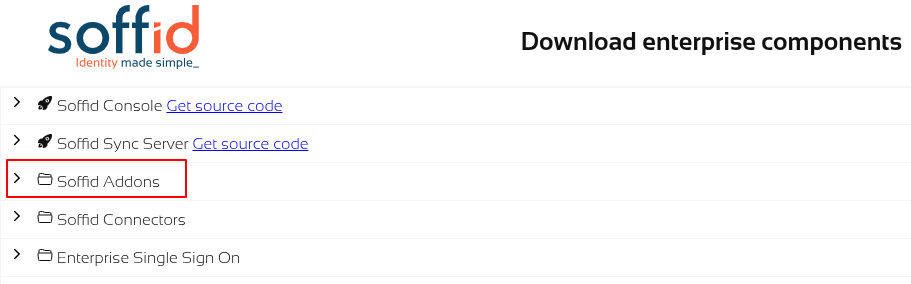
1. You could download the addon at the following link http://www.soffid.com/download/enterprise/ if you have a Soffid user with authorization, or in the following http://download.soffid.com/download/ by registering.
The addons are in the Addon seccion.
Image
2. Once the addon is downloaded, please log in to IAM Console.
You need to be an administrator user of the Soffid console or a user with permission to upload addons.
It is recommended to upload the addons to the master, this is the way to maintain updated all, master and tenants if there are.
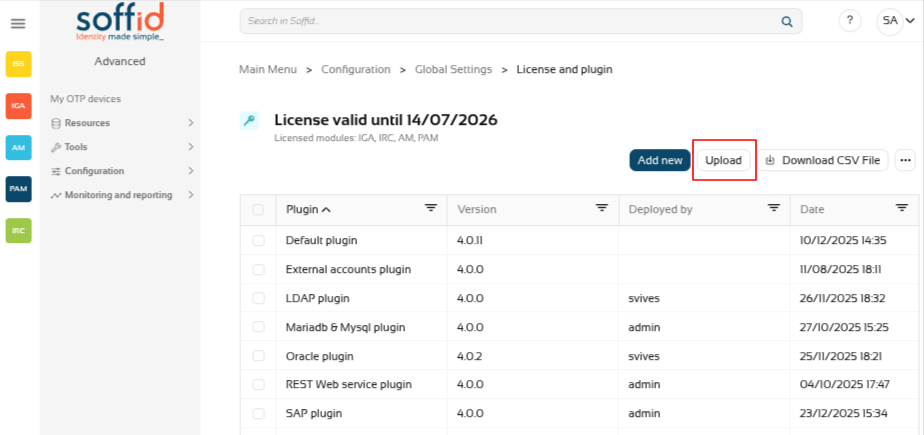
3. In the Soffid console, please go to the License and plugin page.
Soffid 3:
Soffid 4:
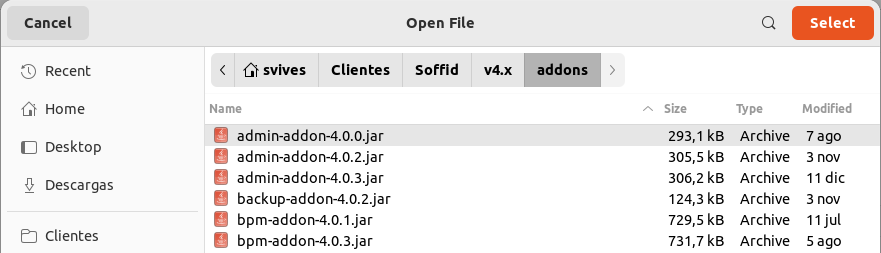
4. Then, click the add button "Upload" and pick the file and click the "Select" button and Soffild will upload the addon file.
Image
5. Finally, when the addon is installed, the Consola has to be restarted, a popup will be displayed to perform this action, you can choose to do it now or later.
Image
6. Once the Soffid console has restarted, you can check if the plugin was correctly uploaded on the "License and plugins" page.
7. Now, you can configure the addon.
Recertification policies
Description
Soffid allows you to establish some policies to define the scope of the recertification process.
Menu option
Screen overview
Custom attributes
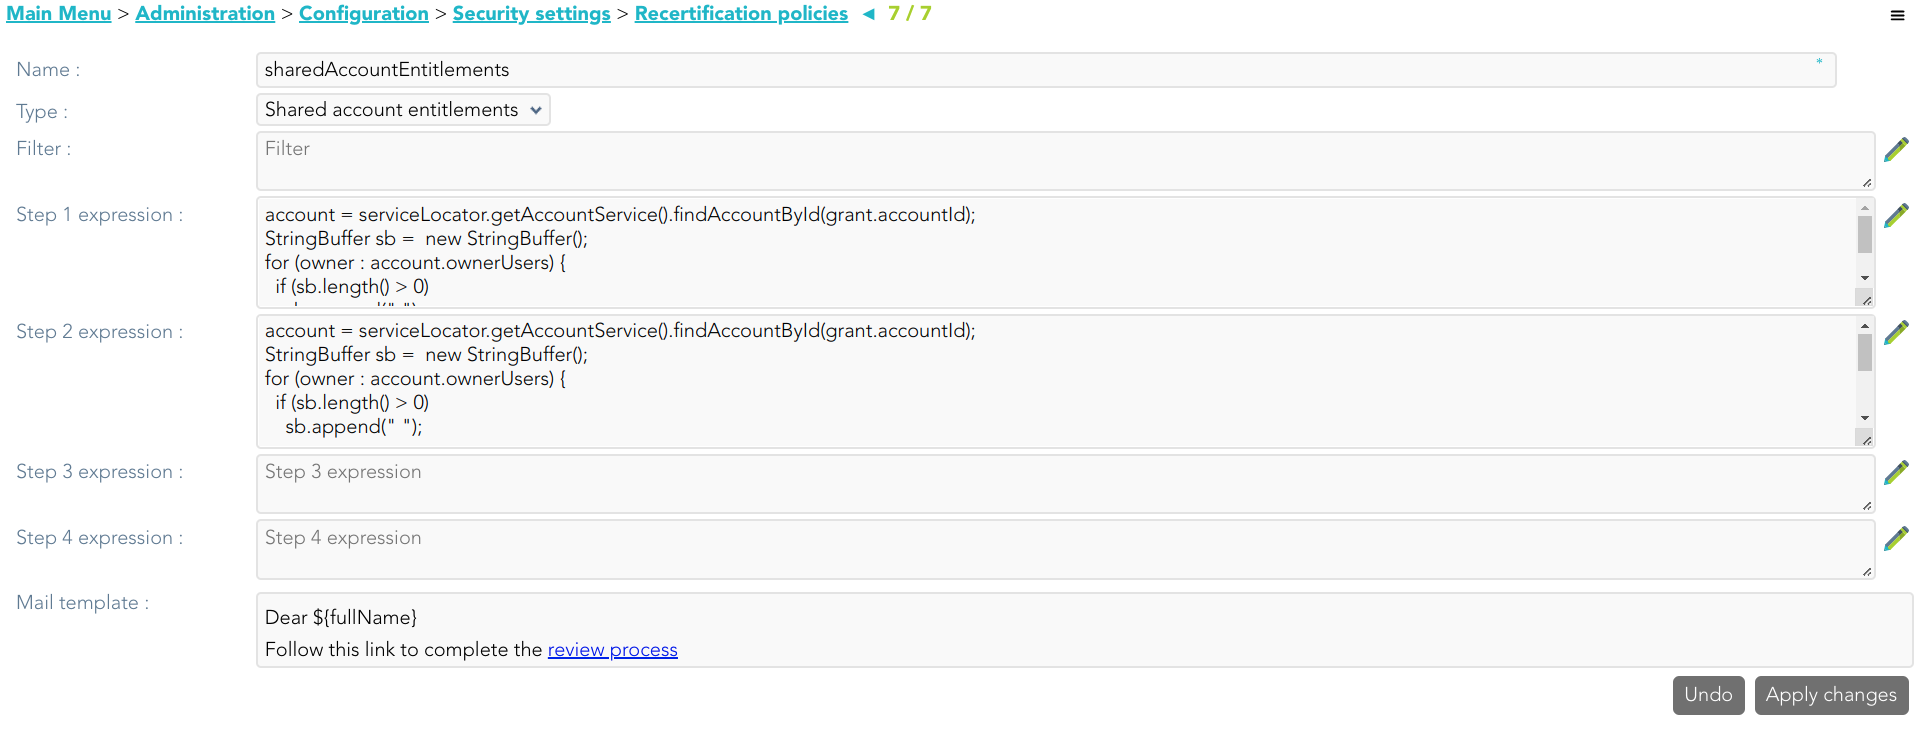
- Name: name to identify the policy
- Type: list of available recertification types.
- User entitlements: the recertification process will be conducted to review user access rights.
- Role definitions: the recertification process will be conducted to review the relationship between roles.
- Share account entitlements: the recertification process will be conducted to review access rights to shared accounts.
- Filter: this allows you to define a script to identify the grant list to which to apply the recertification process. The grant object (*1) is always available. You can use the Enumeration SoDRisk to compare:
- SOD_LOW
- SOD_HIGH
- SOD_FORBIDDEN
- SOD_NA
- Step 1 expression: this allows you to define a script to determine who is or are in charge to approve or deny the recertification process in the first level.
- Step 2 expression: this allows you to define a script to determine who is or are in charge to approve or deny the recertification process after the first level of approval.
- Step 3 expression: this allows you to define a script to determine who is or are in charge to approve or deny the recertification process after the second level of approval.
- Step 4 expression: this allows you to define a script to determine who is or are in charge to approve or deny the recertification process after the third level of approval.
- Mail Template: this allows you to define a template to send an email to the people in charge to approve or deny. Be in mind, that to work fine, the review process link must be ${url}
(*1) grant object is a com.soffid.iam.api.RoleAccount object.
Examples
Some sample scripts for the filters and approval steps are shown below
Filter
Return all grants with risk.
return grant.sodRisk != null
	&& grant.sodRisk != es.caib.seycon.ng.comu.SoDRisk.SOD_NA;
Steps
account = serviceLocator.getAccountService().findAccountById(grant.accountId);
StringBuffer sb =  new StringBuffer();
for (owner : account.ownerUsers) {
  if (sb.length() > 0)
    sb.append(" ");

  sb.append(owner);
}
if (sb.length() > 0)
  return sb.toString();
else
  return "admin";
com.soffid.iam.api.Role role = serviceLocator.getApplicationService().findRoleByNameAndSystem(grant.roleName, grant.system);
StringBuffer sb = new StringBuffer();
List owners = role.getAttributes().get("owner");
if (owners != null) {
for (owner : account.ownerUsers) {
if (sb.length() > 0)
sb.append(" ");
sb.append(owner);
}
}
if (sb.length() == 0)
return "admin";
else
return sb.toString();Mail template

Actions
Recertification policies query
|
Add new |
Allows you to add a new Recertification policy. You can choose that option on the hamburger menu or click the add button (+). To add a new it is necessary to fill in the required fields. |
| Delete |
Allows you to remove one or moreRecertification policies by selecting one or more records and next clicking the button with the subtraction symbol (-). To perform that action, Soffid will ask you for confirmation, you could confirm or cancel the operation. |
| Import |
Allows you to upload a CSV file with the Recertification policies to add or update the attribute definition to Soffid. First, you need to pick up a CSV file, that CSV has to contain a specific configuration. Then you need to check the content to be loaded, it is allowed to choose if you want or not to load a specific attribute. And finally, you need to select the mappings for each column of the CSV file to import the data correctly and click the Import button. |
|
Download CSV file |
Allows you to download a CSV file with the basic information of all Recertification policies. |
|
Add or remove columns |
Allows you to show and hide columns in the table. You can also set the order in which the columns will be displayed. The selected columns and order will be saved for the next time Soffid displays the page to the user. |
Recertification policies details
| Apply changes |
Allows you to save the data of a new policy or to update the data of a specific policy and quit. To save the data it will be mandatory to fill in the required fields. |
|
Save |
Allows you to save the data of a new policy or to update the data of a specific policy. To save the data it will be mandatory to fill in the required fields. |
|
Delete |
Allows you to remove a specific policy. You can choose that option on the hamburger icon. To perform that action, Soffid will ask you for confirmation, you could confirm or cancel the operation. |
|
Undo |
Allows you to quit without applying any changes. |
https://download.soffid.com/doc/console/latest/uml/es/caib/seycon/ng/comu/SoDRisk.html
Recertification campaigns
Description
Soffid allows you to define new campaigns to review the users' access rights and to assign who has to recertify or revoke their entitlements.
You can create a campaign related to a previously defined recertification policy. Depending on the policy type selected, you will have to fill in some required information to create a new campaign.
To create a new campaign, will be mandatory that one or more accounts for recertification exist.
When a campaign is created, the initial status will be Preparation. This status will change to Active automatically. The Finished status will be when the proper users approve or deny the recertifications
Menu option
Screen overview
Custom attributes
Basic
- Name: name to identify the campaign.
- Template: select the policy that will be applied. That has to be defined previously on the Recertification policies page.
- Groups: list of user groups where the campaign will be applied. You can choose one or more.
- Information Systems: list of information systems where the campaign will be applied. You can choose one or more.
Others
- Start date: date and time when the campaign started. This field is generated automatically.
- Finish date: date and time when the campaign finished. This field is generated automatically.
- Status: recertification campaign process status. Three statuses are available:
- Preparation: it is the first status when the campaign is created.
- Active: it is the status when the recertification campaign is ready to be applied.
- Finished: it is the status when the recertification campaign ends.
- Groups: users groups list to which the campaign will be applied.
- Group name
- Status
- % done
- Applications: application list to which the campaign will be applied.
- Application name
- Status
- % done
- Group members: list of users who belong to the selected group.
- Active
- User
- Creation date
- Status
- Step 1
- Step 2
- Step 3
- Step 4
Actions
Recertification campaigns query
|
Add new |
Allows you to add a new Recertification policy. You can choose that option on the hamburger menu or click the add button (+). To add a new it is necessary to fill in the required fields. |
| Delete |
Allows you to remove one or moreRecertification policies by selecting one or more records and next clicking the button with the subtraction symbol (-). To perform that action, Soffid will ask you for confirmation, you could confirm or cancel the operation. |
| Import |
Allows you to upload a CSV file with the Recertification policies to add or update the attribute definition to Soffid. First, you need to pick up a CSV file, that CSV has to contain a specific configuration. Then you need to check the content to be loaded, it is allowed to choose if you want or not to load a specific attribute. And finally, you need to select the mappings for each column of the CSV file to import the data correctly and click the Import button. |
|
Download CSV file |
Allows you to download a CSV file with the basic information of all Recertification policies. |
|
Add or remove columns |
Allows you to show and hide columns in the table. You can also set the order in which the columns will be displayed. The selected columns and order will be saved for the next time Soffid displays the page to the user. |
Recertification campaigns details
| Click group |
By clicking a record group, Soffid will display the group members' list. |
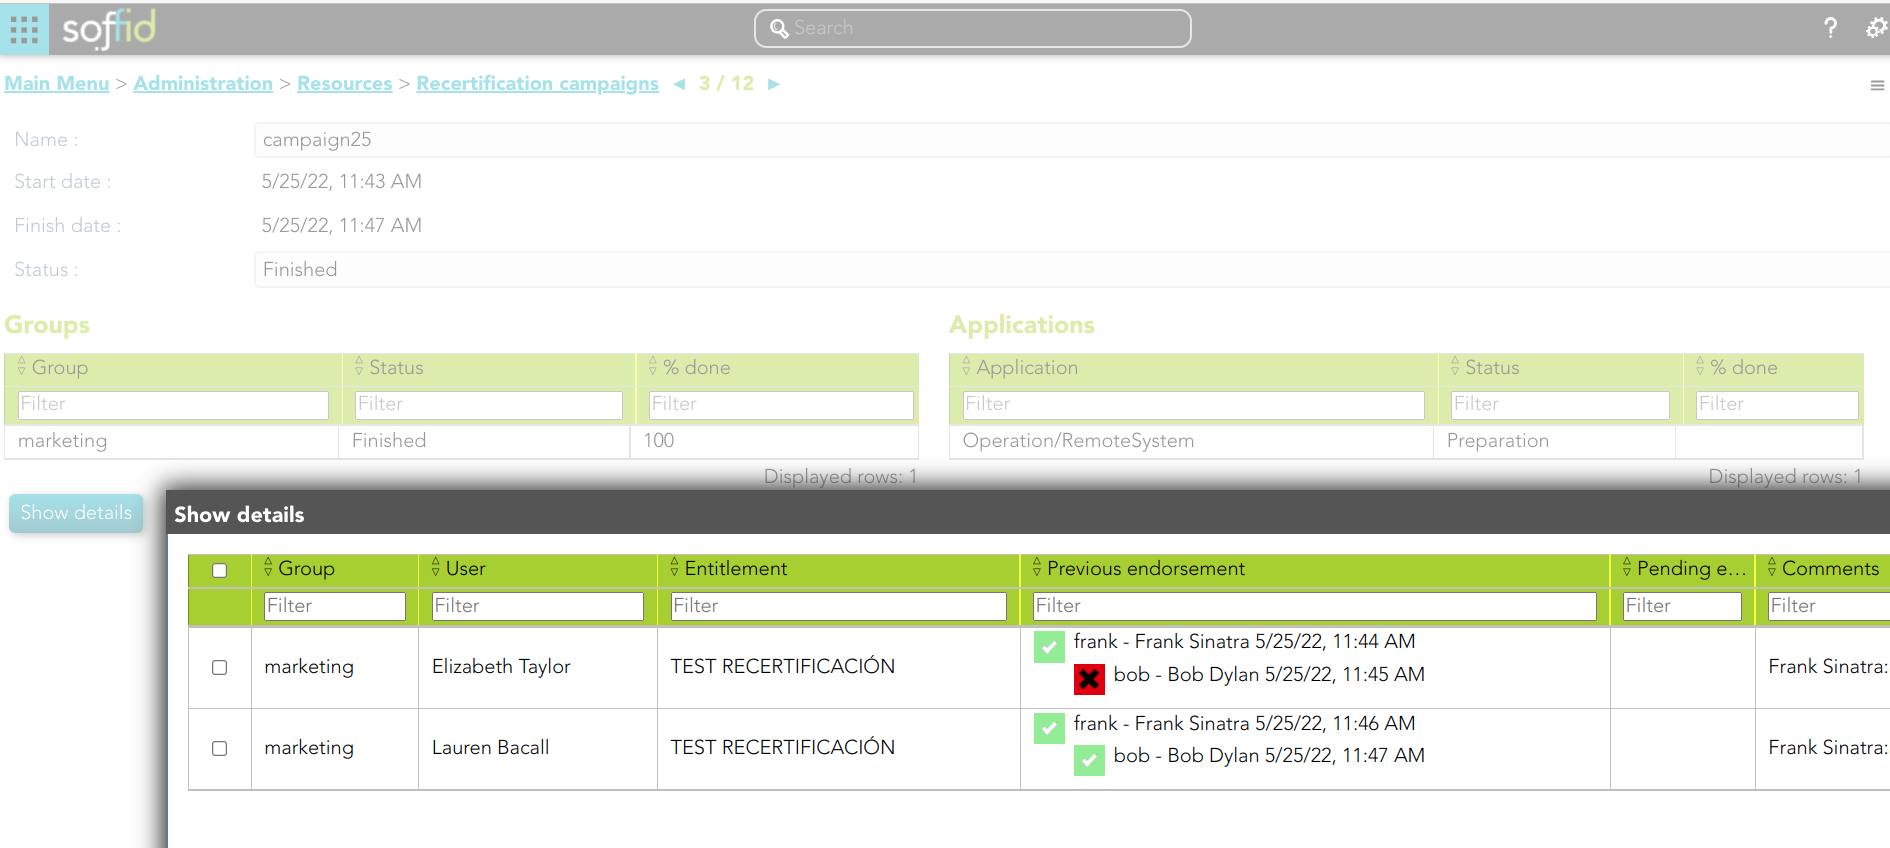
| Show details |
Displays a detailed list with the recertification data for each user to recertificate. |
| Delete |
Allows you to delete a recertification campaign. You can select this option on the hamburger menu. It is not allowed to delete a recertification process once it has been started. |
Recertification details
| Delegate |
Allows you to delegate to another user the recertification by clicking a record group o by selecting one or more records, Soffid will display the group members' list. |
| Back |
Allows you to delegate the operation to approve or deny the process. Once you click the delegate option, Soffid will allow you to select one or more users to delegate the process. |
Recertifications to do
Description
When a campaign is run, the pending recertifications will be displayed in the Recertifications to-do list of the proper user who has to Accept or Deny the recertification. The user who has to manage the recertification can delegate it as well to another user to manage it.
Menu option
Screen overview
Custom attributes
Recertifications campaign list
- Name: name to identify the campaign.
- Start date: date and time when the campaign started.
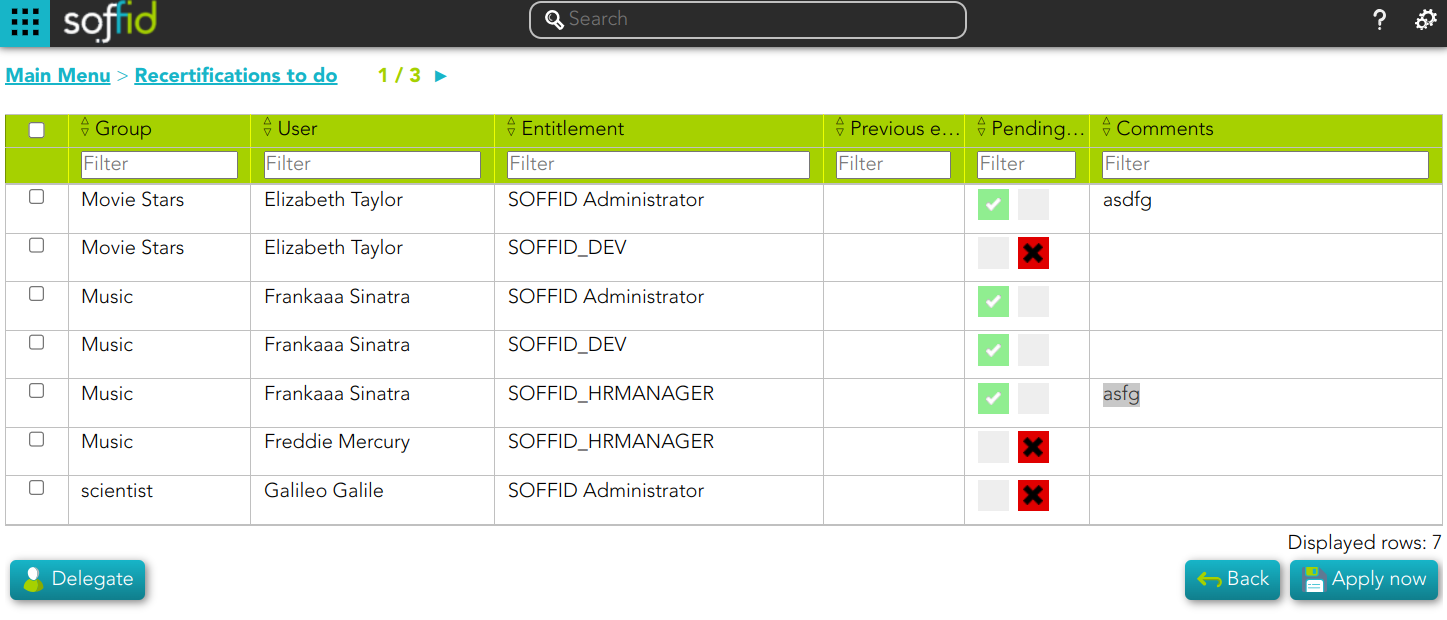
Recertifications to do list
- Group: group to which recertification applies.
- User: user to whom permissions will be assigned or not. If you click the user, Soffid will display a new page with the user data.
- Entitlement: the role that you can assign or not to the user. If you click the role, Soffid will display a new page with the role data.
- Previous endorsement: status previous endorsement.
- Pending endorsement: allows you to select the option to approve or deny.
- Comments: this allows you to write a comment.
Actions
Recertifications campaign
|
Click recertification |
If you click one campaign record, Soffid will display the recertifications to do list. |
Recertifications to do list
|
Pending endorsement |
In the pending endorsement column, you can approve or deny the recertification for each user who appears on this list. You can approve or deny by clicking on the proper check
|
| Apply changes |
Allows you to save the recertifications accepted and denied. Before applying changes, you need to select for each recertification if you approve or deny it. Also, you can write a comment. Once you apply changes, the recertifications executed will be removed from the recertifications to do list. |
|
Back |
Allows you to quit without applying any changes. |
|
Delegate |
Allows you to delegate the operation to approve or deny the process. Once you click the delegate option, Soffid will allow you to select one or more users to delegate the process. |
|
Browse user |
By clicking the user, Soffid will open a new window with the user data. |
|
Browse entitlement |
By clicking the entitlement, Soffid will open a new window with the role data |
Recertification Examples
Recertification Examples
Shared account entitlements