Full PAM installation using Docker Compose
Introduction
This tutorial describes all the steps required to install and configure a basic PAM environment for a local, demo or small production environment.
Prerequisites
- We have a Linux machine; Ubuntu 24 has been used for this tutorial.
- Docker and the Docker Compose plugin are already installed.
- The database, Console and Syncserver have already been installed.
- The Linux administrator user has sudo privileges.
Step 1: Prepare certificates
1.1 Some initial steps
This tutorial will use self-signed certificates generated for a lab environment.
If you have your own certificates, follow the steps depending on the file type.
For this tutorial, we will be using the following hostnames: store.soffid4.local and launcher.soffid4.local
Go to the current Soffid 4 directory where the docker-compose.yaml is located.
cd /home/user/lab/soffid4/ ---> (this is an example)Add the hostnames in your hosts file.
sudo vim /etc/hosts ---> (use vim or your favourite editor)127.0.0.1 store.soffid4.local
127.0.0.1 launcher.soffid4.localAnd now you will need java, confirm is you have it or not.
java -versionIf you do not have it, for example install java 17 (you can install another version).
sudo apt-get update
sudo apt-get install openjdk-17-jdk
java -version
1.2 Generate .key files
When you run the command, you will be prompted for a password. In this tutorial, we will always use the value 12345678; please replace this with the password of your choice (minimum 8 characters)
sudo openssl genrsa -aes256 -out store.soffid4.local.key
sudo openssl genrsa -aes256 -out launcher.soffid4.local.key
1.3 Generate .pem files
When you run the command, the prompt will ask for the CN (Common Name) attribute; use the values from our domains: store.soffid4.local or launcher.soffid4.local
sudo openssl req -x509 -days 1000 -new -key store.soffid4.local.key -out store.soffid4.local.pem
sudo openssl req -x509 -days 1000 -new -key launcher.soffid4.local.key -out launcher.soffid4.local.pem
1.3 Generate .pfx files
sudo openssl pkcs12 -export -in store.soffid4.local.pem -inkey store.soffid4.local.key -out store.soffid4.local.pfx
sudo openssl pkcs12 -export -in launcher.soffid4.local.pem -inkey launcher.soffid4.local.key -out launcher.soffid4.local.pfx
1.4 Generate .jks files
sudo keytool -v -importkeystore -srckeystore store.soffid4.local.pfx -srcstoretype PKCS12 -destkeystore store.soffid4.local.jks -deststoretype JKS -destkeypass 12345678 -srcstorepass 12345678 -deststorepass 12345678
sudo keytool -v -importkeystore -srckeystore launcher.soffid4.local.pfx -srcstoretype PKCS12 -destkeystore launcher.soffid4.local.jks -deststoretype JKS -destkeypass 12345678 -srcstorepass 12345678 -deststorepass 12345678
Step 2: Store configuration
2.1 Add the store in the yaml file
Edit your docker-compose.yaml.
sudo vim docker-compose.yamlAdd the store service in your docker-compose.yaml.
For this tutorial, ports 8090 and 8091 have been opened.
services:
  store:
    image: soffid/pam-store:1.4.88
    environment:
      JAVA_KEYSTORE: /opt/soffid/tomee/certificates/store.soffid4.local.jks
      KEYSTORE_PASS: 12345678
    ports:
      - "8090:8080"
      - "8091:8443"
    networks:
      - network
    volumes:
      - store-trustedcerts:/opt/soffid/tomee/trustedcerts
      - store-certificates:/opt/soffid/tomee/certificates
      - store-data:/opt/soffid/tomee/data

volumes:
  store-trustedcerts:
    name: soffid4-pam-store-trustedcerts
  store-certificates:
    name: soffid4-pam-store-certificates
  store-data:
    name: soffid4-pam-store-data
Regenerate the docker containers.
sudo docker compose up -d2.2 Create users
The console and the launcher will need users to connect to the store.
We have to run a script in the store container to create the user. This script has two parameters, the user name, and the role. The role opcions are "console" or "launcher".
When the user is created, its password is generated and displayed in the script’s output; please copy and save it for use in the next steps.
Create the user-console.
docker compose exec store /opt/soffid/tomee/bin/add-user.sh user-console console/bin/bash: warning: setlocale: LC_ALL: cannot change locale (en_US.UTF-8)
Password: cccccc/Qul9NFIqQnDU73gYccccVHThyew7Qt8Hqpf0rEzVq1Ft7azcccccccCreate the user-launcher.
docker compose exec store /opt/soffid/tomee/bin/add-user.sh user-launcher launcher/bin/bash: warning: setlocale: LC_ALL: cannot change locale (en_US.UTF-8)
Password: asdadadasdads/Qul9NFIqQnDU73gYccccVHThyew7Qt8Hqpf0rEzVq1Ft7aadadadasd2.3 Add the certificate
Copy the jks certificate into the container.
docker compose cp store.soffid4.local.jks store:/opt/soffid/tomee/certificatesRestart the store.
docker compose restart store2.4 Monitoring the store
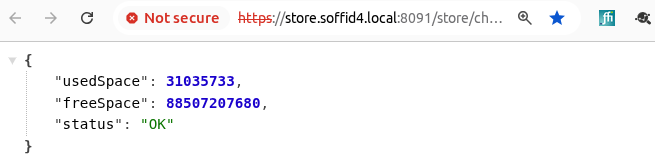
If the store has started successfully, we will be able to access the store’s monitoring page.
https://store.soffid4.local:8091/store/check
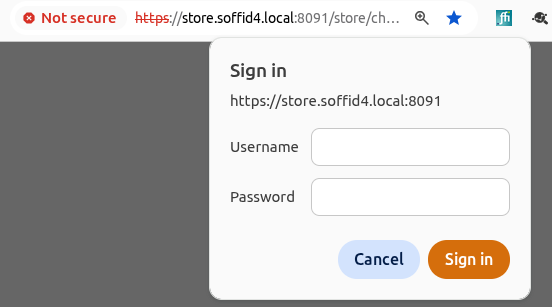
You must use the user-console username to log in.
This is result.
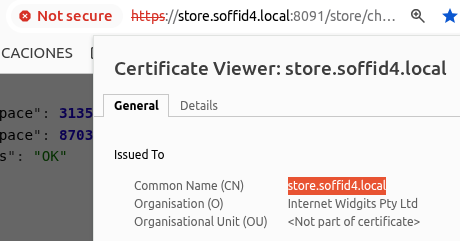
Confirm the CN name (Not secure > Certificate details).
If something has gone wrong, you need to check the log.
sudo docker compose logs storeStep 3: Launcher configuration
3.1 Add the launcher in the yaml file
Edit your docker-compose.yaml.
sudo vim docker-compose.yamlAdd the launcher service in your docker-compose.yaml.
For this tutorial, ports 8092 and 8093 have been opened.
Update the STORE_PASSWORD value for the one generated previously.
services:
  launcher:
    image: soffid/pam-launcher:1.4.88
    environment:
      JAVA_KEYSTORE: /opt/soffid/tomee/certificates/launcher.soffid4.local.jks
      KEYSTORE_PASS: 12345678
      STORE_SERVER: http://store:8080
      STORE_USER: user-launcher
      STORE_PASSWORD: asdadadasdads/Qul9NFIqQnDU73gYccccVHThyew7Qt8Hqpf0rEzVq1Ft7aadadadasd
    ports:
      - "8092:8080"
      - "8093:8443"
    networks:
      - network
    volumes:
      - launcher-trustedcerts:/opt/soffid/tomee/trustedcerts
      - launcher-certificates:/opt/soffid/tomee/certificates
      - launcher-data:/opt/soffid/tomee/launcher
      - /var/run/docker.sock:/var/run/docker.sock

volumes:
  launcher-trustedcerts:
    name: soffid4-pam-launcher-trustedcerts
  launcher-certificates:
    name: soffid4-pam-launcher-certificates
  launcher-data:
    name: soffid4-pam-launcher-data
Regenerate the docker containers.
sudo docker compose up -d3.2 Add the certificate
Copy the jks certificate into the container.
docker compose cp launcher.soffid4.local.jks launcher:/opt/soffid/tomee/certificates
Restart the launcher.
docker compose restart launcher3.3 Monitoring the launcher
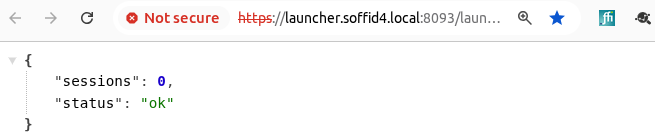
If the launcher has started successfully, we will be able to access the store’s monitoring page.
https://launcher.soffid4.local:8093/launch/status
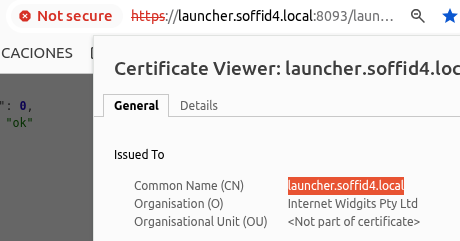
This is result.
Confirm the CN name (Not secure > Certificate details).
If something has gone wrong, you need to check the log.
sudo docker compose logs launcherStep 4: Register certificates
4.1 In the Console
Add the PAM hostnames in the console service.
Check the IP of the docker environtment, in this tutorial 192.168.122.1.
sudo vim docker-compose.yaml

    extra_hosts:
      - store.soffid4.local:192.168.122.1
      - launcher.soffid4.local:192.168.122.1

docker compose up -d
Created the PAM certificates for the Console.
docker compose exec -it console bash
cd /opt/soffid/iam-console-4/trustedcerts
openssl s_client -connect store.soffid4.local:8091 < /dev/null | sed -ne '/-BEGIN CERTIFICATE-/,/-END CERTIFICATE-/p' > store.soffid4.local.crt
openssl s_client -connect launcher.soffid4.local:8093 < /dev/null | sed -ne '/-BEGIN CERTIFICATE-/,/-END CERTIFICATE-/p' > launcher.soffid4.local.crt
exit
docker compose restart console
4.2 Add a store certificate to the sync server
Add the PAM hostnames in the syncserver service.
sudo vim docker-compose.yaml

    extra_hosts:
      - store.soffid4.local:192.168.122.1

docker compose up -d
Add a store certificate to the sync server
docker compose exec -it syncserver bash
cd /opt/soffid/iam-sync/conf
openssl s_client -connect store.soffid4.local:8091 < /dev/null | sed -ne '/-BEGIN CERTIFICATE-/,/-END CERTIFICATE-/p' > store.soffid4.local.crt
keytool -import -file store.soffid4.local.crt -keystore cacerts -alias store.soffid4.local
password: changeit
exit
docker compose restart syncserver
4.3 Add the store/syncserver certificate to the launcher
Add hostnames in the launcher service.
sudo vim docker-compose.yaml

    extra_hosts:
      - store.soffid4.local:192.168.122.1

docker compose up -d
Add the store/syncserver certificate to the launcher.
docker compose exec -it launcher bash
cd /opt/soffid/tomee/trustedcerts
openssl s_client -connect store.soffid4.local:8091 < /dev/null | sed -ne '/-BEGIN CERTIFICATE-/,/-END CERTIFICATE-/p' > store.soffid4.local.crt
openssl s_client -connect sync-server-version4.network:1768 < /dev/null | sed -ne '/-BEGIN CERTIFICATE-/,/-END CERTIFICATE-/p' > sync-server-version4.network.crt
exit
docker compose restart launcher
Step 5: Session types
5.1 Introduction
When starting a user session through the launcher, it requires images for each session type; you must load the latest docker image so that the launcher can start the session.
5.2 load images
Download only the session types that you need.
sudo docker pull soffid/soffid-pasr-ssh:latest
sudo docker pull soffid/soffid-pasr-rdp:latest
sudo docker pull soffid/soffid-pasr-http:latest
sudo docker pull soffid/soffid-pasr-https:latest
sudo docker pull soffid/soffid-pasr-jdbc:latest
sudo docker pull soffid/soffid-pasr-tn5250:latest
sudo docker pull soffid/soffid-pasr-kube:latest
sudo docker pull soffid/soffid-pasr-google-chrome:latest
sudo docker pull soffid/soffid-pasr-vnc:latest
sudo docker pull soffid/soffid-pasr-iaccess:latest
sudo docker pull soffid/soffid-pasr-sap:latest
sudo docker pull soffid/soffid-pasr-gke:latest
5.3 Save web sessions
To save a web sessions you will need to add some parameters to the launcher system.properties.
If it already exists, do nothing.
docker compose exec -it launcher bash
cd /opt/soffid/tomee/conf/
apt-get update
apt-get install vim
vim system.properties

    SOFFID_PAM_PARAMS_http=--shm-size=1024m  --privileged -eVNCSERVER=yes
    SOFFID_PAM_PARAMS_https=--shm-size=1024m  --privileged -eVNCSERVER=yes

exit
docker compose restart launcher
Step 6: Configure PAM in Console
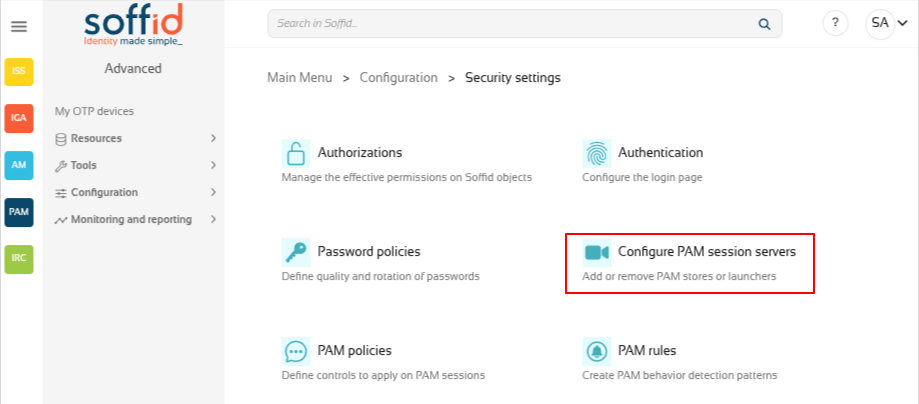
6.1 Introduction
We can now go to the Configure PAM session servers page.
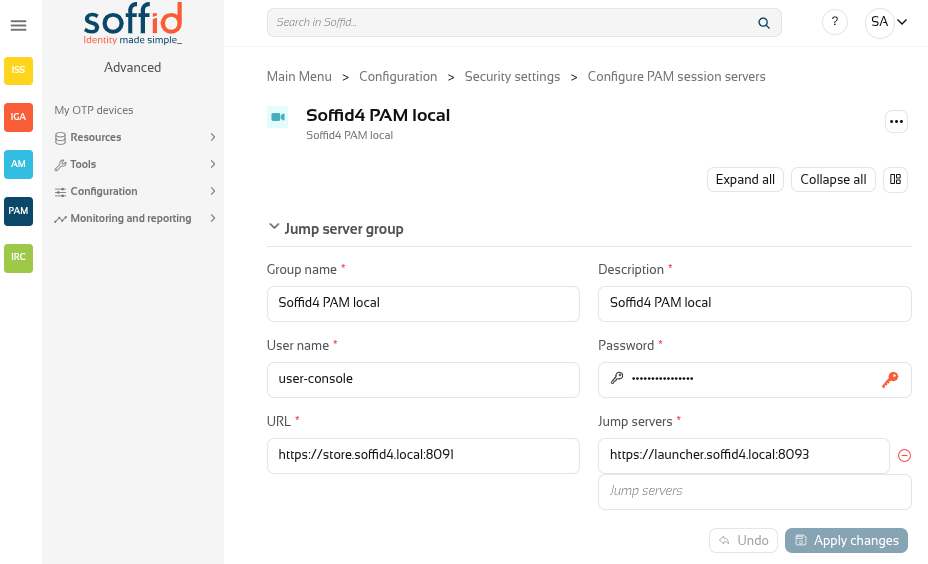
6.2 Create the PAM group
Create a new group and you register the store with its user and password, along with the launcher.
If everything goes well, it will let you to save the changes!
Step 7: Open a web session
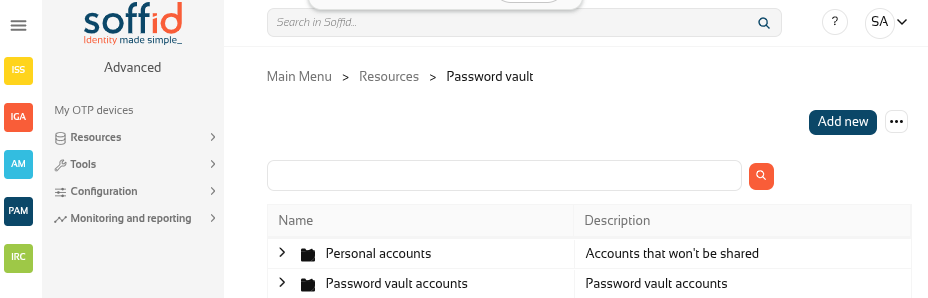
7.1 Password vault
Go to Password vault page.
7.2 Create an account
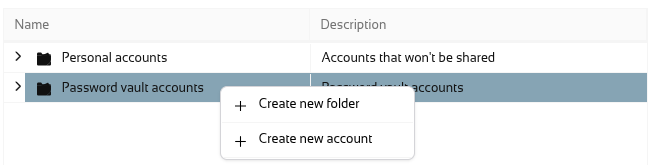
Create a new folder "Password vault accounts" with the button "Add new".
Now, on the "Password vault accounts", click the three poins icon and "Create new account".
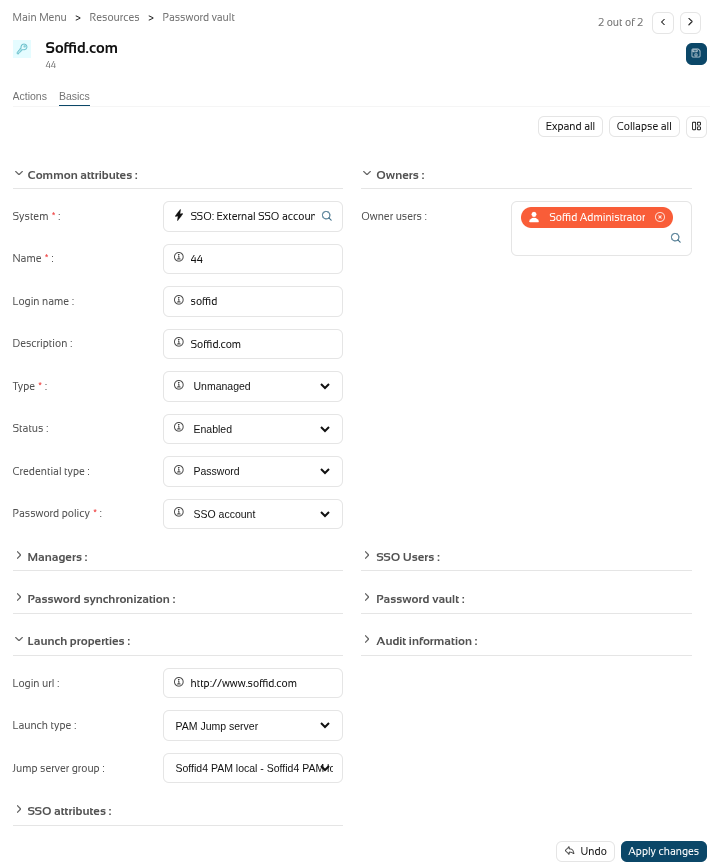
Add these values and click the dick button.
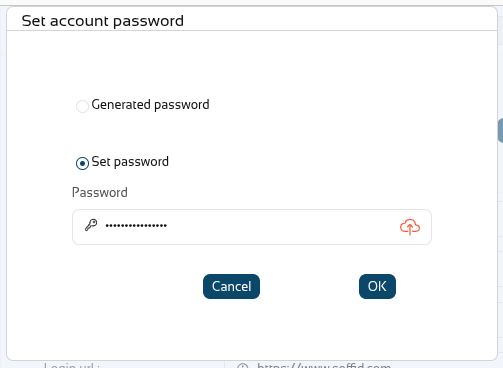
Save a dummy password.

7.3 Launch
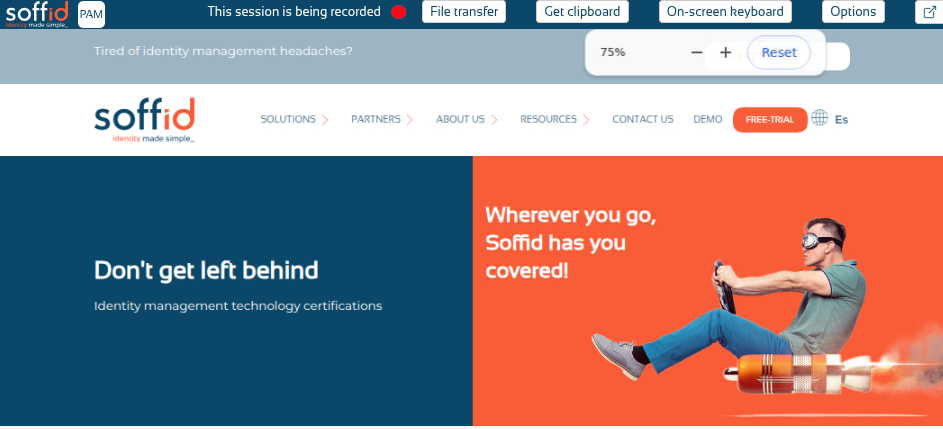
Click the Launch button to confirm that the launcher can open the session type correctly.

Now you have the PAM environment ready to continu