This tutorial will use **self-signed certificates** generated for a lab environment.
If you have your **own certificates**, follow the steps depending on the file type.
For this tutorial, we will be using the following hostnames: **store.soffid4.local** and **launcher.soffid4.local**
Go to the current Soffid 4 **directory** where the docker-compose.yaml is located. ```shell cd /home/user/lab/soffid4/ ---> (this is an example) ``` Add the hostnames in your **hosts** file. ```shell sudo vim /etc/hosts ---> (use vim or your favourite editor) ``` ```shell 127.0.0.1 store.soffid4.local 127.0.0.1 launcher.soffid4.local ``` And now you will need **java**, confirm is you have it or not. ```shell java -version ``` If you do not have it, for example **install java 17** (you can install another version). ```shell sudo apt-get update sudo apt-get install openjdk-17-jdk java -version ``` #### 1.2 Generate .key filesWhen you run the command, you will be prompted for a **password**. In this tutorial, we will always use the value **12345678**; please replace this with the password of your choice (minimum 8 characters)
```shell sudo openssl genrsa -aes256 -out store.soffid4.local.key sudo openssl genrsa -aes256 -out launcher.soffid4.local.key ``` #### 1.3 Generate .pem filesWhen you run the command, the prompt will ask for the **CN (Common Name)** attribute; use the values from our domains: **store.soffid4.local** or **launcher.soffid4.local**
```shell sudo openssl req -x509 -days 1000 -new -key store.soffid4.local.key -out store.soffid4.local.pem sudo openssl req -x509 -days 1000 -new -key launcher.soffid4.local.key -out launcher.soffid4.local.pem ``` #### 1.3 Generate .pfx files ``` sudo openssl pkcs12 -export -in store.soffid4.local.pem -inkey store.soffid4.local.key -out store.soffid4.local.pfx sudo openssl pkcs12 -export -in launcher.soffid4.local.pem -inkey launcher.soffid4.local.key -out launcher.soffid4.local.pfx ``` #### 1.4 Generate .jks files ``` sudo keytool -v -importkeystore -srckeystore store.soffid4.local.pfx -srcstoretype PKCS12 -destkeystore store.soffid4.local.jks -deststoretype JKS -destkeypass 12345678 -srcstorepass 12345678 -deststorepass 12345678 sudo keytool -v -importkeystore -srckeystore launcher.soffid4.local.pfx -srcstoretype PKCS12 -destkeystore launcher.soffid4.local.jks -deststoretype JKS -destkeypass 12345678 -srcstorepass 12345678 -deststorepass 12345678 ``` ## Step 2: Store configuration #### 2.1 Add the store in the yaml file **Edit** your docker-compose.yaml. ``` sudo vim docker-compose.yaml ``` **Add** the store service in your docker-compose.yaml.For this tutorial, **ports 8090** and **8091** have been opened.
Replace **<YOUR-KEYSTORE-PASSWORD>** for your password
```YAML services: store: image: soffid/pam-store:1.4.88 environment: JAVA_KEYSTORE: /opt/soffid/tomee/certificates/store.soffid4.local.jks KEYSTORE_PASS:The **console** and the **launcher** will need **users** to **connect** to the **store**.
We have to **run** a **script** in the **store** container to **create the user**. This script has two parameters, the user name, and the role. The role opcions are "console" or "launcher".
When the user is created, its **password** is **generated** and displayed in the script’s output; please **copy and save it** for use in the next steps.
Create the **user-console**. ```shell docker compose exec store /opt/soffid/tomee/bin/add-user.sh user-console console ``` ``` /bin/bash: warning: setlocale: LC_ALL: cannot change locale (en_US.UTF-8) Password: cccccc/Qul9NFIqQnDU73gYccccVHThyew7Qt8Hqpf0rEzVq1Ft7azccccccc ``` Create the **user-launcher**. ```shell docker compose exec store /opt/soffid/tomee/bin/add-user.sh user-launcher launcher ``` ``` /bin/bash: warning: setlocale: LC_ALL: cannot change locale (en_US.UTF-8) Password: asdadadasdads/Qul9NFIqQnDU73gYccccVHThyew7Qt8Hqpf0rEzVq1Ft7aadadadasd ``` #### 2.3 Add the certificate Copy the **jks certificate** into the container. ```sqlite docker compose cp store.soffid4.local.jks store:/opt/soffid/tomee/certificates ``` **Restart** the store. ```sqlite docker compose restart store ``` #### 2.4 Monitoring the storeIf the store has started successfully, we will be able to access the store’s **monitoring** page.
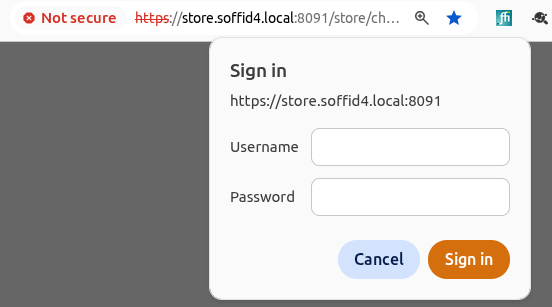
[https://store.soffid4.local:8091/store/check](https://store.soffid4.local:8091/store/check)You must use the **user-console** to log in.
[](https://bookstack.soffid.com/uploads/images/gallery/2026-05/Cg1rAopu5r0DnPWm-image.png) This is result. [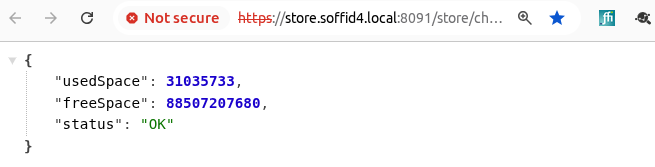](https://bookstack.soffid.com/uploads/images/gallery/2026-05/Y7bHklUUrXA3njKT-image.png) Confirm the CN name (Not secure > Certificate details). [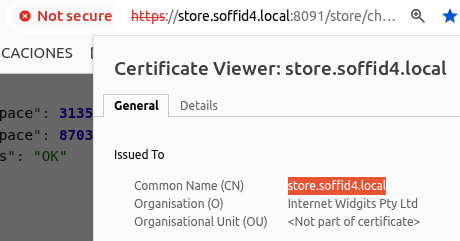](https://bookstack.soffid.com/uploads/images/gallery/2026-05/09UPW3zn5SlDFRUH-image.png) If something has gone wrong, you need to check the log. ```sqlite docker compose logs store ``` ## Step 3: Launcher configuration #### 3.1 Add the launcher in the yaml file **Edit** your docker-compose.yaml. ``` sudo vim docker-compose.yaml ``` **Add** the launcher service in your docker-compose.yaml.For this tutorial, **ports 8092** and **8093** have been opened.
Update the **<YOUR-USER-LAUNCHER-PASSWORD>** value for the one generated previously.
```YAML services: launcher: image: soffid/pam-launcher:1.4.88 environment: JAVA_KEYSTORE: /opt/soffid/tomee/certificates/launcher.soffid4.local.jks KEYSTORE_PASS: 12345678 STORE_SERVER: http://store:8080 STORE_USER: user-launcher STORE_PASSWORD:If the launcher has started successfully, we will be able to access the store’s **monitoring** page.
[https://launcher.soffid4.local:8093/launch/status](https://launcher.soffid4.local:8093/launch/status) This is result. [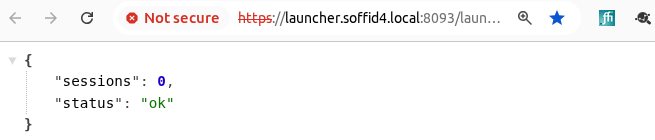](https://bookstack.soffid.com/uploads/images/gallery/2026-05/fRPor6qeHwFRzXk9-image.png) Confirm the CN name (Not secure > Certificate details). [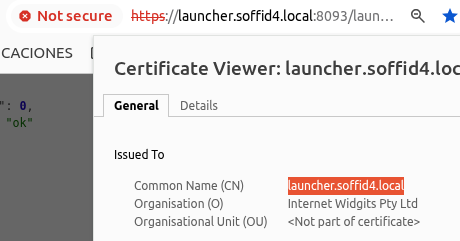](https://bookstack.soffid.com/uploads/images/gallery/2026-05/f6SQiTaB4nERcfke-image.png) If something has gone wrong, you need to check the log. ```sqlite docker compose logs launcher ``` ## Step 4: Register certificates #### 4.1 In the Console Add the PAM hostnames in the console service.Check the **IP** of the **docker environtment**, in this tutorial 192.168.122.1.
```sqlite sudo vim docker-compose.yaml extra_hosts: - store.soffid4.local:192.168.122.1 - launcher.soffid4.local:192.168.122.1 docker compose up -d ``` Created the PAM certificates for the Console. ```sqlite docker compose exec -it console bash cd /opt/soffid/iam-console-4/trustedcerts openssl s_client -connect store.soffid4.local:8091 < /dev/null | sed -ne '/-BEGIN CERTIFICATE-/,/-END CERTIFICATE-/p' > store.soffid4.local.crt openssl s_client -connect launcher.soffid4.local:8093 < /dev/null | sed -ne '/-BEGIN CERTIFICATE-/,/-END CERTIFICATE-/p' > launcher.soffid4.local.crt exit docker compose restart console ``` #### 4.2 Add a store certificate to the sync server Add the PAM hostnames in the syncserver service. ```sqlite sudo vim docker-compose.yaml extra_hosts: - store.soffid4.local:192.168.122.1 docker compose up -d ``` Add a store certificate to the sync server ```sqlite docker compose exec -it syncserver bash cd /opt/soffid/iam-sync/conf openssl s_client -connect store.soffid4.local:8091 < /dev/null | sed -ne '/-BEGIN CERTIFICATE-/,/-END CERTIFICATE-/p' > store.soffid4.local.crt keytool -import -file store.soffid4.local.crt -keystore cacerts -alias store.soffid4.local password: changeit exit docker compose restart syncserver ``` #### 4.3 Add the store/syncserver certificate to the launcher Add hostnames in the launcher service. ```sqlite sudo vim docker-compose.yaml extra_hosts: - store.soffid4.local:192.168.122.1 docker compose up -d ``` Add the store/syncserver certificate to the launcher.Check if **sync-server-version4.network:1768** is the same in your environment (Console > syncserver moniroring).
```sqlite docker compose exec -it launcher bash cd /opt/soffid/tomee/trustedcerts openssl s_client -connect store.soffid4.local:8091 < /dev/null | sed -ne '/-BEGIN CERTIFICATE-/,/-END CERTIFICATE-/p' > store.soffid4.local.crt openssl s_client -connect sync-server-version4.network:1768 < /dev/null | sed -ne '/-BEGIN CERTIFICATE-/,/-END CERTIFICATE-/p' > sync-server-version4.network.crt exit docker compose restart launcher ``` ## Step 5: Session types #### 5.1 IntroductionWhen starting a user session through the launcher, it requires images for each **session type**; you must **load** the **latest** docker **image** so that the launcher can start the session.
#### 5.2 load imagesDownload only the **session types** that **you need**.
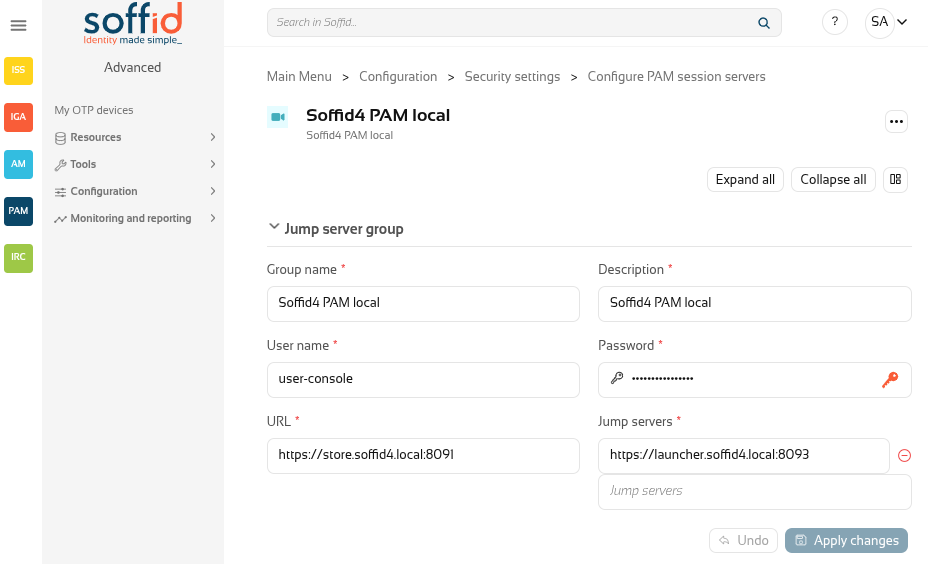
```sqlite docker pull soffid/soffid-pasr-ssh:latest docker pull soffid/soffid-pasr-rdp:latest docker pull soffid/soffid-pasr-http:latest docker pull soffid/soffid-pasr-https:latest docker pull soffid/soffid-pasr-jdbc:latest docker pull soffid/soffid-pasr-tn5250:latest docker pull soffid/soffid-pasr-kube:latest docker pull soffid/soffid-pasr-google-chrome:latest docker pull soffid/soffid-pasr-vnc:latest docker pull soffid/soffid-pasr-iaccess:latest docker pull soffid/soffid-pasr-sap:latest docker pull soffid/soffid-pasr-gke:latest ``` #### 5.3 Save web sessions To **save a web sessions** you will need to add some parameters to the launcher **system.properties**. If it already exists, do nothing. ```shell docker compose exec -it launcher bash cd /opt/soffid/tomee/conf/ apt-get update apt-get install vim vim system.properties SOFFID_PAM_PARAMS_http=--shm-size=1024m --privileged -eVNCSERVER=yes SOFFID_PAM_PARAMS_https=--shm-size=1024m --privileged -eVNCSERVER=yes exit docker compose restart launcher ``` ## Step 6: Configure PAM in Console #### 6.1 Introduction We can now go to the **Configure PAM session servers** page. [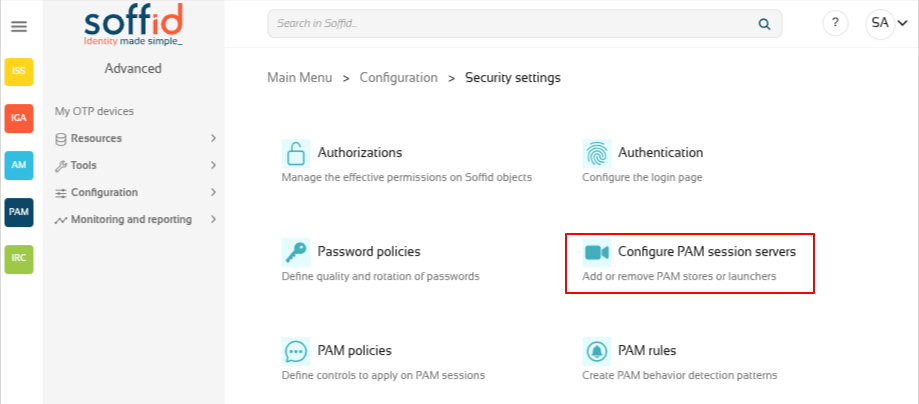](https://bookstack.soffid.com/uploads/images/gallery/2026-05/2laHWFH7kCNicSM3-image.png) #### 6.2 Create the PAM group Create a new group and you register the **store** with its **user** and **password**, along with the **launcher**.If everything goes well, it will let you to save the changes!
[](https://bookstack.soffid.com/uploads/images/gallery/2026-05/H5hsir5RfUy1rswQ-image.png) ## Step 7: Open a web session #### 7.1 Password vault Go to **Password vault** page. [](https://bookstack.soffid.com/uploads/images/gallery/2026-05/PrYmSOqepcB0xhqa-image.png) #### 7.2 Create an account Create a new folder "Password vault accounts" with the button "Add new". Now, on the "Password vault accounts", click the three poins icon and "Create new account". [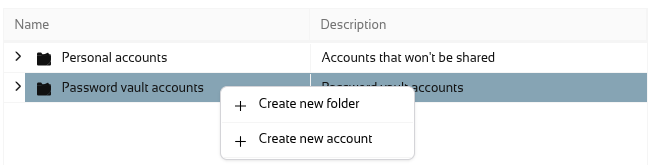](https://bookstack.soffid.com/uploads/images/gallery/2026-05/84AWorlMkHSQfowV-image.png) Add these values and click the dick button. [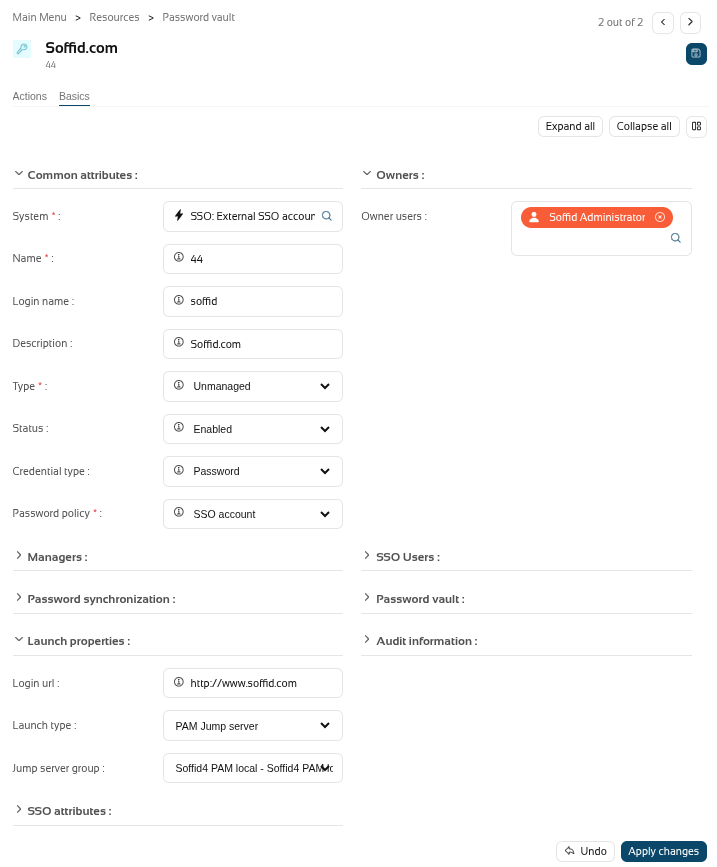](https://bookstack.soffid.com/uploads/images/gallery/2026-05/zTl1IFh7mpeXTmQp-image.png) Save a dummy password. [](https://bookstack.soffid.com/uploads/images/gallery/2026-05/8t1AIWjTZX6loHH5-image.png) [](https://bookstack.soffid.com/uploads/images/gallery/2026-05/Uw7cyNMlHlOwwSFF-image.png) #### 7.3 Launch Click the Launch button to confirm that the launcher can open the session type correctly. [](https://bookstack.soffid.com/uploads/images/gallery/2026-05/rYCkXEkuU2HGvtxX-image.png) [](https://bookstack.soffid.com/uploads/images/gallery/2026-05/KnxwmN7Xxt3gOlTj-image.png)Now you have the PAM environment ready to continu