# Step 4.3. Reconcile (Optional)
To request the accounts you must launch the reconciliation process. The main purpose of reconciling process is to provide a mechanism to ensure that all users are aligned on the specific roles and responsibilities.
## Step-by-step
1. First of all, you need to edit the agent must access the agent page in the following path:
`Main Menu > Administration > Configure Soffid > Integration engine > Agents`
2. Once you have accessed the agent page, Soffid will display all the active agents created on Soffid. You must click on the record of the agent you want to reconcile. Then Soffid will display a new window with the agent data.
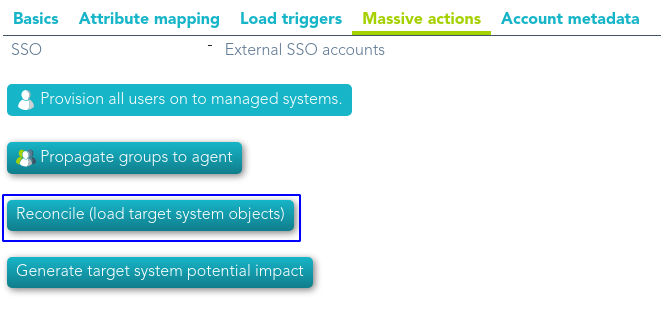
3. Then, you must click on the "Massive actions" tab.
4. At the "Massive actions" tab, you must click on the "Reconcile (load target system objects)" button to launch the reconciliation process.
5. Once completion of the conciliation process, Soffid will show the result of the process execution. You could click on the alert to view the process result.
5.1. Green alert: the process finished ok.
5.2. Red alert: the process finished with an error.
## Screen overview