# Step 4.1. Add database (Optional)
The fourth step, to add a database, is an **optional** step. You only need to configure when there is any database (SQL Server or Oracle) in some of the discovered hosts and you want to manage its accounts as privileged or shared accounts.
## Step-by-step
The network discovery process can discover and connect to the hosts. Then Soffid allows you to add databases as account repositories in the proper host.
1. First of all, the agent must be created on Soffid. That agent could be a SQL Server agent or an Oracle agent. To create an agent you can visit the next page[ Step 4.2. Create an agent (Optional)](https://bookstack.soffid.com/books/pam-implementation-guide/page/step-41-create-agent-optional "Step 4.1. Create agent (Optional)")
2. Then, you must access the network discovery page in the following path:
`Main Menu > Administration > Configuration > Integration engine > Network discovery`
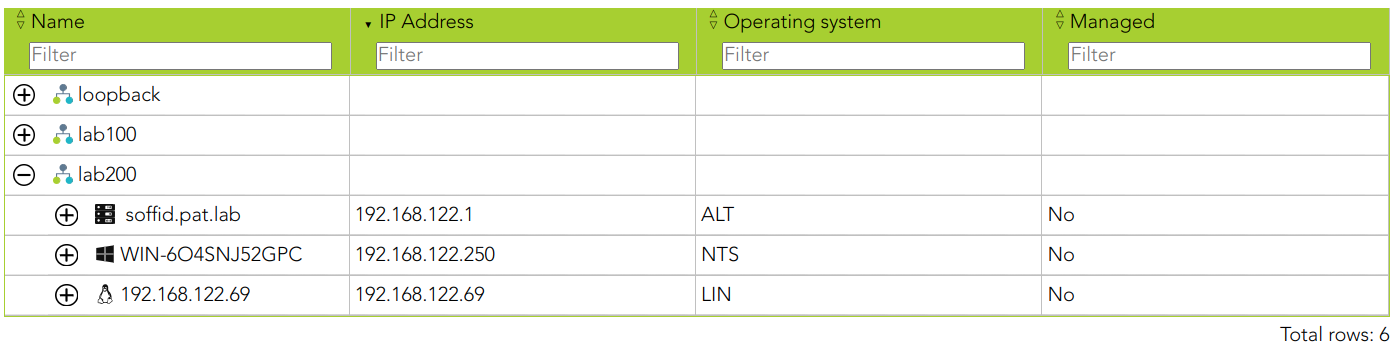
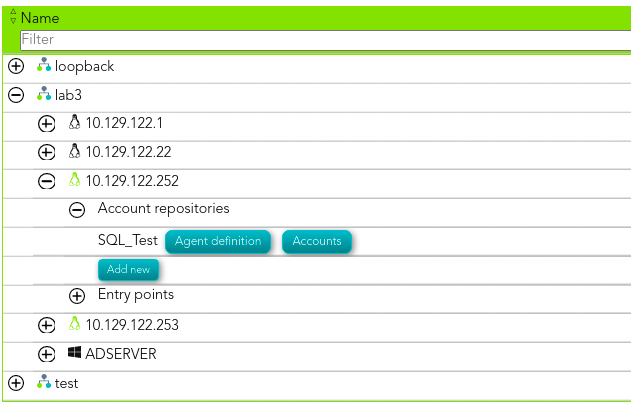
3. Once you have accessed the network discovery page, Soffid will display all the networks.
3.1. First, you must identify the network and click on the plus icon (+) to display all the hosts discovered.
[](https://bookstack.soffid.com/uploads/images/gallery/2023-10/image-1696427236754.png)
3.2. Then, you must identify the host.
[](https://bookstack.soffid.com/uploads/images/gallery/2023-10/image-1696427285978.png)
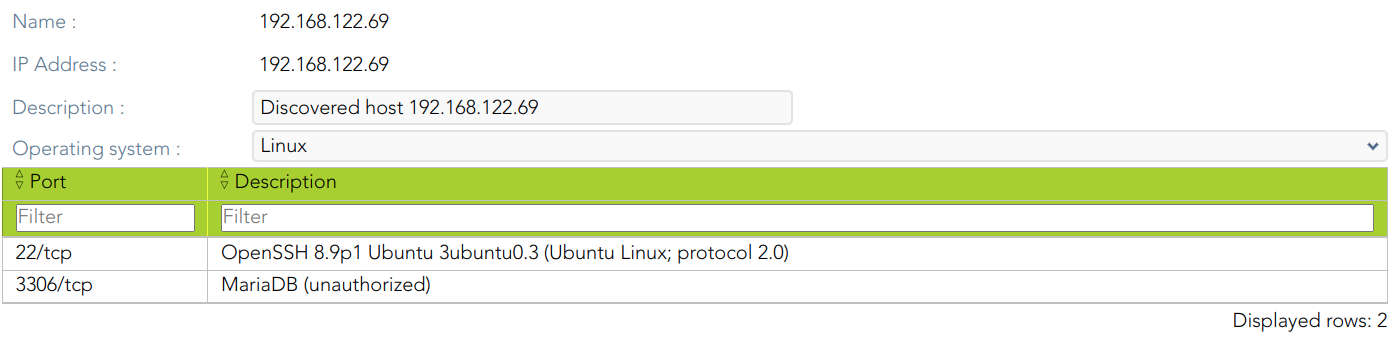
You can consult the information retrieved
[](https://bookstack.soffid.com/uploads/images/gallery/2023-10/image-1696427363496.png)
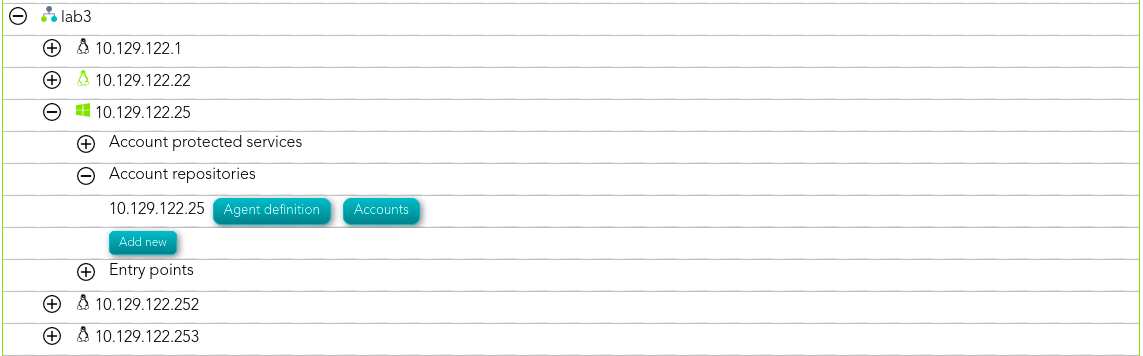
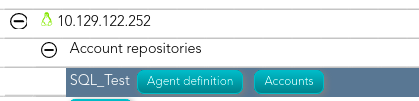
3.3. Finally, on the "Account repositories" you must click the "Add new" button.
[](https://bookstack.soffid.com/uploads/images/gallery/2021-08/image-1629874227338.png)
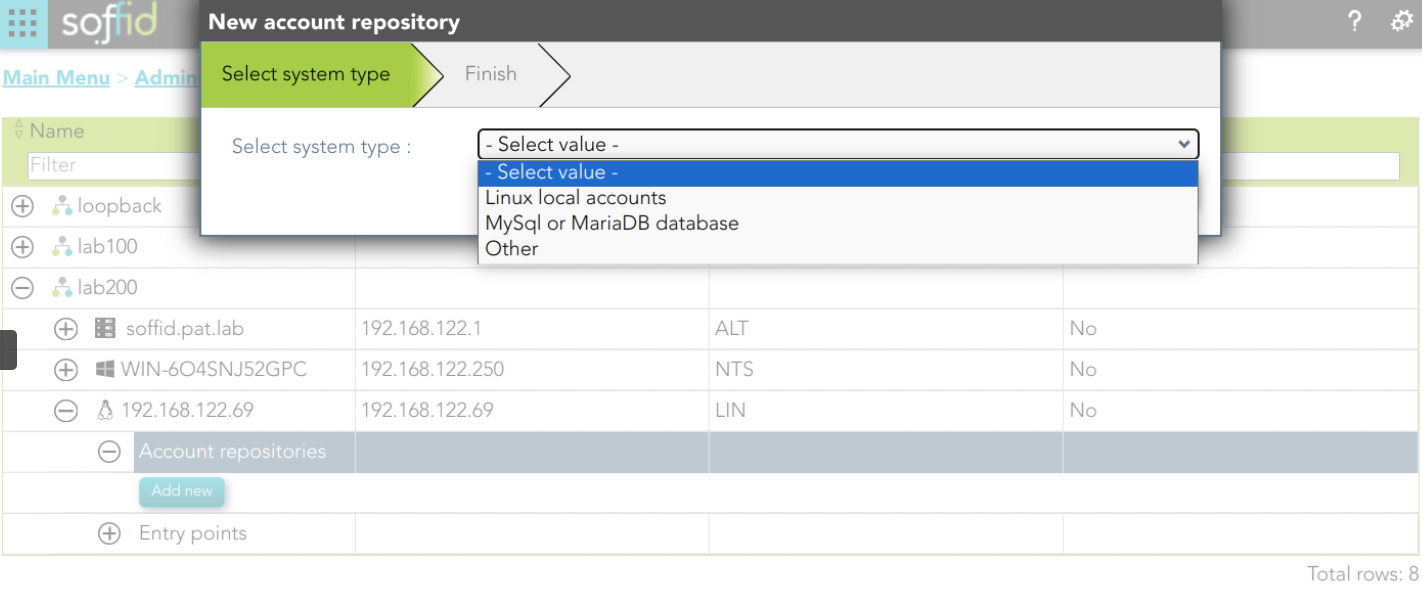
4. When you click "Add new" Soffid will display a wizard to add the database.
[](https://bookstack.soffid.com/uploads/images/gallery/2023-10/image-1696427556107.png)
5. You must select the option "Other" on the "Select system type", and click the "Next" button.
5.1. If you click the "Next" button, the wizard will allow you to search the system using Quick, Basic, or Advanced search. When you run the search, Soffid will display all the systems that apply to the search criteria. Be in mind, the agent must have been previously created.
5.2. You must select the proper system from the result list and click the "Next" button. Then Soffid will add the agent to the "Account repositories" list and close the wizard.
[](https://bookstack.soffid.com/uploads/images/gallery/2021-08/image-1629905496878.png)
\* When you are in the wizard and click the "Undo" button, the wizard will browse to the previous page of the wizard, or close and no operation will execute if it is the first page.
6. Once the database is added to the host, the next step will be to run the reconcile process to get all the accounts and permissions from the database to load into Soffid.
6.1. To access the agent definition, you must click the "Agent definition" button. The button is located close to the name of the agent, inside the "Account repositories" of a specific host, on the network discovery tree.
[](https://bookstack.soffid.com/uploads/images/gallery/2021-08/image-1629970666238.png)
6.2. Once you click the button, Soffid will browse to the agent definition.
6.3. Then you must click the "Massive actions" tab.
6.4. At the "Massive actions" tab you must click the button "Reconcile (load target system objects)". That process is in charge to load into Soffid the accounts and permissions defined on the database.
6.4.1. If the process is successfully completed you could continue with the next step of the PAM implementation.
6.4.2. In another case, you must check the agent configuration and run again the process.
## Screen overview