# General instructions
## Introduction
The purpose of this document is to provide the instructions to implement PAM using the Soffid console. This is a step-by-step implementation guide.
Soffid is an information security product that provides a web console to **manage privileged accounts** in addition to, identity provisioning, identity governance, including risk management and Single sign on.
## Before starting
Before you start the PAM implementation it will be mandatory:
### 1. Install Soffid IAM Console
The first step will be to install Soffid. You could install Soffid console on-premise, or on the cloud; on your own servers, or using docker or Kubernetes.
For more information visit the [Soffid installation book](https://bookstack.soffid.com/books/installation).
### 2. Install Soffid PAM
The purpose of PAM is to manage accounts and to determinate what users will have access to critical resources. Soffid allows to you to install and configure PAM.
For more information visit the [PAM Install & config book](https://bookstack.soffid.com/books/pam-install-config).
### 3. Login into Soffid Console
Your user need to be an administrator user or a user with the proper permission to perform the actions for the implementation procedure.
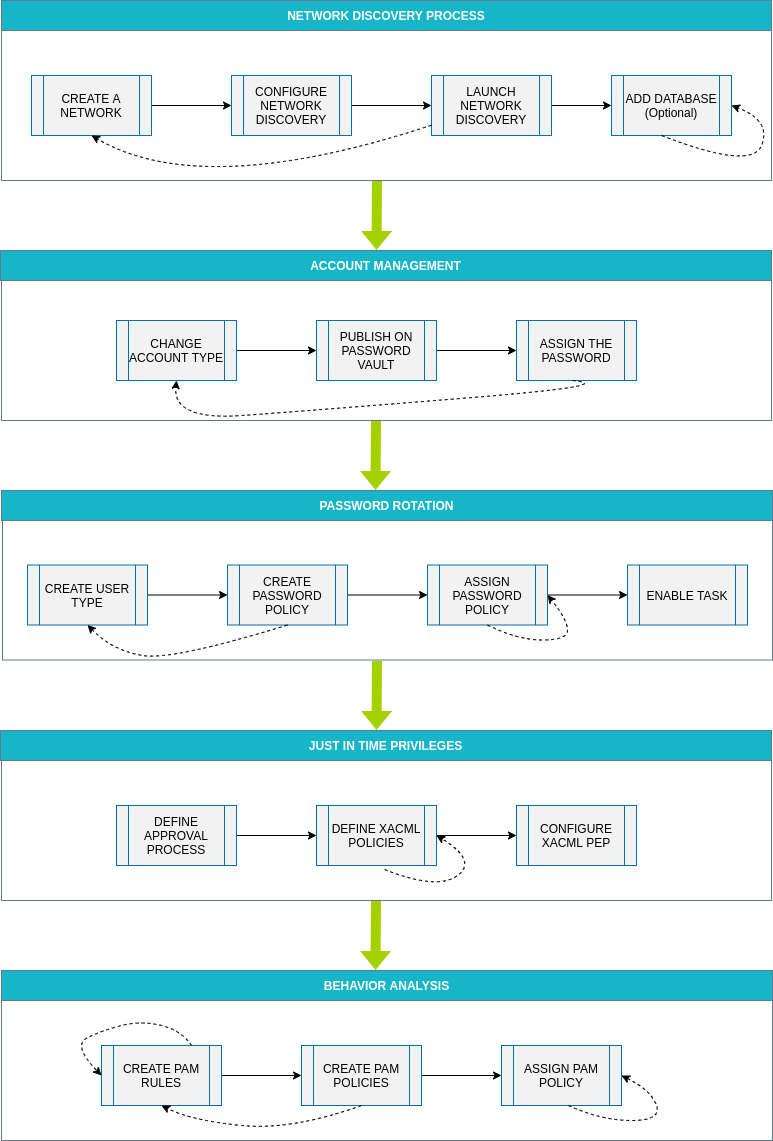
## Process definition