PAM Implementation guide
PAM Implementation guide
- General instructions
- Step 1. Create network
- Step 2. Configure network discovery
- Step 3. Launch network discovery
- Step 4. Register additional resources (Optional)
- Step 4.1. Add database (Optional)
- Step 4.2. Create an agent (Optional)
- Step 4.3. Reconcile (Optional)
- Step 5. Account management
- Step 5.1. Account management
- Step 5.2. Change account type
- Step 5.3. Publish on Password vault
- Step 5.4. Assign the password
- Step 6. Passwords rotation
- Step 6. Passwords rotation
- Step 6.1. Create User type
- Step 6.2. Create Password policy
- Step 6.3. Assign password policy
- Step 6.4. Enable Task
- Step 6.5. Password Rotation using Windows Connector
- Step 7. Just in time privileges
- Step 7. Just in time privileges
- Step 7.1. Define an approval workflow
- Step 7.2. Define XACML policy set to use a workflow
- Step 7.3. Configure XACML PEP
- Step 8. Behavior analysis
General instructions
Introduction
The purpose of this document is to provide the instructions to implement PAM using the Soffid console. This is a step-by-step implementation guide.
Soffid is an information security product that provides a web console to manage privileged accounts in addition to, identity provisioning, identity governance, including risk management and Single sign on.
Before starting
Before you start the PAM implementation it will be mandatory:
1. Install Soffid IAM Console
The first step will be to install Soffid. You could install Soffid console on-premise, or on the cloud; on your own servers, or using docker or Kubernetes.
For more information visit the Soffid installation book.
2. Install Soffid PAM
The purpose of PAM is to manage accounts and to determinate what users will have access to critical resources. Soffid allows to you to install and configure PAM.
For more information visit the PAM Install & config book.
3. Login into Soffid Console
Your user need to be an administrator user or a user with the proper permission to perform the actions for the implementation procedure.
Process definition

Step 1. Create network
The first step of the PAM implementation will be to create the network we want to scan to discover the hosts
Step-by-step
1. First of all, you must access the networks page, the path to access is the following:
2. Once you are located on the networks page, you must click the button with the add symbol (+) to add a new network. Then Soffid will display a new empty page to fill in the network data.
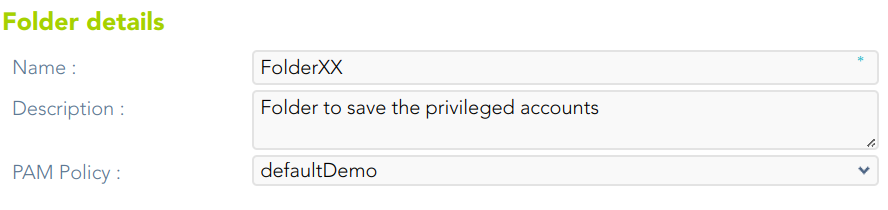
You must fill, at least the required fields (fields with an asterisk) to create a network.
- The name should be an identificative network name, that will be a unique network name (no spaces and no symbols).
- The description should be a brief description of the network.
- The IP Address should be the real network IP address you want to scan.
- The IP Address mask should specify the network's available hosts.
Other fields you could configure
- The Internal network allows you to indicate if this network is fully managed or not.
- The Support DHCP allows you to determine if the hosts that belong to this network will be automatically registered on Soffid.
- The DHCP attributes allow you to enter additional parameters that DHCP server will use to assemble DHCP response. Usually it will have a gw=0.1.2.34 like parameter. It is only needed when a DCHP connector is configured.
Auto calculated fields
- The Used IPs will be IP addresses used.
3. Once you have filled in all those fields, you must apply changes, by clicking on the "Apply changes" button to create the new network.
4. When you apply changes:
4.1. If all the required information is correct, Soffid will save the new network, close the page and show the networks list with all the networks created on the system, including the last one created.
4.2. If the information filled in is not correct, Soffid will show an alert on the fields which have errors. You must correct the mistakes and save the network data again.
Screen overview
Step 2. Configure network discovery
The second step will be to configure the network with the proper parameter to allow you to run the discovery process.
Step-by-step
1. First of all, you must access the network discovery page in the following path:
2. Once you have accessed the network discovery page, Soffid will display all the networks created on Soffid using a list format.
3. You must select the network you want to scan to discover all its hosts.
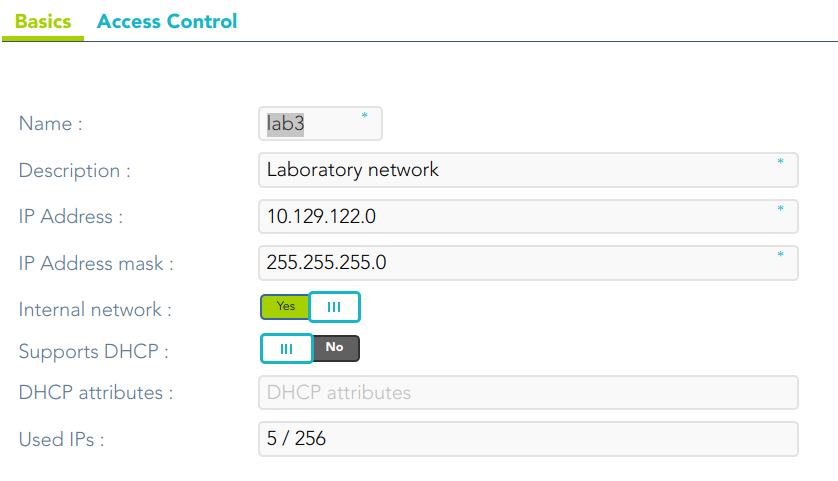
4. Then, Soffid will display detailed information about the network. All that information will be read-only data.
5. You must click the "Enabled discovery" button to display new configuration fields, server, accounts to probe, schedule, and current execution.
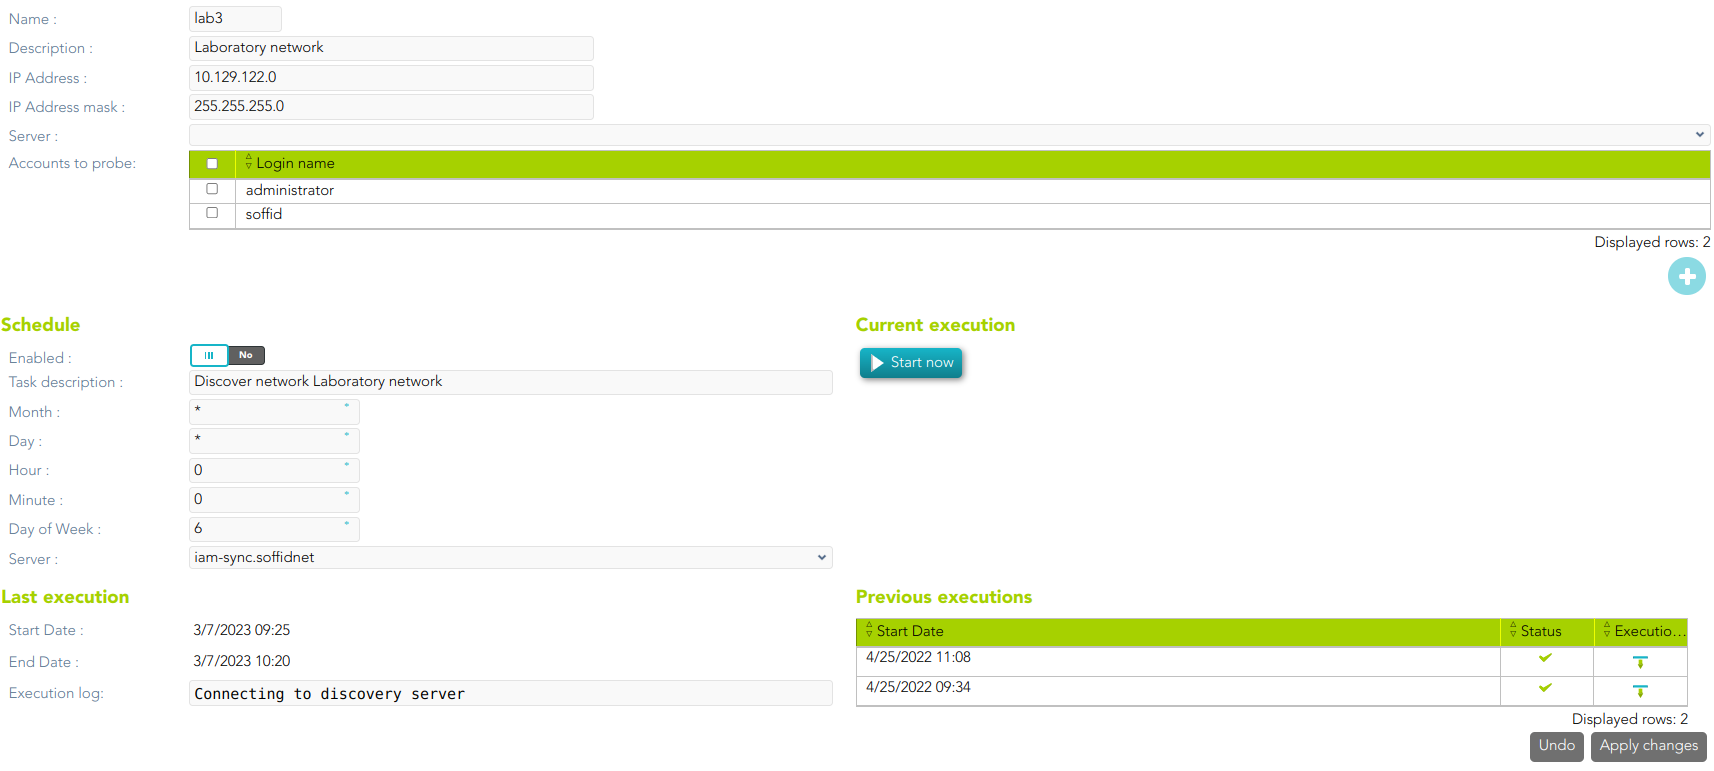
6. The first of one, Server (from now on the discovery proxy server) the selected server will be used to try to connect the detected hosts using the accounts defined on the accounts to probe list. If no servers are selected, the server selected in the task definition will be used.
7. The second, Accounts to probe allows you to add accounts for trying to connect to the network hosts discovered.
7.1. You must click the add button (+) to add a new account.
7.2. You must select to create a new account or add an existing account.
7.2.1. To register a new account you must select the "Register a new account" option and fill in the login name and the password.
7.2.2. To use an existing account, you must select the "Use an existing account" option and select the chosen account. You have two options:
span style="color: #a6d100; font-weight: bold; font-size: 18px;">7.2.2.1. Writing the account name on the text field, Soffid helps you with predictive search. Then you must click the "Apply changes" to save the data and Soffid will add the account to the accounts to probe list.
7.2.2.2. Clicking the user icon, Soffid will show you the search account window. Once you search and find the proper account, you need to click on the account row. Then soffid will add the account to the accounts to probe list.
8. The third, Schedule: you can enable that option to schedule the execution of the task. If you enable that option, a task will be created and configured to be performed on the schedule defined.
8.1. You can update the schedule to be performed, the available fields are the following:
- Month: number of the month (1-12) when the task will be performed.
- Day: number of the day (1-31) when the task will be performed.
- Hour: hour (0-23) when the task will be performed.
- Minute: minute (0-59) when the task will be performed.
- Day of week: number of the day (0-7 where 0 means Sunday) of the week when the task will be performed.
- Server: (from now on discovery manager) primary sync server that will execute the Nmap process to discover hosts of the network. If no server is selected, Soffid will use one of the primary sync servers.
All those fields are mandatory to schedule the task.
For each value of month, day, hour, minute or day of the week:
- * means any month, day, hour, minute or day of the week. e.g. */5 to schedule each five minutes.
- A single number specifies that unit value: 3
- Some comma separated numbers: 1,3,5,7
- A range of values: 1-5
8.2. If you update the schedule data, you will need to "Apply changes" to save the update. If there is any error, that will display and the data will not save; you must correct the data and apply changes again.
9. The fourth, the Current execution option allows you to fire the task execution at the current moment.
10. The Last execution section displays the information about the last execution of the discover network process, the start and end date and time, and the execution log.
11. The last one, Previous executions, will display a list with information about the previous executions. That option will be shown when the task executions were run and finished at least one time.
Soffid will display a list with information about the previous executions, the date and time when the task started, the status, and also will allow you to download the log file. To download the log file you must click on the proper "Execution log" cell, then a Txt file will be downloaded on your computer and you could check it.
Screen overview
Step 3. Launch network discovery
Step 3.1. Launch network discovery
Then, the third step will be to launch the network discovery process. That is the process in charge to scan the network, getting the hosts information, and connecting to the hosts as well.
Step-by-step
1. The discovery network task can be executed manually or automatically:
1.1. By clicking the "Start now" button, the process will be launched manually at the current moment.
1.2. If the schedule option is enabled, the task will be launched at the schedule defined. You can configure it on the Scheduled task page as well.
2. Soffid will display the information about the result of the process when it has finished.
3. Also, Soffid will display in a tree structure the information recover about the host detected identifying indicating whether it was possible to connect, and in the affirmative case, the information about the agent and the entry point created, and the recovered accounts
The discovery process is multithread. To discover the host of the network, Soffid launch from 1 to 20 threads, with that configuration, Soffid gets to optimize the discovery process.
Network discovery process
On the Network dicovery page there are two different servers to configure, the first one, the discovery proxy server (located next to the network attributes), the second one, the discovery manager (located on the schedule section).
Communication between these servers is always encrypted with certificates on both sides.

The server to discover
That server is in charge to scan the network to discover the hosts of the network. For each host discovered, the Nmap utility gets the info about the ports and the protocols used. Also, that process gets the IP Address and the operating system. All the recover information will be saved on Soffid database.
If no discovery manager is selected, to execute that process, Soffil will use on of the principal sync servers installed and configured.
The server to connect
The discovery proxy server works as a proxy to connect to the target systems.
When the discovery manager discovers a host, it gets the host information and then, through discovery proxy server, it attempts to connect to the host using the accounts defined on the accounts to probe list.
- If it can not connect to the host, it will attempt with the next host discovered.
- If it gets to connect to the host, then it will create automatically a Soffid agent with the proper attributes and connector parameters, also with the necessary account metadata.
Then, the reconciliation process of the created agent, will be launched and it will try to recover the information about the accounts defined on the host. Also, it will try to recover the information about the account protected services. The recover information will be saved on Soffid database.
The next step will be to create, in the possible cases, a new entry point to the host with the basic attributes, and the proper executions to run it. That entry point will display on the Application access tree page.
If no discovery proxy server is selected, Soffid will use the same sync server used to the discover process.
https://en.wikipedia.org/wiki/Nmap
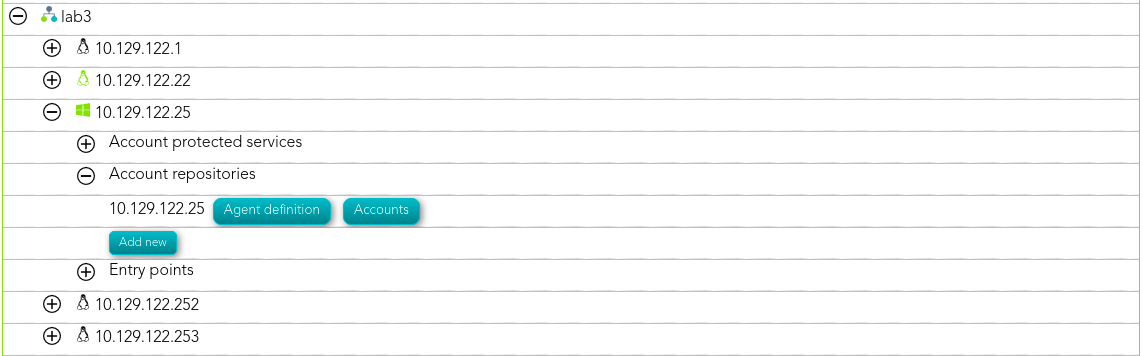
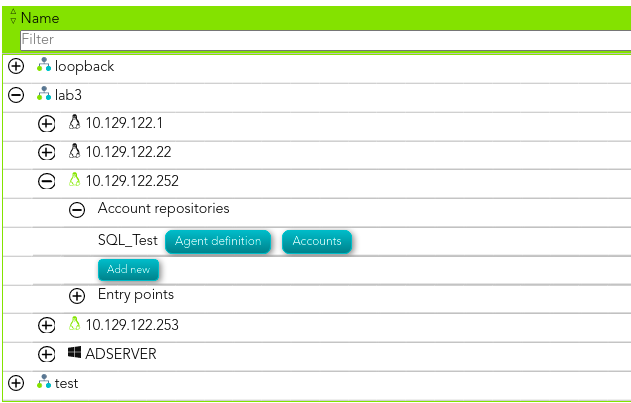
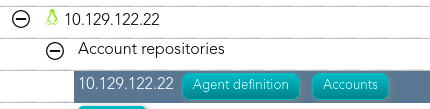
Step 3.2. Account repositories
Once the network discovery process is complete, Soffid will have detected the devices connected to that network and will create, where possible, a repository of accounts. Soffid will also attempt to obtain all accounts from this repository.
This is an automatic process, and as a result, you will be able to access the agent definition and the accounts created
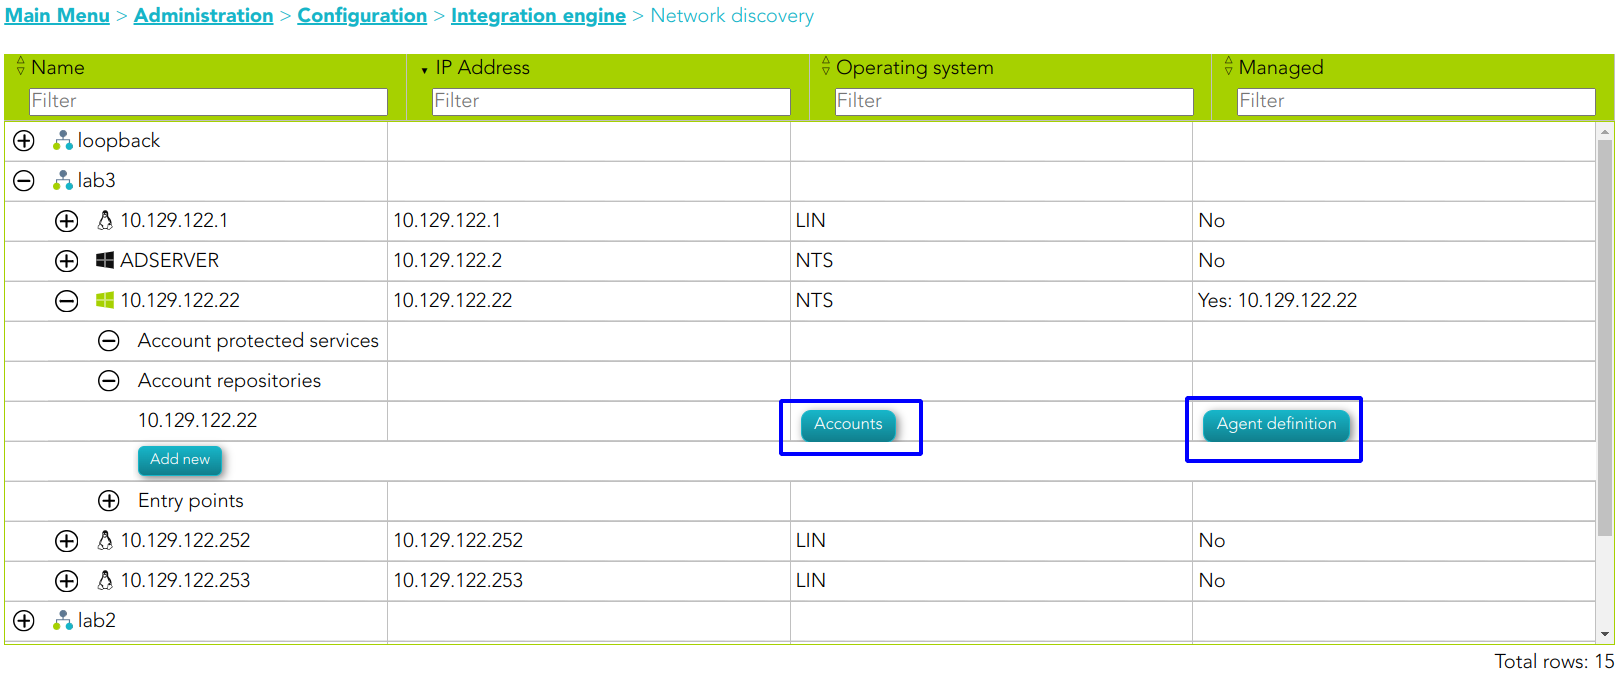
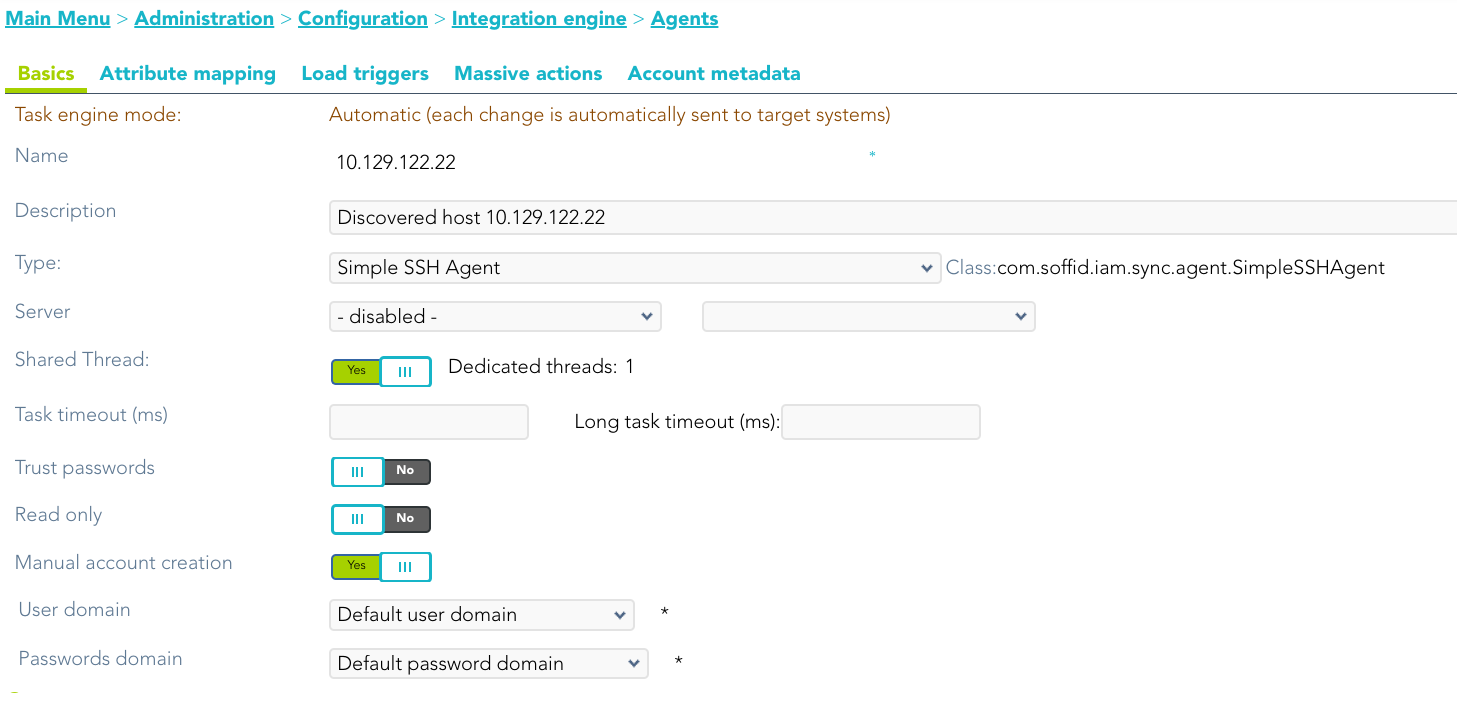
Agent definition
On the agent page, you could find the agent definition.
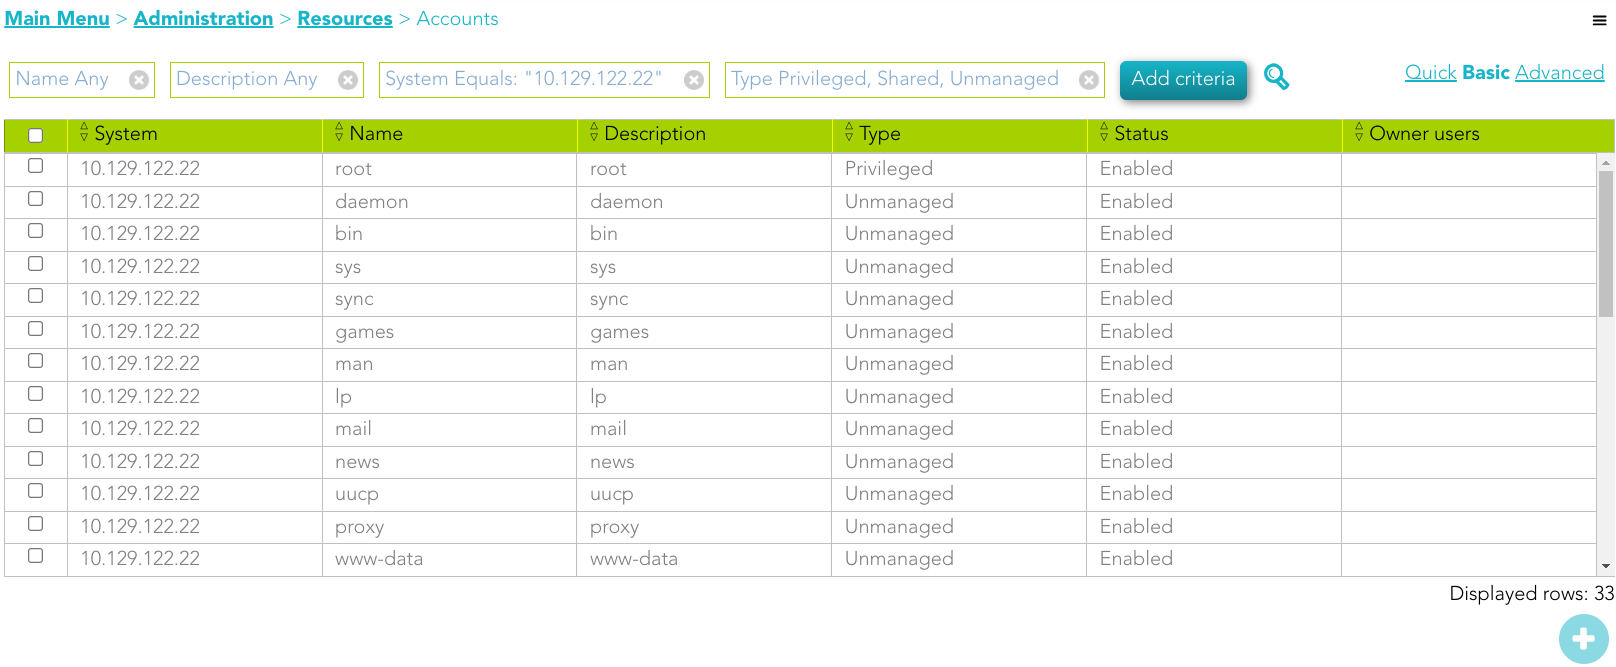
Accounts
On the accounts page, you could find all the accounts detected at this system.
Step 3.3. Entry point
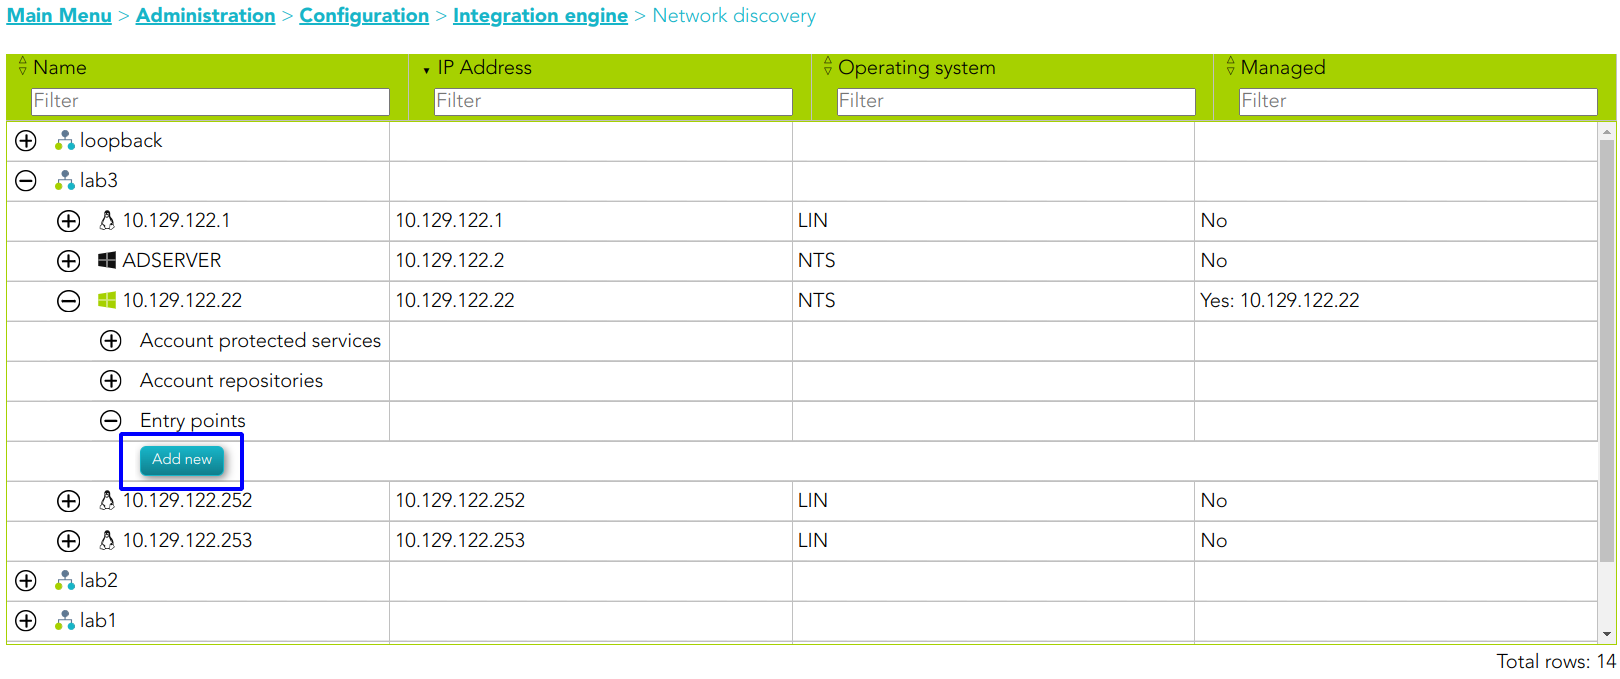
Soffid allows you to manually create entry points to connect to information systems.
Step-by-step
1. Once the device is detected in the network, you could add new Entry points to this device. To add a new device you must click the Add new button
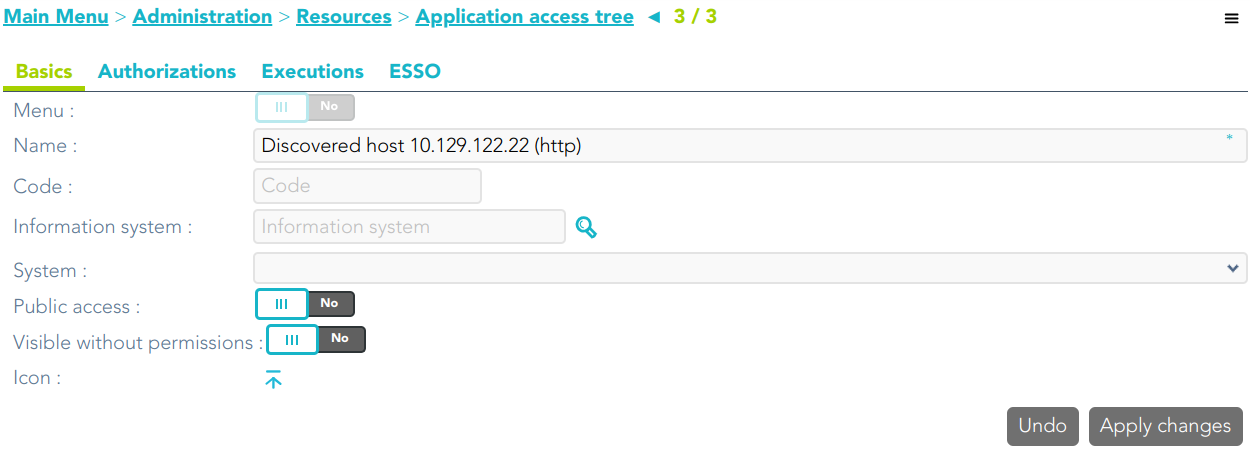
2. Then Soffid will display a new window to add the new Entry point. At this step, you need to select the Entry point type you are creating, and the menu to place the entry point.
- Secure shell (ssh)
- Secure web application (https)
- Web application (HTTP)
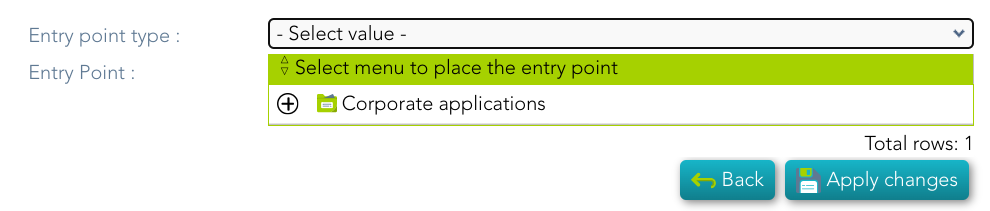
3. Finally you must save by clicking the Apply changes button
4. You could check the new Entry point by visiting the Application access tree page
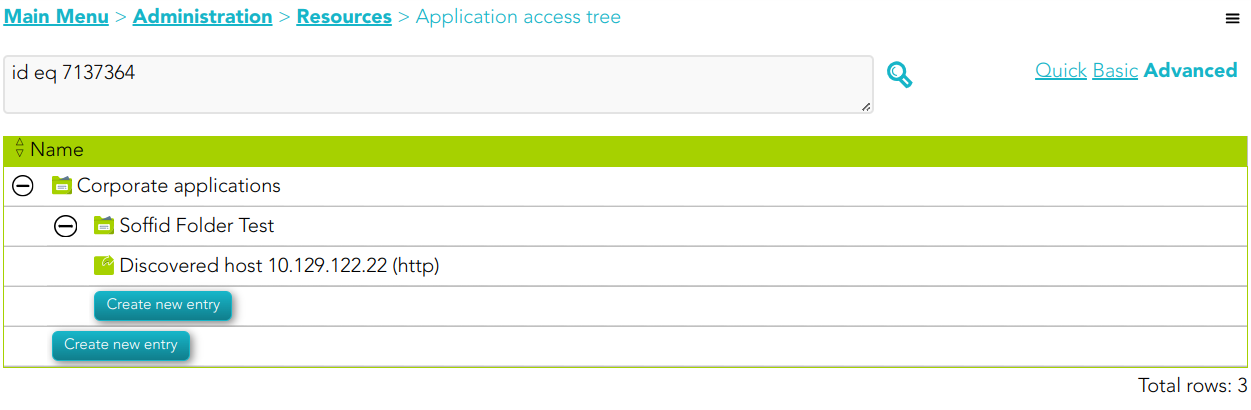
Entry point detail
Step 4. Register additional resources (Optional)
Step 4.1. Add database (Optional)
The fourth step, to add a database, is an optional step. You only need to configure when there is any database (SQL Server or Oracle) in some of the discovered hosts and you want to manage its accounts as privileged or shared accounts.
Step-by-step
The network discovery process can discover and connect to the hosts. Then Soffid allows you to add databases as account repositories in the proper host.
1. First of all, the agent must be created on Soffid. That agent could be a SQL Server agent or an Oracle agent. To create an agent you can visit the next page Step 4.2. Create an agent (Optional)
2. Then, you must access the network discovery page in the following path:
3. Once you have accessed the network discovery page, Soffid will display all the networks.
3.1. First, you must identify the network and click on the plus icon (+) to display all the hosts discovered.

3.2. Then, you must identify the host.
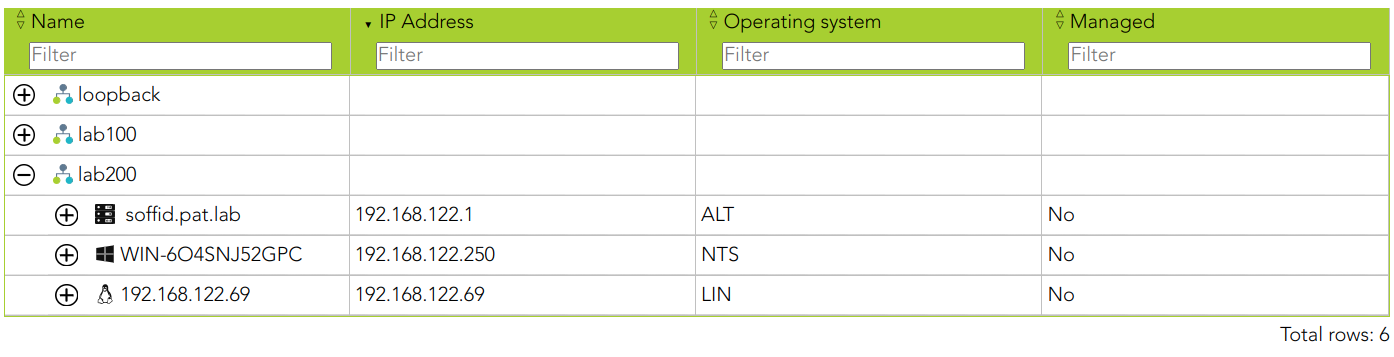
You can consult the information retrieved
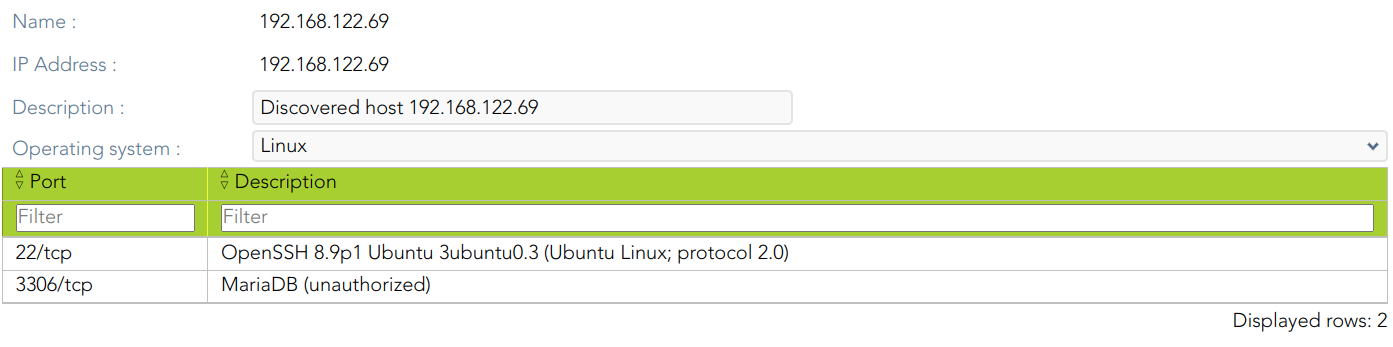
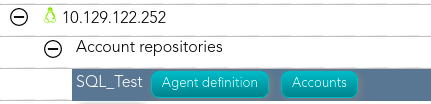
3.3. Finally, on the "Account repositories" you must click the "Add new" button.
4. When you click "Add new" Soffid will display a wizard to add the database.
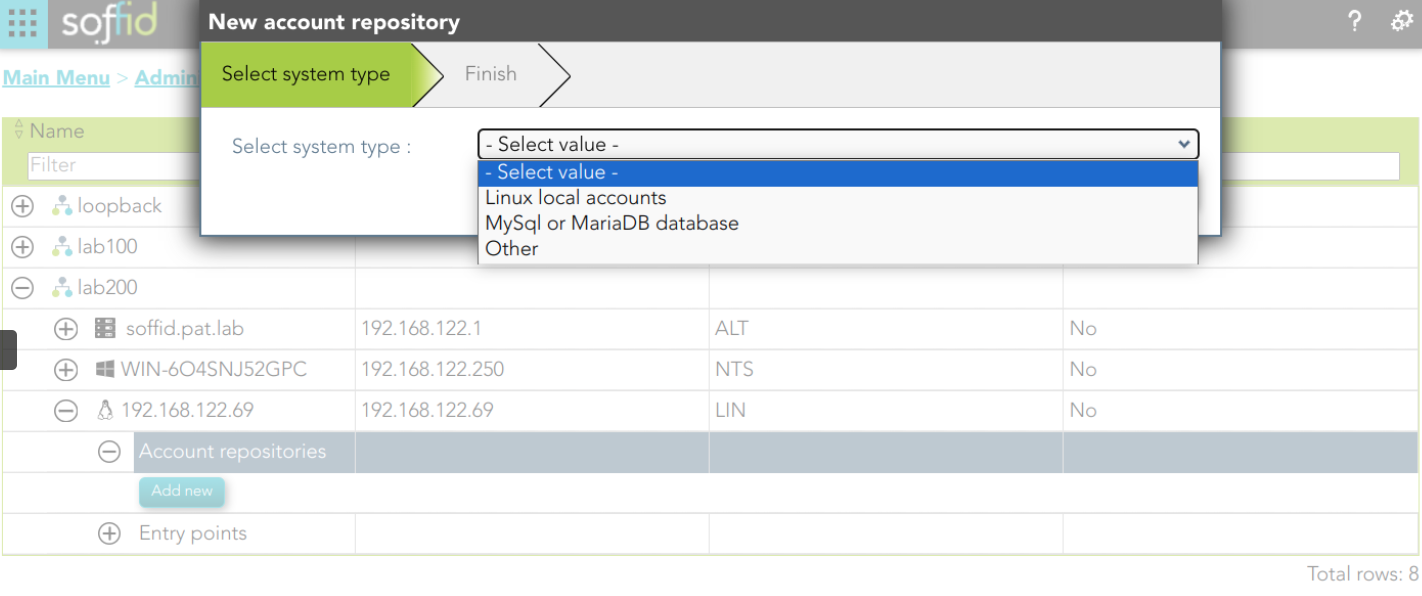
5. You must select the option "Other" on the "Select system type", and click the "Next" button.
5.1. If you click the "Next" button, the wizard will allow you to search the system using Quick, Basic, or Advanced search. When you run the search, Soffid will display all the systems that apply to the search criteria. Be in mind, the agent must have been previously created.
5.2. You must select the proper system from the result list and click the "Next" button. Then Soffid will add the agent to the "Account repositories" list and close the wizard.
* When you are in the wizard and click the "Undo" button, the wizard will browse to the previous page of the wizard, or close and no operation will execute if it is the first page.
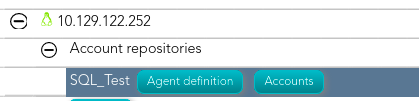
6. Once the database is added to the host, the next step will be to run the reconcile process to get all the accounts and permissions from the database to load into Soffid.
6.1. To access the agent definition, you must click the "Agent definition" button. The button is located close to the name of the agent, inside the "Account repositories" of a specific host, on the network discovery tree.
6.2. Once you click the button, Soffid will browse to the agent definition.
6.3. Then you must click the "Massive actions" tab.
6.4. At the "Massive actions" tab you must click the button "Reconcile (load target system objects)". That process is in charge to load into Soffid the accounts and permissions defined on the database.
6.4.1. If the process is successfully completed you could continue with the next step of the PAM implementation.
6.4.2. In another case, you must check the agent configuration and run again the process.
Screen overview
Step 4.2. Create an agent (Optional)
That step will be an optional step, and it will be mandatory only when the SQL Server agent or the Oracle agent was not created previously on Soffid Console and you need to add a database to manage its accounts.
Step-by-step
1. First of all, to create an agent you must access the agent page in the following path:
2. Once you have accessed the agent page, Soffid will display all the active agents created on Soffid. You must click the button with the add symbol (+) to add a new agent. Then Soffid will display a new empty page to fill in the agent data.
2.1. You must fill, at least the required fields (fields with an asterisk) to create an agent.
-
-
- The Name should be an identificative and unique agent name
- The Description should be a brief description of the agent.
- The Type allows you to select the connector type to use, the SQL Server connector or the Oracle connector. Be in mind that you need to load the connector on Soffid if you did not do it previously.
- The Server allows you to select the synchronization server that will perform the agent tasks. It is allowed to select two servers in cases high disponibility will be necessary. If you choose two servers, when one fails, the other will be used.
- If "-disabled-" is selected, the agent will be disabled-
- The User domain allows you to select how to generate account names. If the account name is the same as the user name (as it is normally the case), the “Default user domain” should be used. The user domain values are defined on the Account naming rules page.
- The Password domain allows you to select the password policies that will be used. If the "Default password domain" is selected, Soffid passwords will be shared with the managed systems. The user domain values are defined on the Password policies page.
-
You can visit the Plugins page for more information about how to load a connector on Soffid Console.
2.2. You must fill in the optional parameters that you need to config the agent.
2.3. You must fill in the "Connector parameters". Those parameters depend on the agent.
2.3.1. SQL Server connector:
Below there are the specific parameters for this agent implementation:
|
Parameter |
Description |
|---|---|
|
User name |
Database user name to authenticate |
|
Password |
The password of the database user |
|
Driver |
Identifies the driver of the relational database to use. Currently, these are the supported databases: MySQL (& MariaDB), PostgreSQL, Oracle, MS SQL Server, Informix, DB2/400, DB2 Universal, Sybase, ODBC |
|
DB URL |
URL that identifies the connection properties. Please refer to the specific database vendor documentation to build this URL. (*) More documentation about the DB URL |
|
SQL Sentence to execute at startup |
Each time the connection to the agent is established, this SQL statement will be executed. |
|
Password hash algorithm |
The algorithm is used to encrypt the password. For instance SHA1, SHA256, MD5, etc |
|
Password hash prefix |
Prefix to add it to the password. |
|
Enable debug |
Two options: Yes, and No. It enables or not more log traces in the Synchronization Server log |
|
Synchronization method |
(**) |
2.3.1. Oracle connector:
Below there are the specific parameters for this agent implementation:
|
Parameter |
Description |
|---|---|
|
User |
Sysdba user name to authenticate |
|
Oracle password |
Password of the user to authenticate |
|
Connection string to database |
Database URL. Use something like jdbc:oracle:thin:@host:port:sid |
|
Password to protect roles |
Optional password to use on password protected roles |
|
Default user profile |
Optional profile to set limits on the database resources and the user password |
|
Default tablespace |
Optional tablespace for user creation |
|
Temporary tablespace |
Optional temporary tablespace for user creation |
|
Enable debug |
Two options: [ Yes / No ]. When it is enabled more log traces are printed in the Synchronization Server log |
3. Then, you should click the "Apply changes" button to save the new agent. Then Soffid will close the form, and display the agent list including the new agent created.
If you click the "Undo" button, the form will be closed and updates will not be saved.
Once the agent is configured, it could be assigned to the host to continue with the PAM implementation process: Step 4. Add database
Screen overview
SQL Server agent

Oracle agent

Step 4.3. Reconcile (Optional)
To request the accounts you must launch the reconciliation process. The main purpose of reconciling process is to provide a mechanism to ensure that all users are aligned on the specific roles and responsibilities.
Step-by-step
1. First of all, you need to edit the agent must access the agent page in the following path:
2. Once you have accessed the agent page, Soffid will display all the active agents created on Soffid. You must click on the record of the agent you want to reconcile. Then Soffid will display a new window with the agent data.
3. Then, you must click on the "Massive actions" tab.
4. At the "Massive actions" tab, you must click on the "Reconcile (load target system objects)" button to launch the reconciliation process.
5. Once completion of the conciliation process, Soffid will show the result of the process execution. You could click on the alert to view the process result.
5.1. Green alert: the process finished ok.
5.2. Red alert: the process finished with an error.
Screen overview

Step 5. Account management
The account management step shows you how to manage the accounts to change the type, how to locate the accounts on the password vault and how to assign a password. To comply this step the discovery process must be completed.
Step 5.1. Account management
The account management step shows you how to manage the accounts to change the type, how to locate the accounts on the password vault, and how to assign a password. To comply with this step the discovery process must be completed.
Step-by-step
1. To access the accounts of a specific host or database (SQL Server or Oracle), you must click the "Accounts" button. The button is located close to the name of the host or the agent, inside the "Account repositories" of a specific host, on the network discovery tree.
- Host
2. Once you click the button, Soffid will display the accounts list which belongs to the host or agent.
3. You must click on the account record to edit the detailed account info.
4. Then, you will be able to change the account type, place the account on the password vault, and assign a password for each account, one by one.
a. Step 5.2. Change account type
b. Step 5.3. Publish on Password Vault
c. Step 5.4. Assign the password
5. And finally, to save the updates you must click on the "Apply changes" button.
Step 5.2. Change account type
The Change account type step shows how to change the type from unmanaged to shared or privileged depending on the case.
Step-by-step
1. Once Soffid displays the account detail, you can change the Type (located on the Common attributes) to the proper type. You must click on the "Type" drop-down list and select the proper value for the account.
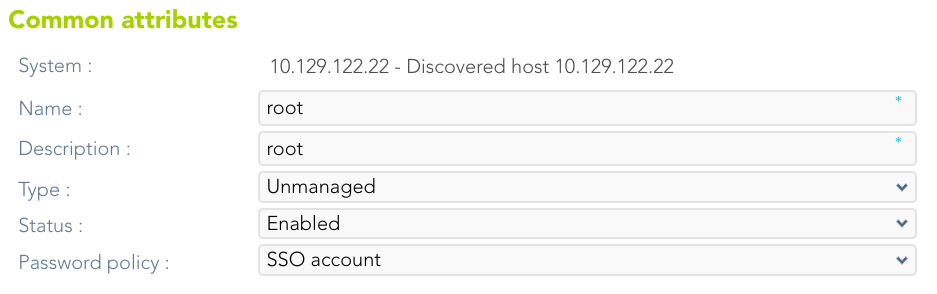
2. Then, you can save the update by clicking on the disk icon (located at the top right), and continue with the next step.
Step 5.3. Publish on Password vault
When critical accounts are detected, the best way to keep them safe is to place them on the Password vault. The password vault allows you to handle the access control list to these accounts, here you can define who are the owners, the managers, and the SSO users
Step-by-step
1. Once Soffid displays the account detail, you can select the "Vault folder" on the "Password vault" section.

2. There are two ways to assign the vault folder:
2.1. Writing on the predictive text field. In that case, Soffid will show the folders name that matches, and you could select the proper folder.
2.1. Click on the folder icon. Then you could search for the proper folder and select
Be in mind that the vault folders have to be created previously on the Password vault page.
3. Finally, you can save the update by clicking on the disk icon (located at the top right), and continue with the next step.
Step 5.4. Assign the password
To be able to use an account, it is necessary to assign a password, this can be the current password or a new password. In the case of assigning a new password, it will be synchronized with the target system.
Step-by-step
1. Once Soffid displays the account detail, you can change the password. You need to click on the hamburger icon and then on the "Set password" option.
2. Then, Soffid will show a new form to set the password.
3. You must select one of the available options:
3.1. Generated password: If you select that option, Soffid will generate a random password and will display the password on the form.
3.1. Set password: If you select that option, you must create a password and write it on the text field. That password should comply with the password policies defined on Soffid.
4. Finally, Soffid will send the new password to the target system.
Step 6. Passwords rotation
The passwords rotation reduces the vulnerability to password-based attacks. Soffid allows you to limit the password lifespan and force you to change it.
Step 6. Passwords rotation
Introduction
The password rotation reduces the vulnerability to password-based attacks. Soffid allows you to limit the password lifespan and force you to change it.
Soffid defines a procedure for Password rotation to keep safe the critical accounts. It allows you to create password policies with the proper configuration to create strong passwords, the password type should be "Automatically generated". Those policies must be assigned to critical accounts. Also, it allows to configure of an automatic task, Expire untrusted passwords, to check when a password has to be changed.
Screen overview
Password Policy
Scheduled task

You can find more information about how to configure a scheduled task on the Scheduled task page.
Step 6.1. Create User type
How to create a new User type. That will be mandatory to create a new Password policy.
Step-by-step
1. First of all, you must access the User types page, the path to access is the following:
2. Once you are located on the User types page, you must click the button with the add symbol (+) to add a new User type. Then Soffid will display a new empty page to fill in the data.
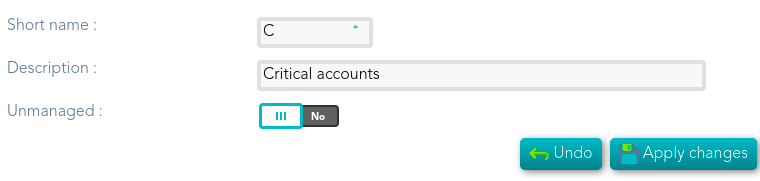
You must fill, at least the required fields (fields with an asterisk) to create a user type.
- The short name should be an identificative name, that will be a unique user type name (no spaces and no symbols).
Other fields you could configure
- The Description should be a brief description about the user type.
- If you check the Unmanaged field (Yes), the accounts that belong to this category will not be propagated to the target system.
3. Once you have filled in all those fields, you must apply changes, by clicking on the "Apply changes" button to create the new user type.
4. When you apply changes:
4.1. If all the required information is correct, Soffid will save the new user type, close the page and show the user types list with all the user types created on the system, including the last one created.
4.2. If the information filled in is not correct, Soffid will show an alert on the fields which have errors. You must correct the errors and save the user type again.
Screen overview
Step 6.2. Create Password policy
How to define a new password policy for the previous user type created.
Step-by-step
1. First of all, you must access the Password policies page, the path to access is the following:
2. Once you are located on the Password policies page, you must click the "Add password policy", at the proper domain, to add a new Password policy type. Then Soffid will display a new empty page to fill in the data.
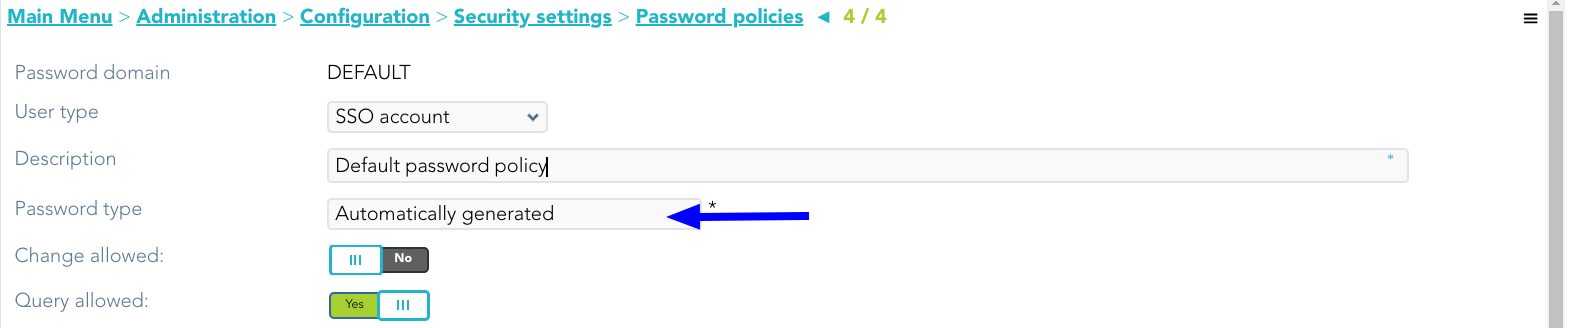
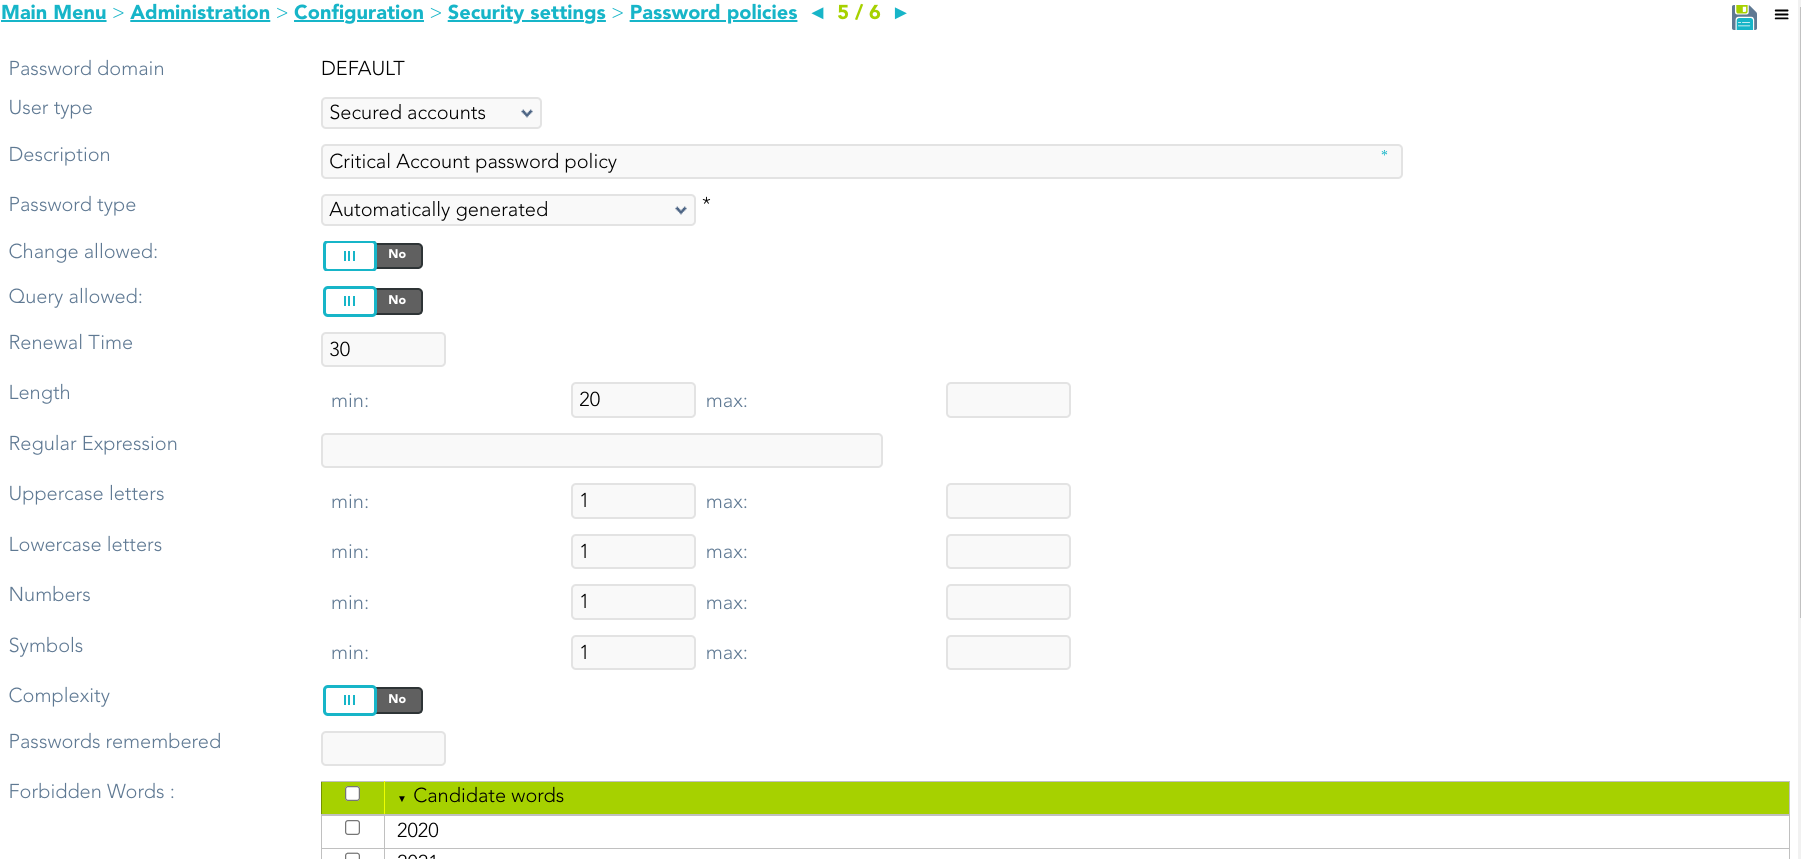
You must fill, at least the required fields (fields with an asterisk) to create a password policy.
- You must select the User type created in the previous step.
- The Description should be a brief description about the password policy.
- The Password type you must select the option Automatically generated.
Other fields you could configure
3. Once you have filled in all those fields, you must apply changes, by clicking on the "Apply changes" button to create the new user type.
4. When you apply changes:
4.1. If all the required information is correct, Soffid will save the new user type, close the page and show the user types list with all the user types created on the system, including the last one created.
4.2. If the information filled in is not correct, Soffid will show an alert on the fields which have errors. You must correct the mistakes and save the user type again.
Screen overview
Step 6.3. Assign password policy
You must assign a proper password policy to the critical accounts to keep them safe.
Step-by-step
1. To access the accounts of a specific host or database (SQL Server or Oracle), you must click the "Accounts" button. The button is located close to the name of the host or the agent, inside the "Account repositories" of a specific host, on the network discovery tree.
- Host
- Database agent
2. Once you click the button, Soffid will display the accounts list which belongs to the host or agent.
3. You must click on the account record to edit the detailed account info.
4. Once Soffid displays the account detail, you can change the password policy (located on the Common attributes) to the proper type. You must click on the "Password Policy" drop-down list and select the proper value for the account.
5. Then, you can save the update by clicking on the disk icon (located at the top right), and continue with the next account to change.
Screen overview

Step 6.4. Enable Task
To rotate the password it will be necessary to enable the task Expire untrusted passwords.
The Expire untrusted passwords task is in charge to create a new password for the accounts:
- Critical accounts with the password type "Automatically generated", in that case, the Renewal Time value will be in mind to determine when a password expires.
- Also, for accounts with the "Entered by the user" Password type that has expired. That case is out of the rotation passwords in the PAM implementation.
Step-by-step
1. First of all, you must access the Scheduled tasks page, the path to access is the following:
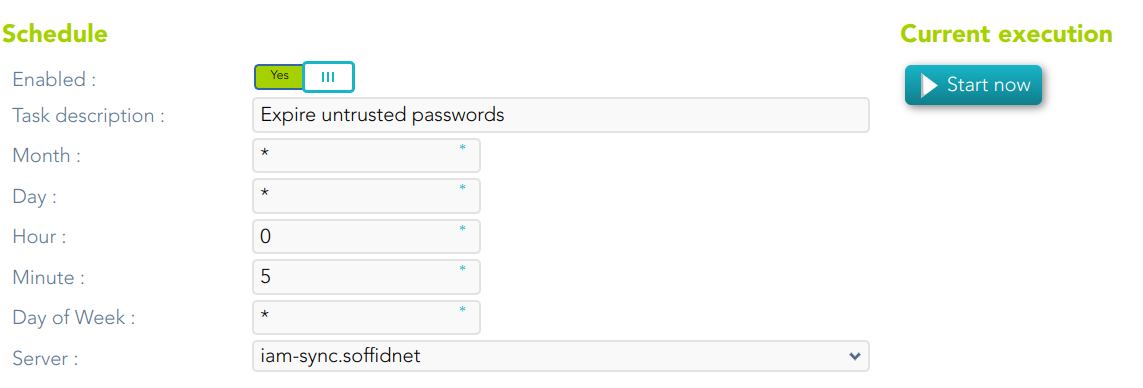
2. Second, you must search the task Expire untrusted passwords and click on the record to edit the task detail.
3. Once you have accessed the task detail, you must check the enable option. Also, you can update the schedule depending on your company policies.
4. Finally you must "Apply changes" to save the updates.
Screen overview
Step 6.5. Password Rotation using Windows Connector
Password Rotation using Windows Connector
When you are configuring password rotation using WIndows Connector, it could be necessary to make some changes in the local computar policies.
The Local Computer Policies on the target Windows server mentioned below:
- User Account Control: Admin Approval Mode for Built-in Administrator Account
- User Account Control: Run All Administrator in Admin Approval Mode
Need to be disabled for PAM application to connect target server and reset password of privilege accounts. If the Policies are originally in ‘Enabled’ mode, then after disabling them a system restart may required for the Policies to get applied on target servers properly.
To check the User Access Policies on servers, follow below mentioned path:
Open group policy editor Run > gpedit.msc > Local Computer Policy > Windows Settings > Security Settings > Local Policies > Security Options > select policy ‘User Account Control: Run all administrators in Admin Approval Mode’ and ‘User Account Control: Run All Administrator in Admin Approval Mode’ and select Disabled and apply > OK.
Step 7. Just in time privileges
Step 7. Just in time privileges
Introduction
Once the discovery process has been run, the critical accounts have been detected and saved on the password vault, and the password rotation process has been defined, the next step would be to define the necessary approval process to manage the use of the critical accounts.
Using the approval process, Soffid allows you to define, step by step on the BPM Editor, the workflow for critical accounts use, and define who has to be the manager or authorized user who will approve or deny to use of those critical accounts. To define and configure the workflow you must know some information like:
- Who or whom can start the process of making a request.
- Who or whom must approve or deny the request.
- If the approved email will be available.
- Which fields must see or fill in the users whom requests.
- Which fields must see or fill in the users whom approve or deny.
- How many approval levels the workflow will need.
- And other requirements.
Then, Soffid can be able to add more complex and restricted rules to the authorizations using XACML. With the XACML tool, you will be able to define policy sets and policies to describe general access control requirements. Also, you will be able to define some obligations as actions that have to be returned with response XACML. To define the policy sets and policies, you need to know some relevant information like:
- On which resources, policy set, or policies should be applied
- On which users, a set of policies or policies should be implemented.
- The actions which will be executed
- In which environments the policy sets or policies will be implemented.
- The rules will be applied.
- And other.
Step 7.1. Define an approval workflow
Step-by-step
1. To define and configure an approval workflow, you can use the Soffid BPM editor. You must access the BPM editor page in the following path:
2. To add a new workflow you must click the add button (+) and Soffil will display a new window.
3. Then, you must write a process name and select the process type "Account reservation" and Soffid will display the process editor to configure the new workflow.
4. At the "Process editor" form you could config the workflow steps.
You can visit the BPM Editor book to find more information and examples about the workflows.
5. Once you finish configuring the workflow, you must click the option "Save and Publish" to be able to use the workflow.
Screen overview

Step 7.2. Define XACML policy set to use a workflow
Step-by-step
1. To define policies, you must access the XACML Policy Management page in the following path:
2. Once you have accessed the XACML Policy Management page, you can click the add button (+) to create a new policy set, or you can click on an existing policy set the record to add new policies.
2.1. Update a policy set: If you want to update an existing policy you must check if the proper PEP was configured with that policy set.
2.2. Create a new policy set: first of all you must click the add button (+). Then Soffid will display an empty window to fill in the required fields.
-
-
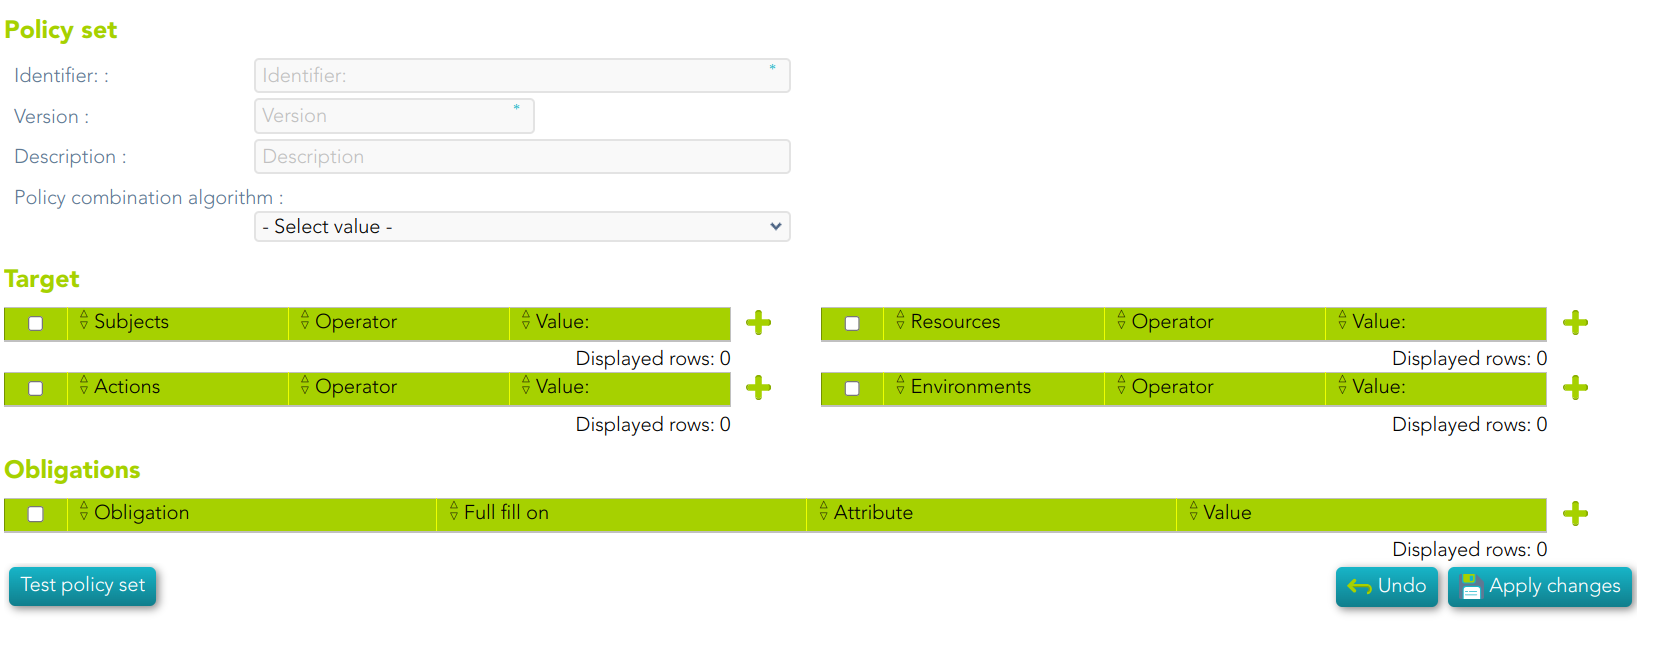
- The Identifier should be an identificative and unique name. You will need the name to configure the PEP
- The Version should be a number to identify the current policy version. You will need the version to configure the PEP.
- The Description should be a brief description of the agent.
- The Policy Combining Algorithm allows you to select the procedure for arriving at an authorization decision.
-
2.3. You need to click on the "Apply changes" button to save the new policy set or to update an existing policy set.
3. Once you have created or updated the policy set, you could add new policy sets, policies, policy references, and/or policy set references.
For more information, you can visit the XACML Book where you could find information about how to use XACML and some examples.
4. Finally, you must check and configure the XACML PEP configuration.
Screen overview
Step 7.3. Configure XACML PEP
Step-by-step
1. To configure the XACML PEP You must access the "XACML PEP configuration" page in the following path:
2. At the "XACML PEP configuration page you must fill in the Password vault Policy Enforcement Point section.
2.1. The policy must be enabled, you must select Yes on the "Enable XACML Policy Enforcement Point".
2.2. Then you must fill in the Policy set ID and the Policy set version to use.
2.3. The trace request is an optional field used to debug.
3. Once you fill in the mandatory information, you must click the "Apply" button to save the updates.
3.1. If there is any error in the data, Soffid will display a message with the error data.
For detailed information about XACML, you can visit the XACML book.
Screen overview

Step 8. Behavior analysis
Step 8. Behavior analysis
Introduction
Using PAM you can configure policies and rules in the Soffid console to detect actions or behaviors that may put your organization at risk. With this information, you will be able to analyze the behavior of the critical accounts that you have defined in your systems and configure what actions you want to run in each case.
Once you create the PAM policy, you must assign it to the proper folder on the password vault.
Step 8.1. PAM Rules
Step-by-step
1. To create a new PAM Rule, you must access the PAM Rules page in the following path:
2. To add a new PAM rule, you must click the add button (+) and Soffid will display a new window to fill in the data.
- The Name should be an identificative and unique rule name. That field will be mandatory.
- The Description should be a brief description of the rule.
- The Type allows you to select the rule will be a keyboard or a screen rule. That field will be mandatory.
- The Content should be what the rule will detect. For instance, a Linux command like sudo or rm *-r. That field will be mandatory.
3. Then you need to click on the "Apply changes" button to save the new PAM rule.
3.1. If you click on the "Undo" button, no updates will be saved.
4. Finally you can create a PAM policy to apply the rules.
Screen overview

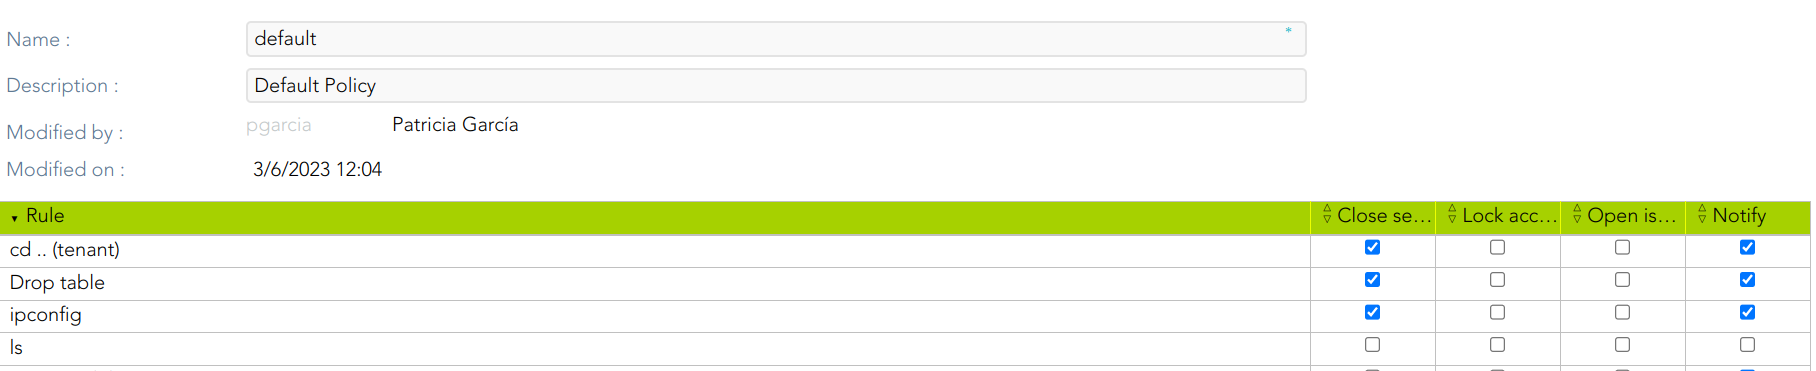
Step 8.2. PAM Policies
Step-by-step
1. To create a new PAM Policy, you must access the PAM Rules page in the following path:
2. To create a new PAM policy, you must click the add button (+) and Soffid will display a new window to fill in the data.
- The Name should be an identificative and unique policy name. That field will be mandatory.
- The Description should be a brief description of the rule.
- The Rules list: show a list of the PAM rules defined. You can check/uncheck the available options. You can choose zero, one, or several options:
- Close session: if you select this option when the rule is met, Soffid will close the session opened.
- Lock account: if you select this option when the rule is met, Soffid will lock the account.
- Open issue: if you select this option when the rule is met, Soffid will open an issue in the ticketing system.
- Notify: if you select this option when the rule is met, Soffid will send a notification about the action.
3. Then you need to click on the "Apply changes" button to save the new PAM policy.
3.1. If you click on the "Undo" button, no updates will be saved.
4. Finally you can assign the PAM policy to the proper Password vault folder.
Screen overview
Step 8.3. Assign PAM policy
Assign PAM policy
1. To assign the PAM policy to a Password Vault folder, you must access the Password vault page in the following path:
2. Then you must select the folder by clicking on the record. Soffid will display a window with the folder data.
3. You can select the password policy selecting it on the drop-down list.
4. Finally you need to click on the "Apply changes" button to save the password policy,
4.1. If you click on the "Undo" button, no updates will be saved.
Screen overview