Step 7. Just in time privileges
- Step 7. Just in time privileges
- Step 7.1. Define an approval workflow
- Step 7.2. Define XACML policy set to use a workflow
- Step 7.3. Configure XACML PEP
Step 7. Just in time privileges
Introduction
Once the discovery process has been run, the critical accounts have been detected and saved on the password vault, and the password rotation process has been defined, the next step would be to define the necessary approval process to manage the use of the critical accounts.
Using the approval process, Soffid allows you to define, step by step on the BPM Editor, the workflow for critical accounts use, and define who has to be the manager or authorized user who will approve or deny to use of those critical accounts. To define and configure the workflow you must know some information like:
- Who or whom can start the process of making a request.
- Who or whom must approve or deny the request.
- If the approved email will be available.
- Which fields must see or fill in the users whom requests.
- Which fields must see or fill in the users whom approve or deny.
- How many approval levels the workflow will need.
- And other requirements.
Then, Soffid can be able to add more complex and restricted rules to the authorizations using XACML. With the XACML tool, you will be able to define policy sets and policies to describe general access control requirements. Also, you will be able to define some obligations as actions that have to be returned with response XACML. To define the policy sets and policies, you need to know some relevant information like:
- On which resources, policy set, or policies should be applied
- On which users, a set of policies or policies should be implemented.
- The actions which will be executed
- In which environments the policy sets or policies will be implemented.
- The rules will be applied.
- And other.
Step 7.1. Define an approval workflow
Step-by-step
1. To define and configure an approval workflow, you can use the Soffid BPM editor. You must access the BPM editor page in the following path:
2. To add a new workflow you must click the add button (+) and Soffil will display a new window.
3. Then, you must write a process name and select the process type "Account reservation" and Soffid will display the process editor to configure the new workflow.
4. At the "Process editor" form you could config the workflow steps.
You can visit the BPM Editor book to find more information and examples about the workflows.
5. Once you finish configuring the workflow, you must click the option "Save and Publish" to be able to use the workflow.
Screen overview

Step 7.2. Define XACML policy set to use a workflow
Step-by-step
1. To define policies, you must access the XACML Policy Management page in the following path:
2. Once you have accessed the XACML Policy Management page, you can click the add button (+) to create a new policy set, or you can click on an existing policy set the record to add new policies.
2.1. Update a policy set: If you want to update an existing policy you must check if the proper PEP was configured with that policy set.
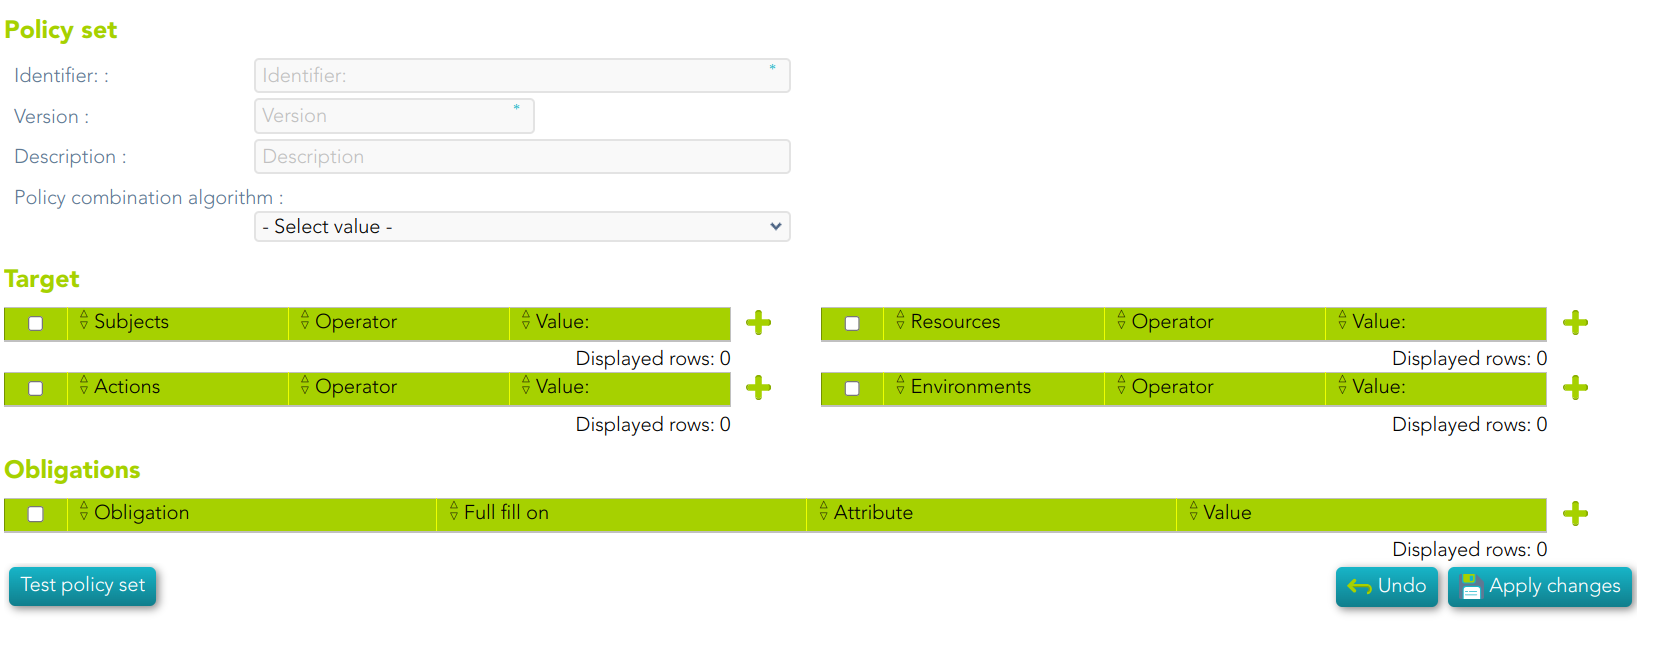
2.2. Create a new policy set: first of all you must click the add button (+). Then Soffid will display an empty window to fill in the required fields.
-
-
- The Identifier should be an identificative and unique name. You will need the name to configure the PEP
- The Version should be a number to identify the current policy version. You will need the version to configure the PEP.
- The Description should be a brief description of the agent.
- The Policy Combining Algorithm allows you to select the procedure for arriving at an authorization decision.
-
2.3. You need to click on the "Apply changes" button to save the new policy set or to update an existing policy set.
3. Once you have created or updated the policy set, you could add new policy sets, policies, policy references, and/or policy set references.
For more information, you can visit the XACML Book where you could find information about how to use XACML and some examples.
4. Finally, you must check and configure the XACML PEP configuration.
Screen overview
Step 7.3. Configure XACML PEP
Step-by-step
1. To configure the XACML PEP You must access the "XACML PEP configuration" page in the following path:
2. At the "XACML PEP configuration page you must fill in the Password vault Policy Enforcement Point section.
2.1. The policy must be enabled, you must select Yes on the "Enable XACML Policy Enforcement Point".
2.2. Then you must fill in the Policy set ID and the Policy set version to use.
2.3. The trace request is an optional field used to debug.
3. Once you fill in the mandatory information, you must click the "Apply" button to save the updates.
3.1. If there is any error in the data, Soffid will display a message with the error data.
For detailed information about XACML, you can visit the XACML book.
Screen overview
