Step 3. Launch network discovery
Step 3.1. Launch network discovery
Then, the third step will be to launch the network discovery process. That is the process in charge to scan the network, getting the hosts information, and connecting to the hosts as well.
Step-by-step
1. The discovery network task can be executed manually or automatically:
1.1. By clicking the "Start now" button, the process will be launched manually at the current moment.
1.2. If the schedule option is enabled, the task will be launched at the schedule defined. You can configure it on the Scheduled task page as well.
2. Soffid will display the information about the result of the process when it has finished.
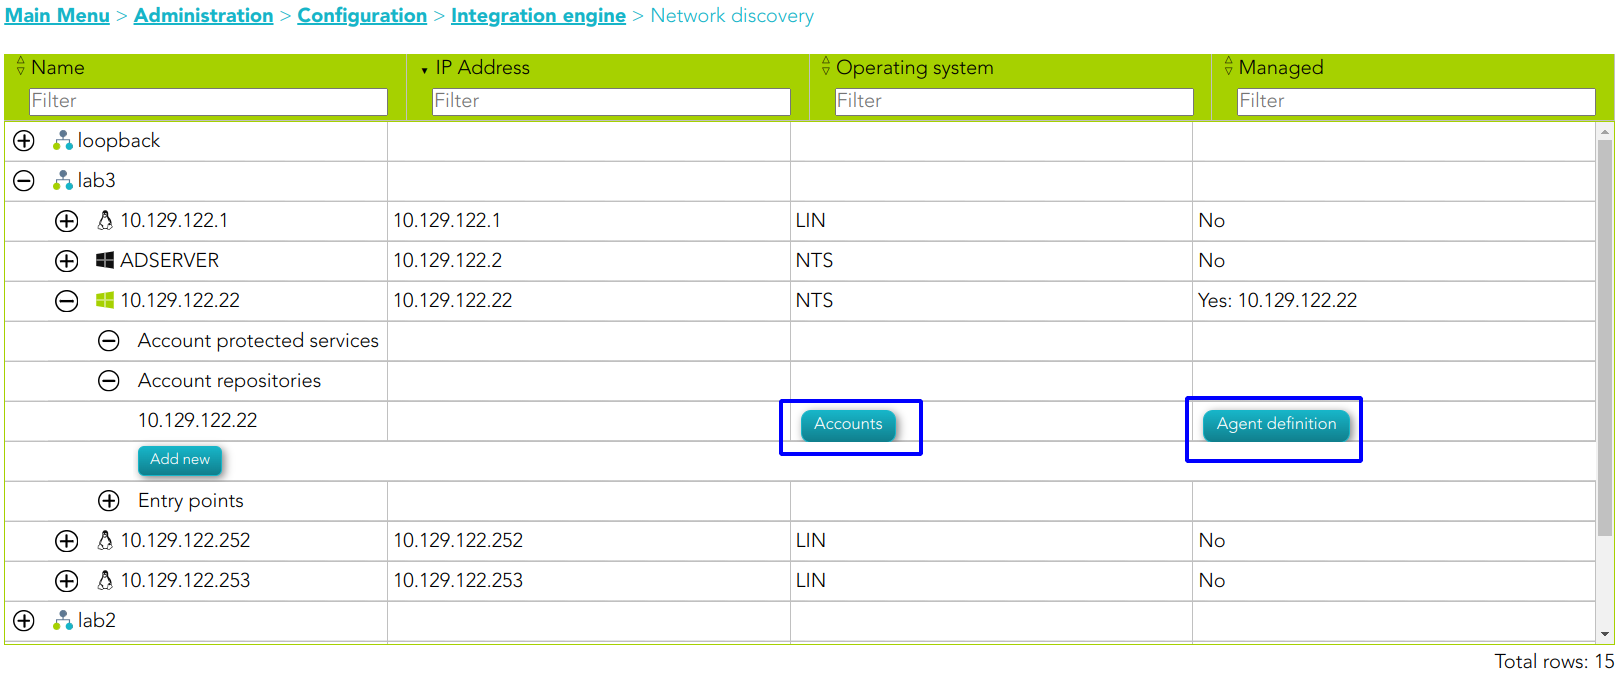
3. Also, Soffid will display in a tree structure the information recover about the host detected identifying indicating whether it was possible to connect, and in the affirmative case, the information about the agent and the entry point created, and the recovered accounts
The discovery process is multithread. To discover the host of the network, Soffid launch from 1 to 20 threads, with that configuration, Soffid gets to optimize the discovery process.
Network discovery process
On the Network dicovery page there are two different servers to configure, the first one, the discovery proxy server (located next to the network attributes), the second one, the discovery manager (located on the schedule section).
Communication between these servers is always encrypted with certificates on both sides.

How Network discovery works?
The server to discover
That server is in charge to scan the network to discover the hosts of the network. For each host discovered, the Nmap utility gets the info about the ports and the protocols used. Also, that process gets the IP Address and the operating system. All the recover information will be saved on Soffid database.
If no discovery manager is selected, to execute that process, Soffil will use on of the principal sync servers installed and configured.
The server to connect
The discovery proxy server works as a proxy to connect to the target systems.
When the discovery manager discovers a host, it gets the host information and then, through discovery proxy server, it attempts to connect to the host using the accounts defined on the accounts to probe list.
- If it can not connect to the host, it will attempt with the next host discovered.
- If it gets to connect to the host, then it will create automatically a Soffid agent with the proper attributes and connector parameters, also with the necessary account metadata.
Then, the reconciliation process of the created agent, will be launched and it will try to recover the information about the accounts defined on the host. Also, it will try to recover the information about the account protected services. The recover information will be saved on Soffid database.
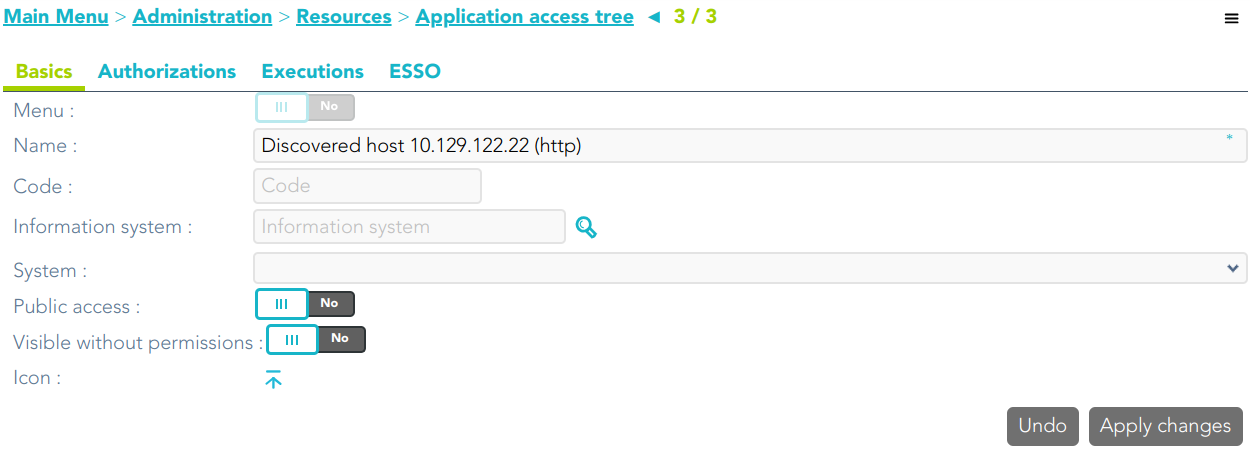
The next step will be to create, in the possible cases, a new entry point to the host with the basic attributes, and the proper executions to run it. That entry point will display on the Application access tree page.
If no discovery proxy server is selected, Soffid will use the same sync server used to the discover process.
https://en.wikipedia.org/wiki/Nmap
Step 3.2. Account repositories
Once the network discovery process is complete, Soffid will have detected the devices connected to that network and will create, where possible, a repository of accounts. Soffid will also attempt to obtain all accounts from this repository.
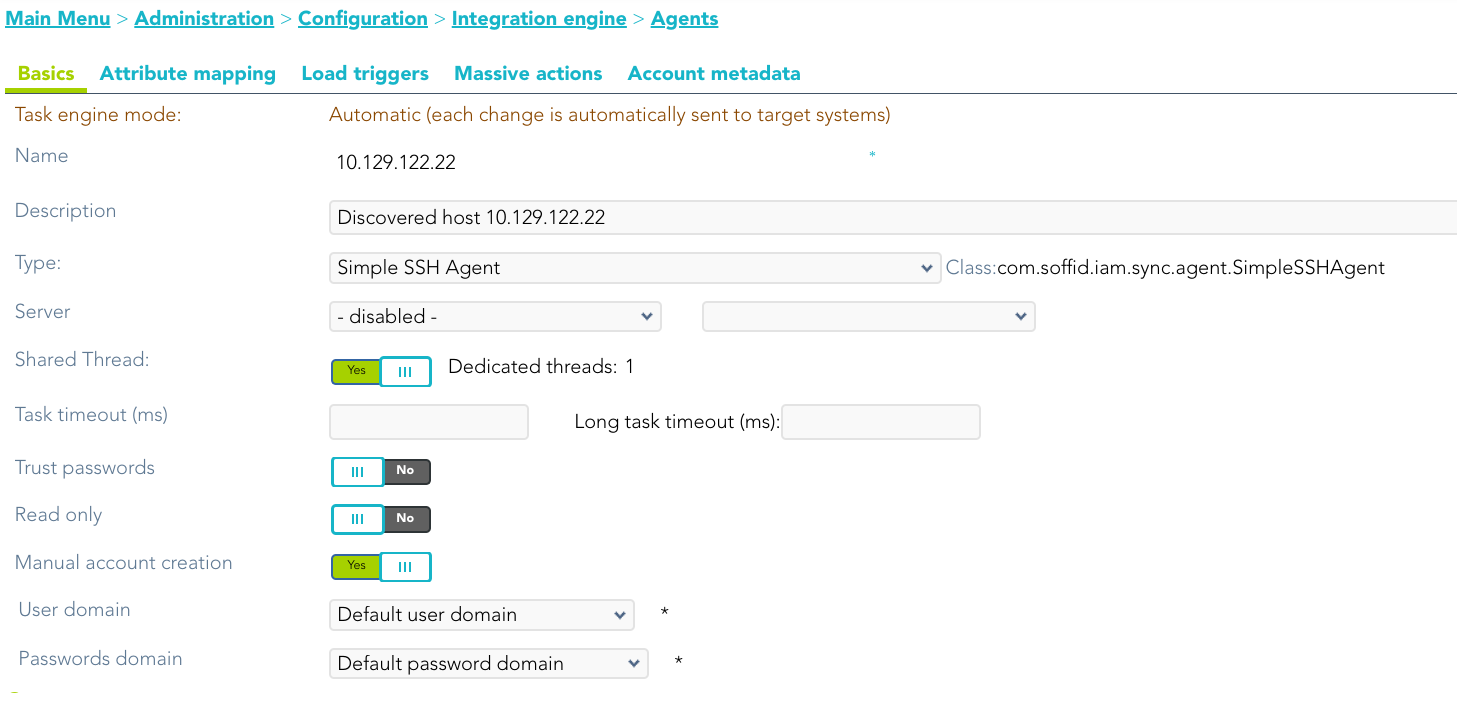
This is an automatic process, and as a result, you will be able to access the agent definition and the accounts created
Agent definition
On the agent page, you could find the agent definition.
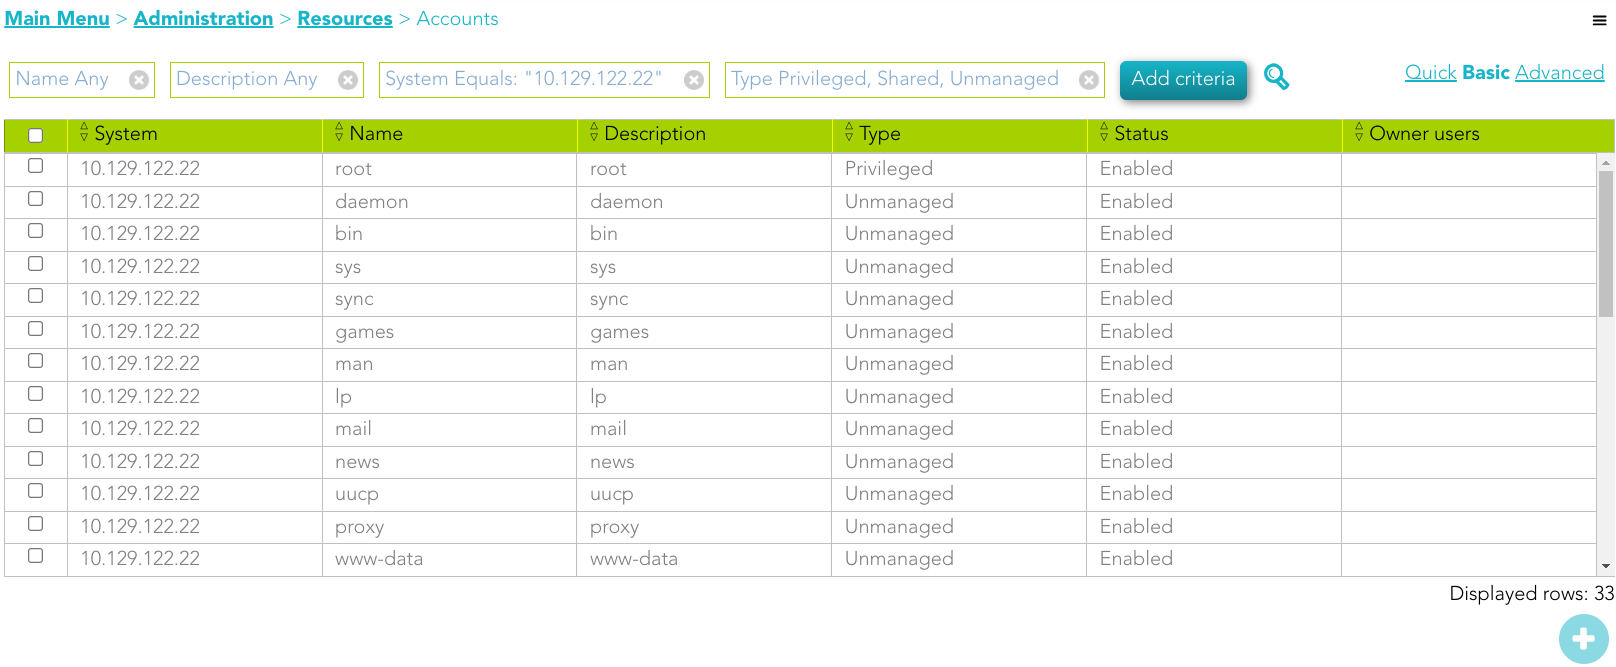
Accounts
On the accounts page, you could find all the accounts detected at this system.
Step 3.3. Entry point
Soffid allows you to manually create entry points to connect to information systems.
Step-by-step
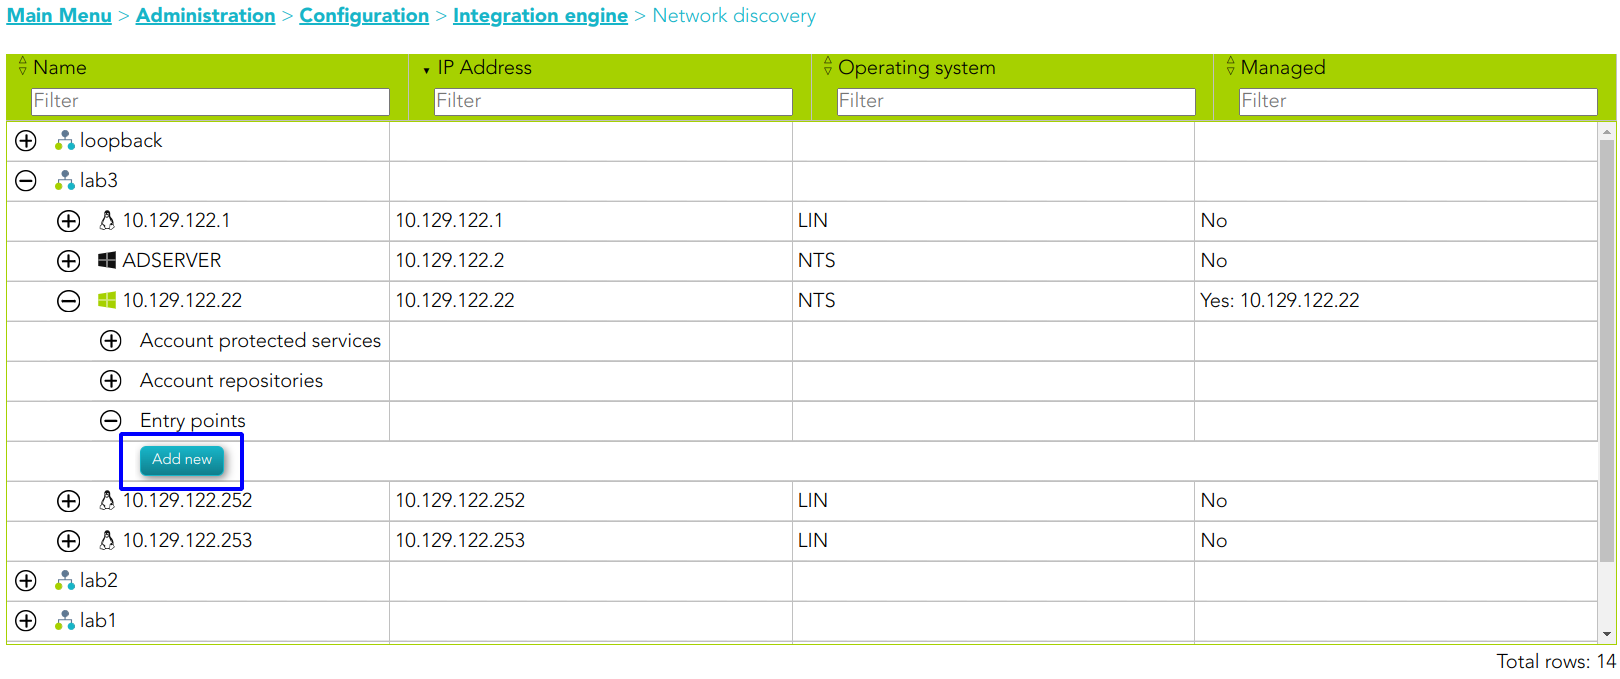
1. Once the device is detected in the network, you could add new Entry points to this device. To add a new device you must click the Add new button
2. Then Soffid will display a new window to add the new Entry point. At this step, you need to select the Entry point type you are creating, and the menu to place the entry point.
- Secure shell (ssh)
- Secure web application (https)
- Web application (HTTP)
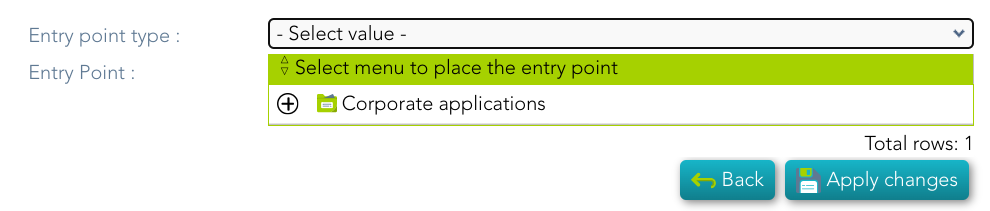
3. Finally you must save by clicking the Apply changes button
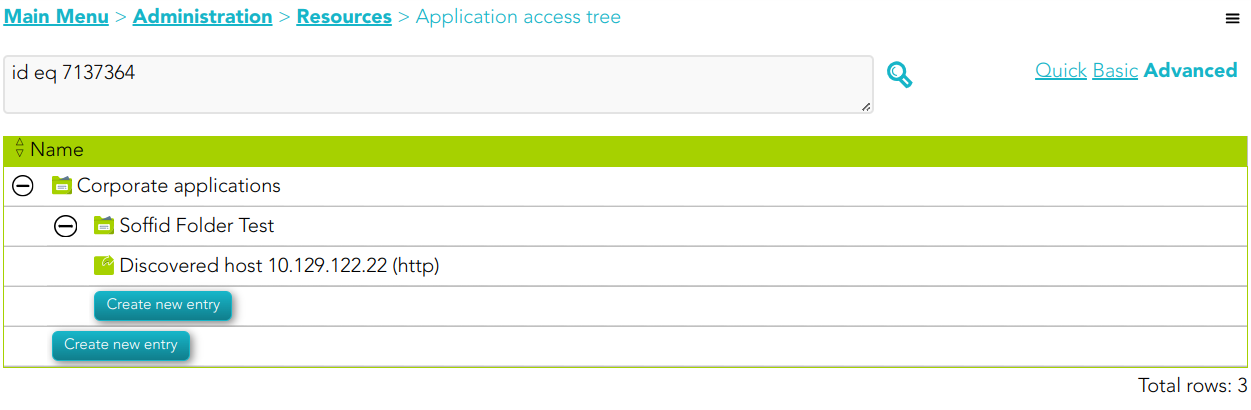
4. You could check the new Entry point by visiting the Application access tree page
Entry point detail