# How to install Soffid using Windows native authentication in SQL Server?
## Autenticación NTLM para SQL Server
### Soffid Versions
To install Soffid using Windows native authentication in SQL Server you will need an specific or higher versions of Console and Sync Server:
- Console 3.6.36 or higher
- Sync server 3.6.26 or higher
You can check the lastest versions in the download area: [https://download.soffid.com/download/enterprise/](https://download.soffid.com/download/enterprise/)
## Steps
### Prerequisites
- Install SQL Server and create the soffid database.
- Install Java JDK11.
### Install and config Soffid Console
#### 1.- Install Soffid Console
Open the installation file, Windows Installer Package (.msi). It will create the operating system level service and will start it. After some seconds, the installation wizard will be up and running in port 8080.
If the console was installed previously, you will need to update the system.properties file. You will have to add the parameters **;integratedSecurity\\=true;trustServerCertificate\\=true**
system.properties file
You can find this file in ...\\Soffid\\IAM-Console\\conf
```
#Configured from soffid startup wizard
#Wed Apr 02 11:31:01 CEST 2025
dbMaxConnections=200
hostName=localhost
dbValidationQuery=select 1 from sysobjects
dbDriverString=sqlserver
dbPasswordCipher=com.soffid.iam.tomcat.SoffidPasswordCipher
openejb.validation.output.level=VERBOSE
tomee.serialization.class.blacklist=*
tomee.serialization.class.whitelist=org.apache.openejb
openejb.deploymentId.format={appId}-{ejbClass}
org.apache.johnzon.buffer-strategy=BY_INSTANCE
dbDriverClass=com.microsoft.sqlserver.jdbc.SQLServerDriver
soffid.server.port=8080
dbUser=DOMAIN\\Administrator
dbStatus=1
dbDriverUrl=jdbc\:sqlserver\://141.94.164.195\:1443;databaseName\=soffid02;integratedSecurity\=true;trustServerCertificate\=true
dbPassword=xxxxxx\=\=
```
Update Service Logon
[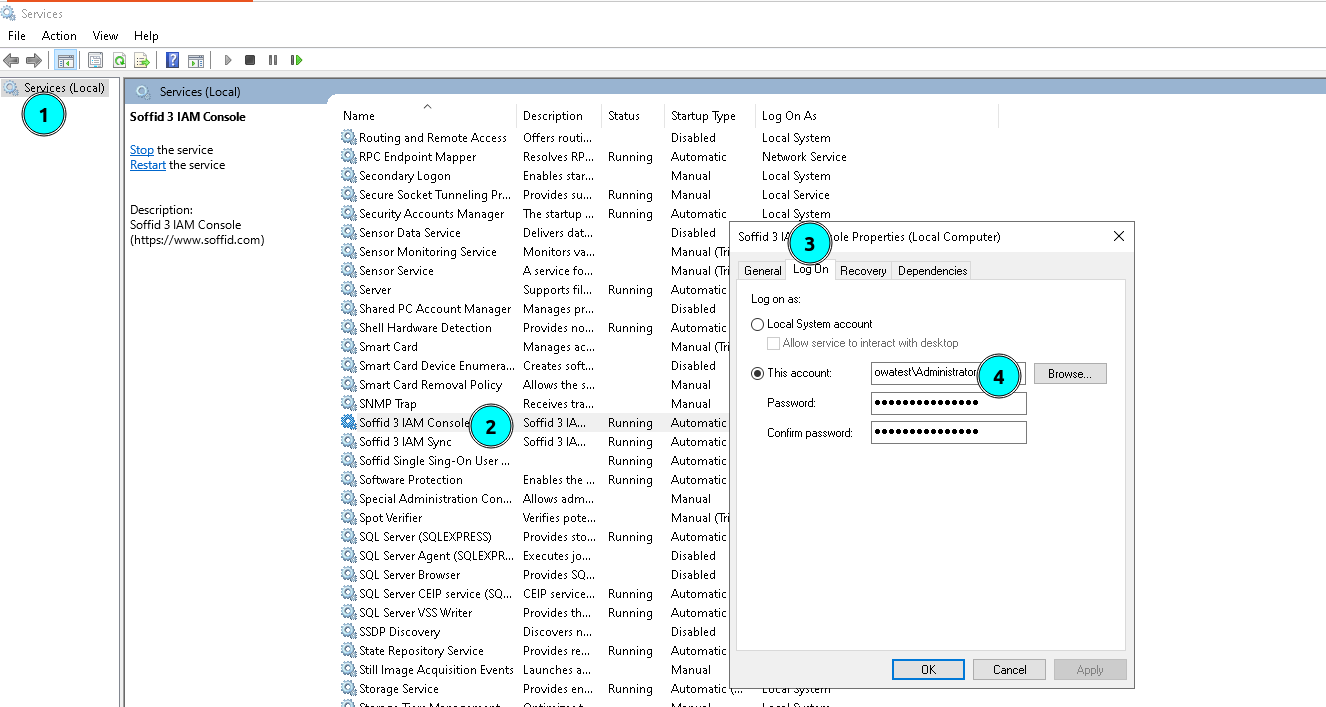](https://bookstack.soffid.com/uploads/images/gallery/2025-04/3bOqj73JhU5BtoOw-image.png)
Configure Soffid Console
[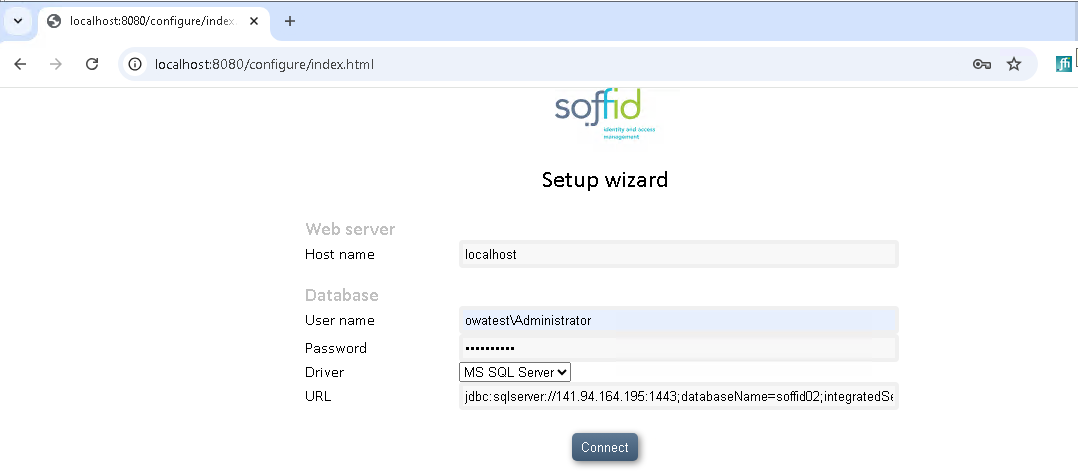](https://bookstack.soffid.com/uploads/images/gallery/2025-04/pOByrL0CGxHvhI8p-image.png)
seycon.properties file
You can find this file in ...\\Soffid\\IAM-Sync\\conf
```
#Soffid autogenerated file
#Wed Apr 02 11:46:45 CEST 2025
password=xxxxxxxx
hostname=WIN-DESK-01
serverlist=https\://WIN-DESK-01\:1760/
port=1760
sslkey=xxxxxxxxxxxx
user=xxxxx.lab\\Administrator
rol=server
java_opt=-Xmx512m
db=jdbc\:sqlserver\://141.94.164.195\:1443;databaseName\=soffid02;integratedSecurity\=true;trustServerCertificate\=true
url=https\://WIN-DESK-01\:1760/
autoupdate=true
```
Update Service Logon
[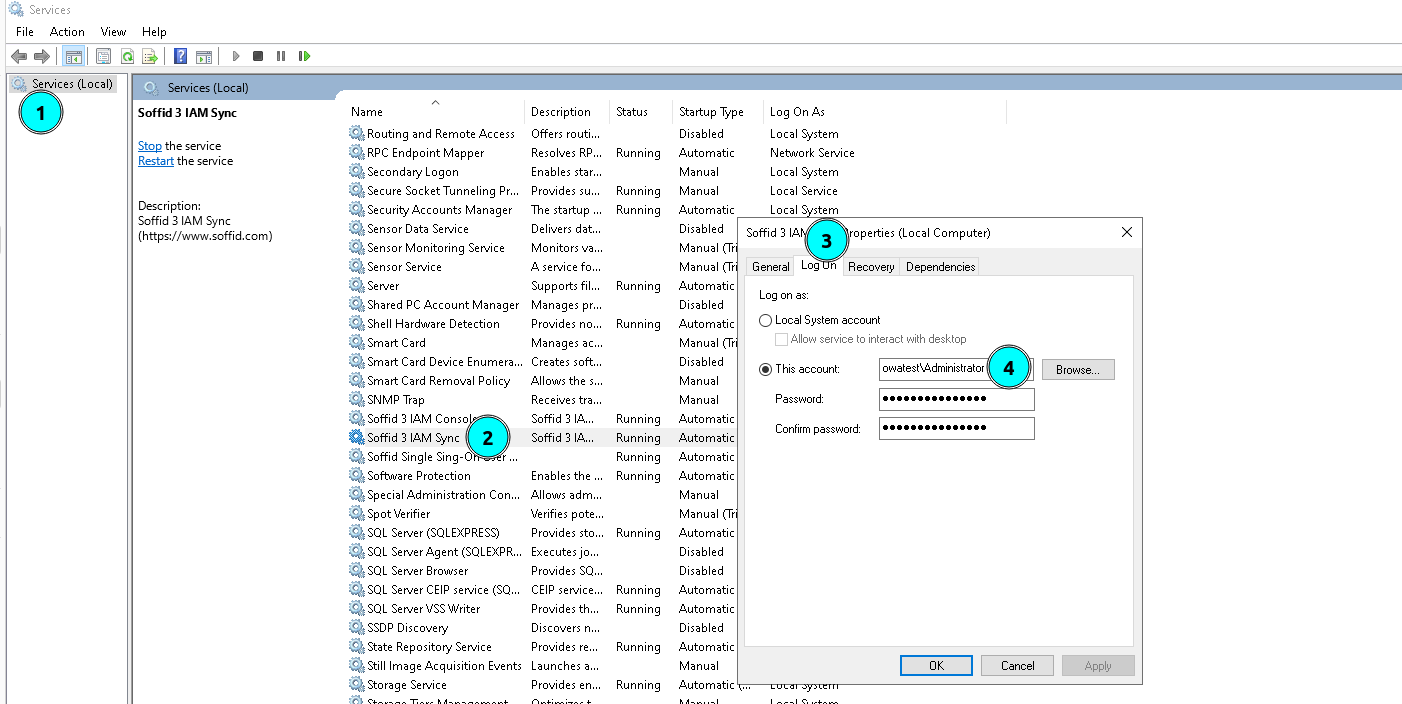](https://bookstack.soffid.com/uploads/images/gallery/2025-04/Wjg8hS8BkGLfOVDl-image.png)