Installation
Intallation guides
- ⏰ Getting started
- System architecture
- Database initialization
- Initialize database on your server
- Initialize database using Docker
- Initialize database on Kubernetes
- Creating a multimaster MariaDB replica
- Configuring database cluster
- Installing Soffid on your server
- Installing IAM Console
- Installing Sync server
- Configure TLS for IAM Console
- Linux operator guide
- Windows operator guide
- Installing Soffid using Docker
- Installing Soffid using Docker Compose
- Installing Soffid
- How to make a Mariadb Backup?
- Full installation of Soffid 3 as test environment
- Full installation of Soffid 4 as test environment
- Installing Soffid on Kubernetes
- Installing IAM Console
- Installing Sync server
- How to copy to Kubernetes Secrets?
- How to copy Sync Server Kube Conf to Database table?
- How to install Soffid using Windows native authentication in SQL Server?
- High Availability
- Customice logging
- Local configuration properties
- Upgrade Soffid3
- Soffid 4 first access
⏰ Getting started
Soffid is compatible with Windows or Linux (Ubuntu is the most commonly used)
To succesfully install Soffid IAM, choose your installation and follow the next steps:
Server
- Initialize database on your server
- Installing Soffid IAM on your own server
- Configure TLS for IAM Console
Docker
Docker compose
Kubernetes
We also recommend reading the Soffid architecture section before proceeding with the installation.
Soffid is not currently compatible with Podman.
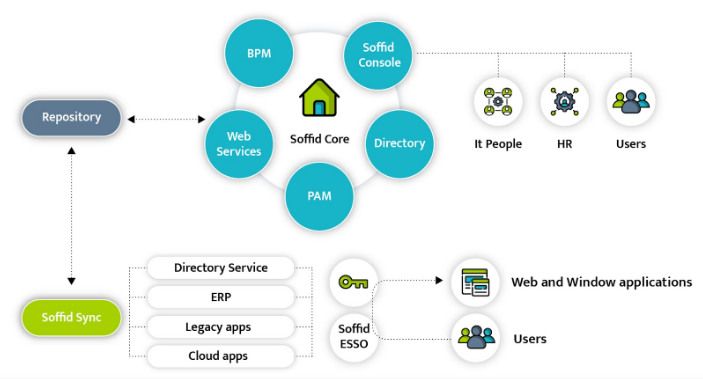
System architecture
Soffid Architecture
Soffid system is composed of up to five different components:
- IAM console
- Sync server
- Repository
- PAM Jump server (optional)
- LDAP Directory server (optional)
- Enterprise SSO (optional)
IAM Console
Is the portal used by administrators to manage identity management objects and by end-users to use the self service portal. It's 100% web and can be deployed in any Windows or Linux server. Kubernetes and Docker deployments are supported as well.
Repository
Is a relational database that stores all the information about configuration, policies and identity objects, including users, accounts and permissions.
Any of the following repositories are supported:
- Maria DB
- My SQL
- Oracle
- SqlServer
- PostgreSQL
Sync server
Is the responsible for connecting the repository with the managed systems. The integration can be in both ways, fetching changes from managed system and pushing changes from Soffid repository.
The sync server can be deployed in many different ways, allowing central, distributed and hybrid deployments, both on cloud or on premise.
PAM Jump server
Is a piece used to allow access to privileged accounts, recording the screen and every keystroke, file or clipboard transfer.
Directory server
Is a directory server based on OpenLDAP. It can only be installed on a Linux server with Docker.
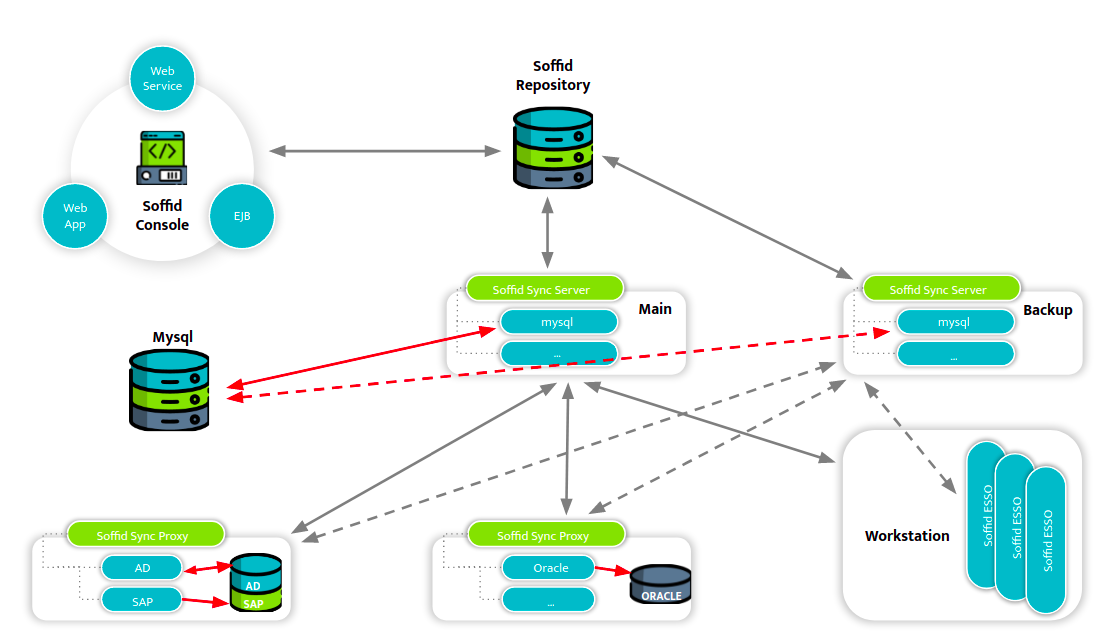
Mixed architecture
In the following image you can view an example of the architecture with a mysql database managed directly from the main servers and an Active Directory and an Oracle database managed through a sync proxy installed on the same host as the managed system.
Database initialization
How to install and initialize database
Initialize database on your server
The purpose of this tutorial is to show how to initialize a database required for Soffid IAM installation.
Prerequisites
First of all, you sould install a database required in the Soffid IAM installation.
The supported databases are:
- MySQL
- MariaDB
- Oracle
- Microsoft SQLServer
- PostgreSQL
MySQL/MariaDB
In order to configure MySQL database you need access to the database administration tool (mysql) with superuser permissions using a TCP/IP connection. If needed, please create a user for the Soffid installation. If you don't have such a user, or don't know its password, please access MySQL as root, execute the mysql tool and create the user with grant command (where ADMIN_USER is the user to be used during the installation process to create the soffid repository database and ADMIN_PASSWORD is the required password).
create database soffid;
use soffid;
grant all privileges on *.* to ADMIN_USER@localhost identified by 'ADMIN_PASSWORD' with grant option;
In addition, in order to be able to manage big files, like process definitions or software add-ons, we have to modify the max_allowed_packet parameter on MySQL. This parameter is commonly located on the /etc/mysql/my.cnf file.
You can find the default option file locations on Linux, Unix, Mac or Windows following this link.
[mysqld]max_allowed_packet=128M |
If the version of MariaDB is 10.1.38, or newer, the recommended value for max_allowed_packet is 512M
Note: in the case, we will obtain the next 'The size of BLOB/TEXT data inserted in one transaction is greater than 10% of redo log size. Increase the redo log size using innodb_log_file_size.' error when trying to upload an addon, we may update the default value of this mysql/mariadb parameter. This parameter is commonly allocated on the /etc/mysql/my.cnf file.
[mysqld]innodb_log_file_size=256M |
If you are installing on a Ubuntu 18.04 server, the default character set is set to utf8mb4. Using this character set can cause problems, as many index sizes will exceed the maximum key size of 767 bytes. To prevent this problem, change the following settings:
[mysqld]character-set-server = Latin1collation-server = Latin1_general_ci |
Alternatively, if UTF character set is required, write the following settings:
[mysqld]character-set-server = utf8mb4collation-server = utf8mb4_general_ciinnodb_large_prefix = 1innodb_file_format = Barracudainnodb_file_per_table = 1 |
Following this link you will find the steps to set up a two nodes database cluster.
Oracle
A new database instance should be created. Optionally two tablespaces should be created (SOFFID_DATA and SOFFID_INDEX) to separate soffid tables and indexes.
CREATE TABLESPACE SOFFID_DATA DATAFILE '/app/oracle/oradata/project/soffid_data.dbf' SIZE 200M EXTENT MANAGEMENT LOCAL AUTOALLOCATETo create the tablespace is necessary to provide the full path name, its size and MANAGEMENT AUTOALLOCATE option. The autoallocate option is needed because the tables are not sized by database creation scripts. Also, the Oracle Listener must have a TCP/IP port accepting connections.
Microsoft SQLServer
You must enable the SQL Server Browser Service at startup and the authentication method have to be set to “SQL Server and Windows Authentication mode”.
In addition, you must ensure that 'READ_COMMITTED_SNAPSHOT" parameter is enabled, you can do so with the following command:
ALTER DATABASE [database_name] SET READ_COMMITTED_SNAPSHOT ONInitialize database using Docker
The purpose of this tutorial is to show how to initialize a database MariaDB required for Soffid IAM installation using Docker.
Prerequisites
1. Install docker ( https://docs.docker.com/install/ )
2. Create a docker network, that network allows you to connect containers to the same bridge network to communicate:
sudo docker network create -d bridge NETWORKNAMEFor the correct installation of Soffid it is recommended not to use the underline character _ in the network name.
MySQL/MariaDB
First step will be initialize MariaDB with Docker, in this case we attach the container to an exist network:
sudo docker run -d --name mariadb-service --network=NETWORKNAME -e "MYSQL_ROOT_PASSWORD=ADMIN_PASSWORD" mariadbSecond, you can check the deployed containers:
sudo docker psThen, you must connect to the created container:
sudo docker exec -i -t mariadb-service /bin/bashIn order to configure MySQL database you need access to the database administration tool (mysql) with superuser permissions using a TCP/IP connection. If needed, please create a user for the Soffid installation. If you don't have such a user, or don't know its password, please access MySQL as root, execute the mysql tool and create the user with grant command (where ADMIN_USER is the user to be used during the installation process to create the soffid repository database and ADMIN_PASSWORD is the required password).
Coonect to MySQL:
mysql -u root -pCreate database and grant permissions:
create database soffid;
use soffid;
grant all privileges on *.* to ADMIN_USER@'%' identified by 'ADMIN_PASSWORD' with grant option;
In addition, in order to be able to manage big files, like process definition or software addons, we have to modify max_allowed_packet parameter on MySQL. This parameter is commonly allocated on the /etc/mysql/my.cnf file.
[mysqld]max_allowed_packet=128M |
If the version of MariaDB is 10.1.38, or newer, the recommended value for max_allowed_packet is 512M
Note: in the case we will obtain the next 'The size of BLOB/TEXT data inserted in one transaction is greater than 10% of redo log size. Increase the redo log size using innodb_log_file_size.' error trying to upload an addon, we may update the default value of this mysql/mariadb parameter. This parameter is commonly allocated on the /etc/mysql/my.cnf file.
[mysqld]innodb_log_file_size=256M |
If you are installing on a Ubuntu 18.04 server, default character set is set to utf8mb4. Using this character set can cause problems, as many index sizes will exceed maximum key size of 767 bytes. To prevent this problem, change following settings:
[mysqld]character-set-server = Latin1collation-server = Latin1_general_ci |
Alternatively, if UTF character set is required, write the following settings:
[mysqld]character-set-server = utf8mb4collation-server = utf8mb4_general_ciinnodb_large_prefix = 1innodb_file_format = Barracudainnodb_file_per_table = 1 |
Following this link you will find the steps to setup a two nodes database cluster.
Video Tutorial
MariaDB initialization using Docker
Initialize database on Kubernetes
The purpose of this tutorial is to show how to initialize a MariaDB database required for Soffid IAM installation on Kubernetes.
MySQL/MariaDB
To initialize MariaDB on Kubernetes first of all you must create a Persistent Volume. Storage in the cluster will be provisioned using Storage Classes.
apiVersion: v1
kind: PersistentVolume
metadata:
  name: local-pv
spec:
  capacity:
    storage: 10Gi
  accessModes:
  - ReadWriteOnce
  persistentVolumeReclaimPolicy: Retain
  storageClassName: local-storage
  local:
    path: /home/ulocal/kubernetes-disk
  nodeAffinity:
    required:
      nodeSelectorTerms:
      - matchExpressions:
        - key: kubernetes.io/hostname
          operator: In
          values:
          - soffid1234
---
apiVersion: v1
kind: PersistentVolumeClaim
metadata:
  name: mariadb-claim
spec:
  storageClassName: local-storage
  accessModes:
    - ReadWriteOnce
  resources:
    requests:
      storage: 5Gi
Path "/home/ulocal/kubernetes-disk" must be exists.
Then you must define the MariaDB deployment:
apiVersion: apps/v1
kind: Deployment
metadata:
  name: mariadb
  labels:
    app: soffid
    instance: "Soffid"
    type: database
spec:
  strategy:
    rollingUpdate:
      maxSurge: 0
      maxUnavailable: 1
    type: RollingUpdate
  replicas: 1
  selector:
    matchLabels:
      app: soffid
      instance: "Soffid"
      type: database
  template:
    metadata:
      labels:
        app: soffid
        instance: "Soffid"
        type: database
    spec:
      restartPolicy: Always
      containers:
        - name: mariadb
          image: mariadb
          resources:
            limits:
              memory: 2Gi
            requests:
              memory: 400Mi
          args:
            - "--max-allowed-packet=175M"
            - "--innodb-log-file-size=256M"
            - "--character-set-server=utf8"
            - "--collation-server=utf8_bin"
            - "--net-read-timeout=3600"
            - "--net-write-timeout=3600"
            - "--innodb-buffer-pool-size=100M"
          ports:
            - containerPort: 3306
              name: db-port
          env:
            - name: MYSQL_ROOT_PASSWORD
              valueFrom:
                secretKeyRef:
                  name: mariadb
                  key: root_password
            - name: MYSQL_USER
              valueFrom:
                secretKeyRef:
                  name: mariadb
                  key: username
            - name: MYSQL_PASSWORD
              valueFrom:
                secretKeyRef:
                  name: mariadb
                  key: password
            - name: MYSQL_DATABASE
              value: soffid
          volumeMounts:
          - name: mysql-persistent-storage
            mountPath: /var/lib/mysql

      volumes:
        - name: mysql-persistent-storage
          persistentVolumeClaim:
            claimName: mariadb-claim
---
apiVersion: v1
kind: Service
metadata:
  name: mariadb-service
  namespace: default
spec:
  clusterIP: None
  ports:
  - name: mariadb
    port: 3306
    protocol: TCP
    targetPort: 3306
  selector:
    app: soffid
    instance: "Soffid"
    type: database
  type: ClusterIP
Finally you must create resources in a cluster:
kubectl apply -f mariadb-pv-file.yaml
kubectl apply -f mariadb-deployment-file.yaml
Video Tutorial
MariaDB initialization in Kubernetes
Creating a multimaster MariaDB replica
This topic will cover the process to create a two node Maria DB cluster. The cluster will be configured to allow Soffid console to use either database node, which in turn will replicate data changes to the other one.
|
Node 1 action
|
Node 2 action
|
||||||||
|---|---|---|---|---|---|---|---|---|---|
| Create and setup a Maria DB in node 1. | |||||||||
|
Configure Maria DB to generate binary log files. Add the following lines to /etc/mysql/my.cnf: server-id = 1 |
|||||||||
|
Restart MariaDB: service mysql restart |
|
||||||||
| Create and setup a Maria DB in node 2. | |||||||||
|
Configure Maria DB to generate binary log files. Add the following lines to /etc/mysql/my.conf: server-id = 2 |
|||||||||
|
Restart MariaDB: service mysql restart |
|||||||||
|
Dump current database contents: mysqldump soffid -u soffid -p >soffid.data |
Load current database contents mysql -u soffid -p < soffid.data |
||||||||
|
Create a user for node 1 to fetch data from node 2. From mysql, execute: grant replication slave on *.* to replication_user@<NODE1-IP> set password for replication_user@1<NODE1-IP> = password('<NODE1-PASS>') |
|||||||||
|
Create a user for node 2 to fetch data from node 1. From mysql, execute: grant replication slave on *.* to replication_user@<NODE2-IP> set password for replication_user@1<NODE2-IP> = password('<NODE2-PASS>') |
|||||||||
|
Query current binary log position: MariaDB [(none)]> show master status; The result should look like this:
The got values will be used on node 2 to start replica process. |
|||||||||
|
Start replication from node 1 to node 2. From mysql, execute the following sentence, replacing proper values: CHANGE MASTER TO |
|||||||||
|
Verify replica is working right, by executing SHOW SLAVE STATUS \G Check following lines: Slave_IO_Running: Yes |
|||||||||
|
Query current binary log position: MariaDB [(none)]> show master status; The result should look like this:
The got values will be used on node 1 to start replica process. |
|||||||||
|
Now, start replication from node 2 to node 1. From mysql, execute the following sentence, replacing proper values: CHANGE MASTER TO |
|||||||||
|
Verify replica is working right, by executing SHOW SLAVE STATUS \G Check following lines: Slave_IO_Running: Yes |
|
||||||||
|
Now, create and start SC_SEQUENCE table in node 1. This sequence will generate values 1, 11, 21, 31, 41, and so on: CREATE TABLE `SC_SEQUENCE` ( ); INSERT INTO SC_SEQUENCE VALUES (1, 100, 10); |
|||||||||
|
Now, create and start SC_SEQUENCE table in node 2. This sequence will generate values 2, 12, 22, 32, 42, and so on:: CREATE TABLE `SC_SEQUENCE` ( ); INSERT INTO SC_SEQUENCE VALUES (2, 100, 10); |
Now, configure the Console to use the following jdbc URL:
jdbc:mariadb:sequential://mariadb-host-1,mariadb-host-2/soffid
Configuring database cluster
Once the database replica is setup, it's important to guarantee transactianality rules. To achive it, one database instance must be acting as the master and other as the slave.
Using corosync and pacemaker, you can configure a floating IP address that will mark which one is the active one at each moment.
|
Node 1
|
Node 2
|
|---|---|
| Install Corosync and Pacemaker. It is recommended to use apt or yum because these programs will handle dependencies for you, making the process much easier. | Install Corosync and Pacemaker. |
|
Cluster nodes need a key in order to authenticate the packages sent between them by corosync. sudo corosync-keygen Once the key has been generated, copy it to the other nodes: sudo scp /etc/corosync/authkey <user>@<other-cluster-node>:/home/<user> |
|
| Once the key has been copied, move the copied key from the /home/<user> route to /etc/corosync/authkey | |
| Now we need to tell Corosync which IP to use to communicate with other nodes in the cluster. Open /etc/corosync/corosync.conf and edit the bindnetaddr field. Set the right IP and save the file. We need to do this in every node in the cluster, although you can use the same file if you set the right name in your hosts file. |
|
| Configure Corosync with the right IP binding as done in node 1. | |
| Configure the /etc/default/corosync file to enable Corosync changing START to yes "START=yes". Then we can start Corosync using sudo service corosync start. |
|
| Enable Corosync and start it as in node 1. | |
|
Allow the nodes a few seconds to start, then you can monitor the cluster nodes using sudo crm_mon. The result should be similar to this: ============ Online: [ node1 node2 ] |
|
| Check the nodes with sudo crm_mon | |
|
Corosync is ready, now we will tell Pacemaker which resources we want it to handle in HA. These will be the database and a virtual IP (VIP) we will use to address the cluster. Add the VIP to the node, and then use this to create the resource: You can check the result using sudo crm status, which should look something like: Last updated: Wed Jan 18 10:21:12 2017 Last change: Tue Jan 17 13:08:25 2017 by hacluster via crmd on nodename Online: [ node1 node2 ] Full list of resources: Resource Group: my_cluster |
|
|
Now we will add the database. We will use: sudo crm configure primitive FAILOVER-MARIADB lsb::mysql op monitor interval=15s |
Installing Soffid on your server
Guide to show the installation process os Soffid IAM on your server
Installing IAM Console
Guide to install IAM Console on your own server
Prerequisites
Installing Soffid IAM solution requires the following requirements:
- Windows or Linux (Ubuntu is the most commonly used)
- Java JDK 11 for Soffid 3, Java JDK 17 for Soffid 4
- 8GB RAM
- > 10GB disk space
- Supported database installed
Video Tutorial
Windows
Linux
Installation
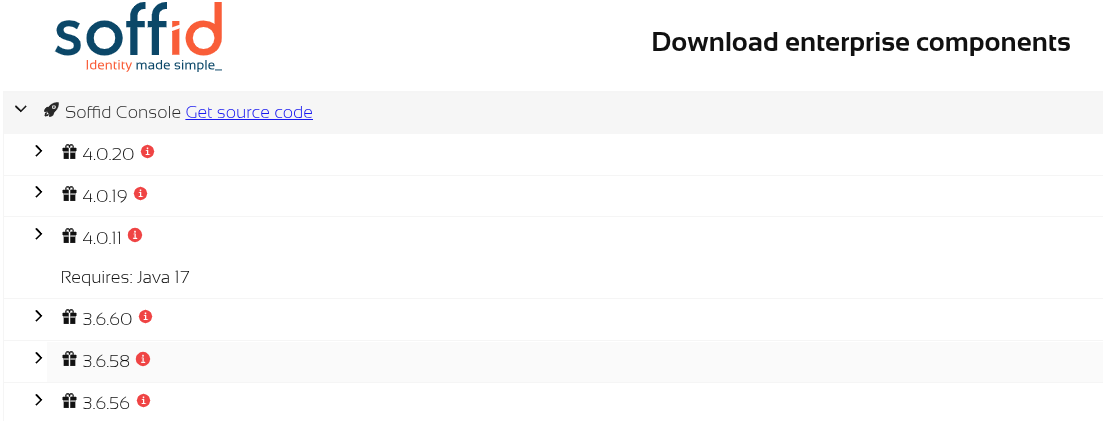
Download
You can download Soffid 3 and Soffid 4 components from our website Soffid Download Opensource or Soffid Download Enterprise.
The installation of Soffid 3 and Soffid 4 is the same, although the examples are in Soffid 4, you can do the same for Soffid 3.
Depending on your platform, you can download the MSI, RPM or DEB version.

As soon as the install-x.y.z.sh file is in your computer, copy the file into a path of your server.
Installing IAM Console
Windows
Open the installation file. It will create the operating system level service and will start it. After some seconds, the installation wizard will be up and running in port 8080.
Linux
We recommend to install the package like:
sudo dpkg -i '/your-path/Soffid Console-Debian_Ubuntu Installer-4.0.20.deb'You can ckeck the IAM Console service status:
systemctl status soffid-iamconsole.serviceConfiguration
Then, open the web browser pointing to http://localhost:8080
The wizard will ask for the following information:
- Host name: enter the name that will be used by end-users to access to the console. To use the fully qualified domain name is suggested. A virtual service name can be used as well. Mind that the web server will work even when you put a wrong host names. This host name will be used in email notifications that contain a link to the console.
- User name: Enter the name of a user with permissions to create tables and indexes in the selected database.
- Password: Enter the database user password.
- Database type: select the right database engine: Maria DB, MySQL, PostgreSQL, MS SQL Server or Oracle.
- Database URL: complete the database URL. The default template use to be good enough, but you can use advanced features depending on the selected database driver:
- Maria DB and MySQL: https://mariadb.com/kb/en/about-mariadb-connector-j/
- PostgreSQL: https://jdbc.postgresql.org/documentation/80/connect.html
- MS SqlServer: https://docs.microsoft.com/es-es/sql/connect/jdbc/building-the-connection-url?view=sql-server-ver15
- Oracle: https://docs.oracle.com/cd/B28359_01/java.111/b31224/urls.htm#BEIJFHHB
The next step, allows you to enter the name and password for the initial Soffid user. You must enter:
- Login name: by default it's admin, but you can use any other naming convention. To change it is good security practice.
- First name: Your first name.
- Last name: Your last name.
- Password: Enter the initial password to use. Write it twice and don't forget it.
Manual Configuration
Configuring service startup
If you are using the RPM, DEB or MSI installers, the service is automatically configured to start up with the computer. If you are using the .tar.gz file, you must enable it manually. Execute these commands as root to start Soffid IAM console service on boot:
ln -fs /opt/soffid/iam-console-3/bin/catalina.sh /etc/init.d/soffid-iamconsole
ln -fs /etc/init.d/soffid-iamconsole /etc/rc2.d/S98soffid-iamconsole
ln -fs /etc/init.d/soffid-iamconsole /etc/rc3.d/S98soffid-iamconsole
ln -fs /etc/init.d/soffid-iamconsole /etc/rc2.d/K10soffid-iamconsole
ln -fs /etc/init.d/soffid-iamconsole /etc/rc3.d/K10soffid-iamconsole
If something is not running as expected, please check the log at:
root@localhost:~# cd /opt/soffid/iam-console-4/logs
root@localhost:/opt/soffid/iam-console-4/logs# less soffid.YEAR-MONTH-DAY.log
Now you can connect IAM Console http://localhost:8080/soffid The first thing you must do is to configure database parameters and admin user. When the console is created, the password for user admin will be valid for 24 hours.
Installing Sync server
Guide to install Synchronization server on your own server
Prerequisites
Soffid IAM sync server requires the following requirements:
- Windows or Linux (Ubuntu is the most commonly used)
- Java JDK 11 for Soffid 3, Java JDK 17 for Soffid 4
- 8GB RAM
- > 10GB disk space
- Soffid console installed
Video tutorial
Windows
Linux
Installation
Download
You can download Soffid 3 and Soffid 4 components from our website Soffid Download Opensource or Soffid Download Enterprise.
Click on Soffid Sync Server and download the latest version for your OS.
As soon as the install-x.y.z.sh file is in your computer, copy the file into a path of your server.
Installing Sync Server
Windows
Open the installation file. It will install the software and will execute the installation wizard.
The installation wizard will ask if it is the first sync server or not.
Linux
sudo dpkg -i '/your-path/Soffid Sync Server-Debian_Ubuntu Installer-4.0.0-beta-2.deb'The installation wizard will ask if it is the first sync server or not.
Installing the first sync server
Automatic wizard
If you answer Y to the first question, the wizard will ask for the following information:
- Database URL: Use the same URL used to install the console.
- Database user: The user name to connect to the database. It was used during the console installation
- Database password: The database user password
- Host name: Enter the fully qualified domain name of the host. IP addresses are not accepted.
- Port to listen: Enter a TCP port number. The sync server will receive connections from the console or other sync servers through this port. The suggested value is 1760.
After checking the database status, the wizard will register the sync server and will create a new certification authority, as well as a digital certificate for the brand new sync server.
Manual wizard
If the wizar is not launched automatically, you should launch it manually. To do that, you must follow the next steps:
1. Stop syncserver service: systemctl stop soffid-iamsync.service
2. Delete previous configuration: rm /opt/soffid/iam-sync/conf/*
3. Launch wizard: /opt/soffid/iam-sync/bin/configure
4. Start synserver service: systemctl start soffid-iamsync.service
The wizard will request about the database configuration:
......
Is this the first sync server in the network (y/n)? y
Database URL (jdbc:....): jdbc:mariadb://localhost/soffid
Database user: ADMIN_USER
Password: xxxxx
This server host name [soffid.my.lab]: localhost
Port to listen to [1760]: 1760
....
Installing the next sync servers
If you answer N to the first question, the wizard will ask for the following information:
- Cloud service: You can install an on-premise sync server connected to a cloud instance. In this case, the communication stack works in a slightly different way. If this is the case, enter Y. If you are connecting to an on-premise Soffid deployment, enter N.
- Server URL: Enter the URL for the first sync server.
- Tenant name: Enter the tenant name. If the sync server is not intended to work with a single tenant, enter master.
- User name: Enter an administrator user name.
- Password: Enter the administrator password.
- Host name: Enter the fully qualified domain name of the host. IP addresses are not accepted.
- Port to listen: Enter a TCP port number. The sync server will receive connections from the console or other sync servers through this port. The suggested value is 1760.
The wizard will connect to the sync server and create a sync server connection request. The administrator must open the "My tasks" page and approve the request. Once the request is approved, the wizard will finish.
Running synchronization server in root mode
Sometimes it is necessary to run the sync server in root mode to solve a problem. To do this it is necessary to edit the service, modify some data and finally restart the service.
sudo systemctl edit --full soffid-iamsyncUser=root
group=root
protectSystem=falsesudo systemctl restart soffid-iamsyncManual Configuration
Manual service configuration
If you are using the RPM, DEB or MSI installers, the service is automatically configured to start up with the computer. If you are using the .tar.gz file, you must enable it manually. Execute these commands as root to start Soffid IAM sync server service on boot:
ln -fs /opt/soffid/iam-sync/bin/soffid-sync /etc/init.d/soffid-sync
ln -fs /etc/init.d/soffid-sync /etc/rc1.d/K01soffid-sync
ln -fs /etc/init.d/soffid-sync /etc/rc2.d/S06soffid-sync
ln -fs /etc/init.d/soffid-sync /etc/rc3.d/S06soffid-sync
ln -fs /etc/init.d/soffid-sync /etc/rc4.d/S06soffid-sync
ln -fs /etc/init.d/soffid-sync /etc/rc5.d/S06soffid-sync
ln -fs /etc/init.d/soffid-sync /etc/rc6.d/K01soffid-sync
Note that if you are running Centos, Redhat7 o version higher than Ubuntu 16.04, you should enable the service in systemctl
sudo systemctl enable soffid-sync
Once you have installed and configured Soffid Sync Server as a service, you could manage it with the following operations
service soffid-sync status
service soffid-sync restart
service soffid-sync start
service soffid-sync stop
First synchronisation server configuration
It is not recommended to install the first sync server on the same host where the database is installed.
To configure the server, please execute the following commands:
On Linux:
/opt/soffid/iam-sync/bin/configure -main -hostname [hostname] -port 760 -dbuser [soffid] -dbpass [pass] -dburl [jdbc:mysql://localhost:3306/soffid]On Windows:
%ProgramFiles%\soffid\iam-sync\bin\configure -main -hostname [hostname] -port 760 -dbuser [soffid] -dbpass [pass] -dburl [jdbc:mysql://localhost:3306/soffid]User and password must be the ones created during the installation process.
The hostname value must be a FQDN (fully qualified domain name), for instance, "myhost.mydomain.com" or in a test environment "syncserver.soffid.lab"
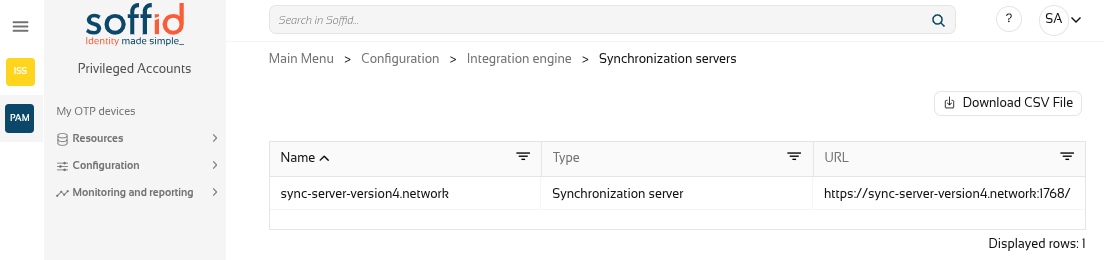
Mind the configuration wizard will refuse to register the sync server if this is not really the first sync server. If you really want to register this sync server as the first one, you must open the Synchronization servers page and remove any already registered sync server.
Next servers configuration
In order to configure the next server syncservers, a two step process is required: first, a normal user installs and configure the sync server software; next, a Soffid administrator allows the sync server to join the sync servers network.
To perform the next step, you do not need to enter the database credentials. Instead, the primary sync server URL and a Soffid console user name and password are required.
For instance, you can execute:
On Linux:
/opt/soffid/iam-sync/bin/configure -hostname [hostname] -user [user] -pass [pass] -server [https://yourserver:760] -tenant [master]On Windows:
%ProgramFiles%\soffid\iam-sync\bin\configure -hostname [hostname] -user [user] -pass [pass] -server [https://yourserver:760] -tenant [master]
After executing the command, an approval task will appear in Soffid console. The administrator can take ownership of the task and approve or reject it. After approving the server creation, the server will be configured as a proxy sync server (without database access).
The administrator can open the sync servers configuration page to change the sync server role at any time.
Configure a synchronization server proxy without approval in UI
If you want to bypass the appoval process, there is a configuration setting that allows it:
- Open console and click on Start → Soffid Configuration → Soffid Parameters:
- Click on Add New and, then, write the parameter soffid.server.register, set the value to direct and Confirm changes.
-
Execute the configuration of a synchronization server proxy as follows:
On Linux:
/opt/soffid/iam-sync/bin/configure -hostname hostname -user usuario -pass pass -server https://<yourserver>:760 -tenant master
On Windows:
%ProgramFiles%\soffid\iam-sync\bin\configure -hostname hostname -user usuario -pass pass -server https://<yourserver>:760 -tenant master
Where hostname is the name of the synchronization server proxy, user and pass are the Soffid console user name and password and, finally, URL is the first synchronization server URL.
- In the Soffid console, go to Start→ Soffid Configuration → Agents and click on Synchronization Servers to check if the synchronization server proxy has been registered.
Thus, you can bypass the standard workflow needed for a sinchronization server to join the synchronization servers security network. Otherwise, the standard approval workflow will be required.
Renaming a sync server
You can rename any sync server at any time by removing the conf directory and executing the configure process again, but the main sync server is a special case. If you remove the conf directory, the certification authority managed by the main sync server will be lost, and every single sync server will be thrown out of the security domain.
Instead, to reconfigure the main sync server you can execute
On Linux:
/opt/soffid/iam-sync/bin/configure -main -force -hostname hostname -port port -dbuser soffid -dbpass pass -dburl jdbc:mysql://localhost:3306/soffidOn Windows:
%ProgramFiles%\soffid\iam-sync\bin\configure -main -force -hostname hostname -port port -dbuser soffid -dbpass pass -dburl jdbc:mysql://localhost:3306/soffidUser and password must be the ones created during the installation process.
The Soffid installation process changes console setup to reflect the new sync server name
The url connection parameter depends on the database system:
- For Oracle by SID: jdbc:oracle:thin:@localhost:1571:XXXX
- For Oracle by Service Name: jdbc:oracle:thin:@localhost:1571/XXXX
- For Mysql: jdbc:mysql://localhost:3306/XXXX
- For SQLServer: "jdbc:sqlserver://localhost:1433;databaseName=XXXX"
- For Postglesql: "jdbc:postgresql://localhost:5432/XXXXX
Now you can connect to the IAM console http://localhost:8080/soffid and chek if Console and Syncserver are connected.
Configure TLS for IAM Console
Introduction
The TLS protection of Soffid IAM Console is applied through the configuration of the Apache TomEE embedded in the installation.
This solution is running under java technology therefore we need a jks file (Java Key Store) or a PKCS#12 file with the information of your certificate.
Once you have the Console installed and your certificate in jks format you can follow this steps to configure it the first time or for an update.
Mind that sometimes, the network encryption algorithm is named SSL, in fact, the configuration file still displays the word SSL. However, SSL protocol is now outdated, and TLSv1.2 is used instead.
Load a PKCS#12 (.PFX) file
There are many standard ways to store and transfer private keys and certificates, but the most common one is the PKCS#12 format. Its main advantage is that it contains, in a single file, both the private key and the public certificate.
To transform the .PFX file to a java key store (.JKS), and can use the next command (you have to adapt it to your system):
Replace <YOUR_FILE> for your file name.
keytool -v -importkeystore -srckeystore <YOUR_FILE>.pfx -srcstoretype PKCS12 \
  -destkeystore /opt/soffid/iam-console-4/conf/<YOUR_FILE>.jks \
  -deststoretype JKS \
  -destkeypass 12345678 -srcstorepass 12345678 -deststorepass 12345678
Next, you will be asked for the PFX encryption password. It must be provided to you along the PFX file.
Next, you will be asked (probably twice) for the password to be used to encrypt the .JKS file. This password must be written down in the server.xml file. At the sample SSL configuration file placed at the top of this page, the sample password is 123456.
If we have a key and certificate (key, crt), the step to perform the conversion is:
openssl pkcs12 -inkey keyfile.key -in certificate.crt -out name_to_export -export

keytool -v -importkeystore -srckeystore name_to_export -srcstoretype PKCS12
    -destkeystore /opt/soffid/iam-console-4/conf/new_certificate_name.jks
    -deststoretype JKS
    -destkeypass password
    -srcstorepass password
    -deststorepass password
Configuration
The configuration file to modify is the following one:
/opt/soffid/iam-console-4/conf/server.xml
It can contain one or more connectors. Uncomment or add the following one, that enables the TLS configuration:
These are the attributes that you have to configure.
|
Attribute
|
Comment
|
|---|---|
| port | You can choose the standard 443 or another custom port |
|
protocols (inside SSLHostConfig tag) sslEnabledProtocols (inside Connector tag) |
You can configure the protocols allowed. For intance, protocols="TLSv1.3" or sslEnabledProtocols="TLSv1.3" |
| certificateKeystoreFile | The source by default starts from /opt/soffid/iam-console-4/ (the installation directory) |
| certificateKeystorePassword | The password used to encrypt the jks file |
| certificateKeyAlias | The alias to identify your key and certificate |
To know the Key Alias, you can run:
keytool -list -keystore yourcert.jksThen, copy or replace your jks file into to the file /opt/soffid/iam-console-4/conf/yourcert.jks
After that, you have to restart the iam-console services.
sudo systemctl restart soffid-iamconsoleIf you have some configuration error, you can search for more information in the Console log (the current day log):
/opt/soffid/iam-console-4/logs/soffid-YYYY-MM-DD.log
Example server.xml
This example only allows protocols TLSv1.3
............
<!-- Define a SSL/TLS HTTP/1.1 Connector on port 8443
         This connector uses the NIO implementation. The default
         SSLImplementation will depend on the presence of the APR/native
         library and the useOpenSSL attribute of the
         AprLifecycleListener.
         Either JSSE or OpenSSL style configuration may be used regardless of
         the SSLImplementation selected. JSSE style configuration is used below.
    -->

    <Connector port="8443" protocol="org.apache.coyote.http11.Http11NioProtocol"
               maxThreads="150" SSLEnabled="true">
        <SSLHostConfig protocols="TLSv1.3">
            <Certificate certificateKeystoreFile="conf/yourcert.jks" certificateKeystorePassword="XXXXXX"
                         certificateKeyAlias="1" type="RSA" xpoweredBy="false" server="Apache TomEE" />
        </SSLHostConfig>
    </Connector>
............
Further information
Additional information can be found at Tomcat website: https://tomcat.apache.org/tomcat-7.0-doc/ssl-howto.html
https://es.wikipedia.org/wiki/TLS
Linux operator guide
Startup / Shutdown console
Start Soffid IAM console
systemctl start soffid-iamconsole.serviceStop Soffid IAM console
systemctl stop soffid-iamconsole.serviceStatus
systemctl status soffid-iamconsole.serviceLogs
You can find the console logs at: /opt/soffid/iam-console-4/logs
Startup / Shutdown Synchronization servers
Start Sync server
systemctl start soffid-iamsync.serviceStart Sync server
systemctl stop soffid-iamsync.serviceStatus
systemctl status soffid-iamsync.serviceLogs
You can find the syncserver logs at: /opt/soffid/iam-sync/logs and the syncserver service log at: /var/log/soffid/
System backup
Soffid relies on a database to store almost every identity data. So, the first step to perform a daily database backup.
- For Maria DB, look at: Backup and restore overview
- For Oracle, look at: Backing Up The Database
- For SQL Server, look at: Create a Full Database Backup (SQL Server)
Soffid console installation directory should be backed up after every installation or upgrade. Once the upgrade or installation has been done, only the log directory needs to be backed up.
Soffid synchronization servers configuration directory (conf) should be backed up just after configuration. In case of system failure, a new synchronization server should be installed and the conf directory can be restored onto it. The conf directory should be backed up on a different media than the database, due to conf directory contains the private keys that can decrypt the data stored in the database.
Windows operator guide
Startup / Shutdown console
Start Soffid IAM console
To start Soffid console, use service manager, or execute:
net start soffid-iamconsoleStop Soffid IAM console
To stop Soffid console, use service manager or execute:
net stop soffid-iamconsoleLogs
You can find the console logs at: c:\program files\soffid\iam-console-4\logs
Startup / Shutdown Synchronization servers
Start Sync server
To start Soffid Sync server, use service manager or execute:
net start SoffidSyncServerStart Sync server
To stop Soffid Sync server, use service manager or execute:
net stop SoffidSyncServerLogs
You can find the console logs at: c:\program files\soffid\iam-sync\logs
System backup
Soffid relies on a database to store almost every identity data. So, the first step to perform a daily database backup.
- For Maria DB, look at: Backup and restore overview
- For Oracle, look at: Backing Up The Database
- For SQL Server, look at: Create a Full Database Backup (SQL Server)
Soffid console installation directory should be backed up after every installation or upgrade. Once the upgrade or installation has been done, only the log directory needs to be backed up.
Soffid synchronization servers configuration directory (conf) should be backed up just after configuration. In case of system failure, a new synchronization server should be installed and the conf directory can be restored onto it. The conf directory should be backed up on a different media than the database, due to conf directory contains the private keys that can decrypt the data stored in the database.
Installing Soffid using Docker
Guide to show the installation process os Soffid IAM using Docker
Installing IAM Console
Guide to install IAM Console using Docker.
Prerequisites
- Docker
- 8GB RAM
- > 10GB disk space (50GB recomended)
- Supported database installed
Repositories
Soffid 3 uses the public Docker Hub: https://hub.docker.com/r/soffid/iam-console/
Soffid 4 uses the Google Cloud Artifact Registry, contact to Soffid when you need access to it.
Video Tutorial
Installation
To configure IAM console, the following environment variables can be set:
| Variable | Description | Example |
| DB_URL | JDBC URL |
jdbc:mariadb://dbcontainer/soffid jdbc:oracle:thin:@HOST:PORT:SID |
| DB_USER | Database user | Soffid |
| DB_PASSWORD | Database password | 5uper5ecret |
| JAVA_OPT | Java virtual machine options | -Xmx4096m |
| SECURE | (optional) Enables the Java Security Manager | true |
| SOFFID_TRUSTED_SCRIPTS |
(optional) Allows you to use insecure classes. Available since console version 3.5.6 |
true false |
| HIDE_MENU |
(optional) Allows you to hide the Console menu options. Available since console version 3.5.6 |
soffid.admin You can choose the proper option from the Console.yaml file. |
| AUTH_METHODS |
(optional) Allows to force the authentication mechanisms. This configuration overrides the one configured in the authentication option of the Soffid console. Available since console version 3.5.6 |
Options SAML PASSWORD SAML PASSWORD |
| EXTERNAL_URL |
(optional) Allows to override host name configuration when there are two Consoles. Available since console version 3.5.9.5 |
https://soffid.lab.internal.com |
Additional parameters to configure the database connections. Allows you to establish the min and the max of database connections:
| Variable | Description | Example |
| DBPOOL_MIN_IDLE | The minimum number of connections should be kept in the pool at all times. | 1 or 2 |
| DBPOOL_MAX_IDLE | The maximum number of connections should be kept in the pool at all times. | between 10 and 15 |
| DBPOOL_INITIAL | The connection number will be established when the connection pool is started. | 3 or 4 |
| DBPOOL_MAX |
The maximum number of active connections that can be allocated. If no value is indicated, the default value is 30. The transaction fails if the maximum connections are reached within 30 seconds and no connection is released. |
25 |
The following volumes must be defined by default:
| Volume | Usage |
| /opt/soffid/iam-console-4/logs | Console log files /opt/soffid/iam-console-4/logs |
| /opt/soffid/iam-console-4/index |
Text search engine index files. It can be erased at any time. The engine will regenerate the search engine. |
| /opt/soffid/iam-console-4/conf | Configuration files, including server.xml and tomee.xml files /opt/soffid/iam-console-4/conf |
Here you have a sample command to start a docker container running IAM console, in this case the docker will be in a docker network, previously created. MariaDB docker is at the same network.
docker run -d \
   -e DB_URL=jdbc:mariadb://mariadb-service/soffid \
   -e DB_USER=soffid \
   -e DB_PASSWORD=soffid \
   --name=iam-console \
   --publish=8080:8080 \
   --network=soffidnet \
   soffid/iam-console
To see console log files, execute:
docker logs -f iam-consoleWhen the console is created, the password for the user admin will be changeit and it will be valid for 24 hours.
Now you can connect the Soffid Console http://localhost:8080/soffid/The first thing you must do is to change the admin user password.
Next Step: Installing Sync server
Installing Sync server
Guide to install Sync server using Docker.
Prerequisites
Soffid IAM sync server requires the following requirements:
Repositories
Soffid 3 uses the public Docker Hub: https://hub.docker.com/r/soffid/iam-console/
Soffid 4 uses the Google Cloud Artifact Registry, contact to Soffid when you need access to it.
Video Tutorial
Linux
Installation
Install first Sync server
To configure the first IAM Sync server, the following environment variables can be set for the first server:
| Variable | Description | Example |
| DB_URL | JDBC URL | jdbc:mariadb://dbcontainer/soffid |
| DB_USER | Database user | Soffid |
| DB_PASSWORD | Database password | 5uper5ecret |
| SOFFID_HOSTNAME | The hostname used to access the sync server | syncserver01.soffid.com |
| SOFFID_PORT | TCP port used for incoming connections | 760 |
| SOFFID_MAIN | Set to yes for the first sync server, no for the next ones | yes |
Additional parameters to configure the database connections. Allows you to establish the min and the max of database connections:
| Variable | Description | Example |
| DBPOOL_MIN_IDLE | The minimum number of connections should be kept in the pool at all times. | 1 or 2 |
| DBPOOL_MAX_IDLE | The maximum number of connections should be kept in the pool at all times. | between 10 and 15 |
| DBPOOL_INITIAL | The number of connections will be established when the connection pool is started. | 3 or 4 |
| DBPOOL_MAX |
The maximum number of active connections that can be allocated. If no value is indicated, the default value is 30. The transaction fails if the maximum connections are reached within 30 seconds and no connection is released. |
25 |
| DBPOOL_MAX_IDLE_TIME |
Number of seconds that a connection to a DB that is not in use is maintained. Available since Sync Server version 3.5.4.3 |
3600 |
Install next Sync servers
To configure the next sync servers, the following environment variables can be set:
| Variable | Description | Example |
| SOFFID_SERVER | First sync server url | https://syncserver01.soffid.com:1760 |
| SOFFID_USER | Soffid user to join the security domain. If you are working in a tenant, the user of the tenant. | admin |
| SOFFID_PASS | Soffid user password. If you are working in a tenant, the user password of the tenant. | changeit |
| SOFFID_HOSTNAME | The host name used to access to the sync server | syncserver.soffid.com |
| SOFFID_PORT | TCP port used for incomming connections | 760 |
| SOFFID_TENANT | Tenant name | master |
| SOFFID_MAIN | Set to yes for the first sync server, no for the next ones | no |
Install Sync server in a private network
To configure a sync server in a private network, not directly accessible from the main sync server, the following environment variables can be set:
| Variable | Description | Example |
| SOFFID_SERVER | First sync server url | https://syncserver01.soffid.com:1760 |
| SOFFID_USER | Soffid user to join the security domain | admin |
| SOFFID_PASS | Soffid user password | changeit |
| SOFFID_HOSTNAME | The host name used to access to the sync server | syncserver.soffid.com |
| SOFFID_TENANT | Tenant name | master |
| SOFFID_MAIN | Set to yes for the first sync server, no for the next ones | no |
| SOFFID_REMOTE | Flag to enable cloud protocol | yes |
You can use this configuration when the main sync server is located in the cloud.
The following volumes are defined by default
| Volume | Usage |
| /opt/soffid/iam-sync/conf | Configuration files, including private keys and certificates |
Command
Here you have a sample command to start a docker container running IAM sync server. Mind to specify the port number to expose the sync server docker to the outside world. It is not needed when using the cloud connectivity:
docker run -d \
   -e DB_URL=jdbc:mysql://mariadb-service/soffid \
   -e DB_USER=soffid \
   -e DB_PASSWORD=soffid \
   -e SOFFID_PORT=1760 \
   -e SOFFID_HOSTNAME=iam-sync.soffidnet \
   -e SOFFID_MAIN=yes \
   --name=iam-sync \
   --publish 1760:1760 \
   --network=soffidnet \
   soffid/iam-sync:latest
To see sync server log file, execute:
docker logs -f iam-syncYou can also view the log files inside the container. To do this, first enter the container, then you should find the log files in the /var/log/soffid/ directory.
root@soffid:~# docker exec -it iam-sync /bin/bash
root@e1a90ff25d99:/# less /var/log/soffid/syncserver.log
Now you can connect to the IAM console http://localhost:8080/soffid and chek if Console and Syncserver are connected.
Installing Soffid using Docker Compose
Installing Soffid
Prerequisites
- Docker compose
- 8GB RAM
- > 10GB disk space (50GB recomended)
Installation
docker-compose.yaml / compose.yaml
services:

  mariadb:
    image: mariadb:11.4
    environment:
      MYSQL_ROOT_PASSWORD: XXXX
      MYSQL_DATABASE: soffid
      MYSQL_USER: soffid
      MYSQL_PASSWORD: YYYY
    healthcheck:
      test: "/usr/bin/mariadb --user=root --password=XXXX --execute \"SHOW DATABASES;\""
      interval: 2s
      timeout: 20s
      retries: 10
    command: --max_allowed_packet=128M --innodb_log_file_size=256M --character-set-server=utf8mb4 --collation-server=utf8mb4_general_ci
    ports:
      - "3306:3306"
    networks:
      - network
    volumes:
      - mariadb_data:/var/lib/mysql

  console:
    image: europe-docker.pkg.dev/soffid-docker-images/private/iam-console:4.0.58
    environment:
      DB_URL: jdbc:mariadb://mariadb/soffid
      DB_USER: soffid
      DB_PASSWORD: YYYY
      JAVA_OPT: -Xmx4096m
    ports:
      - 8080:8080
    networks:
    - network
    healthcheck:
      test: bash -c "(echo 'GET /soffid/anonymous/logo.svg HTTP/1.1' >&0; echo >&0; cat >&2;) <> /dev/tcp/localhost/8080"
      interval: 10s
      timeout: 20s
      retries: 10
      start_period: 40s
    volumes:
      - console_trust:/opt/soffid/iam-console-4/trustedcerts
      - console_conf:/opt/soffid/iam-console-4/conf
      - console_index:/opt/soffid/iam-console-4/index
    depends_on:
      mariadb:
        condition: service_started

  syncserver:
    image: europe-docker.pkg.dev/soffid-docker-images/private/iam-sync:4.0.35
    hostname: syncserver
    environment:
      SOFFID_PORT: 1760
      SOFFID_HOSTNAME: syncserver.network
      SOFFID_MAIN: yes
      DB_URL: jdbc:mysql://mariadb/soffid
      DB_USER: soffid
      DB_PASSWORD: YYYY
    networks:
      - network
    volumes:
      - sync_conf:/opt/soffid/iam-sync/conf
    depends_on:
      mariadb:
        condition: service_started

networks:
  network:
    name: network
    driver: bridge

volumes:
  mariadb_data:
    name: soffid4_mariadbdata
  console_trust:
    name: soffid4_console_trustedcerts
  console_conf:
    name: soffid4_console_conf
  console_index:
    name: soffid4_console_index
  sync_conf:
    name: soffid4_sync_conf
Ubuntu commands
Bear in mind, that the name of the YAML file must be docker-compose.yaml And you must execute the docker compose action inside the folder where this file is located.
cd /.../.../soffidApply the YAML:
docker compose up -d
Check containers
docker compose psView the console log
docker compose logs -f consoleView the Sync Server log
docker compose logs -f sync-serverWhen the console is created, the password for the user admin will be changeit and it will be valid for 24 hours.
Now you can connect to Soffid Console http://localhost:8080/soffid The first thing you must do is to change the admin user password changeit.
Upgrade
You can update the version in the yaml file
docker compose up -dHow to make a Mariadb Backup?
You can perform Mariadb backup by executing the following command:
sudo docker exec -i MARIADB_CONTAINER_NAME mariadb-dump -u root -p soffid01 | gzip > /some/path/on/your/host/soffid01.dump.gzThis action requires the root password.
You can use:
--max-allowed-packet=512M: sets the maximum packet size to 512MB to handle large databases.--skip-add-locksand--skip-lock-tables: these options are used to improve performance by skipping certain locking mechanisms.
Example

Full installation of Soffid 3 as test environment
Introduction
This guide describes all the steps required to install Soffid 3 as test environment.
We’re going to install it using Docker Compose, as it’s the simplest and quickest method for both installation and maintenance.
Prerequisites
- To have a Linux machine; Ubuntu 24 has been used for this tutorial.
- The Linux administrator user must have sudo privileges.
Step 1: Install Docker & Docker compose
The first step is to install Docker and Docker compose. Docker is the platform and compose is a tool that simplifies management.
1.1 Install docker
Install docker.
sudo apt-get update
sudo apt-get install docker.io
docker --version
1.2 Use docker without sudo
To use docker without sudo.
| Command | Comment |
|
sudo gedit /etc/group |
Edit the file with your editor (gedit for this example) |
| docker:x:988:YOUR-USER | Add YOUR-USER at the end of the docker command without : at the end |
| logout | Log out from the ubuntu session |
| login | Log in into the ubuntu session |
| docker ps | Confirm that you do not need to use sudo with a docker command |
1.3 Install docker compose
Install docker compose.
sudo apt-get install docker-compose-plugin
docker compose version
Step 2: Install Soffid 3
At this link, you can see the most commonly used Docker Compose commands: Docker compose commands
2.1 Test connectivity
Test the connectivity with the Soffid 3 repository pulling an image (¡Do not use sudo with docker, it does not work!).
docker pull "soffid/iam-console:3.6.75"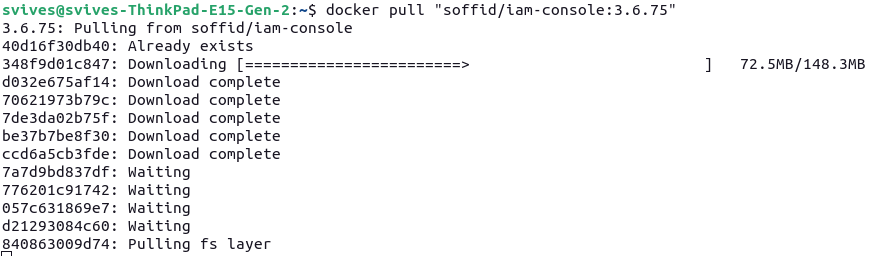
2.2 Create the directory and file structure
Create a the new file for the docker compose with this directory structure.
cd
mkdir lab
cd lab
mkdir soffid3
cd soffid3
touch docker-compose.yaml
2.3 Configure the docker-compose.yaml
Use this content for the docker-compose.yaml file.
Change the XXXX password and YYYY password for your values.
services:

  mariadb:
    image: mariadb:11.4
    environment:
      MYSQL_ROOT_PASSWORD: XXXX
      MYSQL_DATABASE: soffid
      MYSQL_USER: soffid
      MYSQL_PASSWORD: YYYY
    healthcheck:
      test: "/usr/bin/mariadb --user=root --password=XXXX --execute \"SHOW DATABASES;\""
      interval: 2s
      timeout: 20s
      retries: 10
    command: --max_allowed_packet=128M --innodb_log_file_size=256M --character-set-server=utf8mb4 --collation-server=utf8mb4_general_ci
    networks:
      - network
    volumes:
      - mariadb_data:/var/lib/mysql

  console:
    image: soffid/iam-console:3.6.74
    environment:
      DB_URL: jdbc:mariadb://mariadb/soffid
      DB_USER: soffid
      DB_PASSWORD: YYYY
      SOFFID_TRUSTED_SCRIPTS: true
    networks:
    - network
    ports:
      - "8080:8080"
    volumes:
      - console_trust:/opt/soffid/iam-console-3/trustedcerts
      - console_conf:/opt/soffid/iam-console-3/conf
      - console_index:/opt/soffid/iam-console-3/index
    depends_on:
      mariadb:
        condition: service_healthy

  syncserver:
    image: soffid/iam-sync:3.6.47
    hostname: syncserver
    environment:
      SOFFID_PORT: 1760
      SOFFID_HOSTNAME: syncserver
      SOFFID_MAIN: yes
      DB_URL: jdbc:mysql://mariadb/soffid
      DB_USER: soffid
      DB_PASSWORD: YYYY
    networks:
      - network
    volumes:
      - sync_conf:/opt/soffid/iam-sync/conf
    depends_on:
      mariadb:
        condition: service_healthy

networks:
  network:
    name: netcompose
    driver: bridge

volumes:
  mariadb_data:
    name: soffid3_mariadbdata
  console_trust:
    name: soffid3_console_trustedcerts
  console_conf:
    name: soffid3_console_conf
  console_index:
    name: soffid3-console_index
  sync_conf:
    name: soffid3_sync_conf
2.4 Generate the containers
Generate the containers.
docker compose up -d2.5 Publish the domains
We recommend using a local domain to access the Console, create new entries in:
- Linux /etc/hosts
- Windows C:\Windows\System32\drivers\etc\hosts
# Soffid 3 local
127.0.0.1 console.soffid3.local
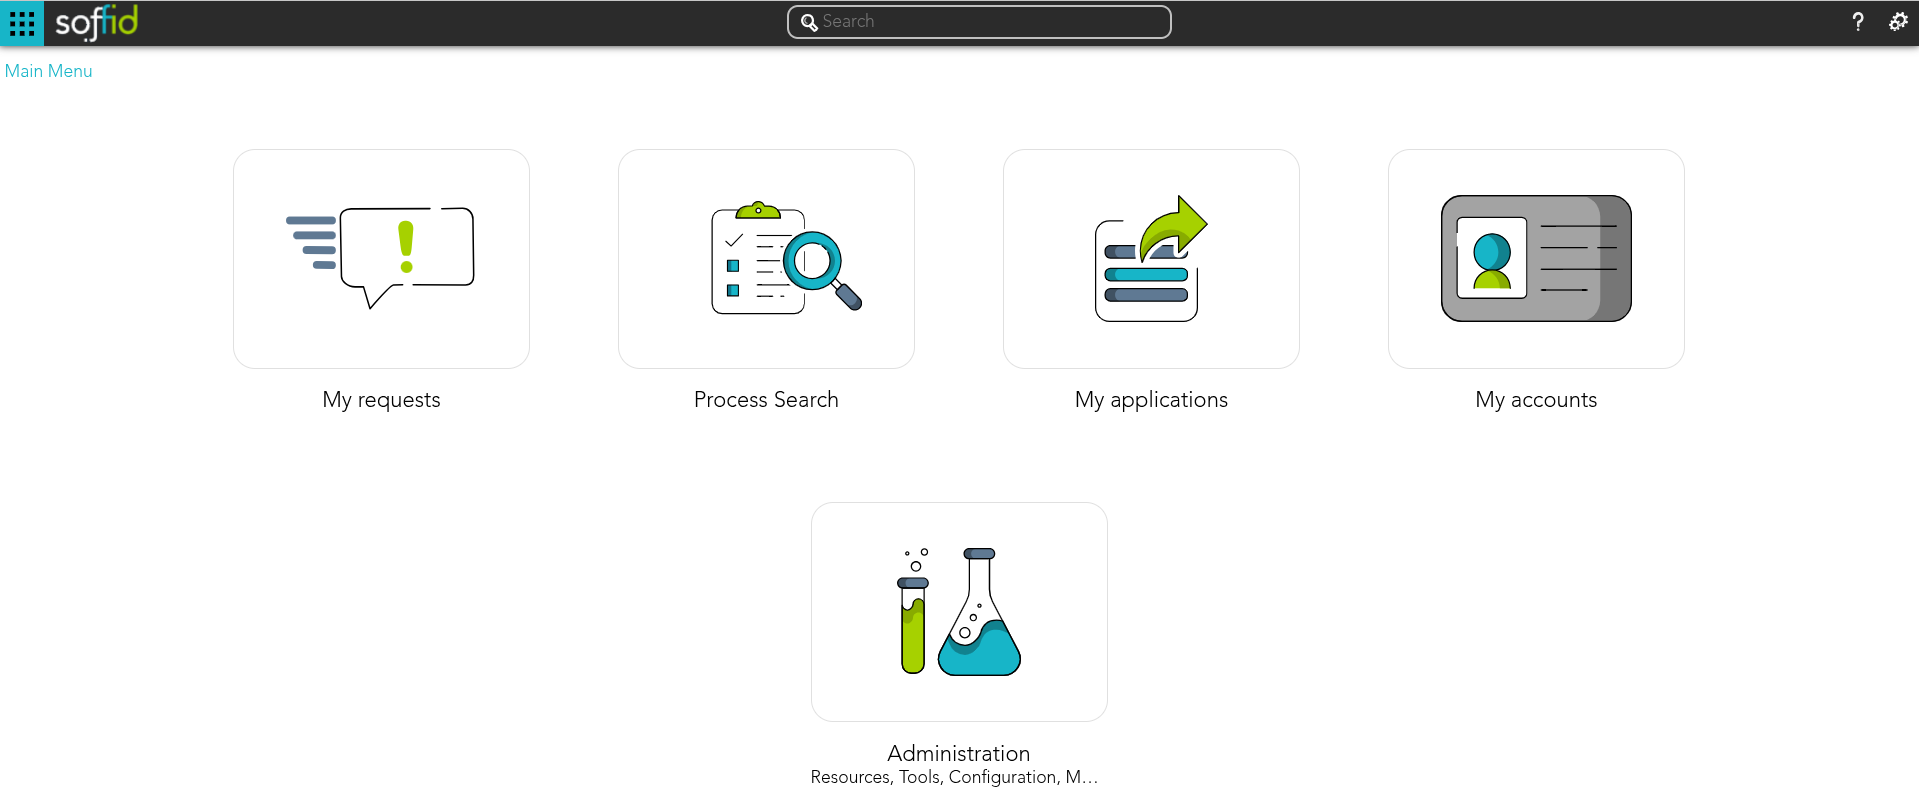
127.0.0.1 syncserver.soffid3.local2.6 Access to the Console
Follow these steps:
- Go to login page: http://console.soffid3.local:8080
- We have to wait until the login page will be prompted.
- User: admin / password: changeit (temporal for 24 hours).
- Fill the new password and save it to use it later!
You will now see this page.
Full installation of Soffid 4 as test environment
Introduction
This guide describes all the steps required to install Soffid 4 as test environment.
We’re going to install it using Docker Compose, as it’s the simplest and quickest method for both installation and maintenance.
Prerequisites
User prerequisites
- To have a Linux machine; Ubuntu 24 has been used for this tutorial.
- The Linux administrator user must have sudo privileges.
- To have a Soffid account for the license activation step.
Soffid prerequisites
- Your Soffid account has to had a special role to download Soffid 4 images from the marketplace.
- Your Soffid account has to had a Soffid 4 license for the test environment.
Step 1: Install Docker & Docker compose
The first step is to install Docker and Docker compose. Docker is the platform and compose is a tool that simplifies management.
1.1 Install docker
Install docker.
sudo apt-get update
sudo apt-get install docker.io
docker --version
1.2 Use docker without sudo
To use docker without sudo.
| Command | Comment |
|
sudo gedit /etc/group |
Edit the file with your editor (gedit for this example) |
| docker:x:988:YOUR-USER | Add YOUR-USER at the end of the docker command without : at the end |
| logout | Log out from the ubuntu session (sometimes we have needed a restart) |
| login | Log in into the ubuntu session |
| docker ps | Confirm that you do not need to use sudo with a docker command |
1.3 Install docker compose
Install docker compose.
sudo apt-get install docker-compose-plugin
docker compose version
At this link, you can see the most commonly used Docker Compose commands: Docker compose commands
Step 2: Install Soffid 4
2.1 Test connectivity
Test the connectivity with the Soffid 4 repository pulling an image (¡Do not use sudo with docker, it does not work!).
docker pull "europe-docker.pkg.dev/soffid-docker-images/private/iam-console:4.0.0"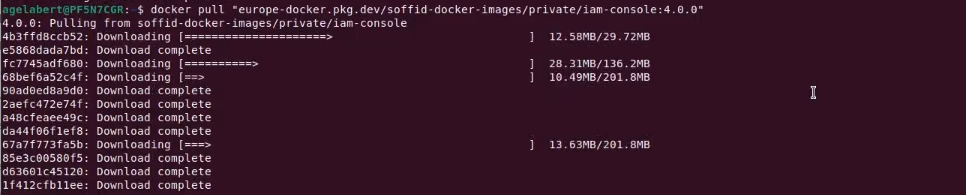
2.2 Create the directory and file structure
Create a the new file for the docker compose with this directory structure.
cd
mkdir lab
cd lab
mkdir soffid4
cd soffid4
touch docker-compose.yaml
2.3 Configure the docker-compose.yaml
Edit the docker-compose.yaml file, you can use vim.
At this link, you can see the How to use vim
sudo vim docker-compose.yamlUse this content for the docker-compose.yaml file.
Change the XXXX password and YYYY password for your values.
services:

  mariadb:
    image: mariadb:11.4
    environment:
      MYSQL_ROOT_PASSWORD: XXXX
      MYSQL_DATABASE: soffid
      MYSQL_USER: soffid
      MYSQL_PASSWORD: YYYY
    healthcheck:
      test: "/usr/bin/mariadb --user=root --password=XXXX --execute \"SHOW DATABASES;\""
      interval: 2s
      timeout: 20s
      retries: 10
    command: --max_allowed_packet=128M --innodb_log_file_size=256M --character-set-server=utf8mb4 --collation-server=utf8mb4_general_ci
    ports:
      - "3306:3306"
    networks:
      - network
    volumes:
      - mariadb_data:/var/lib/mysql

  console:
    image: europe-docker.pkg.dev/soffid-docker-images/private/iam-console:4.0.58
    environment:
      DB_URL: jdbc:mariadb://mariadb/soffid
      DB_USER: soffid
      DB_PASSWORD: YYYY
      JAVA_OPT: -Xmx4096m
    ports:
      - 8080:8080
      - 8443:8443
    networks:
    - network
    healthcheck:
      test: bash -c "(echo 'GET /soffid/anonymous/logo.svg HTTP/1.1' >&0; echo >&0; cat >&2;) <> /dev/tcp/localhost/8080"
      interval: 10s
      timeout: 20s
      retries: 10
      start_period: 40s
    volumes:
      - console_trust:/opt/soffid/iam-console-4/trustedcerts
      - console_conf:/opt/soffid/iam-console-4/conf
      - console_index:/opt/soffid/iam-console-4/index
    depends_on:
      mariadb:
        condition: service_started

  syncserver:
    image: europe-docker.pkg.dev/soffid-docker-images/private/iam-sync:4.0.35
    hostname: syncserver
    environment:
      SOFFID_PORT: 1760
      SOFFID_HOSTNAME: syncserver.network
      SOFFID_MAIN: yes
      DB_URL: jdbc:mysql://mariadb/soffid
      DB_USER: soffid
      DB_PASSWORD: YYYY
    ports:
      - 1760:1760
      - 1443:1443
    networks:
      - network
    volumes:
      - sync_conf:/opt/soffid/iam-sync/conf
    depends_on:
      mariadb:
        condition: service_started

networks:
  network:
    name: network
    driver: bridge

volumes:
  mariadb_data:
    name: soffid4_mariadbdata
  console_trust:
    name: soffid4_console_trustedcerts
  console_conf:
    name: soffid4_console_conf
  console_index:
    name: soffid4_console_index
  sync_conf:
    name: soffid4_sync_conf
2.4 Generate the containers
Generate the containers.
docker compose up -d2.5 Access to the Console
Follow these steps:
- Go to login page: http://localhost:8080
- We have to wait until the login page will be prompted (it takes several minutes).
- Accept the Update button.
- User: admin / password: changeit (temporal for 24 hours).
- Fill the new password and save it to use it later!
You will now see this page.
Step 3: Configure SSL access
To correctly validate the new license, the Soffid Console must be SSL-enabled, it has to be open with the https protocol.
3.1 Publish the domains
If you have a local environment, create new entries in:
- Linux /etc/hosts
- Windows C:\Windows\System32\drivers\etc\hosts
# Soffid 4 local
127.0.0.1 console.soffid4.local
127.0.0.1 syncserver.soffid4.local
3.2 Generate a self-signed certificate (pfx)
Generate a self-signed certificate (pfx).
Use 12345678 for all requiered passwords.
Generate a private key.
sudo openssl genrsa -aes256 -out console.soffid4.local.keyGenerate a pem certificate.
When you run the command, the prompt will ask for the CN (Common Name) attribute; use console.soffid4.local
sudo openssl req -x509 -days 1000 -new -key console.soffid4.local.key -out console.soffid4.local.pemGenerate a pfx (PKCS12).
sudo openssl pkcs12 -export -in console.soffid4.local.pem -inkey console.soffid4.local.key -name "console.soffid4.local" -out console.soffid4.local.pfx3.3 Generate a jks file
Copy the pfx file in the console container.
sudo docker compose cp console.soffid4.local.pfx console:/opt/soffid/iam-console-4/trustedcertsEnter the container.
docker compose exec -it console bashGenerate the jks file
cd /opt/soffid/iam-console-4/trustedcerts/Change the password 12345678 if you have used a different one before
keytool -v -importkeystore \
  -srckeystore /opt/soffid/iam-console-4/trustedcerts/console.soffid4.local.pfx \
  -srcstoretype PKCS12 \
  -destkeystore /opt/soffid/iam-console-4/trustedcerts/console.soffid4.local.jks \
  -deststoretype JKS \
  -destkeypass 12345678 -srcstorepass 12345678 -deststorepass 12345678
Confirm that we are able to open the file and that the alias is correct.
keytool -v -list -keystore console.soffid4.local.jks
3.4 Configure the SSL port
Configure the server.xml file.
cd /opt/soffid/iam-console-4/conf
apt-get update
apt-get install vim
vim server.xml
Add this configuration.
	<Connector
		port="8443"
		protocol="org.apache.coyote.http11.Http11NioProtocol"
		maxThreads="150"
		SSLEnabled="true">
		<SSLHostConfig
			protocols="TLSv1.3">
			<Certificate
				certificateKeystoreFile="trustedcerts/console.soffid4.local.jks"
				certificateKeystorePassword="12345678"
				certificateKeyAlias="console.soffid4.local"
				type="RSA"
				xpoweredBy="false"
				server="Apache TomEE" />
		</SSLHostConfig>
	</Connector>
Port 8443 has already been configured in the step 2.3.
Exit the container and restart the Console.
exit
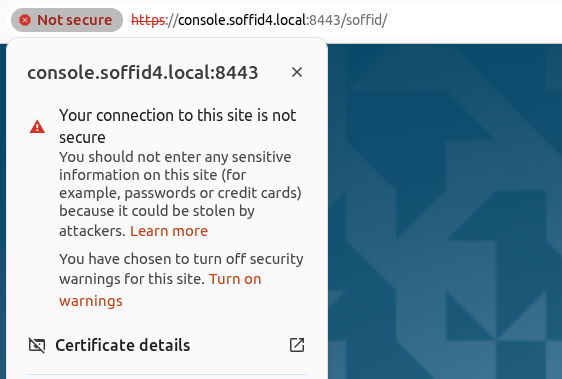
docker compose restart console3.5 Access to Console with SSL
Connect to the new URL:
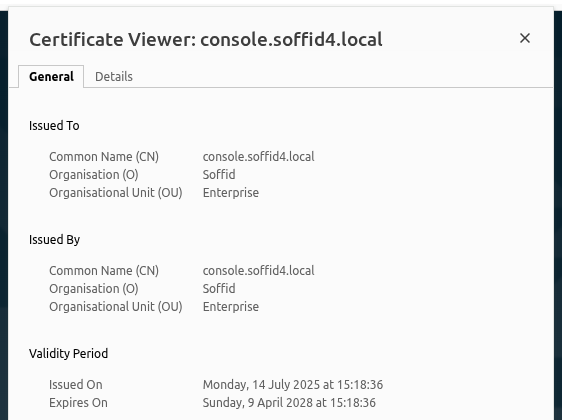
Confirm the SSL: browser > Not secure > Certificate details
Step 4: Apply the license
When accessing the Soffid Console for the first time, you will need to apply a licence that the Soffid team will have created for you beforehand.
For more information, check the License and plugin page.
Step 4.1 Login with the Soffid account
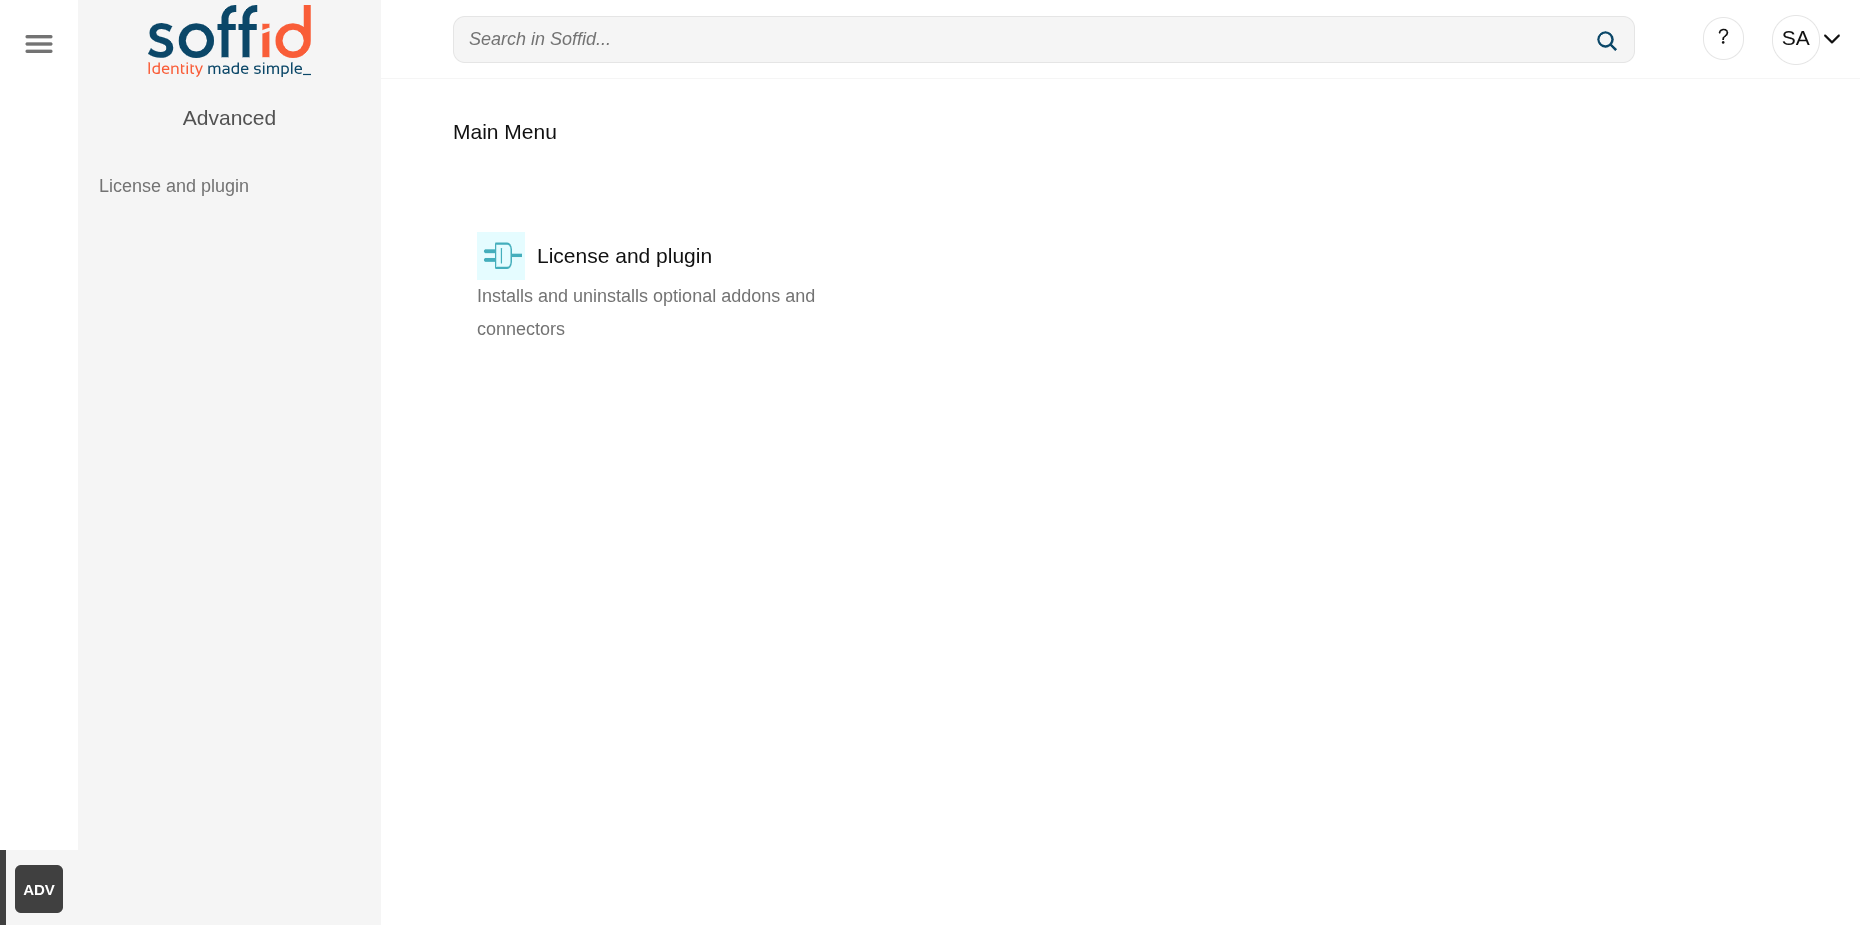
To apply the license follow these steps:
- Log into the Soffid Console
- Go to the "License and plugin" page
- You will not have an active license
- Click the "License manager" button
- Log in with your Soffid account received from Soffid
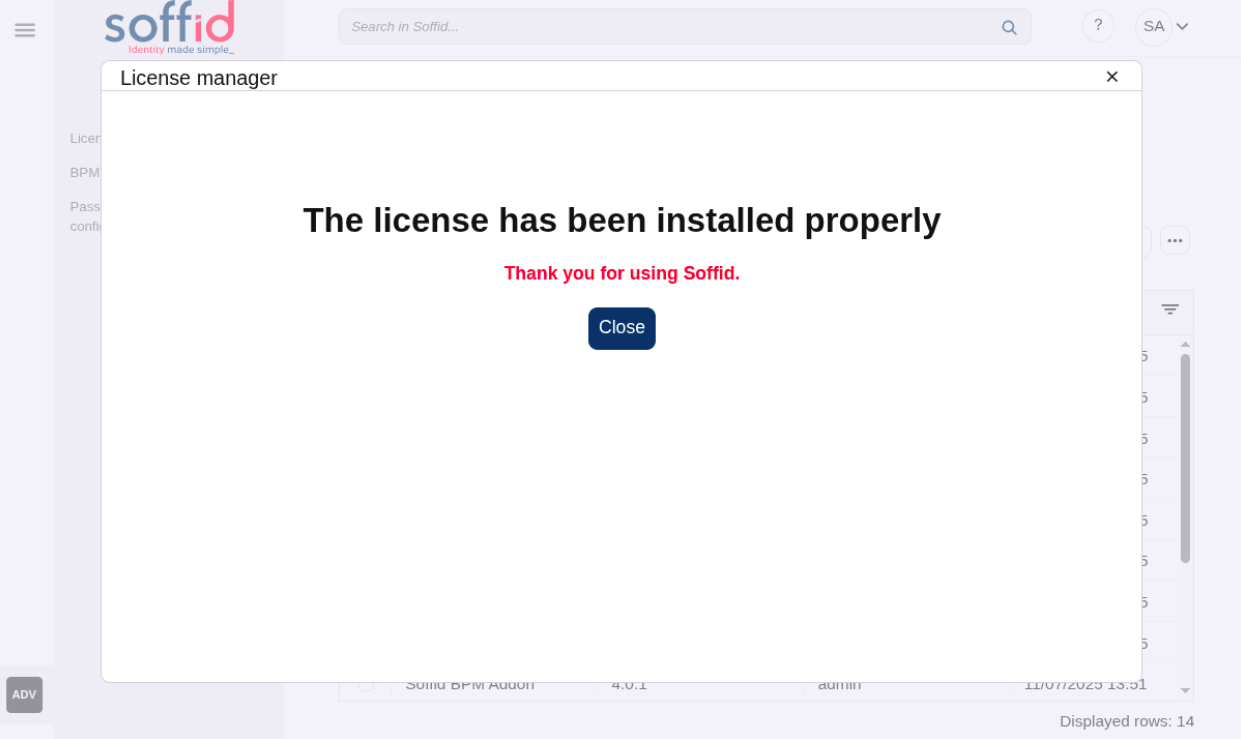
Step 4.2 Apply license
- Select your new license
- Accept the conditions
- Allow "Access other apps and services on this device"
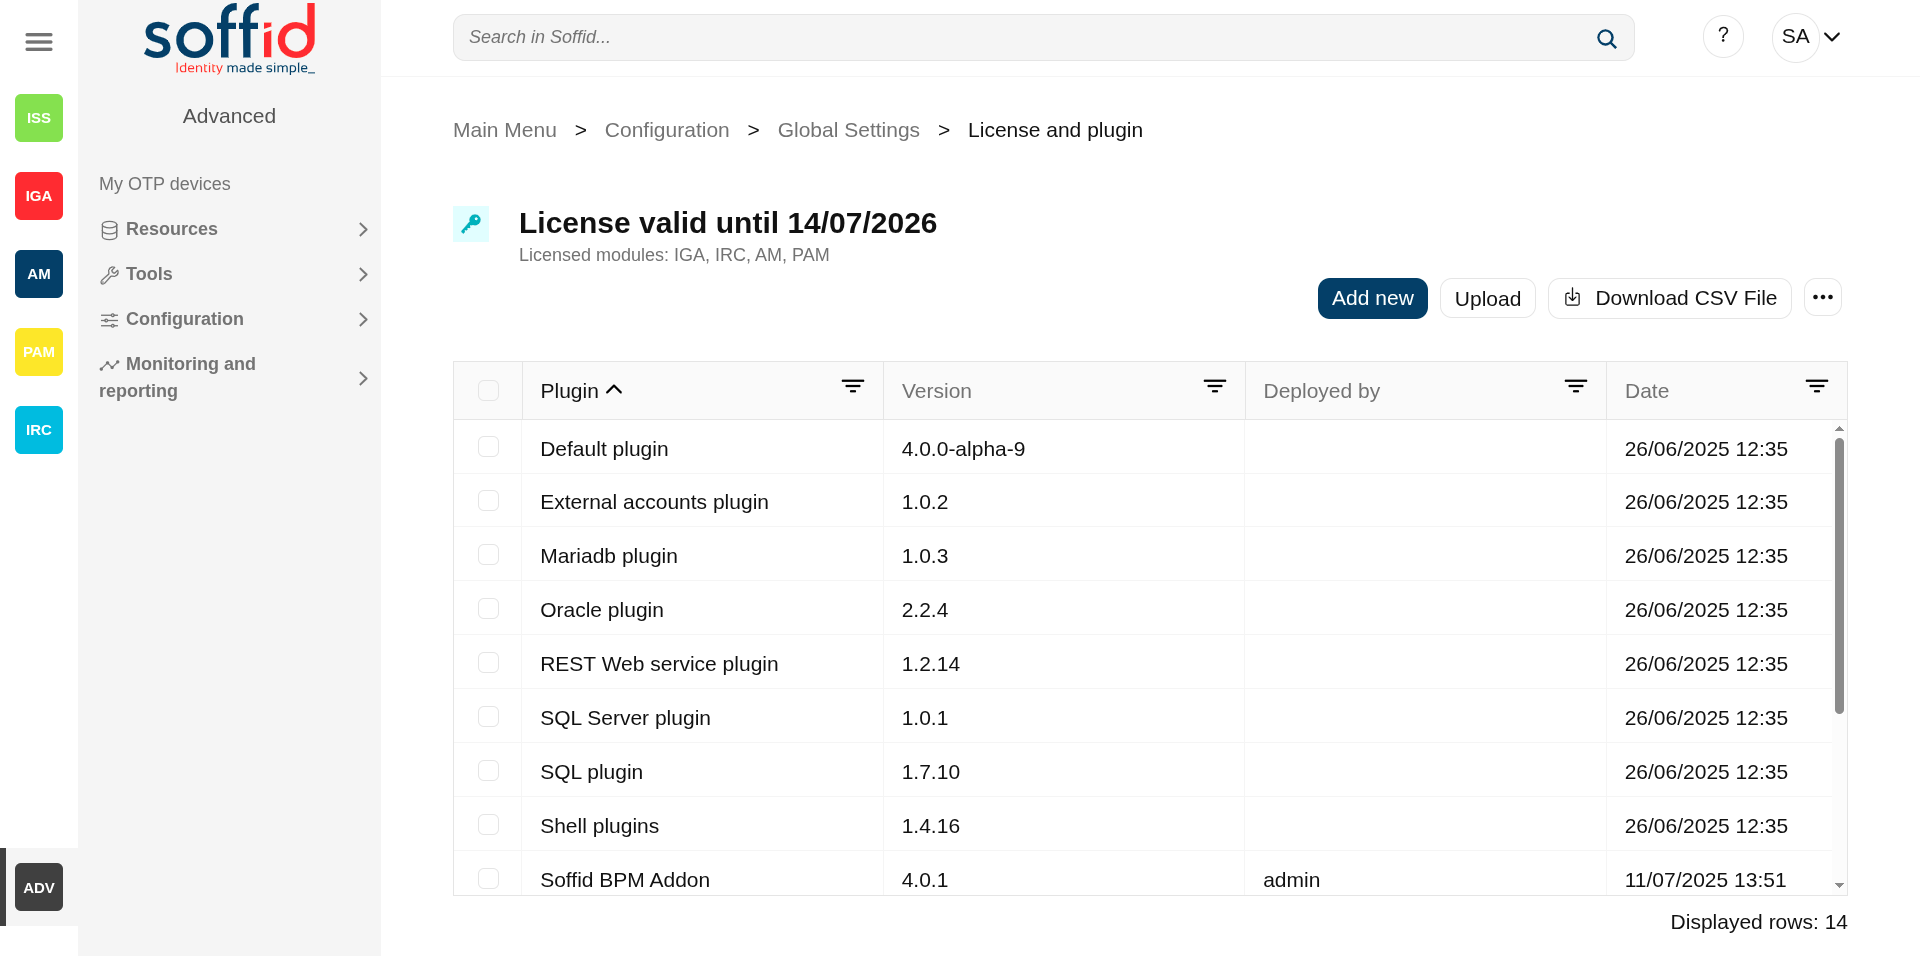
- Close. Finally you will have an active license and access to all pages
Step 4.3 Welcome to Soffid 4!
You will now be able to access all of Soffid’s features.
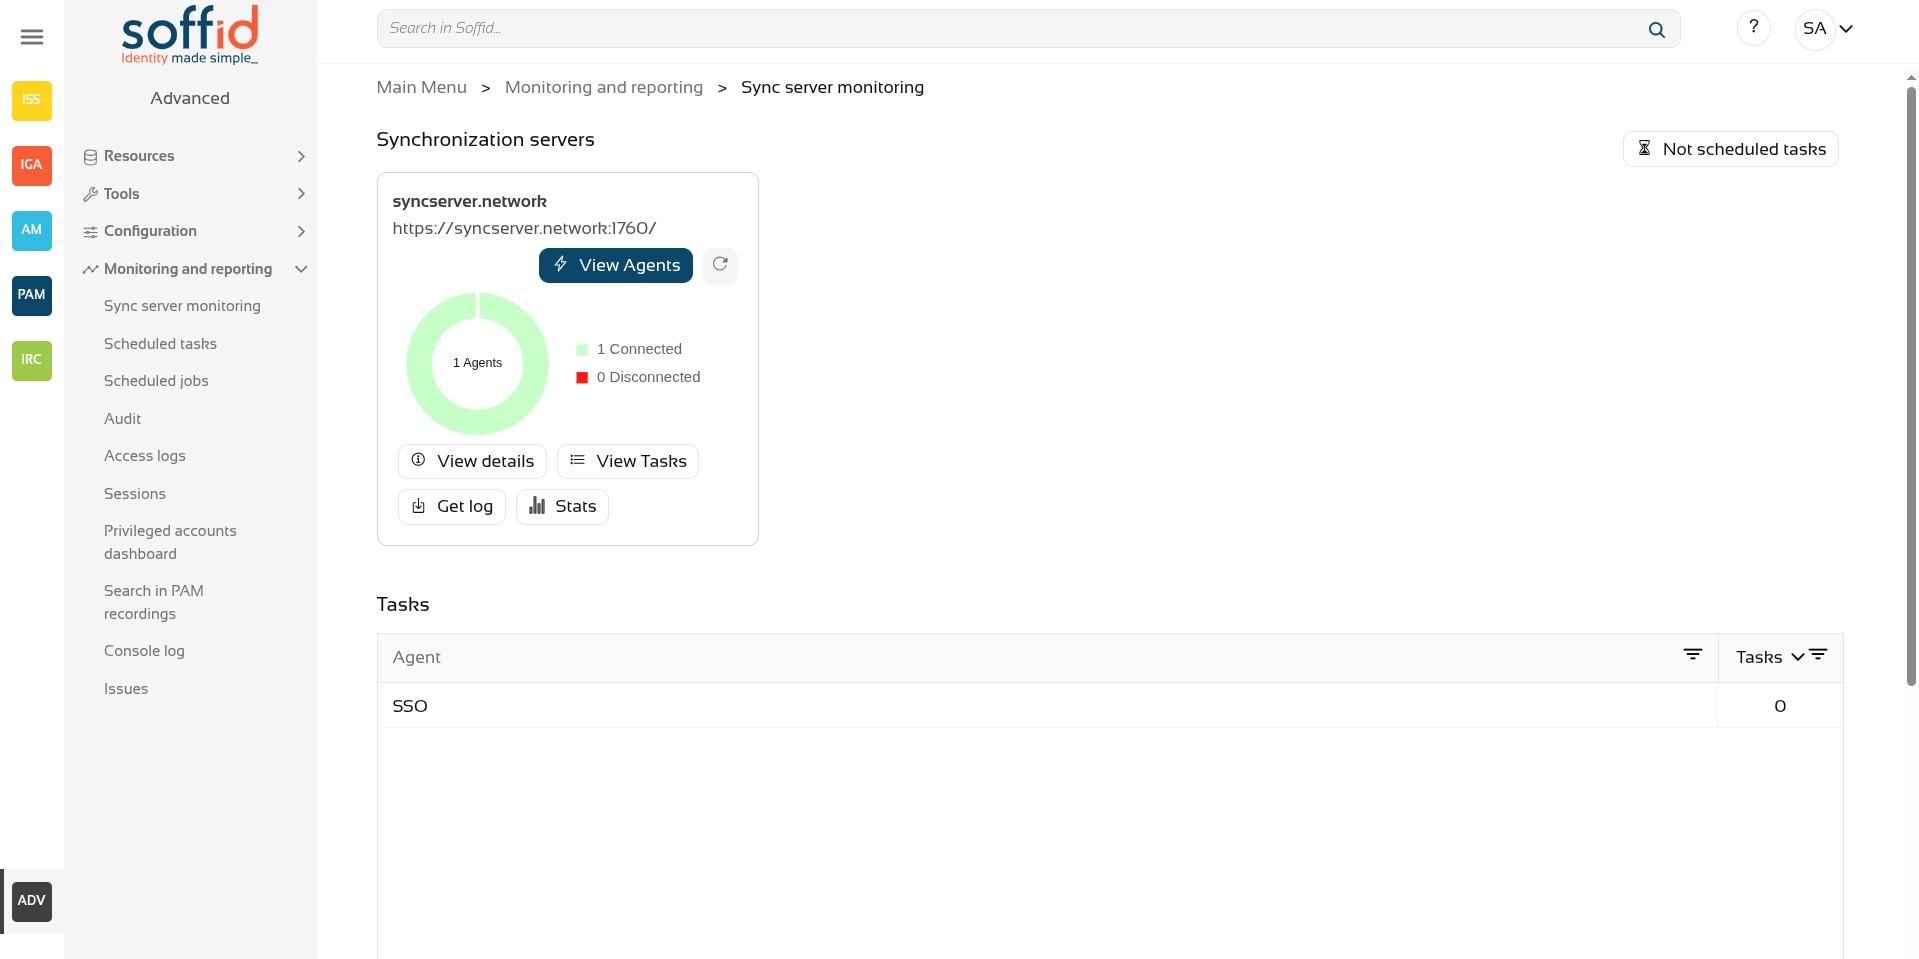
Step 4.4 Check the syncsever
To check if the syncserver is active:
- Go to the "Sync server monitoring" page
- If the syncserver is not off, it is running
Installing Soffid on Kubernetes
Guide to show le installation process os Soffid IAM in Kubernetes
Installing IAM Console
Guide to install IAM Console on Kubernetes.
Prerequisites
- Kubernetes
- 8GB RAM
- > 10GB disk space
- Supported database installed
Video Tutorial
Linux
Installation
You can use the docker image described at Installing IAM console using Docker. Here you have a sample Kubernets YAML descriptor to deploy it.
Mind that any certificate present in the folder /opt/soffid/iam-console-4/trustedcerts is considered as a trusted certificate. It is important to include the root syncserver certificate or any other certificate the console must connect with.
Another aspect to be aware of is the DNS resolution cache implemented by the java virtual machine. Because pods and service names often change its IP address, it suggested to disable the DNS cache adding the -Dsun.net.inetaddr.ttl=-1 parameter.
apiVersion: v1
kind: Secret
metadata:
   name: trusted-certs
data:
   syncserver: MIIC+TCCAeGgAwIBAgIGAWwFI+dWMA0GCSqGSIb3DQEBCwUAMDMxDzANBgNVBAMMBlJvb3RDQTEPMA0GA1UECwwGbWFzdGVyMQ8wDQYDVQQKDAZTb2ZmaWQwHhcNMTkwNzE3MTMwMjE0WhcNMjkwNzE4MTMwMjE0WjAzMQ8wDQYDVQQDDAZSb290Q0ExDzANBgNVBAsMBm1hc3RlcjEPMA0GA1UECgwGU29mZmlkMIIBIjANBgkqhkiG9w0BAQEFAAOCAQ8AMIIBCgKCAQEArkRq5/Kq1a/WlI00xzuxj0CDaH/L3G01dN5tXEFMXnm4VgDaaQXEjxGL0HEO47flDWGvJckLxIHSgEtRaHTquLRYLfHwHw3S0CC/DqdYcMZGG7QkCHDfdGunIoRGvWOAYOaV0pSiqBsfXhqG/7R4Ux7kx7mWoRXHnTyWXZl6tlNl9k2fC47foI5uMsblB3bybNnzLw2JvdwC6I8bbzf1j38r98WevdzQMVYxn10CQjLz2ZN7irYpgHzaBPoZlwKNVBhf7Tke9TDWuGO5G2UXTpys3euyTFw82TeetNTydcVK8SpdGKMlN95Cj2pgwzzz9d+qaMbN0tJu2CuGO+TROwIDAQABoxMwETAPBgNVHRMBAf8EBTADAQH/MA0GCSqGSIb3DQEBCwUAA4IBAQApbPFO3fMlLOdvgx+O8w7JJyxOJNG+ogV7QH+ipxM6eyCWLI7euJbRSc7skR61Hw0H6Ka+ExFjHOqe0u/ysIg/ITlWTV6olaD8OpT3GKsZqhiQpBO6dKqPs8JcwMt4gBbQ7YxfYefk3OER6PUG9sk8OPMmdeF+jQu1bWijUNPB0qEPio+NWXc+SF0/Ij1DQF2sW9yDb5LvsbgrkQXewvp6eUJPpwHh+pGqNKKuHkwTCfu5cUtNBMAC6CQjjCm6CUy4BYxRcF3zfzjV2nK3zTeshF7wlK95ZMaC8IGYbYwZ86qT/x/PxX/qYOjRftSr6/Y58heYvfXLFM1pceQYVW9v
   star_soffid_com: MIIGcDCCBVigAwIBAgIRAOFY+IkZ+FTddCqKixlQEIMwDQYJKoZIhvcNAQELBQAwgY8xCzAJBgNVBAYTAkdCMRswGQYDVQQIExJHcmVhdGVyIE1hbmNoZXN0ZXIxEDAOBgNVBAcTB1NhbGZvcmQxGDAWBgNVBAoTD1NlY3RpZ28gTGltaXRlZDE3MDUGA1UEAxMuU2VjdGlnbyBSU0EgRG9tYWluIFZhbGlkYXRpb24gU2VjdXJlIFNlcnZlciBDQTAeFw0xOTA2MTgwMDAwMDBaFw0yMTA2MTcyMzU5NTlaMFkxITAfBgNVBAsTGERvbWFpbiBDb250cm9sIFZhbGlkYXRlZDEdMBsGA1UECxMUUG9zaXRpdmVTU0wgV2lsZGNhcmQxFTATBgNVBAMMDCouc29mZmlkLmNvbTCCASIwDQYJKoZIhvcNAQEBBQADggEPADCCAQoCggEBAKnDKURLcT1XfaMjmIU8QtxdhVe1XG1Oo4LrrEyUVBaAA/5RPcWrvkCIf2Kq6/JTBBxbwvJP1pHAninwTGLam2lNTL2jvlyYXC/oA0hqbRxDCBjkq7e7fj6R2rcFJcAx0jUiyzlfgZmP/QX+ju7KrJ33sR4DPAG47Xnz8XgWJMuXdoSvQ8NeaWNAUjK7Pt3vHB/QD40MAAisXuOq1w11R3MzEJv0nHgNPvxqGvVdHTDX5RwHoVEMEHF7lQY0Mh2oIejQgN+VPOJNJh6vd7HiVUlVLXop8qhjJQgy2DQS2VGTUBObTFTgD81UPKzZgRzlziU3RWimZMVgHjzDn9MmzkcCAwEAAaOCAvowggL2MB8GA1UdIwQYMBaAFI2MXsRUrYrhd+mb+ZsF4bgBjWHhMB0GA1UdDgQWBBTPiYczqwQVFTogNEQydqg0WGGnwzAOBgNVHQ8BAf8EBAMCBaAwDAYDVR0TAQH/BAIwADAdBgNVHSUEFjAUBggrBgEFBQcDAQYIKwYBBQUHAwIwSQYDVR0gBEIwQDA0BgsrBgEEAbIxAQICBzAlMCMGCCsGAQUFBwIBFhdodHRwczovL3NlY3RpZ28uY29tL0NQUzAIBgZngQwBAgEwgYQGCCsGAQUFBwEBBHgwdjBPBggrBgEFBQcwAoZDaHR0cDovL2NydC5zZWN0aWdvLmNvbS9TZWN0aWdvUlNBRG9tYWluVmFsaWRhdGlvblNlY3VyZVNlcnZlckNBLmNydDAjBggrBgEFBQcwAYYXaHR0cDovL29jc3Auc2VjdGlnby5jb20wIwYDVR0RBBwwGoIMKi5zb2ZmaWQuY29tggpzb2ZmaWQuY29tMIIBfgYKKwYBBAHWeQIEAgSCAW4EggFqAWgAdgC72d+8H4pxtZOUI5eqkntHOFeVCqtS6BqQlmQ2jh7RhQAAAWtpdk7pAAAEAwBHMEUCIQCyc83CoGLtckCrDEtAph3U/+XMqwkEPwqEgi9bu7xNBgIgKachYG2OED40K9pd9byRWUjy+BeV+5tVeN+I8JD48XoAdQBElGUusO7Or8RAB9io/ijA2uaCvtjLMbU/0zOWtbaBqAAAAWtpdk7+AAAEAwBGMEQCIFqjuu2Q/TTq48nkobC87nRfgE9FQmlUp4PI98U90ygJAiBoFsiy0kz2ZDNz+BeAVjqAj7UsnrNIv8vwG3V7rh6kxgB3AG9Tdqwx8DEZ2JkApFEV/3cVHBHZAsEAKQaNsgiaN9kTAAABa2l2Tv4AAAQDAEgwRgIhAMLmnVu4rduXSiaC5pfbk6uQsceV6zEx1fgNjQXNupDwAiEAtCh5VG2lC6iWy0chA/PfC5ejmlgBAmHbYLxsr9uiOWwwDQYJKoZIhvcNAQELBQADggEBABqZ8Stnzkk/abCQTMjOhNsSswSZZ74mszAGrd+emh7/VhLeJ29AaoMiCF5j0uphx/t9id5UmKbqwuapo9E1NuAVQqDOV1N0wV4Awa2nEivbDcuDCTMX6VtOK3DnCnE9yLMdD6GF9xcwzsgz5wKXu2Dxwt4vw05KIM+4Myy91sEpifa62+qdzR/Vfbv6SqeL1IzTDyHMzEtBu/4jL189VeSkTVvdKGT1g6eAMHTX562z7jJgTH23c2zolCEj9YPd+KUbt6/OO+Pljsj0MeTzO1QImj2syqCE/O4tYyHOHOdHJcrVSP951nCu0bkH6MBUhFvgk8a6rjI8tcnZCpsdcNU=
---
apiVersion: apps/v1
kind: Deployment
metadata:
  name: soffid-console
  labels:
    app: soffid
    type: console
spec:
  replicas: 1
  selector:
    matchLabels:
      app: soffid
      type: console
  template:
    metadata:
      labels:
        app: soffid
        type: console
    spec:
      containers:
      - name: soffid-console
        image: soffid/iam-console:4.0.0-beta-8
        imagePullPolicy: Always
        resources:
          limits:
            memory: 4Gi
          requests:
            memory: 2Gi
        volumeMounts:
        - name: trusted-certs-volume
          mountPath: /opt/soffid/iam-console-4/trustedcerts
        ports:
        - containerPort: 8080
        env:
            - name: DB_USER
              value: soffid
            - name: DB_PASSWORD
              value: 5uper5ecret
            - name: JAVA_OPT
              value: "-Xmx4048m -Dsun.net.inetaddr.ttl=1"
            - name: DB_URL
              value: jdbc:mariadb://mariadb-service:3306/soffid
      imagePullSecrets:
      - name: regcred
      volumes:
      - name: trusted-certs-volume
        secret:
          secretName: trusted-certs
---
apiVersion: v1
kind: Service
metadata:
  name: iam-console-service
spec:
  selector:
      app: soffid
      type: console
  type: loadBalancer
  ports:
  - name: web
    protocol: TCP
    port: 8080
    targetPort: 8080
Linux commands
Apply the YAML file with the defining Kubernetes resources
kubectl apply -f syncserver.yamlCheck deployments
kubectl get deploymentsCheck pods: you can check pods and their status
kubectl get podsView the IAM console log
kubectl logs <your-pod-iamconsole-name>When the console is created, the password for the user admin will be changeit and it will be valid for 24 hours.
Now you can connect to Soffid Console http://<Node-Ip>:<publish-port>/soffid The first thing you must do is to change the admin user password.
Next Step: Installing Sync server
Installing Sync server
Guide to install Sync server on Kubernetes.
Prerequisites
Soffid IAM sync server requires the following requirements:
Video Tutorial
Linux
Installation
You can use the docker image described at Installing Sync server using Docker. Here you have a sample Kubernets YAML descriptor to deploy it.
# Secrets to store syncserver configuration
apiVersion: v1
kind: Secret
metadata:
  name: syncserver
type: Opaque
data:
  config: c3Nva20=
---
# Service account for sync server
apiVersion: v1
kind: ServiceAccount
metadata:
  name: syncserver
---
# Role to access the sync server
kind: ClusterRole
apiVersion: rbac.authorization.k8s.io/v1
metadata:
  name: syncserver
rules:
  - verbs:
      - get
      - update
    apiGroups:
      - ''
    resources:
      - deployments
      - pods/attach
      - secrets
      - secrets/syncserver
---
kind: RoleBinding
apiVersion: rbac.authorization.k8s.io/v1
metadata:
  name: syncserver
  namespace: default
subjects:
  - kind: ServiceAccount
    name: syncserver
roleRef:
  apiGroup: rbac.authorization.k8s.io
  kind: ClusterRole
  name: syncserver
---
apiVersion: apps/v1
kind: Deployment
metadata:
  name: syncserver01
  labels:
    app: soffid
    type: syncserver
spec:
  replicas: 1
  selector:
    matchLabels:
      app: soffid
      type: syncserver
  template:
    metadata:
      labels:
        app: soffid
        type: syncserver
    spec:
      serviceAccountName: syncserver
      containers:
        - name: syncserver
          image: soffid/iam-sync:4.0.0-beta-2
          ports:
            - containerPort: 760
              name: syncserver-port
          readinessProbe:
            initialDelaySeconds: 5
            failureThreshold: 1
            httpGet:
              path: /diag
              scheme: HTTPS
              port: 760
          livenessProbe:
            initialDelaySeconds: 5
            timeoutSeconds: 3
            failureThreshold: 3
            httpGet:
              path: /diag
              scheme: HTTPS
              port: 760
          env:
            - name: DB_USER
              value: soffid
            - name: DB_PASSWORD
              value: 5uper5ecret
            - name: SOFFID_HOSTNAME
              value: syncserver01.cloud.soffid.com
            - name: SOFFID_MAIN
              value: "yes"
            - name: KUBERNETES_CONFIGURATION_SECRET
              value: "syncserver"
            - name: DB_URL
              value: jdbc:mariadb://mariadb-service/soffid
---
apiVersion: v1
kind: Service
metadata:
  name: syncserver
spec:
  externalTrafficPolicy: Local
  type: LoadBalancer
  selector:
    app: soffid
    type: syncserver
  ports:
  - name: syncserver
    protocol: TCP
    port: 760
    targetPort: 760
If the syncserver pod is not available in 5 seconds, probably it will restart constantly and it will not be available. To solve this, change the sample Kubernetes YAML descriptor showed above like this:
livenessProbe:
        failureThreshold: 3
        httpGet:
          path: /diag
          port: 761
          scheme: HTTP
        initialDelaySeconds: 360
        periodSeconds: 10
        successThreshold: 1
        timeoutSeconds: 3
      name: syncserver
      ports:
        - containerPort: 760
          name: syncserver-port
          protocol: TCP
      readinessProbe:
        failureThreshold: 1
        httpGet:
          path: /diag
          port: 761
          scheme: HTTP
        initialDelaySeconds: 300
        periodSeconds: 10
        successThreshold: 1
        timeoutSeconds: 1
Linux commands
Apply the YAML file with the defining Kubernetes resources
kubectl apply -f syncserver.yamlCheck deployments
kubectl get deploymentsChek pods: you can check pods and their status
kubectl get podsView Sync server log
kubectl logs <your-pod-syncserver-name>Now you can connect to the IAM console http://<Node-Ip>:<publish-port>/soffid and chek if Console and Syncserver are connected.
How to copy to Kubernetes Secrets?
When making any manual changes to the Sync server configuration files, it will be necessary to copy these changes to the Kubernetes secrets.
Command example:
java -cp "/opt/soffid/iam-sync/bin/bootstrap.jar" com.soffid.iam.sync.bootstrap.KubernetesSaverSince Soffid version 3.x, the certificates are automatically updated when the certificate end date is close and no manual actions are required.
How to copy Sync Server Kube Conf to Database table?
When you install soffid Sync server in kubernetes, a properties file is generated. If this file is not saved in a permanent storage, it could be lost during the Syns Server upgrade process.
Here you are the steps to copy your Kube config to a data base table
1.-
unset KUBERNETES_CONFIGURATION_SECRET2.-
export DB_CONFIGURATION_TABLE=syncserver3.-
java -cp "/opt/soffid/iam-sync/bin/bootstrap.jar:/opt/soffid/iam-sync/lib/mariadb-java-client-1.8.0.jar:/opt/soffid/iam-sync/lib/ojdbc10-19.18.0.0.jar:/opt/soffid/iam-sync/lib/postgresql-42.2.5.jre7.jar:/opt/soffid/iam-sync/lib/sqljdbc4-3.0.jar" com.soffid.iam.sync.bootstrap.KubernetesSaverHow to install Soffid using Windows native authentication in SQL Server?
Autenticación NTLM para SQL Server
Soffid Versions
To install Soffid using Windows native authentication in SQL Server you will need an specific or higher versions of Console and Sync Server:
- Console 3.6.36 or higher
- Sync server 3.6.26 or higher
You can check the lastest versions in the download area: https://download.soffid.com/download/enterprise/
Steps
Prerequisites
- Install SQL Server and create the soffid database.
- Install Java JDK11.
Install and config Soffid Console
1.- Install Soffid Console
Open the installation file, Windows Installer Package (.msi). It will create the operating system level service and will start it. After some seconds, the installation wizard will be up and running in port 8080.
If the console was installed previously, you will need to update the system.properties file. You will have to add the parameters ;integratedSecurity\=true;trustServerCertificate\=true
system.properties file
You can find this file in ...\Soffid\IAM-Console\conf
#Configured from soffid startup wizard
#Wed Apr 02 11:31:01 CEST 2025
dbMaxConnections=200
hostName=localhost
dbValidationQuery=select 1 from sysobjects
dbDriverString=sqlserver
dbPasswordCipher=com.soffid.iam.tomcat.SoffidPasswordCipher
openejb.validation.output.level=VERBOSE
tomee.serialization.class.blacklist=*
tomee.serialization.class.whitelist=org.apache.openejb
openejb.deploymentId.format={appId}-{ejbClass}
org.apache.johnzon.buffer-strategy=BY_INSTANCE
dbDriverClass=com.microsoft.sqlserver.jdbc.SQLServerDriver
soffid.server.port=8080
dbUser=DOMAIN\\Administrator
dbStatus=1
dbDriverUrl=jdbc\:sqlserver\://141.94.164.195\:1443;databaseName\=soffid02;integratedSecurity\=true;trustServerCertificate\=true
dbPassword=xxxxxx\=\=
2.- Configure the Soffid Console service
- Stop the Soffid Console service.
- Update the service to use the domain admin account and password.
- Start the Soffid Console service.
Update Service Logon
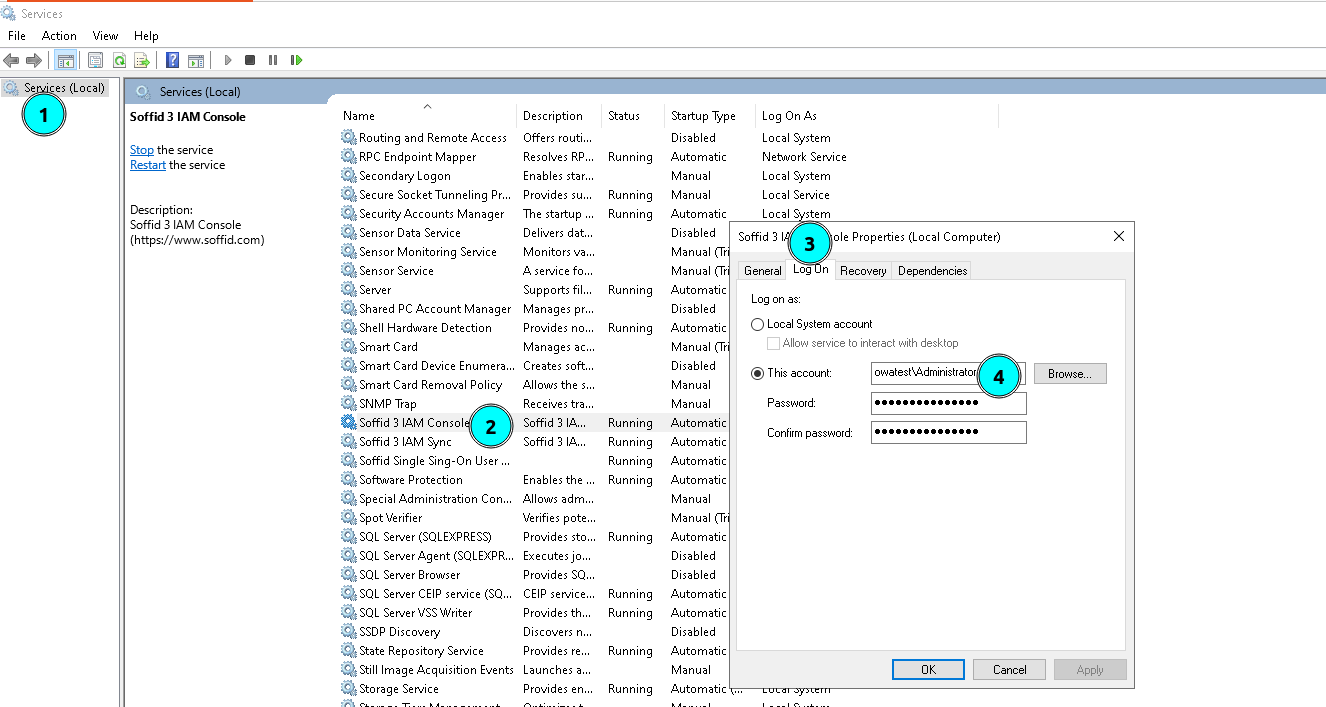
3.- Configure the Soffid Console
- Go to http://localhost:8080
- Click the configure button
- Fill in the parameter to connect: It will be mandatory to add the properties ;integratedSecurity=true;trustServerCertificate=true to the URL
- Click the connect button
Configure Soffid Console
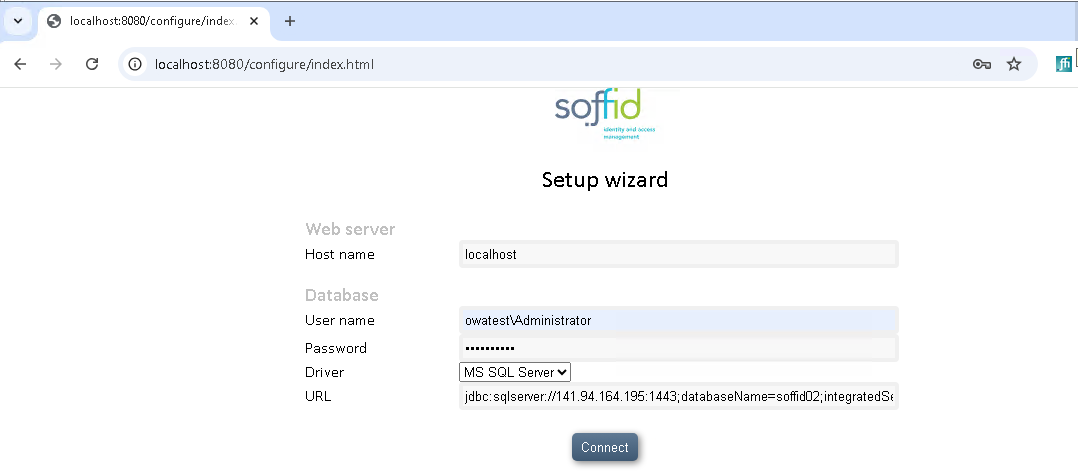
Install and config Sync Server
1.- Install Soffid Sync Server
Open the installation file Windows Installer Package (.msi). It will install the software and will execute the installation wizard.
2.- Configure Soffid SyncServer
The installation wizard will ask to configure the Sync Server.
It will be mandatory to add the parameters ;integratedSecurity=true;trustServerCertificate=true to the connection to database URL
seycon.properties file
You can find this file in ...\Soffid\IAM-Sync\conf
#Soffid autogenerated file
#Wed Apr 02 11:46:45 CEST 2025
password=xxxxxxxx
hostname=WIN-DESK-01
serverlist=https\://WIN-DESK-01\:1760/
port=1760
sslkey=xxxxxxxxxxxx
user=xxxxx.lab\\Administrator
rol=server
java_opt=-Xmx512m
db=jdbc\:sqlserver\://141.94.164.195\:1443;databaseName\=soffid02;integratedSecurity\=true;trustServerCertificate\=true
url=https\://WIN-DESK-01\:1760/
autoupdate=true
3.- Configure the Soffid SyncServer service
- Stop the Soffid Sync Server service.
- Update the service to use the domain admin account and password.
- Start the Soffid Sync Server service.
Update Service Logon
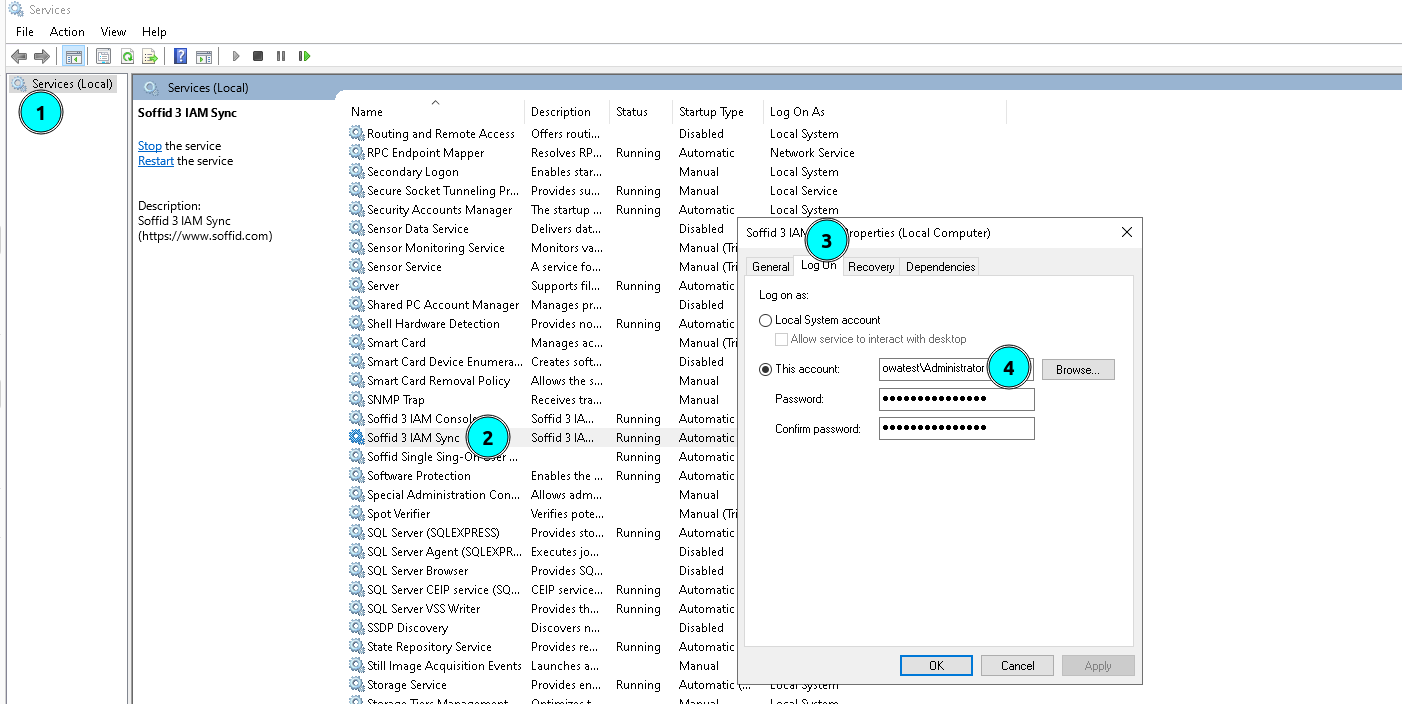
High Availability
Introduction
High availability configuration is supported on each layer of the Soffid stack.
Database replication
Soffid supports two kinds of database replication:
- Builtin asymmetric replication
- Database engine replication
Builtin asymmetric database replication
There is an addon available in the download area. This addon lets you define replica databases that will be populated using the sync server engine.
Afterward, you can instruct any sync server to use this replica database upon the master database failover. When the main database is ready, the synchronization server will fall back and use the master database again.
This mechanism provides a simple way to ensure that all the services provided by the synchronization server are alive upon database failure but does not protect the Soffid console. It's useful to ensure single sign-on components work properly upon database failure.
Database engine replication
This is the recommended configuration to achieve database high availability, but the way to configure depends on the selected engine. There is a special table named SC_SEQUENCE that must not be replicated across instances. This table contains a single row with the global counter for new object ids: Its columns are:
SEQ_NEXT: Next sequence number to assign.
SEQ_CACHE: How many sequence numbers must be cached by Soffid.
SEQ_INCREMENT: Gap between sequence numbers.
So, this table can have the following values for a two database replicas. So that one replica will generate positive IDs and the other one will generate negative IDs:
|
Database
|
SEQ_NEXT
|
SEQ_CACHE
|
SEQ_INCREMENT
|
|---|---|---|---|
| First | 1 | 100 | +1 |
| Second | -1 | 100 | -1 |
Another possibility, valid for a three database replica would be the following. One replica will generate 1,4,7,..., the second one will generate 2,5,8,... and the third one will generate 3,6,9,... and so on.
|
Database
|
SEQ_NEXT
|
SEQ_CACHE
|
SEQ_INCREMENT
|
|---|---|---|---|
| First | 1 | 100 | +3 |
| Second | 2 | 100 | +3 |
| Third | 3 | 100 | +3 |
Console high availability
Many consoles can be installed either independently or bound to a load balance appliance. This is the best way to increase architecture scalability.
Synchronization server high availability
Soffid supports the installation of many synchronization servers. The only task that is exclusive to the main (first) synchronization server is the enrolment of new synchronization servers. All the remaining tasks can be performed by any synchronization server
Customice logging
Introduction
Sync server logging can be customized by adding logging.properties file in the conf directory.
Example
Following is a sample configuration file:
handlers=java.util.logging.ConsoleHandler
.level=INFO
config=

java.util.logging.ConsoleHandler.level=INFO
java.util.logging.ConsoleHandler.formatter=com.soffid.iam.sync.engine.log.SoffidFormatter

org.hibernate.level=WARNING
org.springframework.level=WARNING
RemoteServiceLocator.level=SEVERE
org.mortbay.log.level=SEVERE
org.springframework.context.support.ClassPathXmlApplicationContext.level=WARNING
Local configuration properties
Introduction
seycon.properties file gives administrators a way to customize and improve synchronization server behavior. Some of the following parameters will always be present, some others should be created by the administrator.
|
Parameter
|
Description
|
|---|---|
| user | database owner |
| password | database owner's password (obfuscated) |
| db | database url |
| sslkey | obfuscated password used to protect the server private/public key |
| hostname | host name |
| serverlist | list of master and backup servers. |
| java_opt |
additional parameters to pass to JVM. Sample value for a high capacity server are: java_opt=-Xmx1024M |
| broadcast_listen | Set to true to enable the synchronization server to listen on any available IP address. By default, the server will only listen on the IP address that it's host name resolves to. |
| requestId | it will temporary contain the request number during the certificate enrollment process |
Upgrade Soffid3
Upgrade from version 2
These are the steps to upgrade your Soffid 2 deployment to Soffid 3:
- Stop Soffid 2 console
- Install and configure Soffid 3 IAM console. It will upgrade the database and perform any upgrading task.
Have a look and the console log file to check the upgrade process log. - Upgrade optional modules. After the console upgrade, most of them will not work as expected. You must upload Soffid 3 compatible versions through the plugins page.
After uploading them, restart the console - Upgrade sync servers. Simply install Soffid 3 sync server on top of current Soffid 2 sync server
To upgrade a docker deployment, docker containers must be dropped and created again, using the same parameters used for the initial setup. Tools like Portainer will help you do this task.
To upgrade a Kubernetes deployment, simply change the version tag in your Kubernetes YAML file. The system will pull the image from the docker hub and will start the service
Upgrade from version 3
To upgrade a Soffid 3 IAM console, simply install the new packages downloaded from our downloads site. It will replace any component and will restart the service.
If it's needed, it will upgrade the database and perform any upgrading task.
In the same way, to upgrade a Soffid 3 Sync server install the new packages downloaded from our download site. It will replay any component and restart the service.
Docker and Kubernetes notes
To upgrade a docker deployment, docker containers must be dropped and created again, using the same parameters used for the initial setup. Tools like Portainer will help you do this task.
To upgrade a Kubernetes deployment, simply change the version tag in your Kubernetes YAML file. The system will pull the image from the docker hub and will start the service
Soffid 4 first access
Introductión
After installing Soffid using any of the above methods, the following steps must be taken when accessing the Console for the first time.
Upgrade
Click "OK" to coninue the installation process.


Login
The next step is to log in to the Soffid Console for the first time.
During the installation process, the admin user was created with the temporary password changeit. When you log in, you will be asked to enter your new final password.


Licence
When you access the Console for the first time, you will only be able to see the ‘Licence and plugin’ page.
If you do not see this page, log out and log back in.
To obtain a licence, please contact the Soffid sales team.
For further information, please refer to the Licence and plugin page.
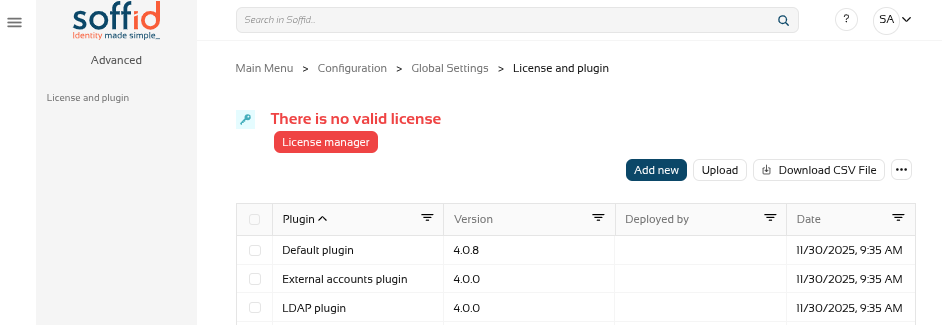
HTTPS
In order to select and accept the licence, as well as use the marketplace to upload and update components, you must enable the Console in https.
Revise la siguiente documentación: Configure TLS for IAM Console