# WS-Fed
WS-Federation
# WS-Fed
> WS-Federation (Web Services Federation) is an Identity Federation specification
>
> WS-Federation defines mechanisms for allowing different security realms to broker information on identities, identity attributes and authentication. WS-Federation focuses on federated identity and trusting authentication tokens across different realms, privileged password management is concerned with the security, control, and audit of high-risk account passwords within an IT environment
WS-Fed will only be used with **Exchange** and a few other applications.
---
*[https://en.wikipedia.org/wiki/WS-Federation](https://en.wikipedia.org/wiki/WS-Federation)*
# WS-Fed Architecture
## Introduction
WS-Federation (Web Services Federation) is an Identity Federation specification
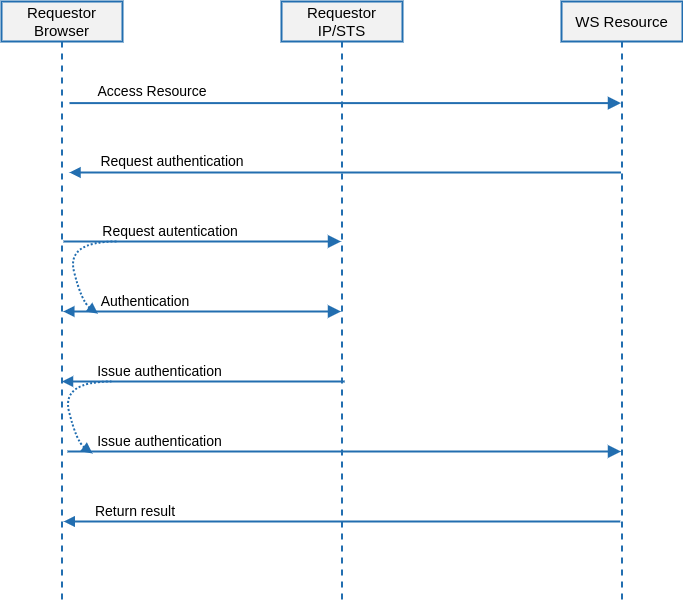
### Sign-On
---
[*http://docs.oasis-open.org/wsfed/federation/v1.2/cd/ws-federation-1.2-spec-cd-01.html*](http://docs.oasis-open.org/wsfed/federation/v1.2/cd/ws-federation-1.2-spec-cd-01.html)
# WS-Fed Example
## Steps
### Attribute definition
First of all, will be mandatory to create two new attributes
- User principal name
- AD SID
[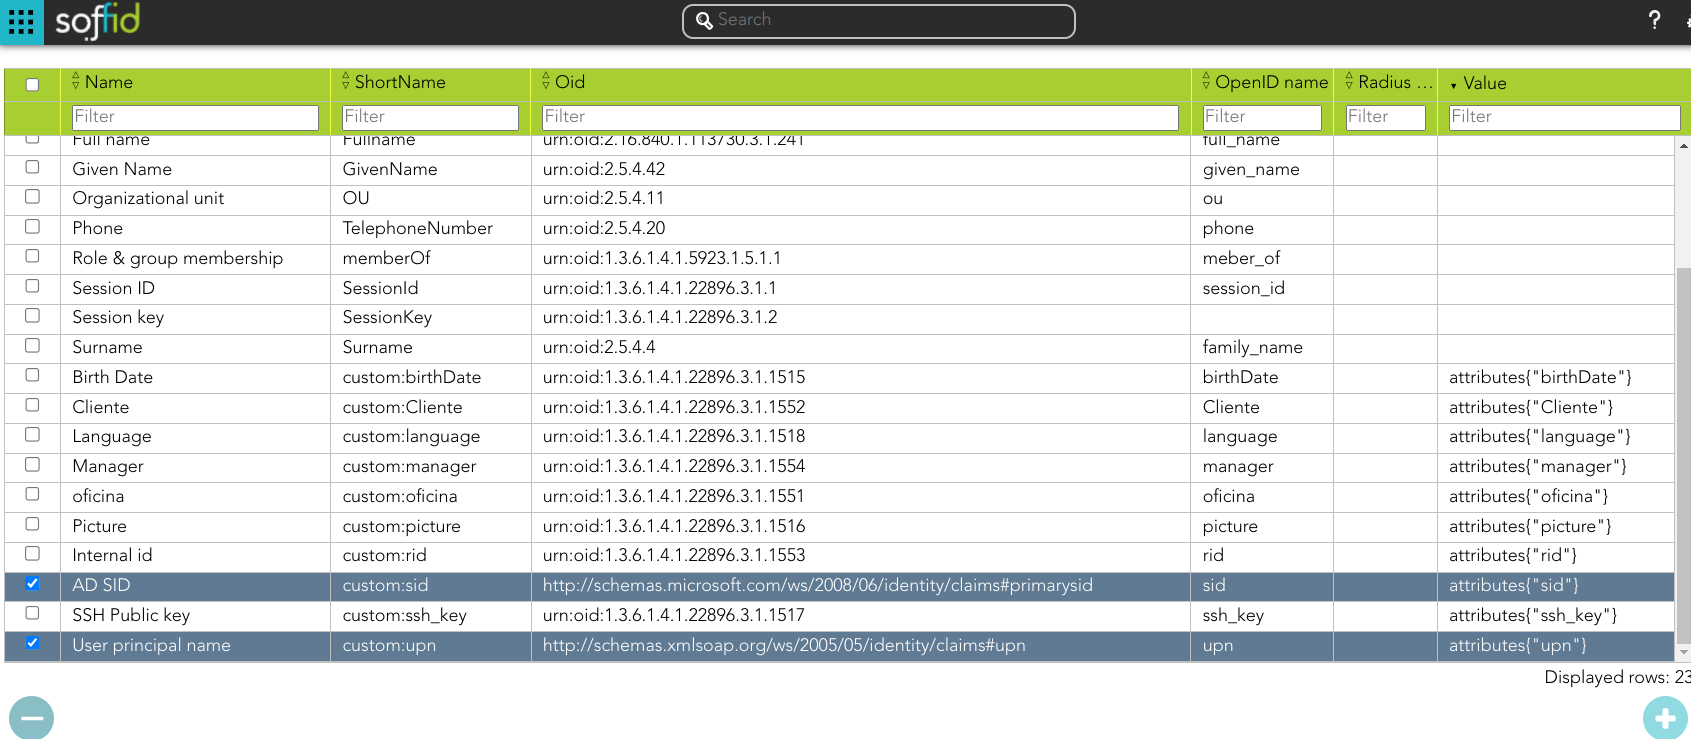](https://bookstack.soffid.com/uploads/images/gallery/2023-09/image-1695799061910.png)
Bear in mind, that those attributes have to be retrieved from the appropriate system:
[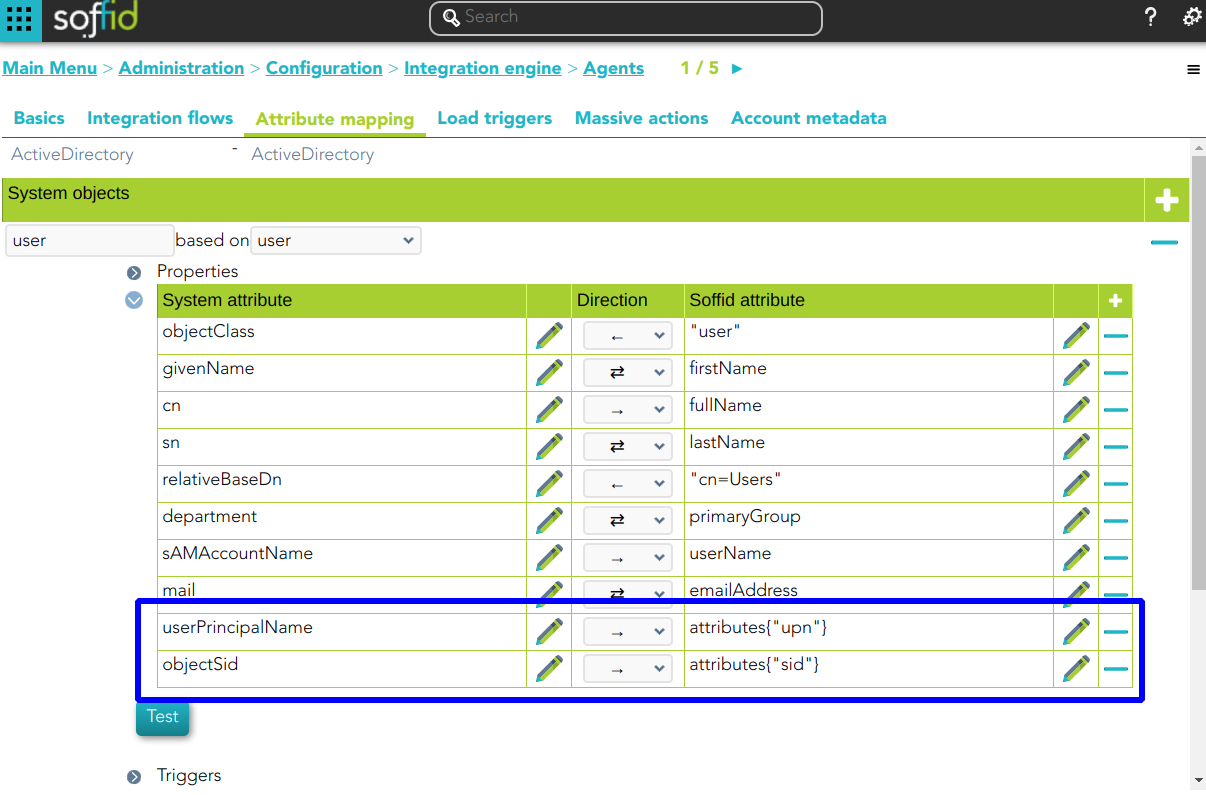](https://bookstack.soffid.com/uploads/images/gallery/2023-09/image-1695803778715.png)
And those attributes have to be defined in the object metadata:
[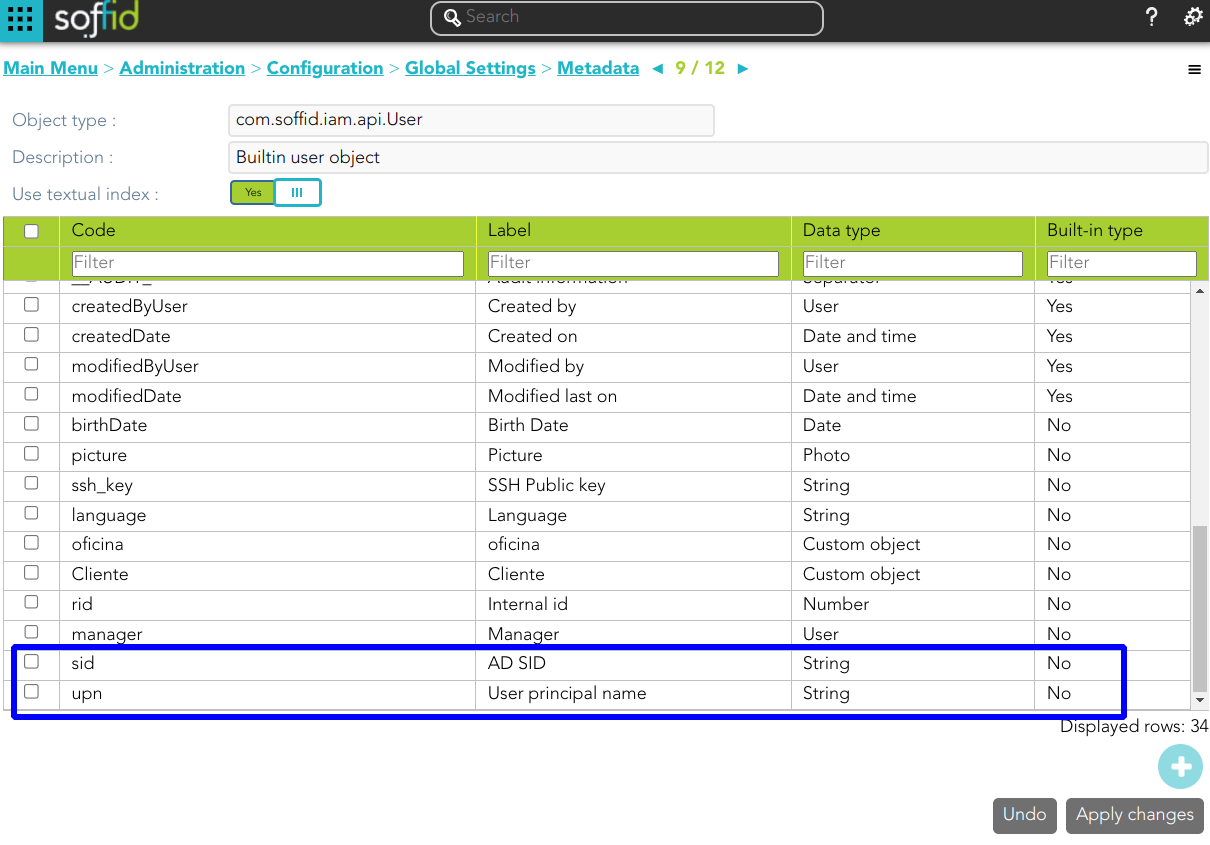](https://bookstack.soffid.com/uploads/images/gallery/2023-09/image-1695804665489.png)
### Attribute sharing policies
Define the proper attribute policy
[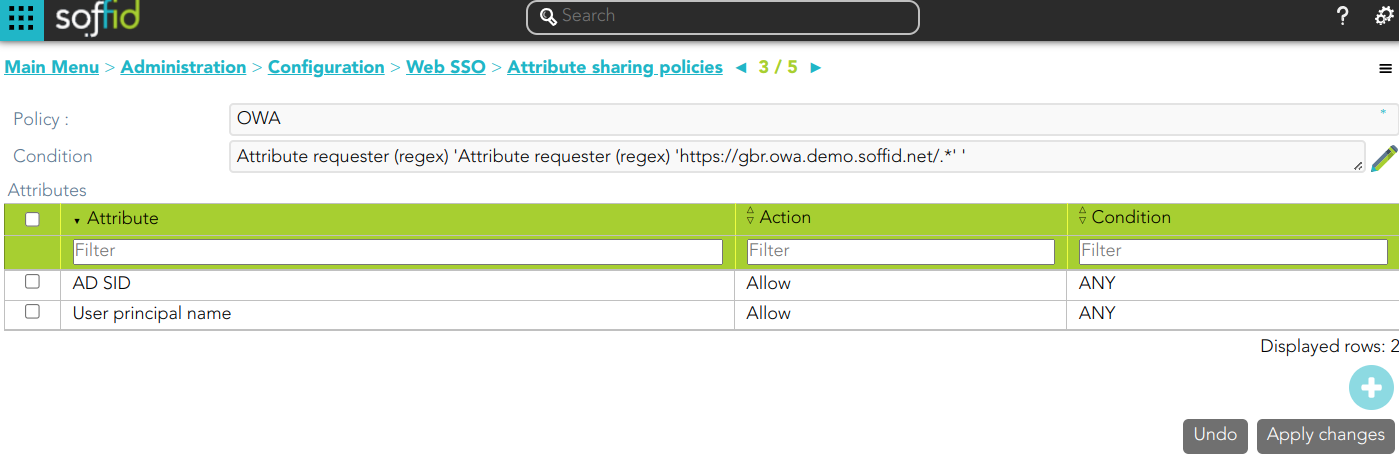](https://bookstack.soffid.com/uploads/images/gallery/2023-09/image-1695801239762.png)
### Service Provider
[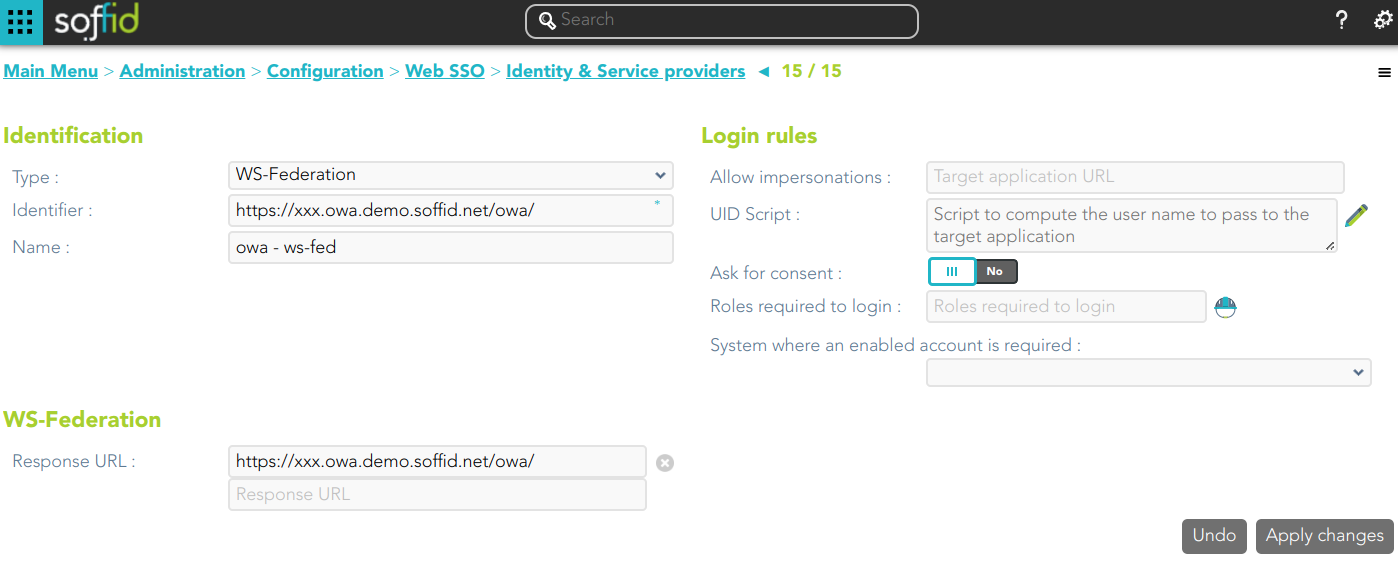](https://bookstack.soffid.com/uploads/images/gallery/2023-09/image-1695801347498.png)
### Configure Exchange
Finally, you must configure the Exchange.
1.- Upload the SAML certificate to the certificate repository
2.- Search for the thumbprint of the certificate:
```
Set-Location Cert:\LocalMachine\Root; Get-ChildItem | Short-Object Subject
```
[](https://bookstack.soffid.com/uploads/images/gallery/2023-09/image-1695814095103.png)
3.- From the Exchange Management Shell, run:
```
Set-OrganizationConfig -AdfsIssuer https://gbr.idp.demo.soffid.net/profile/wsfed `
-AdfsAudienceUris "https://gbr.owa.demo.soffid.net/owa/","https://gbr.owa.demo.soffid.net/ecp/" `
-AdfsSignCertificateThumbprint "XXXXXXXXXXXXXXXX"
```
```
Set-OWAVirtualDirectory -Identity "OWA (Default Web Site)" -AdfsAuthentication $true `
-BasicAuthentication $false -DigestAuthentication $false -FormsAuthentication $false `
-WindowsAuthentication $false
```
```
Set-ECPVirtualDirectory -Identity "ECP (Default Web Site)" -AdfsAuthentication $true `
-BasicAuthentication $false -DigestAuthentication $false -FormsAuthentication $false `
-WindowsAuthentication $false
```
```
net stop was /y
```
```
net start w3svc
```
The server must be up to date. Otherwise WS-Fed will reject the response