How to deploy the identity & service provider
How to deploy the identity & service provider
Step-by-step
1. To deploy the identity provider is advisable to install a dedicated sync server. It can be configured as a proxy sync server as it does not need direct access to Soffid database. Instead, it will connect to main sync servers to get users and federation information. Also, you can deploy the identity provider in your existing sync.
To install a proxy sync server follow the instructions at the Install sync server page.
2. If the installation is in a dedicated Sync server:
2.1. You need open the Sofid Console and approve the Task to accept the new Sync server.

2.1. You need tune the Sync server memory usage.

3. Once the Sync server is registered, if you want to create a Soffid IdP you must create a new Identity Provider Agent.
- Type: Soffid Identity Provider.
- Server: select the sync server that will host the identity provider.
- Trust password: must be unchecked.
- Read only: must be unchecked.
- Manual account creation: usually is unchecked, but could be useful to check it during initial tests.
- Role based: usually is unchecked, despite it could be used to limit the users that can use it.
- Groups: select the groups that can use it. Leave it blank to allow any user.
- User domain: use default users domain. Nevertheless, depending on your needs, creating another user domain could be a good option.
- Password domain: use default password domain.
- User types: check the user types that can use the identity provider.
- Public ID: enter the public ID assigned in the federation management page.
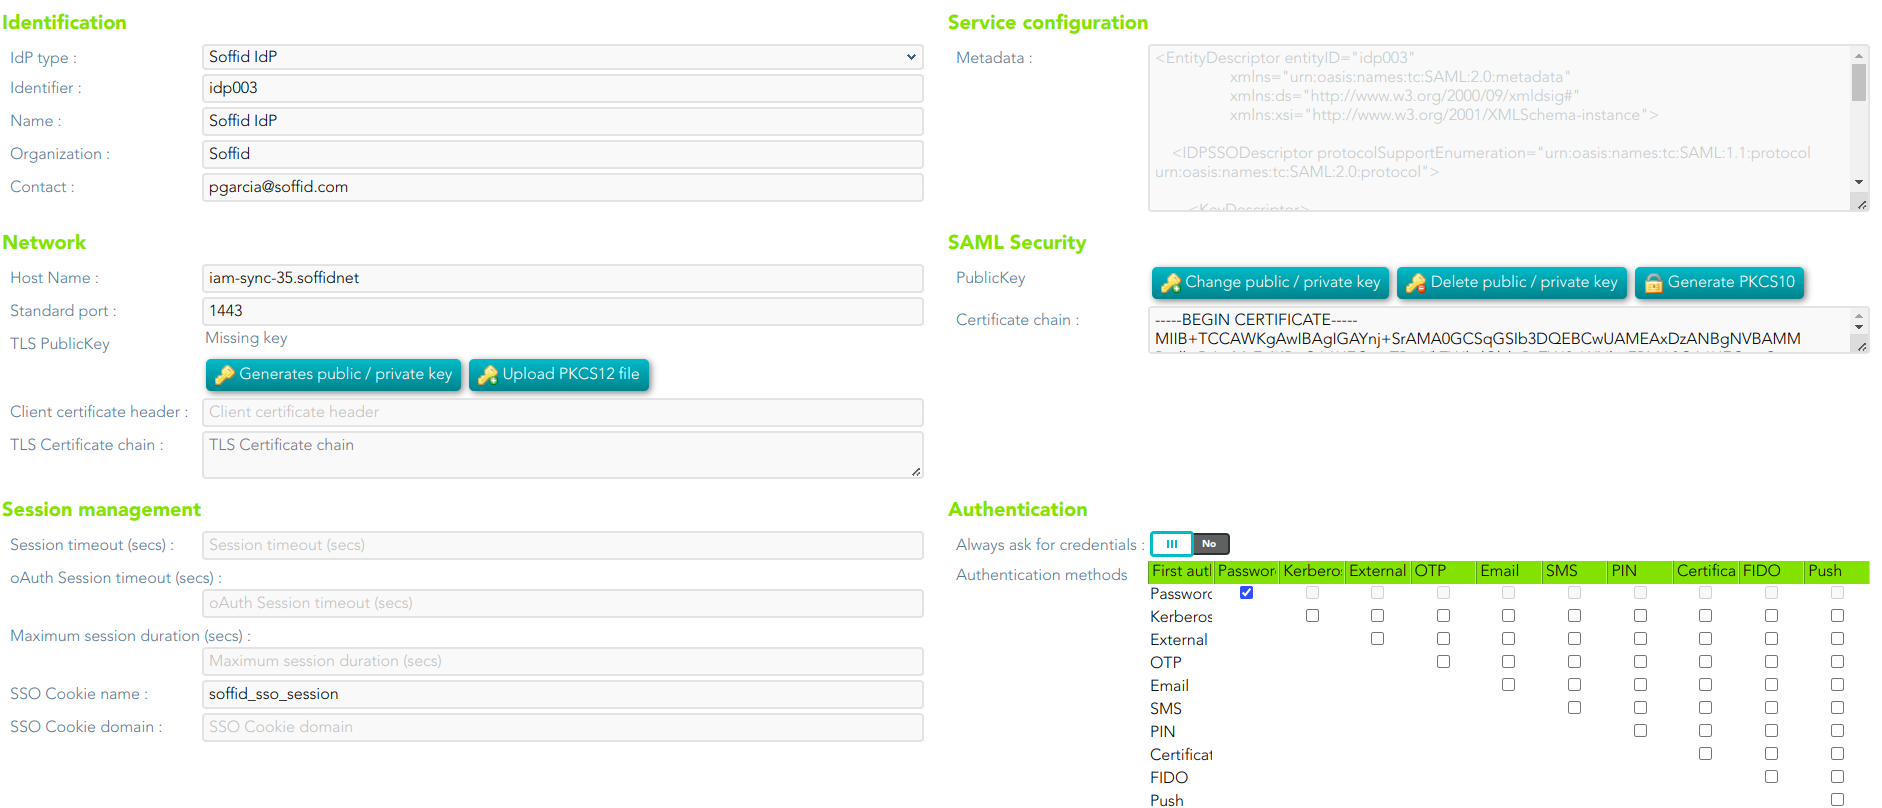
Your identity provider agent should look like this one:

4. Upload the Federation addon to the Soffid Console:
To upload the addon follow the instructions at the How to install Federation in Soffid page.
5. Once you are connected to the Soffid console, you can start creating an Entity Group.
5.1. First of all, open the Identity & Service providers page
5.2. Then, click the "Add group" button and Soffid will display a new window to fill in the Entity group attributes.
5.3. Once you fill in the fields, you need to save (disk button) or apply changes (Apply changes button) to save the data.
When the Entity Group is created, inside there will be two options, one to create the Identity Providers and other to create the Service Providers.

5.3.1. Clicking on the Identity Providers record a identity providers list will be displayed and it will be able to create new identity providers. To create a new Identity Provider continue on step 5rd.
5.3.2. Clicking on the Service Providers record a service provider list will be displayed and it will be able to create new service providers. To create a new Service Provider continue on step 6th.
6. New Identity Provider:
6.1. To create a new Identity Provider you can click on the "Add identity provider" button on the tree view, or click the add button (+) on the Identity Provider list. Then Soffid will display a new window.
6.2. At the new window you must select the IdP type you want to create and fill in the required fields. The fields to full fill depend on the IdP type selected.
-
- You can visit the Identity Provider page for more detail.
6.2.1. When creating a Soffid identity provider, it will be mandatory to create an agent. The agent will have to be a Soffid Identity Provider agent. On the connector parameters you must define a unique Public ID which will be used on the Identity Provider configuration.

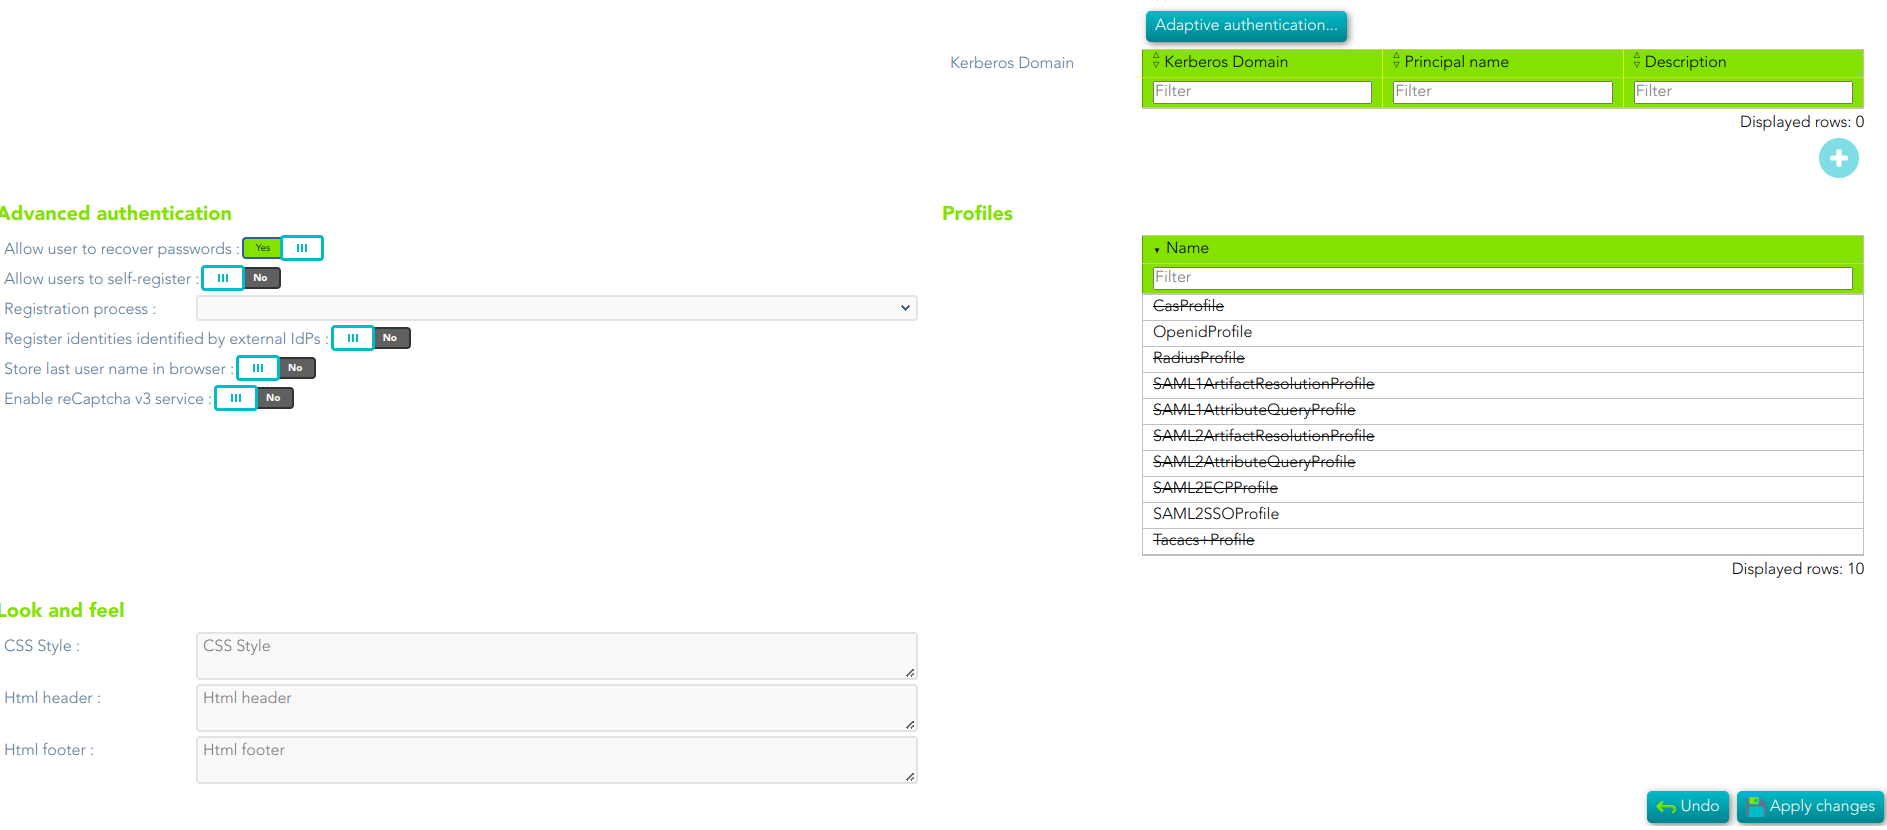
6.3. Once you fill in all the data, you need to enable the proper profiles by clicking on the profile list and configuring them.
-
- You can fin more information visiting the Profile page where the available protocols are defined.
6.4. Finally, you need to save (disk button) or apply changes (Apply changes button) to save the data.
Note that in some cases it will be necessary to restart the synchronization server, so Soffid will generate the additional metadata or certificate data needed.
Note that you may have to open the standard port.
Soffid Identity Provider Screenshot
You could check your Identity Provider
https://<YOUR_SYNCSERVER_HOSTNAME>:1443/protectedFor instance: https://iam-sync-idp.soffidnet:1443/protected
You could view your IdP metadata
https://<YOUR_SYNCSERVER_HOSTNAME>:1443/SAML/metadata.xmlFor instance: https://iam-sync-idp.soffidnet:1443/SAML/metadata.xml
In addition, the complete metadata of soffid
https://<YOUR_SYNCSERVER_PRINCIPAL>:1760/SAML/metadata.xmlFor instance: https://iam-sync.soffidnet:1760/SAML/metadata.xml
7. New Service Provider:
7.1. To create a new Service Provider you can click on the "Add service provider" button on the tree view, or click the add button (+) on the Service Provider list. Then Soffid will display a new window.
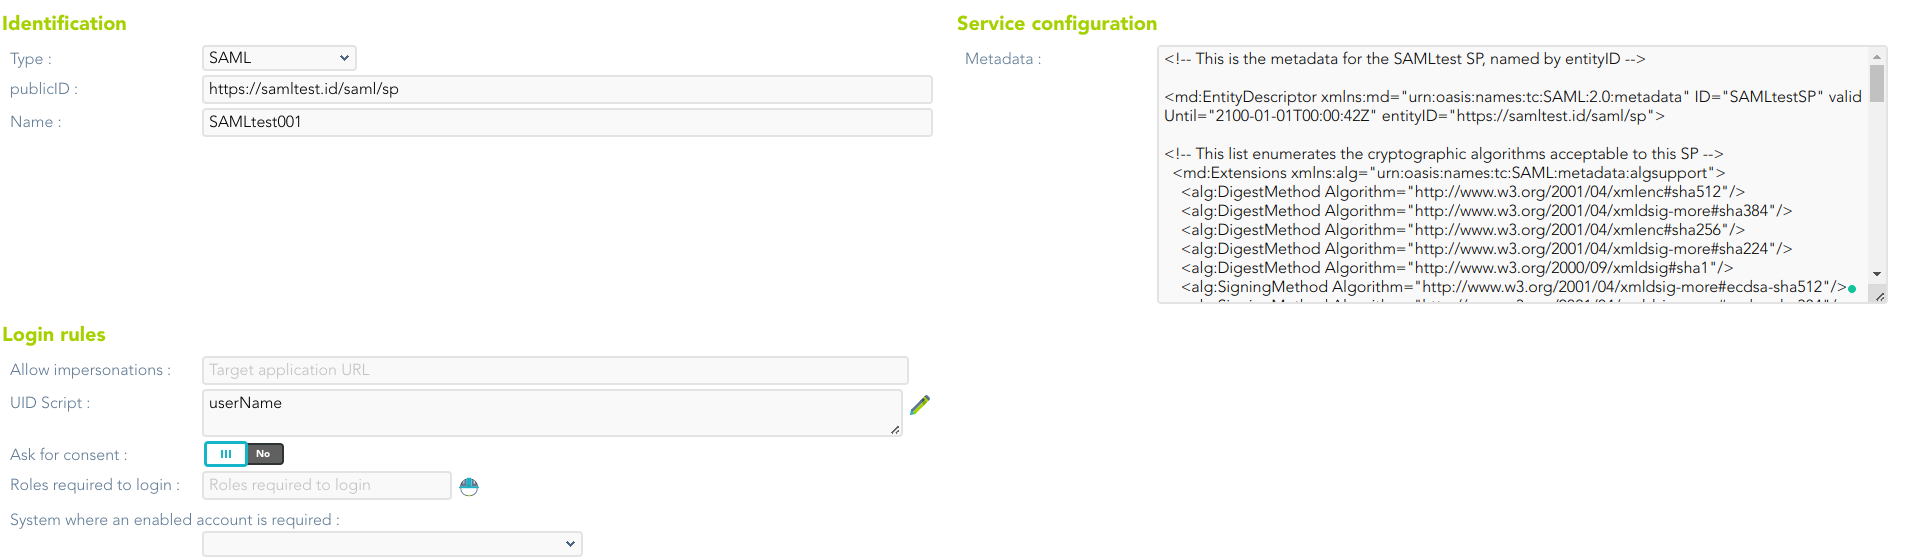
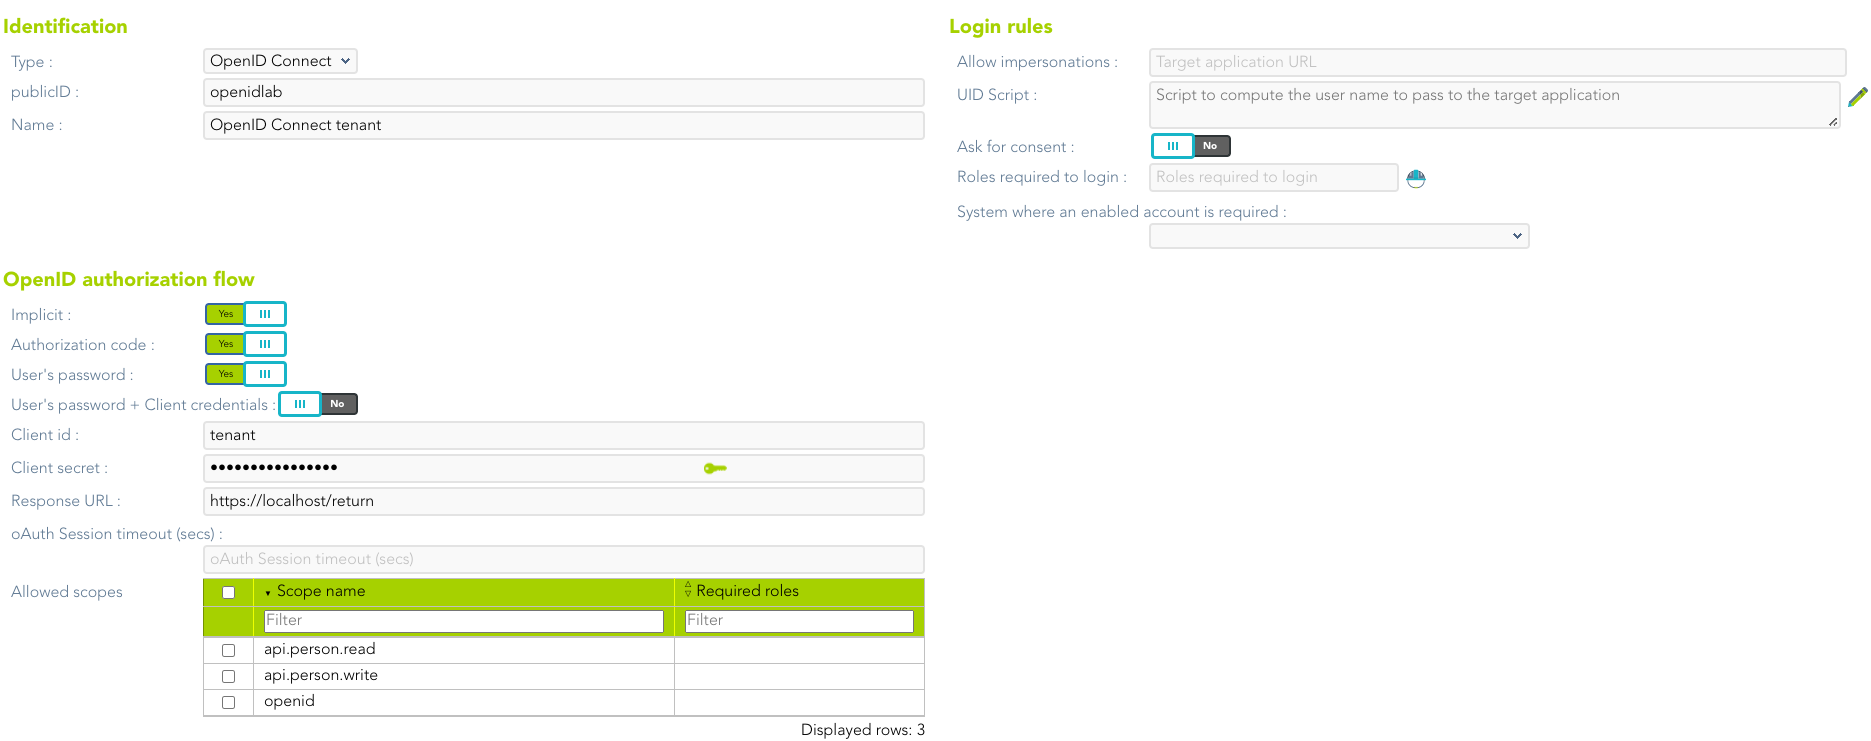
7.2. At the new window you must select the Service provider type you want to create and fill in the required fields. The fields to full fill depend on the IdP type.
-
- You can visit the Service Provider page for more detail.
7.3. One you fill in all the data, you need to save (disk button) or apply changes (Apply changes button) to save the data.
SAML Service Provider Screenshot
OpenID Connect Service Provider Screenshot
8. Enable, when it will be necessary, the External SAML identity provider. To do that you need to access to the Authentication page:

You can visit the Authentication page for more information.
Change Password URL
There is a service point to allow users change their passwords. Simply redirect the user to:
https://<YOUR_SYNCSERVER_HOSTNAME>:1443/protected/passwordChangeFor instance: https://iam-sync-idp.soffidnet:1443/protected/passwordChange
💻 Image
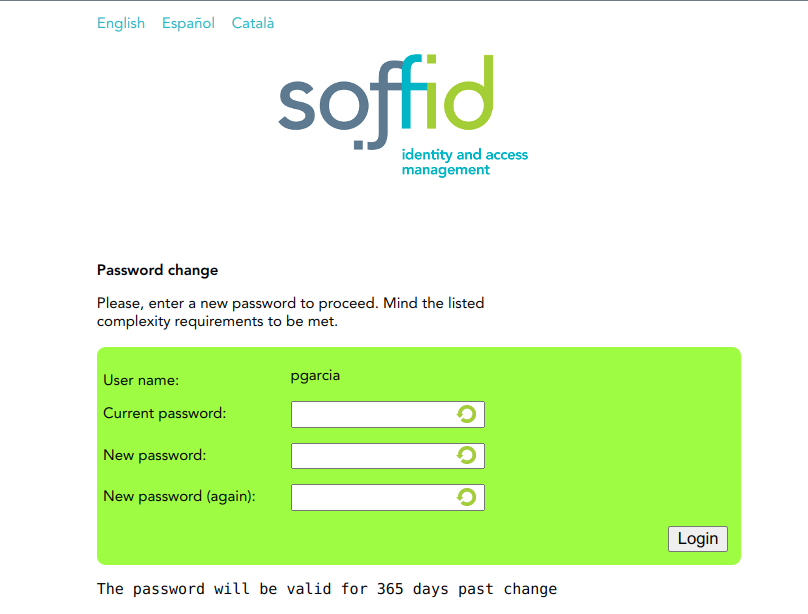
The user will be required to enter identify itself and enter a new password. Optionally, you can enter a web page to return after password change is complete:
https://servername:port/protected/changePassword?return=URL
How to perform unsolicited login
Soffid Identity Provider supports unsolicited login (Idp initiated login) profile. In order to enable it, you must be sure that federation metadata for the target service provider allows it. It is configured using the AuthnRequestsSigned attribute of the SPSSODescriptor tag:
<md:EntityDescriptor xmlns:md="urn:oasis:names:tc:SAML:2.0:metadata" ID=....." entityID="...Service Provider Public ID....">
  <md:SPSSODescriptor AuthnRequestsSigned="0" protocolSupportEnumeration="urn:oasis:names:tc:SAML:2.0:protocol">
Once it is enabled, you can access to:
https://IdentityProvider:port/profile/SAML2/Unsolicited/SSO?providerId=<ServiceProviderPublicID>
Now, you will be requested to show your credentials. If they are valid, you will be redirected to the service provider initial page.
Another way to achieve the same functionality when the service provider is Shibboleth, is to send the request directly to the service provider. This approach has an additional advantage, as you can specify which URL must be served by the service provider.
https://ServiceProvider:port/Shibboleth.sso/Login?target=TargetURL