Connecting Service Providers
- Connecting an OpenID Connect service
- Connecting a SAML service
- Connecting Soffid console
- Connecting your custom applications
- Openid-connect to SAML interoperability
- Openid-connect Dynamic Register
- Connecting CAS client
- Connecting Tacacs+
- Connecting Radius client
Connecting an OpenID Connect service
Introduction
There are three basic OpenID flows, depending whether the service name must be authenticated using its client secret or not:
OpenID flow
Implicit flow
- The Service Provider sends the user to the IdP.
- The IdP authenticates the user.
- The user returns control to the Service Provider along an OpenID token and an OAuth token.
Client credentials flow
- The Service Provider sends the user to the IdP.
- The IdP authenticates the user.
- The user returns control to the Service Provider along an authorization code.
- The Service Provider gets the OpenID token and OAuth token from the IdP by presenting the authorization code, and its client secret. This request is using a direct connection between them.
Password authentication flow
- The Service Provider asks for a user name and password.
- The Service Provider gets the OpenID token and OAuth token from the IdP by presenting the user's name and password, and optionally its client secret. This request is using a direct connection between them.
Register an OpenId Connect Service Provider
1. To register an OpenId Connect service provider, open the federation page:
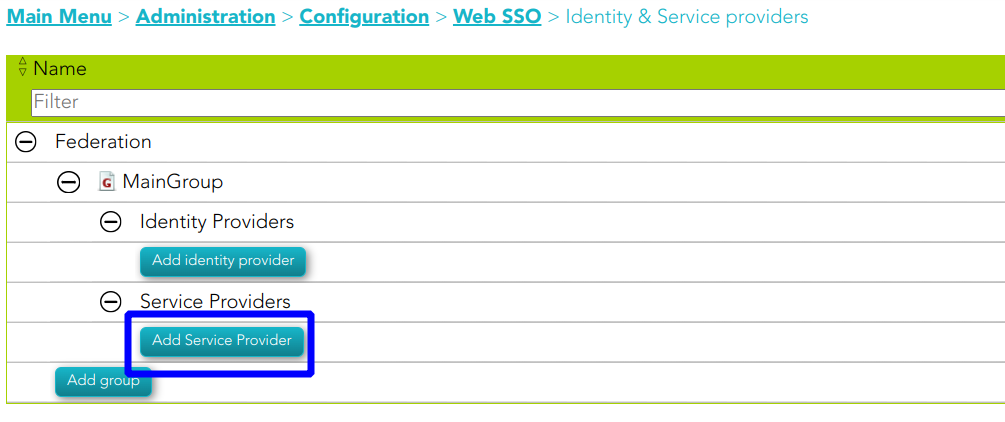
2. Then, select an Entity Group and the branch Service Providers and click on the Add Service Provider button.
3. Soffid will display the following window:

For more information about the attributes, you can visit the OpenID Connect detailed info.
4. Finally, you must apply changes.
Examples
1. Authorization code flow
The client application creates a random String, named nonce, and sends to the user the following URL
Request
|
https://youridentityprovider:2443/authorization? redirect_uri=https://<serviceprovider>/response& client_id=MYCLIENT& nonce=12345679801234567890& scope=openid+test+other& response_type=code |
Then, the user will be asked for a username and password, or any other means of authentication. After authenticating the user, the browser will be redirected to the URL configured in the service provider page, adding a one-time authorization code.
|
https://<serviceprovider>/response/? |
Once the service provider has received the one-time authorization code, it can connect to the identity provider to retrieve the oAuth token, as well as the OpenID token.
Request
|
POST https://youridentityprovider:2443/token HEADERS Accept: application/json Authorization: Basic dGVzdDp0ZXN0 Content-Type: application/x-www-form-urlencoded BODY PARAMS grant_type=authorization_code& code=XXXXXXXXXXXX |
Parameters
Response
|
{ "access_token":"8bDP2P...", "refresh_token":"gjLmSW...", "id_token":"eyJra.eyJ.LQ_XtHKr.RY3A4...", "token_type":"Bearer", "expires_in":11998 } |
- The id_token tag contains the OpenId token.
- The access_token tag contains the oAuth token.
Before the number of seconds specified om expires_in are elapsed, the token can be renewed by invoking again the token endpoint changing the grant_type:
Request
|
POST https://youridentityprovider:2443/token HEADERS Accept: application/json BODY PARAMS grant_type=refresh_token& refresh_token=gjLmSW... |
Parameters
Response
|
{ "access_token":"8bDP2P...", "refresh_token":"gjLmSW...", "id_token":"eyJra.eyJ.LQ_XtHKr.RY3A4...", "token_type":"Bearer", "expires_in":11998 } |
2. User’s password + client credentials flow
The application asks the user for the user name and password. Then, it connects to the token endpoint to get an access token:
Request
|
POST https://youridentityprovider:2443/token HEADERS Accept: application/json BODY PARAMS grant_type=password& |
Parameters
Response
|
{ |
- The id_token tag contains the openid token.
- The access_token tag contains the oAuth token.
Before the number of seconds specified in expires_in are elapsed, the token can be renewed by invoking again the token endpoint:
Request
|
POST https://youridentityprovider:2443/token HEADERS Accept: application/json BODY PARAMS grant_type=refresh_token& refresh_token=gjLmSW... |
Parameters
Response
|
{ |
3. Closing the session
The application wants to revoke the token and session cookie:
Request
|
POST https://youridentityprovider:2443/revoke HEADERS Accept: application/json BODY PARAMS token_type_hint=token=access_token& token=8bDP2P... |
Parameters
4. Getting user attributes
All the user attributes can be extracted from the OpenID token. Anyway, it is possible to get them in a more readable format user the user-info endpoint.
Request
|
GET https://youridentityprovider:2443/userinfo HEADERS Accept: application/json |
Parameters
Response
|
{ "sub": "admin", "surname": "Admin", "given_name": "Admin", "member_of": [ "TestRole2@soffid", "TestRole@soffid" ] } |
5. Getting a session cookie for the user
Sometimes, a mobile application has authenticated the user using the username & password grant, but wants to share this authenticated session with the underlying web browser. For such a case, the application can request a session cookie with this request:
Request
|
GET https://youridentityprovider:2443/session_cookie HEADERS Accept: application/json |
Parameters
Response
|
{ "cookie_domain": "cookied", } |
Please note that it is mandatory to fill in the name of the cookie in the identity provider, at the session management section
Connecting a SAML service
Introduction
To connect a SAML service provider, the service provider must offer you its SAML metadata. The SAML metadata contains information about its public id, the services that implement and the service endpoints.
Register a SAML service provider
1. Open the Identity & Service Provider page.
2. To add a new service provider, click on the Add Service Provider button.
Be in mind that you can configure more than one Entity Group and you could add new service providers in each one.
3. Then you must fill in the required fields. Also, you need to provide the identity provider metadata. You can either copy it from the Soffid federation page or instruct the service provider to download the federation metadata by itself.
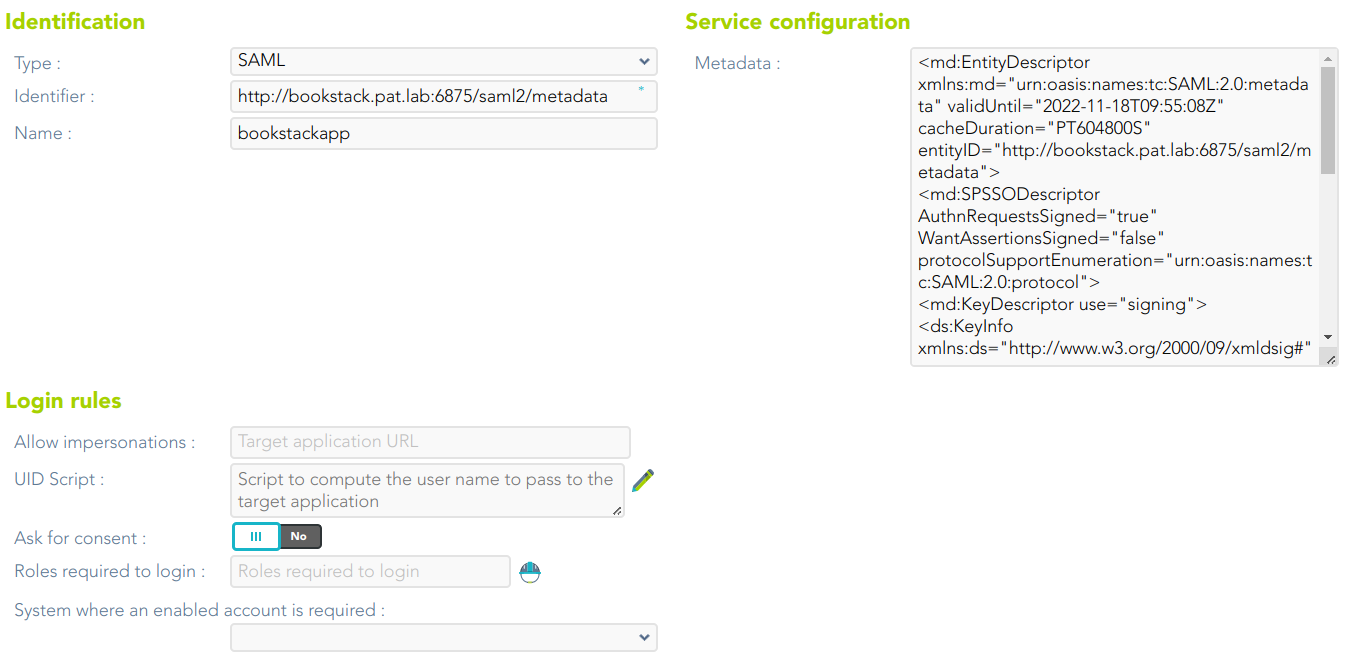
For more information about the attributes, you can visit the SAML detailed info.
4. To publish the federation members metadata, the main sync server exports the members metadata at the path /SAML/metadata.xml. Thus, if your sync server is listening at soffid1.your.domain, you can get the whole federation metadata document from https://soffid1.your.domain:760/SAML/metadata.xml.
5. After some seconds, up to five minutes, every federation member will notice any change.
Connecting Soffid console
Introduction
Soffid console has a built-in SAML client, so it can act as a service provider in the Soffid federation. It is interesting to use this configuration, as it allows you to enforce the use of two factors authentication to log into the Soffid console.
Register Soffid as a service provider
1. Enable the SAML protocol in the Soffid console:
1.1. Open the Authentication page:
1.2. You must enable the External XAML identity provider.
1.3. Then you must fill in the fields:
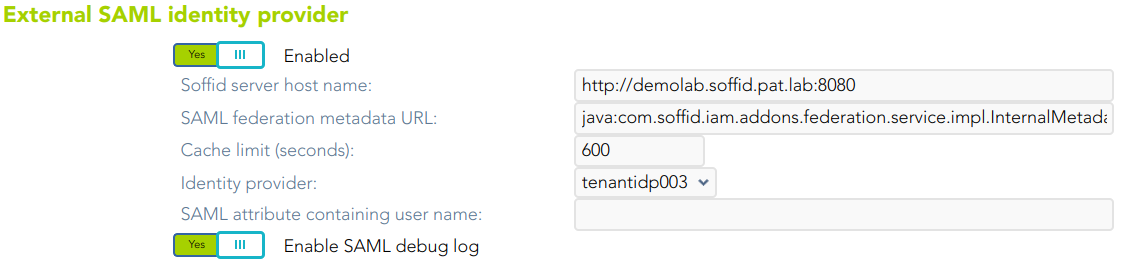
- Soffid server host name: URL of the Soffid console.
- SAML federation metadata URL: URL where the whole federation metadata can be obtained. It used to be https://your.primary.sync.server:760/SAML/metadata.xml Sometimes, an error as "unable to find valid certification path to requested target" could be displayed.
In that case, you must obtain the public certificate from the sync server and store in your Java trusted certs repository. To do that, use the keytool command. The trusted certs repository is located at <JAVA_HOME>/lib/security/cacerts
The command should look like the next one. When prompted for a password type in "changeit"
|
root@myserver:~$ /usr/lib/jvm/java-8-openjdk-amd64/jre/bin/keytool |
- Cache limit (seconds): the amount of time the metadata should be kept in memory before refreshing.
- Identity provider: after reading the federation metadata, this drop-down box lets you select any identity provider present at the federation. Usually, you will select the Soffid IdP.
2. Download Soffid console metadata:
2.1. Open the Authentication page:
2.1. Click the Download metadata button and save the file.

This XML file is the metadata descriptor for the console, including a self-signed certificate generated to sign SAML requests.
The XML file will be like the next one:

3. Register Soffid Metadata in the third-party Identity Provider.
4. You can use the Wizard to Add Applications
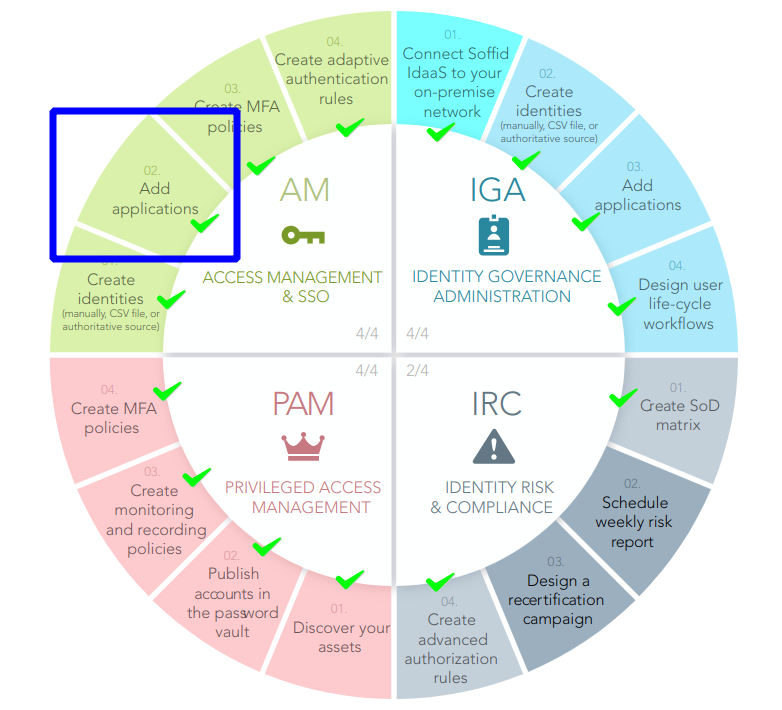
For more information, visit the Add Applications page.
5. Test it
5.1. Next time you log into the Soffid console, a new button will appear for External (XAML) login
5.2. Click on the External (SAML) login button, and the user will be forwarded to the identity provider.

Connecting your custom applications
Introduction
SAML 2.0 is a complex and not easy to implement standard. There are some libraries that can help somewhat, but a correct implementation needs a deep knowledge of SAML protocol, and is always hard to test and debug.
To make it easier, Soffid provides some JSON rest web services, that can help any application to correctly implement the SAML service provider part of the protocol.
Data flow
The following diagram, shows the resulting data flow between the end user, your application, the identity provider and Soffid web services:

Data flow steps
1. The end-user requests access to a protected page
2. The custom application can check the user identity looking up a session variable. By the time being, the user is not authenticated.
3. The custom application issues a JSON request to Soffid web service. In turn, Soffid web service builds, signs and maybe encrypts a SAML request
4. Then custom application taks the JSON request and builds an HTTP Redirect response with the received data.
5. The identity provider identifies the user as usual.
6. The custom application receives the SAML response. At this point, the application packs and forwards the received data to Soffid Web Service.
7. Soffid Web Service decrypts and checks SAML response integrity and correctnes, and returns a JSON document specifying the success or failure status, and the underlying identity attributes. If needed, Soffid web service can provision a new identity in target systems on the fly.
8. The custom application gets the identity data, stores it in a session variable and provides the protected resource to the end user.
In order to get it, will be necessary:
- Declare the custom application as an internal service provider in the federation page.
- Create a Soffid application account for the custom application.
- Implement the protection filters.
- Implement the endpoint where the SAML response must be sent.
Example
1. Creating an internal service provider
You can create an internal service provider as a SAML service provider.
2. SAML Request generator
After deploying Soffid SAML addon, a web service to generate SAML request will be automatically deployed. This web service requires an account with the federation:serviceProvider authorization.
The endpoint will be locate in Soffid Console:
http://your.soffid.console:8080/webservice/federation/rest/generate-saml-request
Method:
POST
Headers to include in the request:
Accept = “application/json”Content-Type = “application/json”
Request: Send a JSON decument with following fields:
user → suggested user to authenticate (optional)identityProvider → identity provider public ID. Must match the public ID of anyidentity provider registered in Soffid federation.serviceProviderName → service provider which requests the userauthentication. Must match the public ID of an internal service providersessionSeconds → max time for the user session inactivity
Response:
method → Method to use: urn:oasis:names:tc:SAML:2.0:bindings:HTTP-POSTinstructs the application to build a HTML Form that automatically submits thefollowing parameters. Value urn:oasis:names:tc:SAML:2.0:bindings:HTTP-Redirectinstructs the application to perform a redirect (Location HTTP header) with theURL and parameters specifiedparameters → every parameter included must be submited to the identityprovider. Usually, these two will be present:RelayState → identifier of the ticket of the SAML requestSAMLRequest → encoded SAML requesturl → identity provider endpoint.
Request sample:
|
{ "user" : "myuser@soffid.poc", } |
Response sample:
|
{ |
3.
In turn, your application will issue the following location header to the browser
|
Location: https://idp.soffid.com/SAML/Redirect?RelayState=_457cab260c4948ef4c6d35a67cac000d3348d1ec48f53215&SAMLRequest=PD94bWwgdmVyc2lvbj0iMS4wIiBlbmNvZGluZz0iVVRGLTgiPz48c2FtbDJ... |
Should the method be urn:oasis:names:tc:SAML:2.0:bindings:HTTP-POST, your application should build an HTML similar the following one:
|
<form action="https://idp.soffid.com/SAML/Redirect"> |
4. SAML Response endpoints
Your application must implement the SAML response endpoint. This endpoint must accept the POST method and forward each received parameter to Soffid's parse-saml-response. Mind that your endpoint must accept application/x-www-form-urlencoded parametern while Soffid service accepts application/json.
Soffid endpoint will be located in Soffid Console:
http://your.soffid.console:8080/webservice/federation/rest/generate-saml-request
Method:
POST
Headers:
Accept = “application/json”Content-Type = “application/json”
Authentication:
Use your application account to login using basic authentication schema. In multitenant environments, the user name will have the forma TENANT_NAME\ACCOUNT_NAME
Request: send a JSON document with following fields
autoProvision → [false|true] Set to true if you want Soffid to automatically enrollunknown identities. This is not normally needed if you are using Soffid IdP, but it'suseful when using third party IdPs.response: JSON object with any parameter received in post method.RelayState → identifier of the ticket of the SAML responseSAMLResponse → encoded SAML responseprotocol → use always “urn:oasis:names:tc:SAML:2.0:bindings:HTTP-POST”serviceProviderName → service provider which requests the user authentication
Response:
authentication → [yes|no]failureMessage → if authentication=”no”, a message with the error cause.principalName → account name, as sent by the IdPuser → Soffid identity with standard attributesattributes → Soffid identity custom attributessessionId → session identifier
Example data received by your endpoint
|
POST /saml-receiver |
Example request
|
{ |
Example response
|
{ |
Openid-connect to SAML interoperability
Introduction
OpenID-Connect has a clear design suitable for both frontend and backend.
SAML has a clear design for the frontend, but the backend usage is harder as the security in SAML cannot be placed at transport layer. Instead, in must be placed at document level. Additionally, it requires intensive use of cryptographic algorithms for signature and encryption.
That’s why some applications put a SAML frontend protection for both the frontend and relay on the session cookies generated by the fronted for backend access.
The problem arises when one service provider needs to invoke some services from a SAML enabled application that does not support or implement WS-Security.
To solve it, Soffid Identity Provider provides a service to get the session cookies required to access to a SAML application.
Data flow
The rest service /userinfo/impersonate?url=…. will do the job, and will return the cookies to use to act upon the target application impersonating the current user.

Request
|
POST https://<YOUR_SERVER>:2443/userinfo/impersonate?url=http://targetapplication/ [ } |
Parameters
- URL: is the access URL for the target application.
- Authorization: contains the oauth token.
Response
The response contains the list of cookies to send to the target application.
|
[ } |
Request
Once the application has got the list of cookies, it can invoke the target application URL
|
POST https://targetapplication/api/service1 |
As security measures, the impersonation profile must be enabled, and the source application must be entitled to use it against the target application
Openid-connect Dynamic Register
Introduction
Openid-connect allows a service provider registers dynamically other service providers.
Dynamic Register
To dynamically register a client, acquire an initial access token, and then register the new application by using the registration API. You can get the access token from Soffid.
Register Server
Request
POST https://<YOUR_SERVER>:2443/registerAuthorization
- Authorization: contains the Bearer Token.
Header
- Content-type: application/x-www-form-urlencoded
JSON
{
    "application_type": "web",
    "redirect_uris":
        ["https://client.example.org/callback",
         "https://client.example.org/callback2"],
    "client_name": "My Example 7",
    "logo_uri": "https://client.example.org/logo.png",
    "subject_type": "pairwise",
    "token_endpoint_auth_method": "client_secret_basic",
    "jwks_uri": "https://client.example.org/my_public_keys.jwks",
    "userinfo_encrypted_response_alg": "RSA1_5",
    "userinfo_encrypted_response_enc": "A128CBC-HS256",
    "contacts": ["ve7jtb@example.org", "mary@example.org"],
    "request_uris":
        ["https://client.example.org/rf.txt#qpXaRLh_n93TTR9F252ValdatUQvQiJi5BDub2BeznA"]
}
Response 200 OK
{
    "client_secret_expires_at": 0,
    "registration_client_uri": "https://iam-sync-tenantidp.soffidnet:2443/register?client_id=DR_7",
    "client_secret": "wBeH8G6hT2GRwr7jJ6HfX2lMJDGdwGi9M49SKF2MjHRGOtwZ",
    "redirect_uris": [
        "https://client.example.org/callback",
        "https://client.example.org/callback2"
    ],
    "registration_access_token": "NjYxODg1Ng.AFa8jQbltq+bocWQpT3okPvHXHrTM+HqXQC26Kz5mfAWfXWG",
    "client_name": "My Example 7",
    "client_id": "DR_7"
}
Client read request
Request
GET https://<YOUR_SERVER>:2443/register?client_id=DR_7Header
- Content-type: application/json
Params
Response
{
    "client_secret_expires_at": 0,
    "registration_client_uri": "https://iam-sync-tenantidp.soffidnet:2443/register?client_id=DR_7",
    "redirect_uris": [
        "https://client.example.org/callback",
        "https://client.example.org/callback2"
    ],
    "client_name": "My Example 7",
    "client_id": "DR_7"
}
Connecting CAS client
Introduction
The CAS protocol is a simple and powerful ticket-based protocol. It involves one or many clients and one server. Clients are embedded in CASified applications (called “CAS services”) whereas the CAS server is a standalone component.
Register CAS client
1. Open the Identity & Service Provider page.
2. To add a new service provider, click on the Add Service Provider button.
Be in mind that you can configure more than one Entity Group and you could add new service providers in each one.
3. Then you must fill in the required fields. Also, you need to provide the identity provider metadata. You can either copy it from the Soffid federation page or instruct the service provider to download the federation metadata by itself.
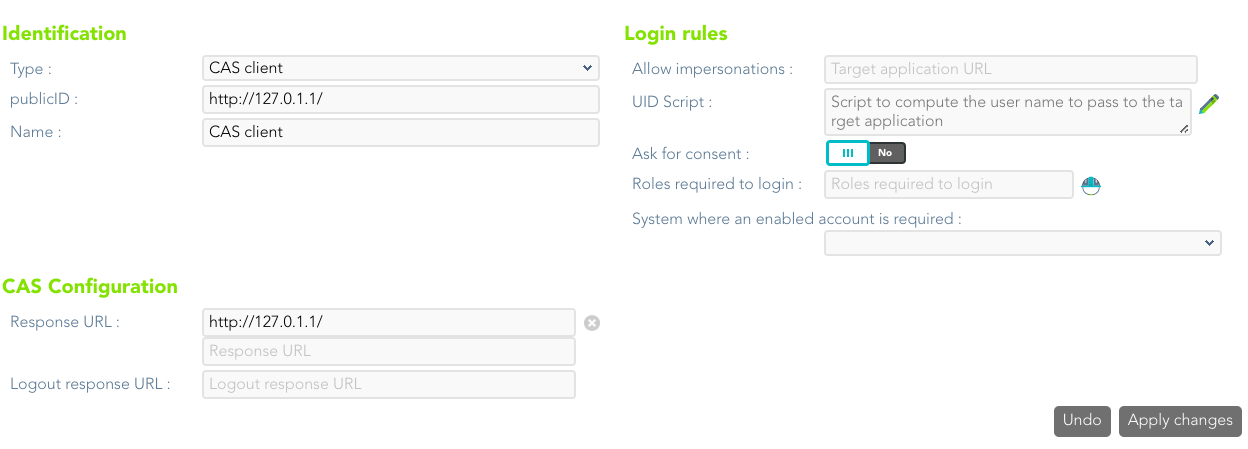
For more information about the attributes, you can visit the CAS client detailed info.
Connecting Tacacs+
Introduction
TACACS (Terminal Access Controller Access Control System) is a security protocol that provides centralized validation of users who are attempting to gain access to a router or NAS
TACACS+ is a protocol for AAA services:
- Authentication
- Authorization
- Accounting
Register Tacas+
1. Open the Identity & Service Provider page.
2. To add a new service provider, click on the Add Service Provider button.
Be in mind that you can configure more than one Entity Group and you could add new service providers in each one.
3. Then you must fill in the required fields. Also, you need to provide the identity provider metadata. You can either copy it from the Soffid federation page or instruct the service provider to download the federation metadata by itself.

For more information about the attributes, you can visit the Tacacs+ detailed info.
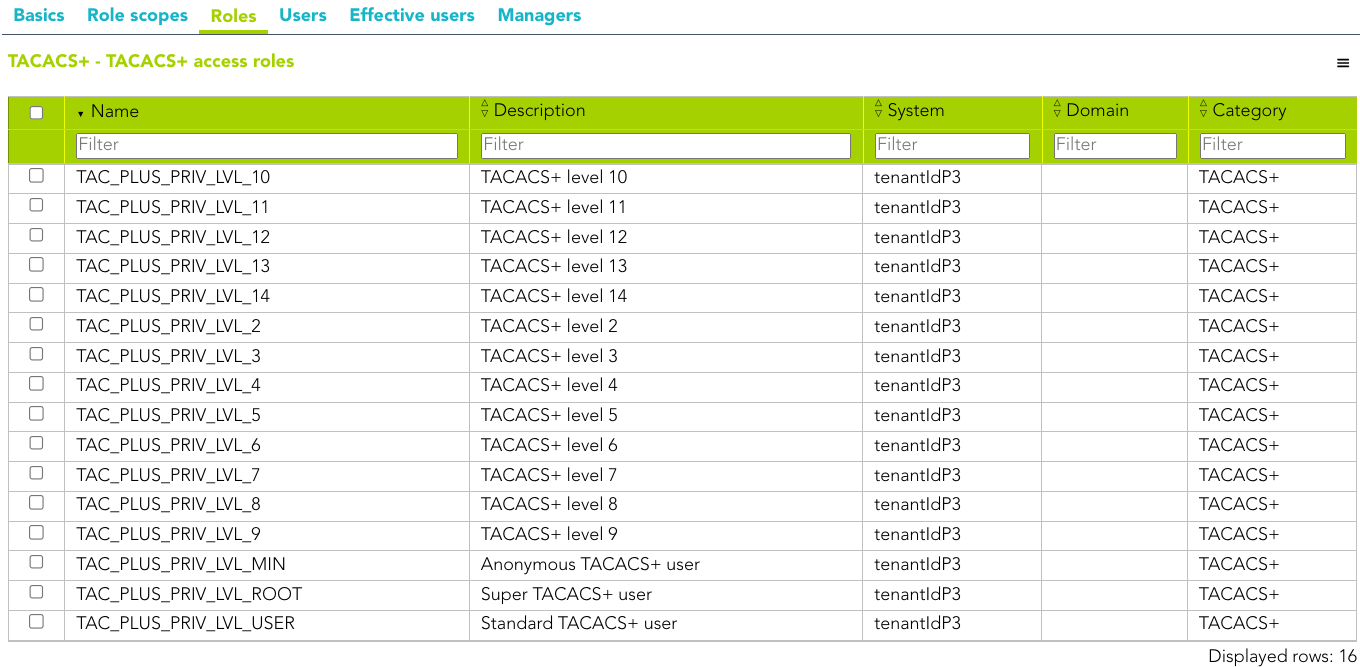
When a Tacacs Service Provider is created, Soffid creates an Information System
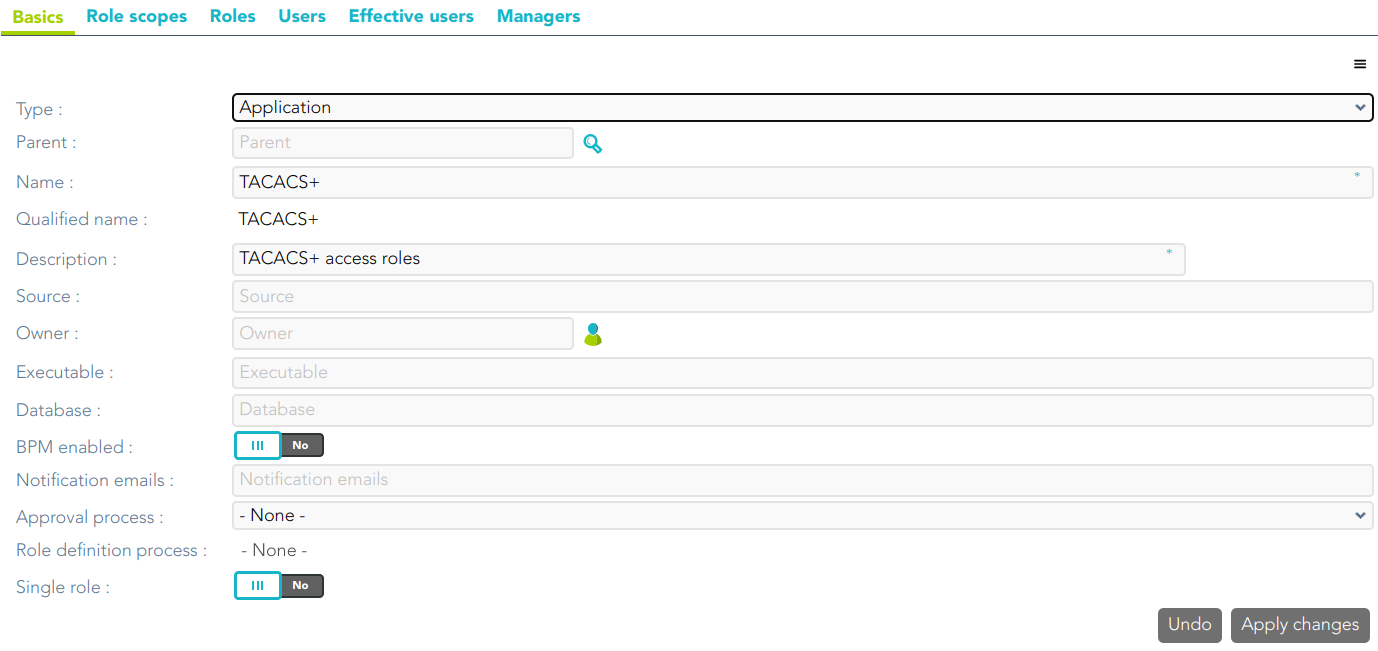
There are some roles defined for this Information System (0: anonymous, 1: user, ....15: root)
Connecting Radius client
Introduction
The Radius protocol (Remote Authentication Dial-In User Service) is a networking protocol that authorizes and authenticates users who access a remote network.
Register a Radius client
1. Open the Identity & Service Provider page.
2. To add a new service provider, click the Add Service Provider button.
Be in mind that you can configure more than one Entity Group and you could add new service providers in each one.
3. Then, you must fill in the required fields. Also, you need to provide the identity provider metadata. You can either copy it from the Soffid federation page or instruct the service provider to download the federation metadata by itself.
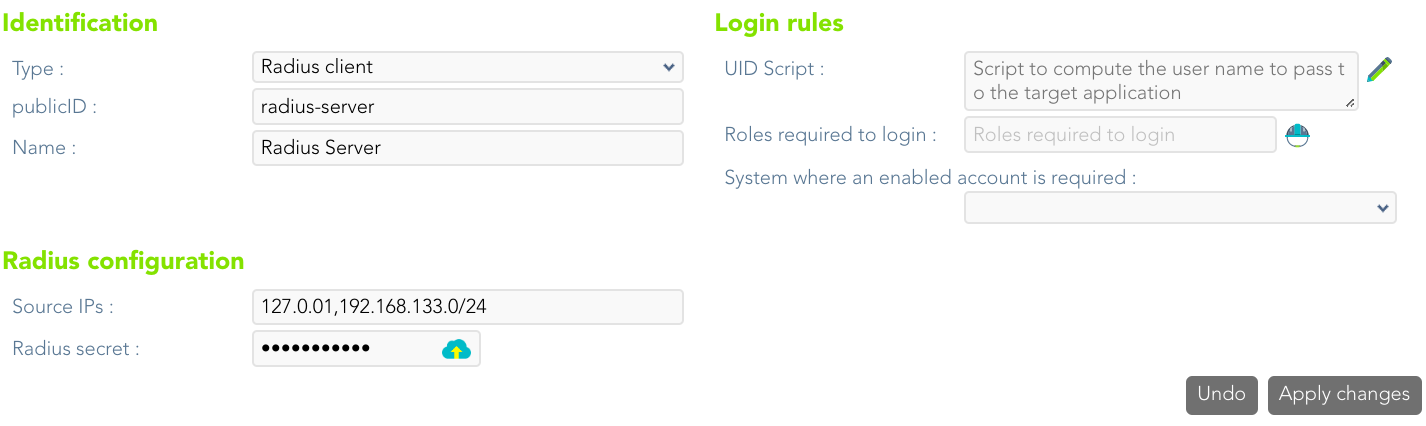
For more information about the attributes, you can visit the Radius detailed info.