For more information, you can visit [the Network discovery page](https://bookstack.soffid.com/books/pam-deployment/page/network-discovery).
## Step-by-step 1. Once you select the Discover you assets option, Soffid will display the form to fill in. 2. You need to register your network data and click the Next button. [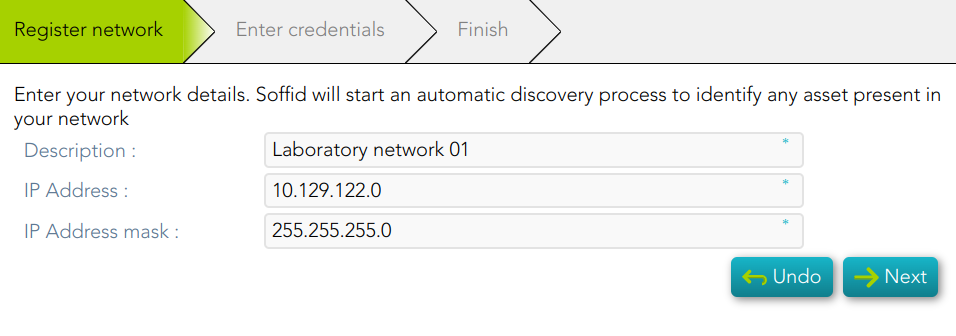](https://bookstack.soffid.com/uploads/images/gallery/2023-02/image-1677074814027.png) 3. You need to register an account. You can choose to register a new one or to use an existing account. 3.1. If you select the *Register a new account* option, you must fill in the Login name and the password and click the Apply changes button [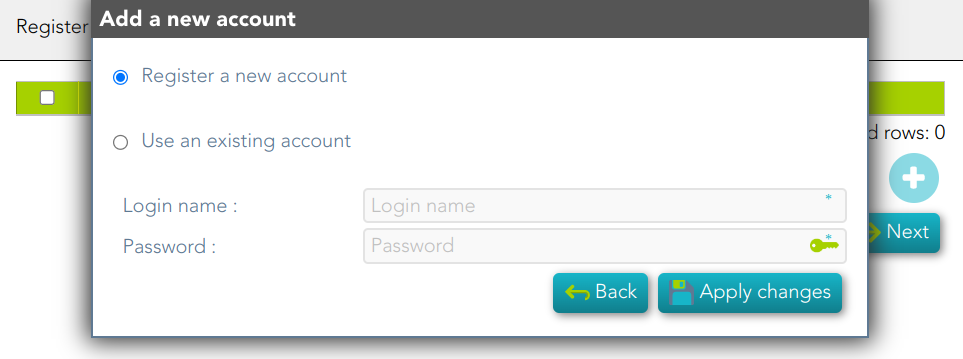](https://bookstack.soffid.com/uploads/images/gallery/2023-02/image-1677075386016.png) 3.2. If you select *Use an existing account*, you must select an existing account in the system and click the Apply changes button. [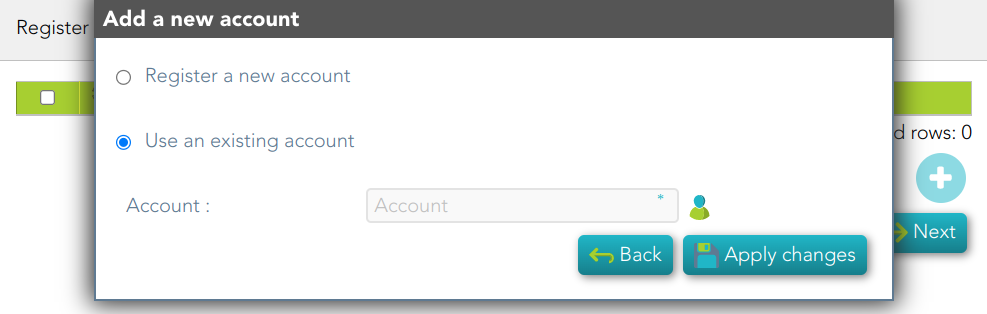](https://bookstack.soffid.com/uploads/images/gallery/2023-03/image-1677663289187.png) 4. Soffid display this message to indicate the network discovery is in process [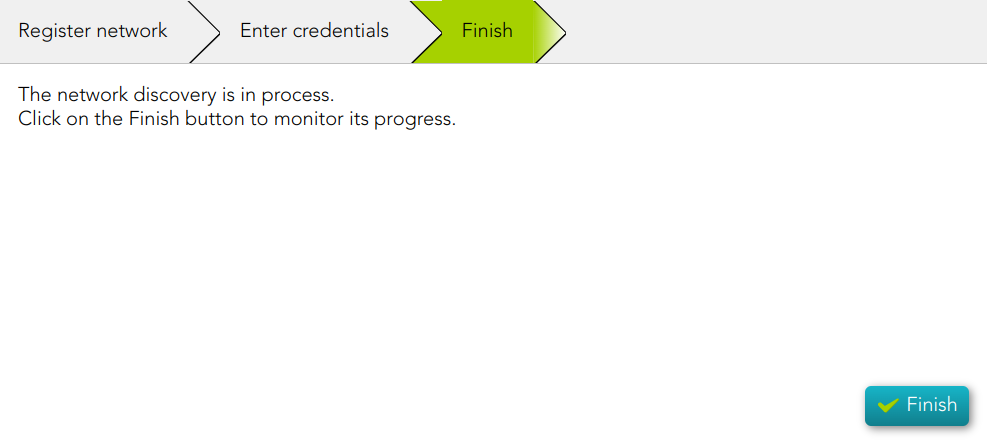](https://bookstack.soffid.com/uploads/images/gallery/2023-03/image-1678181171257.png) 5. If you click the Finish button, Soffid will display the Network discovery monitoring. [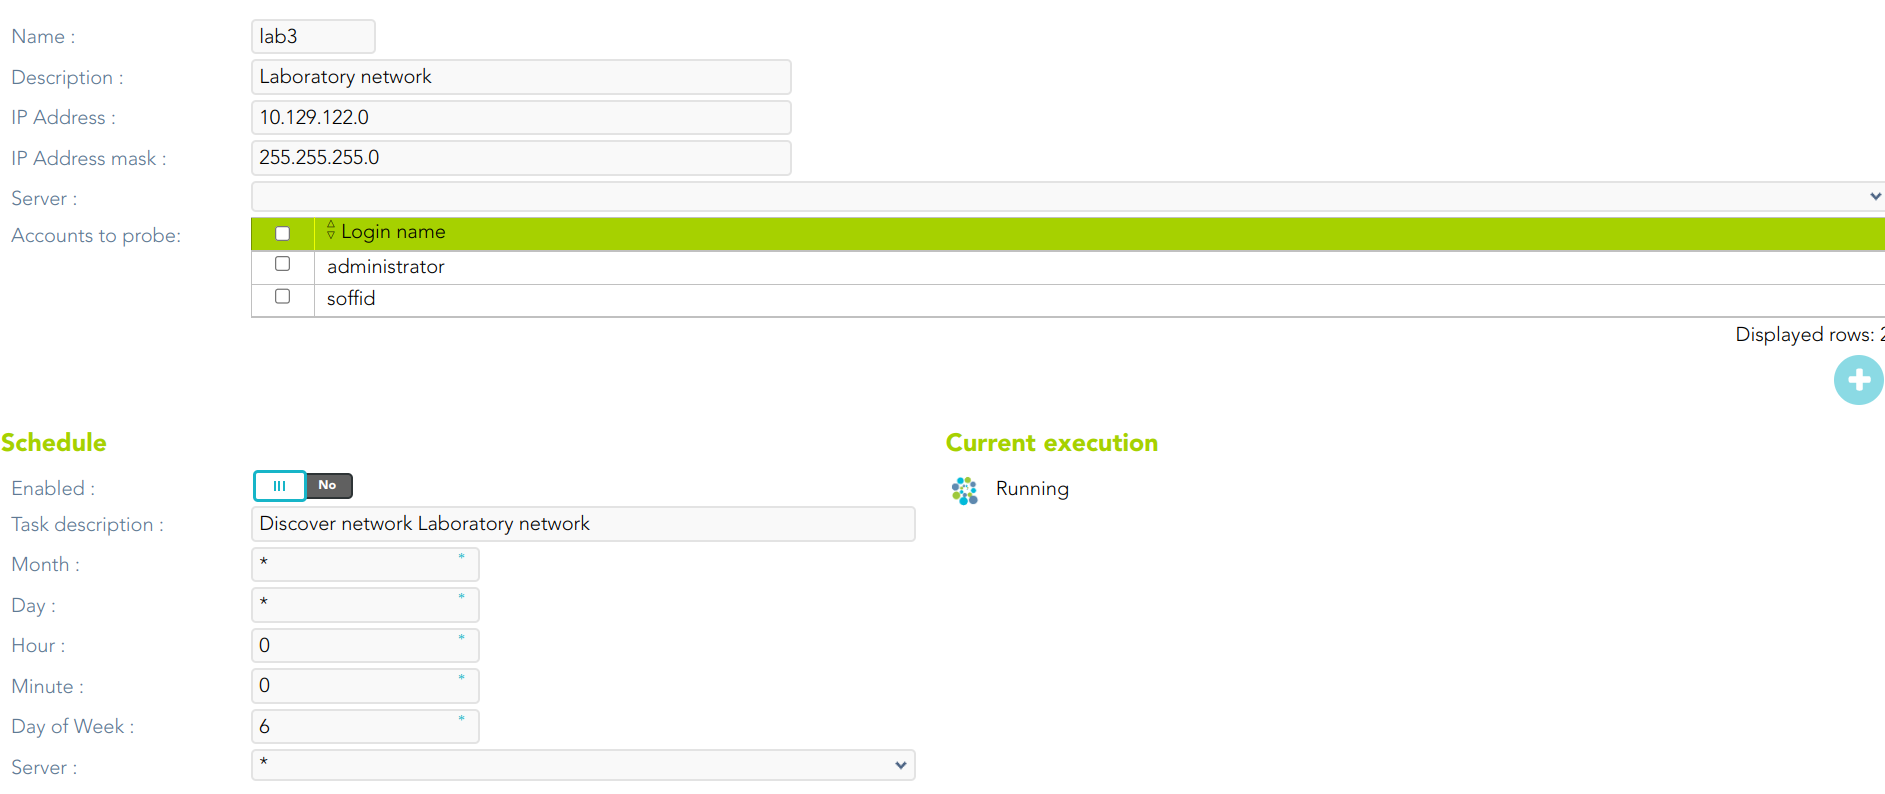](https://bookstack.soffid.com/uploads/images/gallery/2023-03/image-1678181285472.png) # Publish accounts in the password vault ## Description This wizard allows you to publish some accounts in the password vault in order to save and manage these accounts and their password.For more information, you can visit [the Password vault page](https://bookstack.soffid.com/books/soffid-3-reference-guide/page/password-vault).
## Step-by-step 1. Once you select the *Public accounts in the password vault* option, Soffid will display the following wizard 2. You must select the accounts you want to publish and click the Next button. [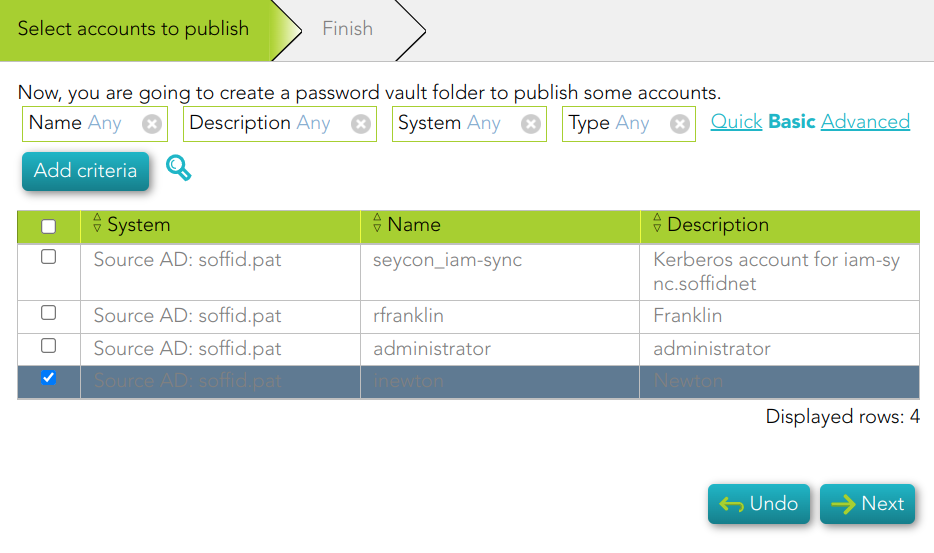](https://bookstack.soffid.com/uploads/images/gallery/2023-03/image-1677665161084.png) 3. Then, Soffid will configure the password vault. [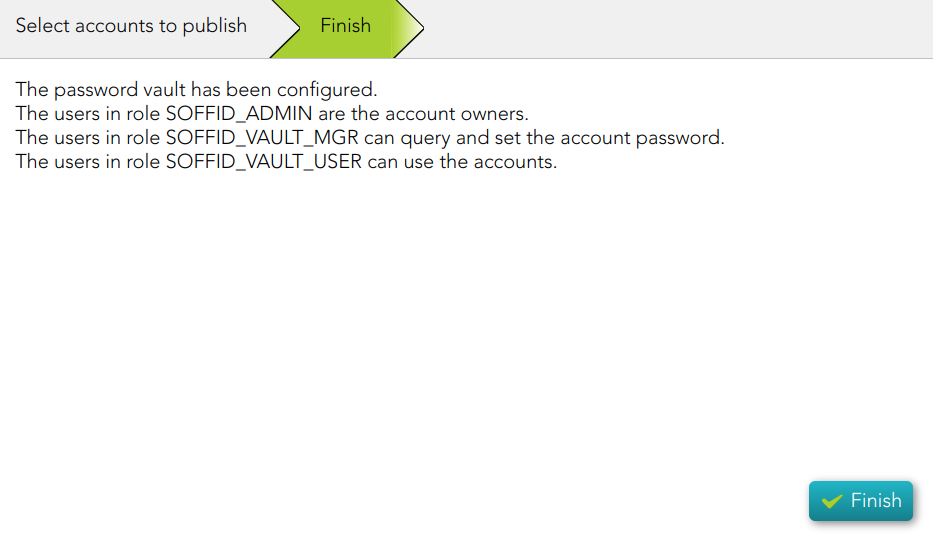](https://bookstack.soffid.com/uploads/images/gallery/2023-03/image-1677665252320.png) 4. When you click the Finish button, Soffid will browse to the Password vault page. On this page, you could check and update the permissions. [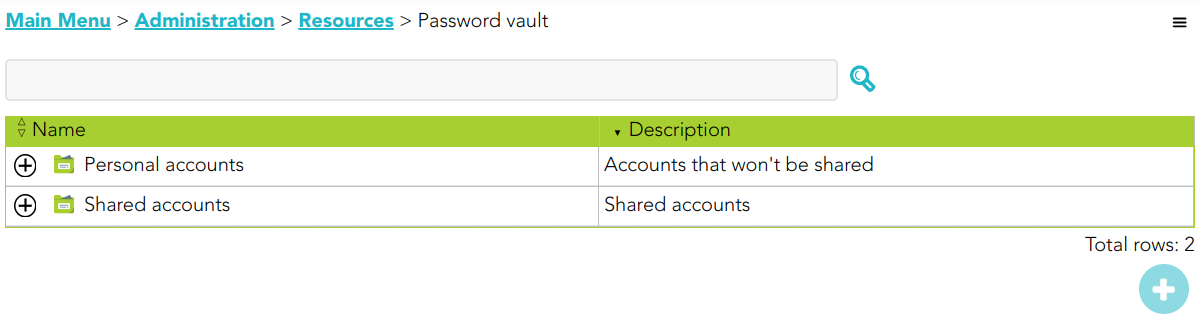](https://bookstack.soffid.com/uploads/images/gallery/2023-03/image-1677665399042.png) [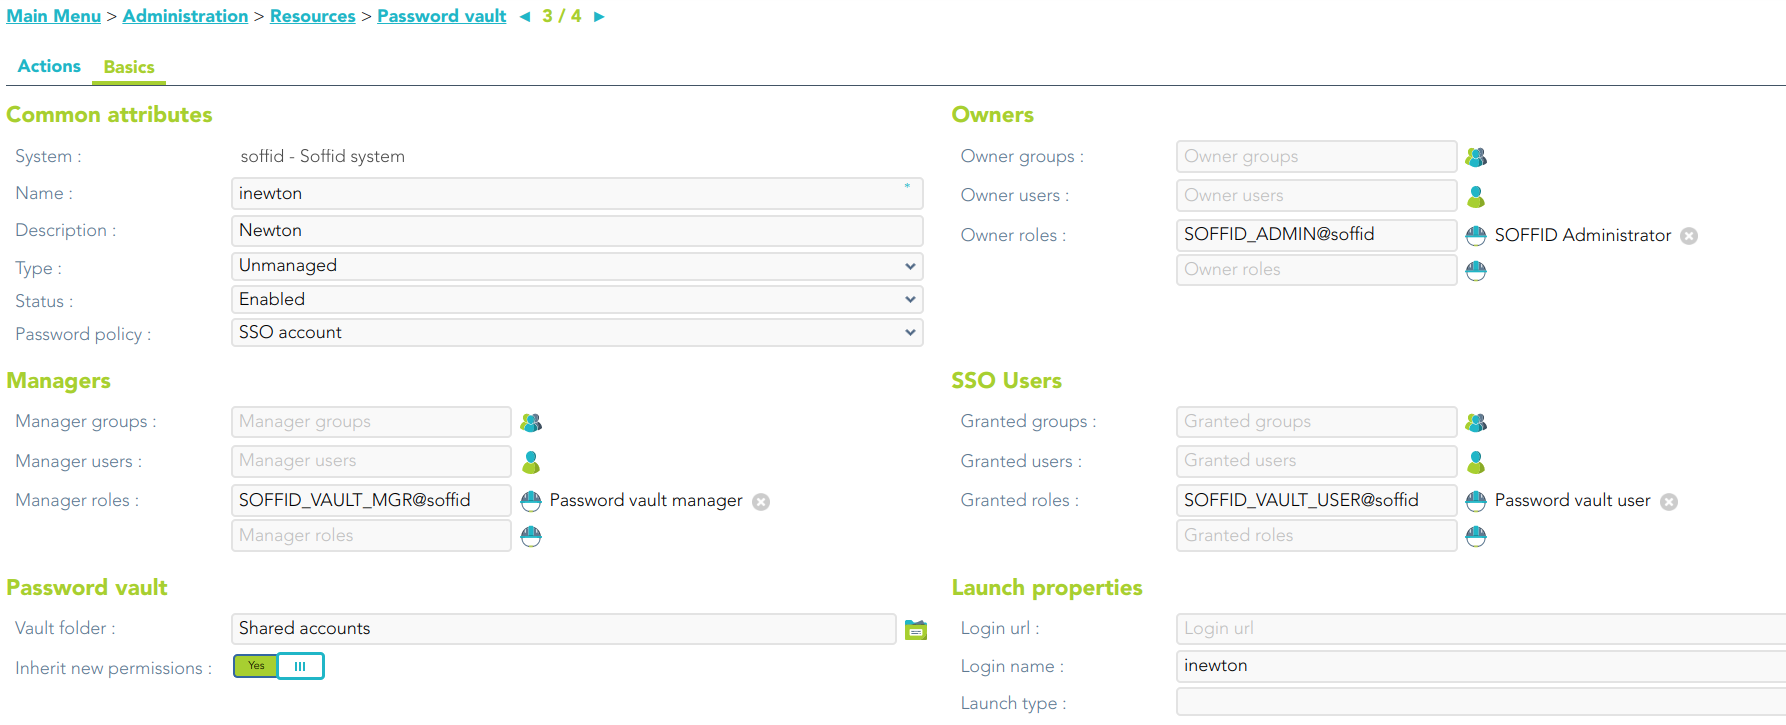](https://bookstack.soffid.com/uploads/images/gallery/2023-03/image-1677665440094.png) # Create monitoring and recording policies ## Description PAM policy is a subset of cybersecurity policies that deal with privileged access. This determines which users can have privileged access to specific systems, when, and for how long. You can check the policies in the following menu option: `Main Menu > Administration > Configuration > Security settings > PAM policies`For more information, you can visit [the PAM policies page.](https://bookstack.soffid.com/books/pam-deployment/page/pam-policies)
## Step-by-step 1. Once you click the *Create monitoring and recording policies* option, Soffid will create a default policy. [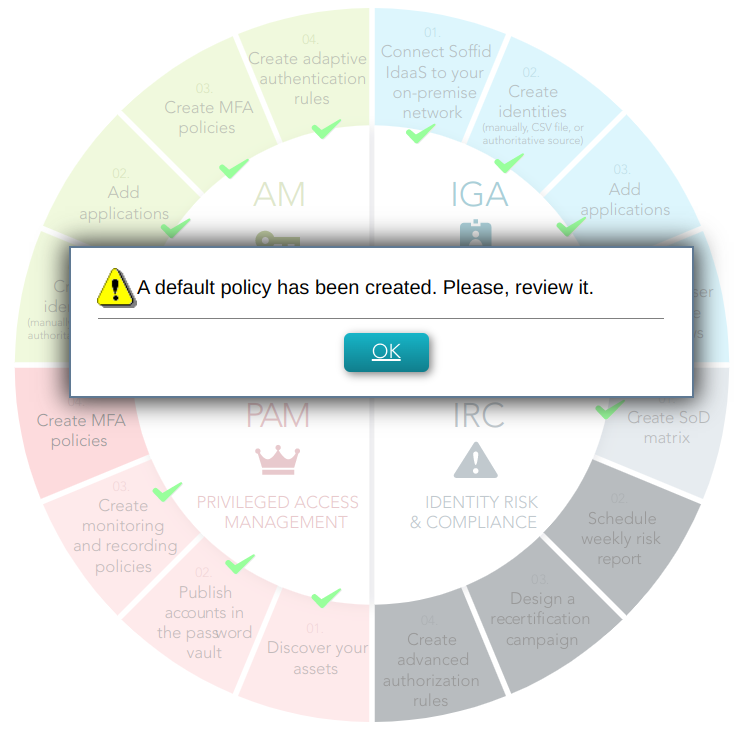](https://bookstack.soffid.com/uploads/images/gallery/2023-03/image-1678104384200.png) 2. When you click the Ok button, Soffid will browse to the created policy and allows you to update the default configuration. [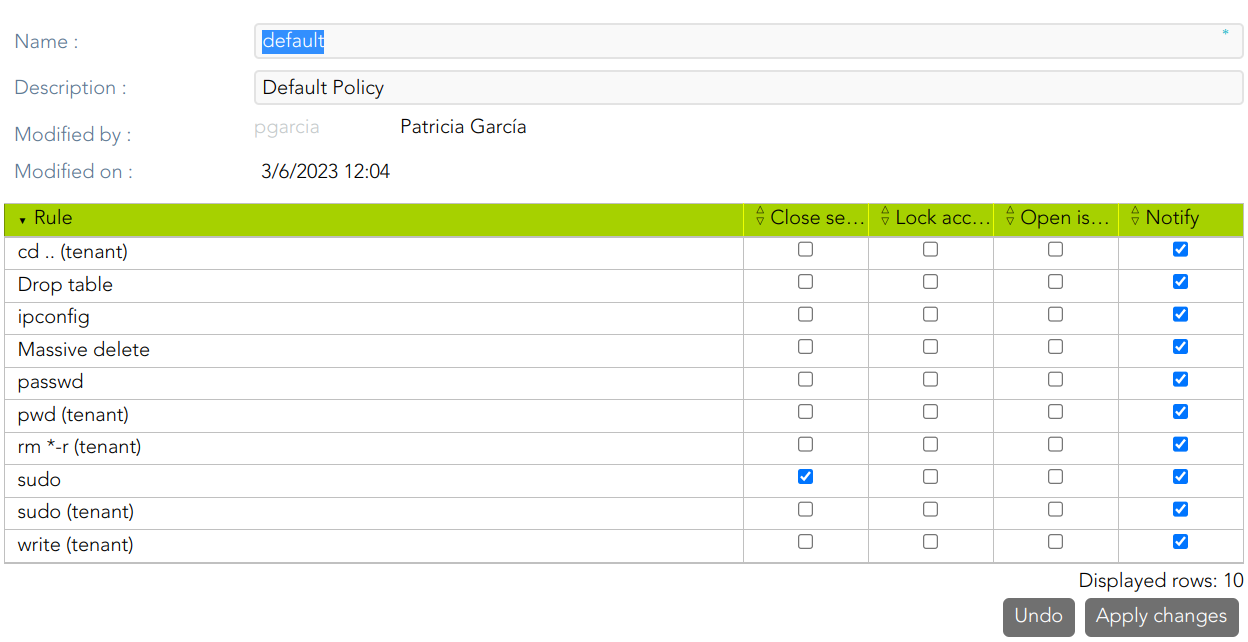](https://bookstack.soffid.com/uploads/images/gallery/2023-03/image-1678106829891.png) # Create MFA policies ## Description This wizard allows you to configure the access control rules for Soffid Console. By default, an OTP will be required to access to the Password vault or application menu. You can check the configuration in the following menu option: ` > Administration > Configuration > Security settings > Authentication`For more information, you can visit [the Two-factor authentication (2FA) book](https://bookstack.soffid.com/books/two-factor-authentication-2fa-VsJ) and the [Second Factor Authentication configuration](https://bookstack.soffid.com/link/164#bkmrk-second-factor-authen)
## Step-by-step 1. Once you select the *Create monitoring and reporting policies* option, Soffid will launch the following wizard [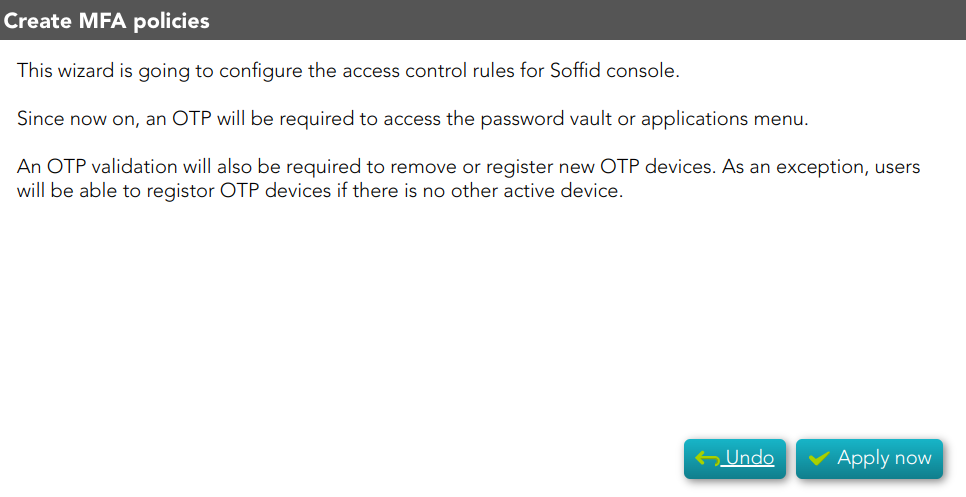](https://bookstack.soffid.com/uploads/images/gallery/2023-02/image-1677142847903.png) 2. If you click the Apply now button, Soffid will browse to the Authentication page, allowing you to configure the Second Factor Authentication. [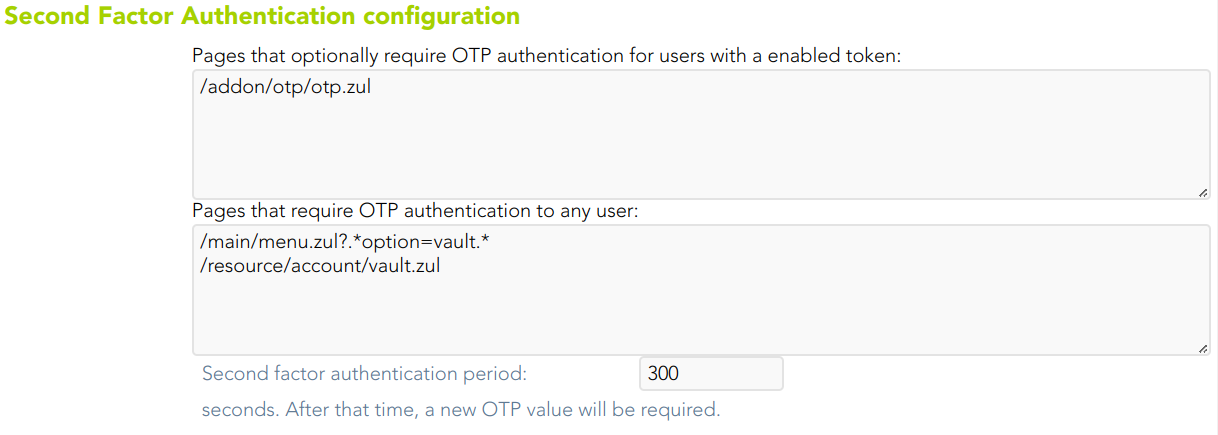](https://bookstack.soffid.com/uploads/images/gallery/2023-02/image-1677146097093.png) 3. To confirm the changes, you must click the Confirm changes button.