Break Glass
- ⏰ Getting started
- Step 1.- How to install Soffid Break glass?
- Step 1.1.- How to install Soffid Break glass add-on?
- Step 1.2.- How to install Soffid Break glass tool?
- Step 2.- How to configure Break glass?
- Step 3.- How to use Soffid Break glass recovery tool?
⏰ Getting started
What is Soffid Break glass?
It refers to a mechanism that allows users to gain emergency access to critical systems or information under exceptional circumstances when normal access procedures are not viable.
Break glass is a crucial component of security and emergency planning, providing a balance between stringent access controls and the need for urgent access during critical situations.
Step 1.- How to install Soffid Break glass?
Step 1.1.- How to install Soffid Break glass add-on?
Installation
Download
Please download the Soffid Break glass add-on.
You could download it at the following link http://www.soffid.com/download/enterprise/ if you have a Soffid user with authorization, or in the following http://download.soffid.com/download/ by registering.
Upload
1. Once the Break glass add-on is downloaded, please log in to IAM Console.
You need to be an administrator user of the Soffid console or a user with permission to upload addons.
It is recommended to upload the addons to the master, this is the way to maintain updated all, master and tenants if there are.
2. In the Soffid console, please go to:
3. Then, click the add button (+) and pick the file and Soffild will upload the addon file.
4. Finally, when the addon is installed, it will be required to restart the Soffid Console and the Sync server.
5. Once the Soffid console is restarted, you could check the plugin was uploaded properly on the plugins page:
6. Now, you can set up the Break glass.
Step 1.2.- How to install Soffid Break glass tool?
Intallation
Execute the Store YAML
version: '2'

services:
  breakglass:
    image: eu.gcr.io/soffid-cloud/breakglass:1.0.3
    environment:
      JAVA_KEYSTORE: /opt/soffid/tomee/certificados/breakglass.jks
      KEYSTORE_PASS: <YOUR_KEYSTORE_PASS>
      mail_from: pat.lab@sysadm.soffid.com
      mail_host: <YOUR_MAIL_HOST>
      mail_password: <YOUT_MAIL_PASS>
      mail_port: 465
      mail_transport_protocol: smtps
      mail_user: pat
      mail_auth: true
    ports:
      - "8445:8080"
    networks:
      - network
    volumes:
      - breakglass-certificados:/opt/soffid/tomee/certificados
      - breakglass-data:/opt/soffid/tomee/breakglass

networks:
  network:
    name: netcompose
    driver: bridge

volumes:
  breakglass-certificados:
    name: breakglass-certificados-laboratorio
  breakglass-data:
    name: breakglass-data-laboratorio
Ubuntu commands
1. Bear in mind, that the name of the YAML file must be docker-compose.yaml And you must execute the docker compose action inside the folder where this file is located.
cd /.../.../soffid2. Apply the YAML:
sudo docker compose up -d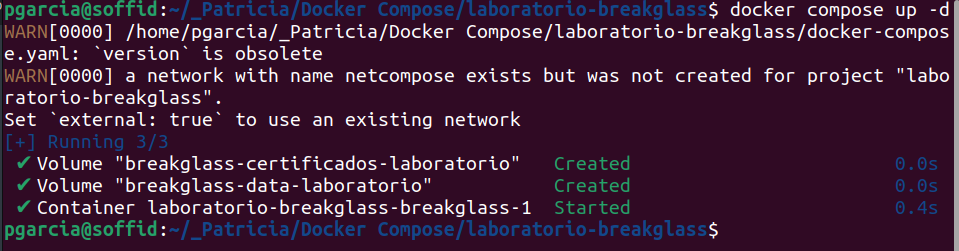
3. Check containers
sudo docker compose ps4. View the breakglass log
sudo docker compose logs -f <BREAKGLASS_CONTAINER>Upgrade
You can update the version in the yaml file and execute the command:
sudo docker compose up -dStep 2.- How to configure Break glass?
Configuration
Once you have installed the Break glass addon and Break glass tool, you must configure this tool
Steps
Break-glass recovery configuration
1. First of all, you need to configure the Break glass recovery. To do this, you need to browse to Break-glass recovery configuration menu option:
2. Then, you need to configure the Authorized users and Authorized application:
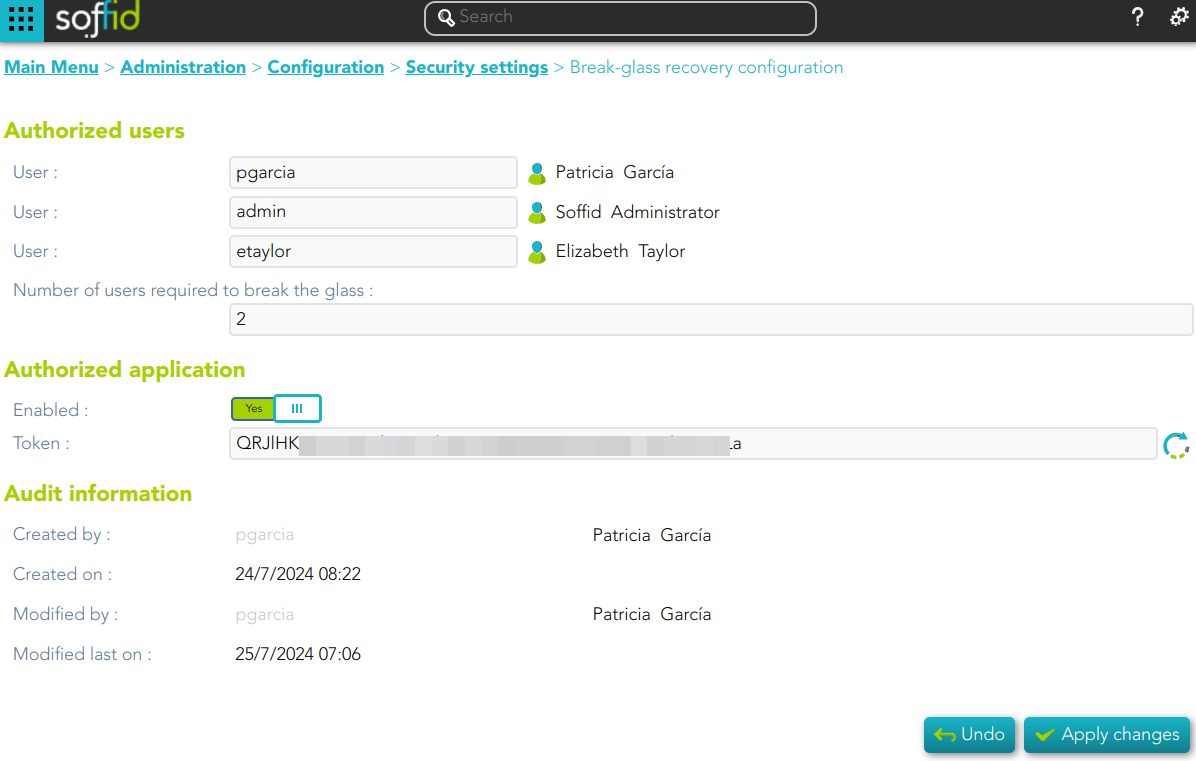
Bear in mind to generate and copy your token because you will need it to configure the Break glass tool
3. Click the Apply changes button to save your data.
For more information about this screen, you can visit the Break-glass recovery configuration page.
Break-glass recovery tool
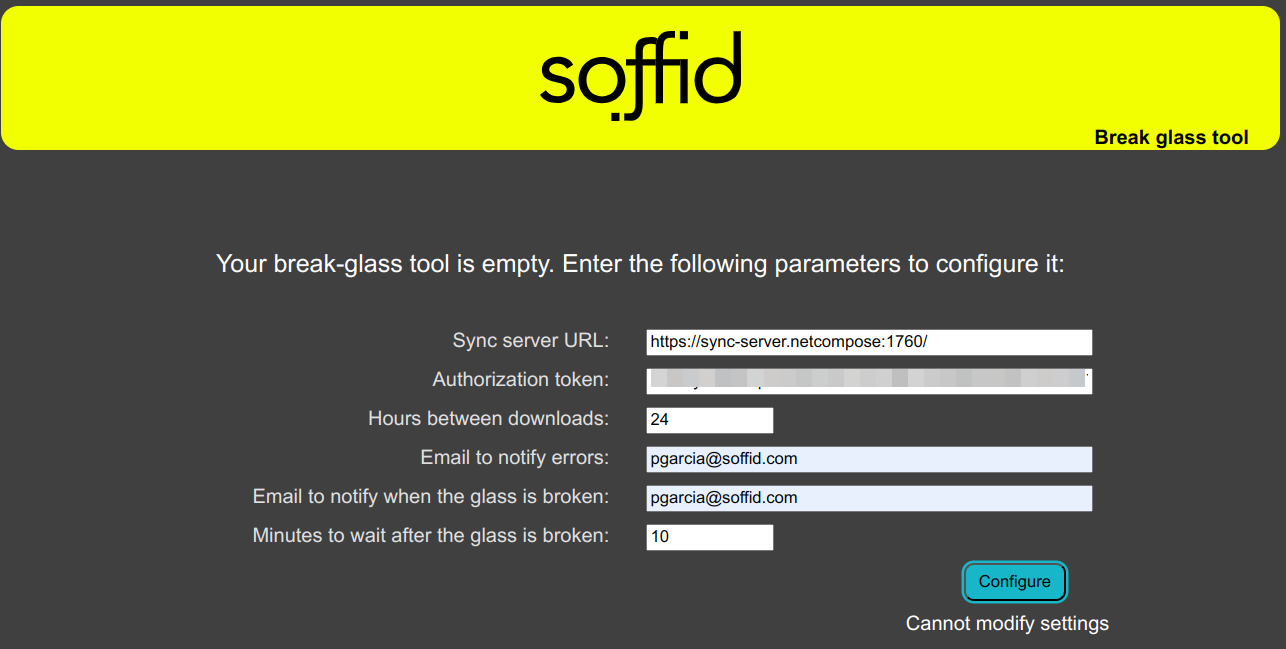
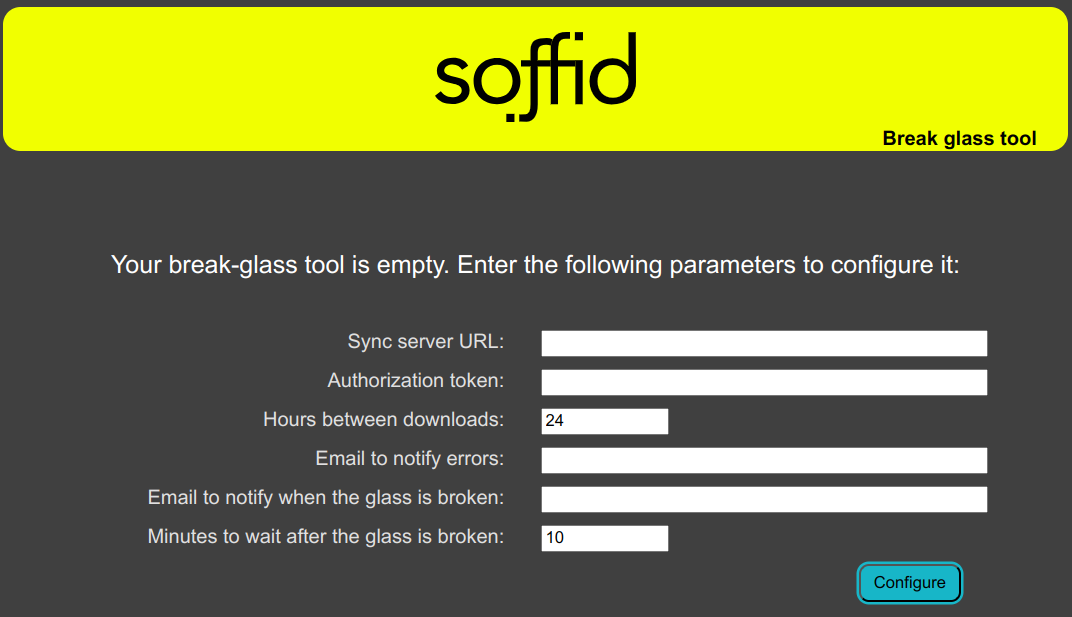
4. Once you have configured your Break-glass recovery configuration, you need to browse to http://localhost:8445/
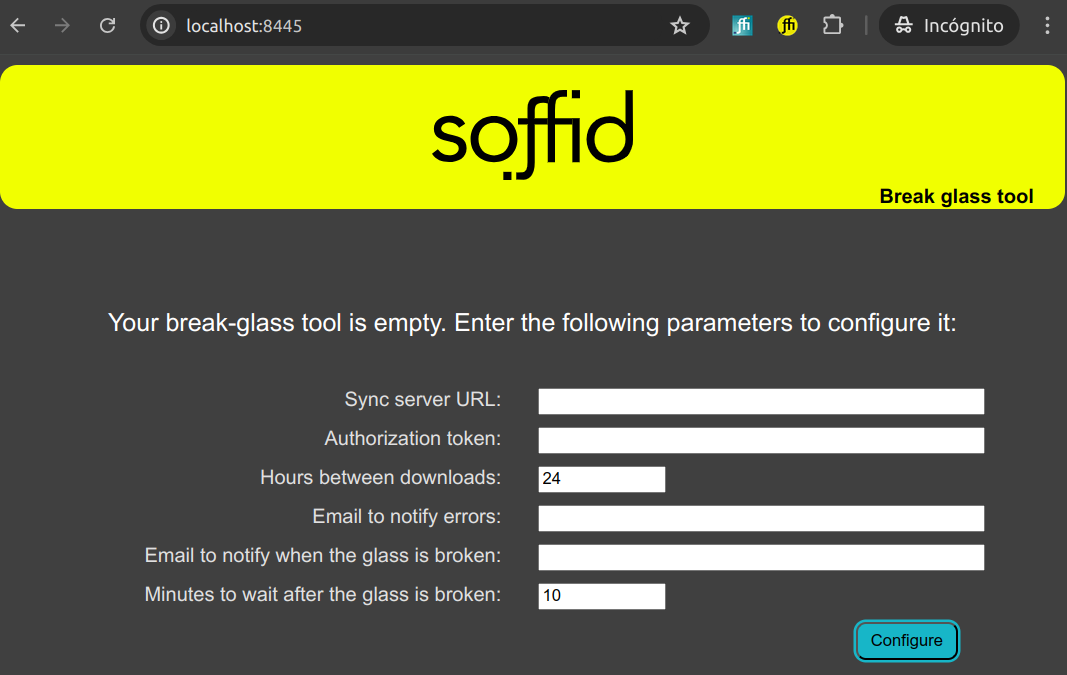
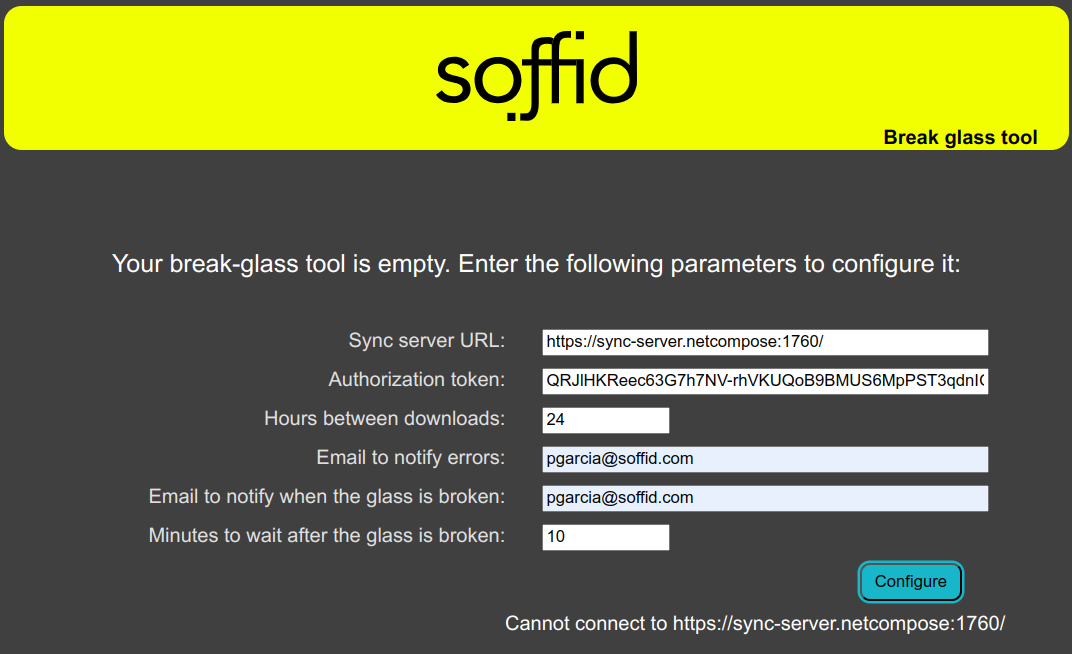
5. Here you need to configure your Break glass tool with the proper data.
Please note that here you need your token, previously copied.
Here is an example:

6. Click the configure button
6.1. If the data are saved properly this message is displayed:
6.2 If the tool can not connect to your Sync Server a message like this will be displayed:
This can be because:
- You need to apply changes at the Break-glass recovery configuration.
- The Authorized application is not enable.
- The token is incorrect.
- The Sync server is down.
Now the Soffid Breack glass is configured
Step 3.- How to use Soffid Break glass recovery tool?
If your system is working fine
A window like this will be displayed:

If your system is broken
You could use Soffid break glass tool:
1. First of all, browse to your Soffid break glass tool URL
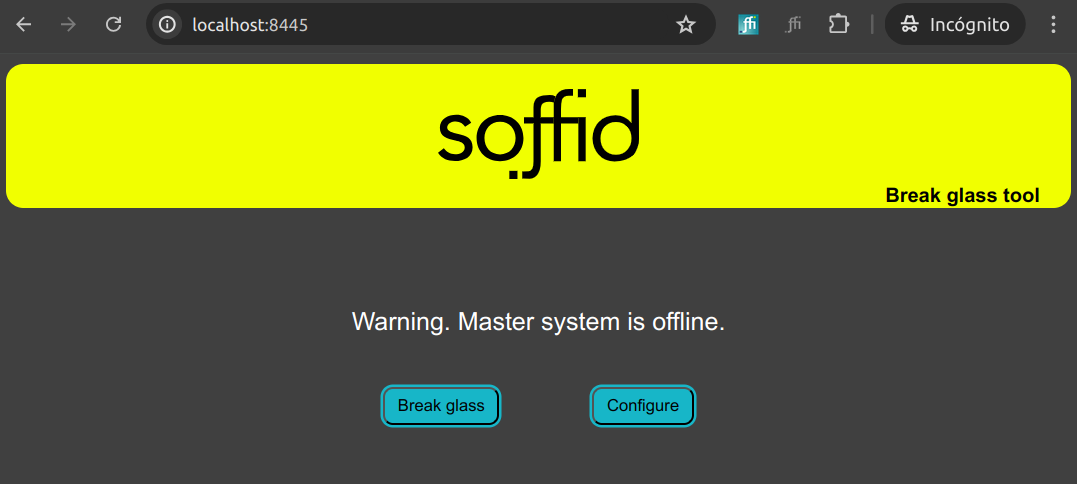
2. Soffid break glass tool offer you two options
- Break glass
- Configure
3. If you selec the Break glass option:
3.1. Soffid will display a window with all the avaliable backups:
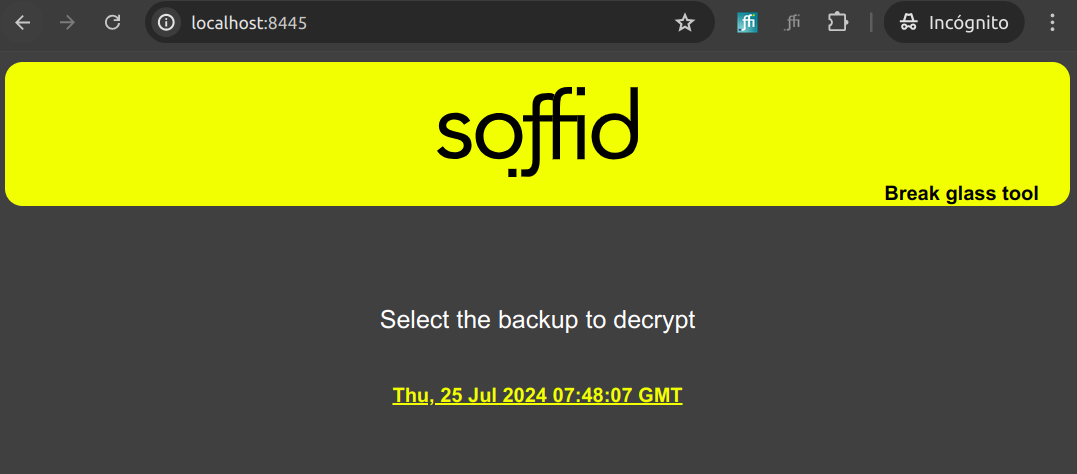
3.2. You can choose one of them by clicking on the link. Then Soffid will display a new window to retrieve the backup copy:
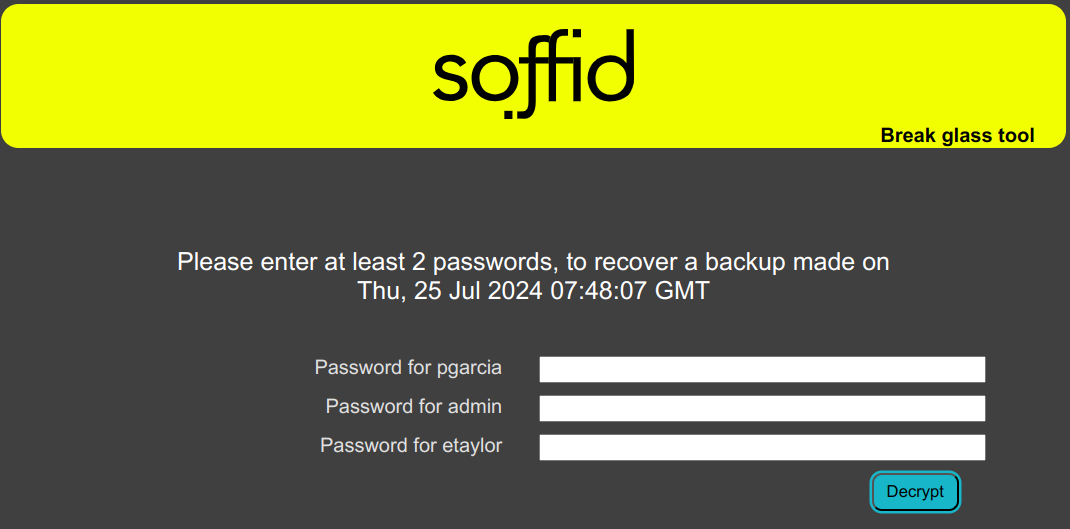
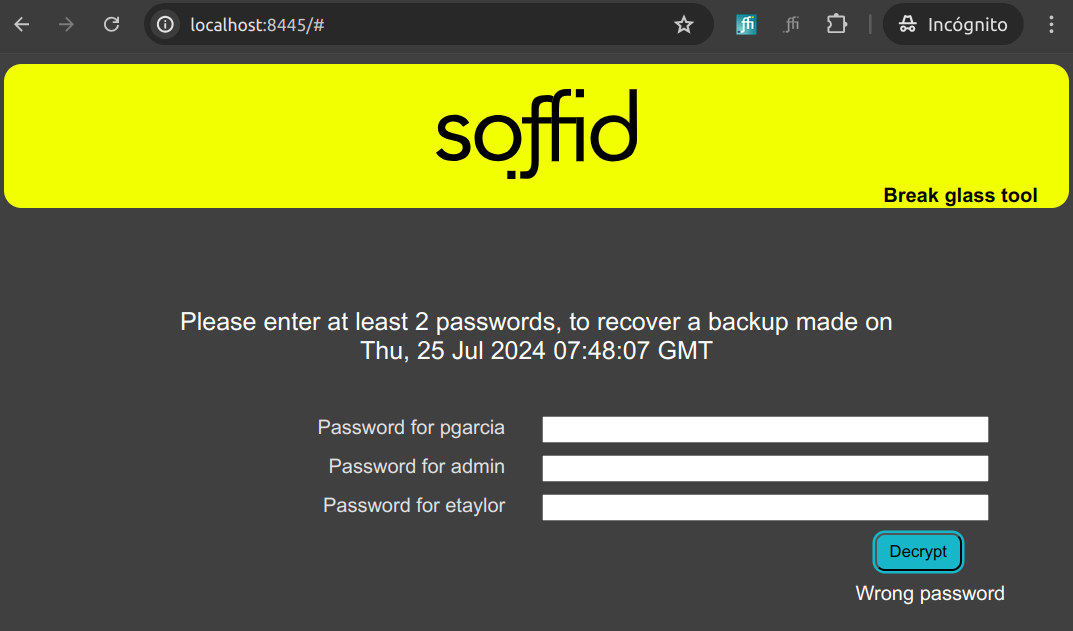
3.3. Here you will need to enter the required passwords.
3.3.1. If there are any error with the passwords, Soffid Break glass tool will display an error message
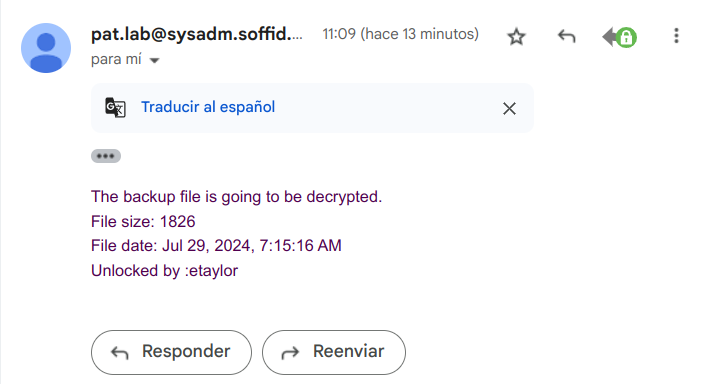
3.3.2. If you enter the passwords properly:
3.3.2.1. An email will be sent to the user indicated at the Break glass tool configuration
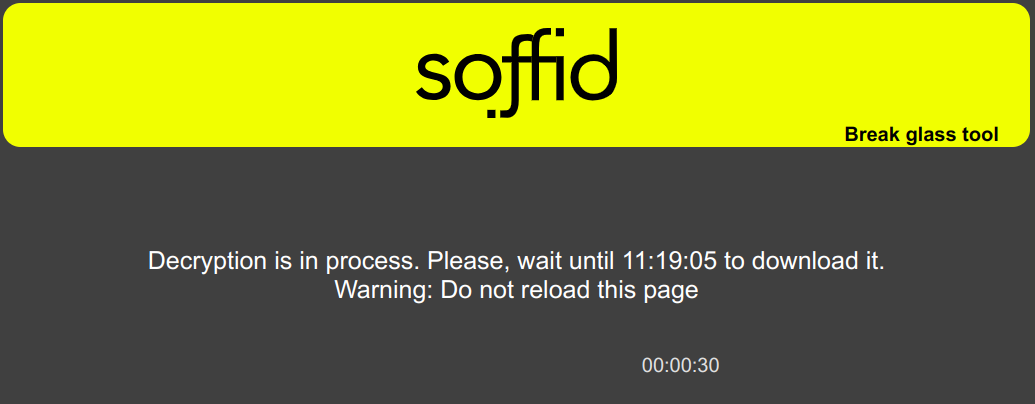
3.3.2.2. Soffid break glass tool will display a new window with the with the remaining time to download the backup
3.3.2.3. When the waiting time has elapsed, you will be able to download the backup. This backup will be a CSV file.
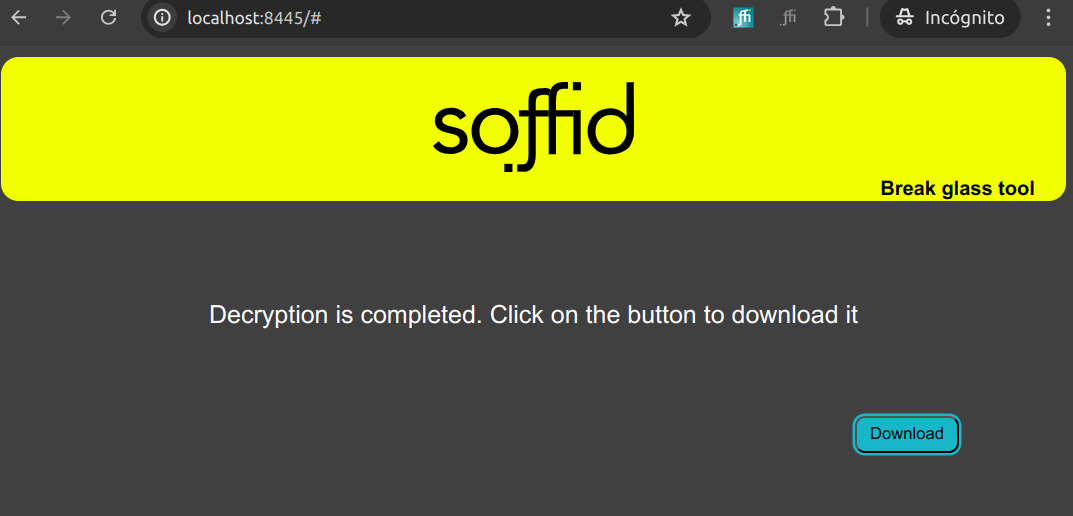
The file can be downloaded during the following 4 hours.
The tool will have to be reconfigured.
4. If you select the Configure option, Break glass tool will display the window that allows you to configure the Break glass recovery tool again.
For more information about how to fill this form visit the Step 2.- How to configure Break glass? page